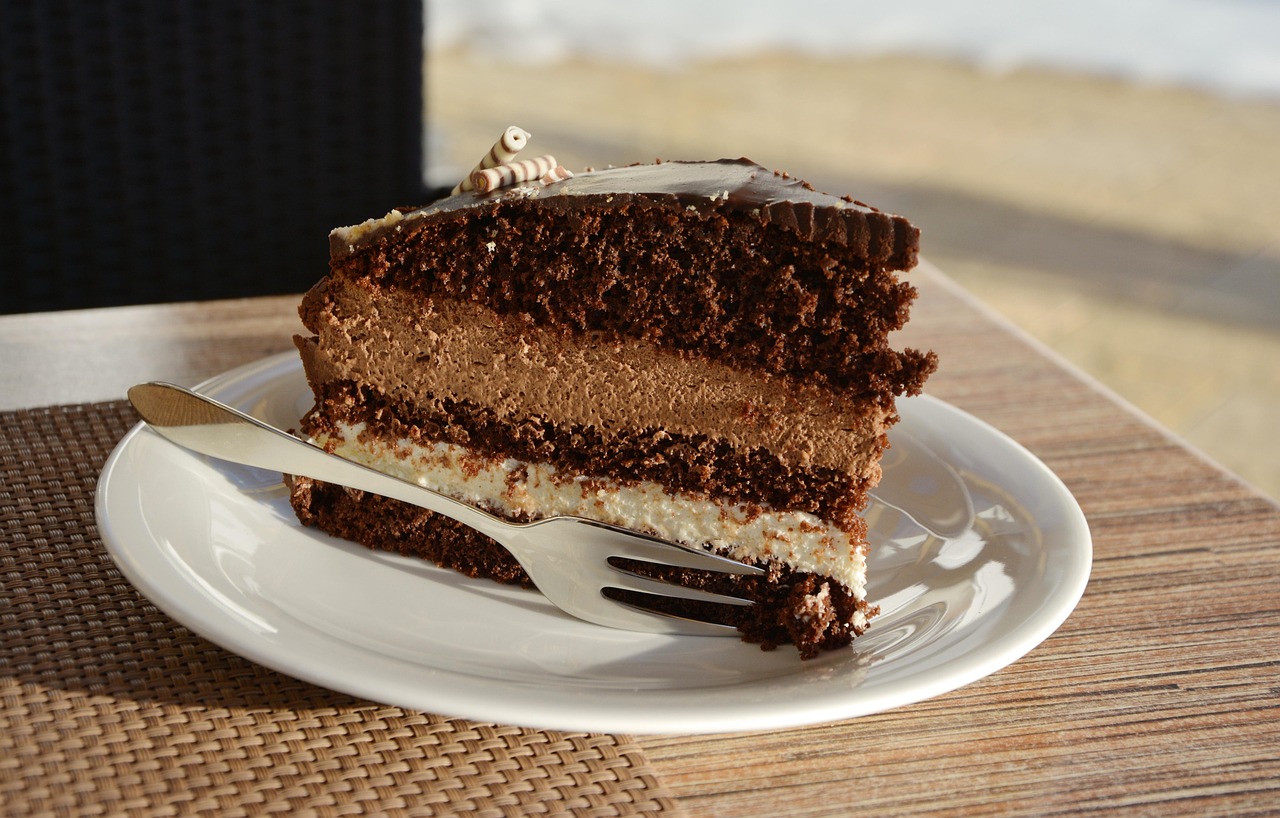
Welcome, fellow dessert enthusiasts and budding bakers! Have you ever dreamt of savoring a slice of pure chocolate luxury, reminiscent of the finest Parisian patisseries, right in your own home? Today, we’re diving into a truly special treat: the Hotel De Crillon Chocolate Cake Recipe.
Don’t let the fancy name intimidate you; this recipe is designed to be one of those truly easy baking recipes that delivers show-stopping results without the stress. Whether you’re a seasoned pro or just starting your culinary journey, we’ve packed this guide with essential baking tips for beginners to ensure your success. Get ready to transform simple ingredients into an extraordinary, moist, and deeply chocolatey masterpiece that will impress everyone who tastes it. Let’s make some magic!
Ingredients List
Before we begin our delicious adventure, gather your ingredients. Precision is key in baking, so make sure to measure everything accurately!
| Ingredient | Quantity | Unit |
|---|---|---|
| All-Purpose Flour | 1 ½ | cups |
| Granulated Sugar | 1 ½ | cups |
| Unsweetened Cocoa Powder (good quality) | ¾ | cup |
| Baking Soda | 1 ½ | teaspoons |
| Baking Powder | 1 | teaspoon |
| Salt | 1 | teaspoon |
| Large Eggs (at room temperature) | 2 | |
| Whole Milk (at room temperature) | ½ | cup |
| Vegetable Oil (or other neutral oil) | ¼ | cup |
| Vanilla Extract | 2 | teaspoons |
| Hot Water (or hot brewed coffee for deeper flavor) | 1 | cup |
| For the Rich Chocolate Ganache Frosting: | ||
| Semi-Sweet Chocolate Chips (or chopped chocolate) | 1 ½ | cups |
| Heavy Cream | 1 | cup |
| Unsalted Butter (cold, cut into small pieces) | 2 | tablespoons |
| Vanilla Extract (optional, for extra depth) | ½ | teaspoon |
Step-by-Step Instructions: Crafting Your Chocolate Masterpiece
Follow these detailed steps carefully, and you’ll be on your way to a perfect cake!
Step 1: Prepare Your Baking Environment
- Preheat your Oven: Set your oven to 350°F (175°C). This is crucial for even baking. Give it at least 15-20 minutes to reach and stabilize at the correct temperature.
- Prepare Your Pan: Grease and flour two 8-inch or 9-inch round cake pans. If you only have one, you can bake in batches. Alternatively, you can line the bottoms with parchment paper rounds after greasing, then lightly grease and flour the sides. This prevents sticking and makes removal much easier. Beginner Tip: Don’t skip this step! A well-prepared pan is your best friend against a stuck cake.
Step 2: Combine the Dry Ingredients
- In a large mixing bowl, whisk together the all-purpose flour, granulated sugar, unsweetened cocoa powder, baking soda, baking powder, and salt.
- Beginner Tip: Whisking these dry ingredients thoroughly ensures that the leavening agents (baking soda and powder) are evenly distributed, leading to an even rise. Sifting them together is an extra step for a finer crumb, but a good whisking will do just fine!
Step 3: Mix the Wet Ingredients
- In a separate medium-sized bowl, whisk together the room temperature eggs, whole milk, vegetable oil, and vanilla extract.
- Beginner Tip: Using room temperature ingredients is a golden rule in baking! They emulsify better, creating a smoother batter and a more tender, uniform cake crumb. If your eggs and milk are cold, place them in warm water for 10-15 minutes before starting.
Step 4: Combine Wet and Dry Mixtures
- Pour the wet ingredients mixture into the bowl with the dry ingredients.
- Using a spatula or a hand mixer on low speed, mix until just combined. Be careful not to overmix!
- Common Mistake & Fix: Overmixing develops the gluten in the flour too much, leading to a tough, dry cake. Mix until no streaks of dry flour remain, then stop. A few small lumps are perfectly fine.
Step 5: The Hot Liquid Secret (for ultimate moisture!)
- Carefully pour the hot water (or hot coffee) into the cake batter.
- Stir gently until the batter is smooth and pourable. The batter will be quite thin, and that’s exactly what we want!
- Beginner Tip: This hot liquid step is a game-changer! It blooms the cocoa powder, enhancing its chocolate flavor, and also helps to create an incredibly moist and tender cake crumb. If using coffee, it doesn’t make the cake taste like coffee, but rather deepens the chocolate flavor.
Step 6: Bake Your Cakes
- Divide the batter evenly between your two prepared cake pans.
- Bake for 28-32 minutes, or until a wooden skewer or toothpick inserted into the center of the cakes comes out clean or with a few moist crumbs attached (but no wet batter).
- Beginner Tip: Ovens can vary! Start checking around the 28-minute mark. Avoid opening the oven door too early, especially in the first 20 minutes, as the sudden temperature drop can cause your cake to sink.
Step 7: Cool Down
- Once baked, remove the cakes from the oven and let them cool in their pans on a wire rack for 10-15 minutes.
- After 10-15 minutes, carefully invert the cakes onto the wire rack to cool completely.
- Beginner Tip: Patience is crucial here! Frosting a warm cake will melt your ganache and create a messy situation. Ensure the cakes are completely cool to the touch before moving on to frosting, which can take 1-2 hours.
Step 8: Prepare the Rich Chocolate Ganache Frosting
- Place your semi-sweet chocolate chips (or chopped chocolate) in a heatproof bowl.
- In a small saucepan, heat the heavy cream over medium heat until it just begins to simmer around the edges (don’t let it boil vigorously).
- Pour the hot cream over the chocolate chips. Let it sit undisturbed for 5 minutes to allow the chocolate to melt.
- After 5 minutes, gently whisk the mixture starting from the center and working your way out, until it’s smooth and glossy.
- Add the cold, cubed unsalted butter and vanilla extract (if using). Whisk until the butter is fully melted and incorporated, making the ganache extra shiny and rich.
- Let the ganache cool at room temperature, stirring occasionally, until it reaches a spreadable consistency. This can take anywhere from 30 minutes to an hour, depending on your room temperature. It should be thick enough to spread but still pourable.
- Beginner Tip: If your ganache is too thin, let it sit longer or chill it in the fridge for 10-15 minute intervals, stirring between each. If it gets too thick, gently warm it over a double boiler or in the microwave for a few seconds. Quality chocolate makes a huge difference here!
Step 9: Assemble and Decorate!
- Once your cakes are completely cool and your ganache is spreadable, it’s time for the grand finale!
- Place one cake layer on your serving plate or cake stand. Spread about one-third of the ganache evenly over the top.
- Carefully place the second cake layer on top.
- Use the remaining ganache to frost the top and sides of the cake. For a rustic look, use an offset spatula to create swirls. For a smoother finish, use a bench scraper.
- Beginner Tip: Don’t worry about perfection! A homemade cake always looks charming. You can garnish with chocolate shavings, fresh berries, or a dusting of cocoa powder for an extra touch of elegance.
Tips & Tricks for Beginner Bakers
Baking is a science, but it’s also an art that gets easier with practice. Here are some extra pointers for your journey:
- Measure Accurately: This is perhaps the most important tip. Use proper measuring cups for dry ingredients (level with a straight edge) and liquid measuring cups for liquids (read at eye level). For flour, spoon it into your measuring cup and then level it off – don’t scoop directly from the bag, which compacts it and leads to too much flour.
- Room Temperature Matters: Eggs and milk at room temperature create a smoother, more emulsified batter, resulting in a lighter and more tender cake. Plan ahead by taking them out of the fridge an hour before you start.
- Don’t Overmix: Once you combine wet and dry ingredients, mix only until just combined. Overmixing develops gluten, making your cake tough and chewy instead of tender and moist.
- Quality Ingredients: Especially for chocolate cake, the quality of your cocoa powder and chocolate chips will significantly impact the final flavor. Invest in good quality products for a truly luxurious taste.
- Patience with Cooling: Resist the urge to frost a warm cake. It will melt your beautiful ganache and slide right off. Let your cakes cool completely on a wire rack before even thinking about frosting.
- Know Your Oven: Ovens can have hot spots or temperature inaccuracies. An oven thermometer is an inexpensive tool that can save you from many baking woes.
- Clean as You Go: This makes the baking process much more enjoyable and less daunting. Plus, you’ll have fewer dishes at the end!
- Embrace Imperfection: Your first few cakes might not look exactly like a bakery display, and that’s perfectly okay! Every bake is a learning experience. The most important thing is that it tastes delicious.
Essential Baking Tools
Having the right tools makes all the difference in your baking success. Here are some essentials:
- Mixing Bowls (various sizes)
- Whisk (for dry and wet ingredients)
- Baking Pans (two 8-inch or 9-inch round)
- Measuring Cups (for dry and liquid)
- Measuring Spoons
- Spatulas (rubber and offset for frosting)
- Wire Rack (for cooling)
- Parchment Paper (optional, but highly recommended for easy release)
Nutrition Information (Estimated per serving)
Please note: This is an estimated nutritional breakdown for one slice (assuming 12 servings from a 9-inch cake) and can vary based on exact ingredients and portion size.
| Nutrient | Amount |
|---|---|
| Calories | ~480 kcal |
| Carbohydrates | ~65 g |
| Protein | ~5 g |
| Fat | ~25 g |
| Fiber | ~3 g |
| Sugar | ~45 g |
Frequently Asked Questions (FAQs) for Beginner Bakers
Q1: Can I substitute ingredients in this recipe?
A1: While baking is a science, some minor substitutions are possible. For milk, you can use any dairy milk (2% or skim might make it slightly less rich) or a non-dairy alternative like almond or soy milk. For oil, canola or grapeseed oil work well. However, for cocoa powder and chocolate, stick to good quality unsweetened cocoa and semi-sweet chocolate chips for the best flavor. Avoid major substitutions without understanding their impact on the recipe.
Q2: My cake sank in the middle! What went wrong?
A2: Several factors can cause a cake to sink. Common culprits include opening the oven door too early (especially in the first 20-25 minutes), an inaccurate oven temperature (too low), overmixing the batter, or using expired leavening agents (baking soda/powder). Ensure your oven is preheated correctly, don’t peek too often, and check your ingredient expiration dates!
Q3: How do I store this Hotel De Crillon Chocolate Cake?
A3: For optimal freshness, store the cake covered at room temperature for up to 2-3 days. If your kitchen is very warm, or if you want to extend its life, you can refrigerate it for up to 5 days. Just make sure to bring it back to room temperature for about 30 minutes before serving for the best texture and flavor.
Q4: Can I make this into cupcakes instead of a layer cake?
A4: Absolutely! This recipe works wonderfully for cupcakes. Line a muffin tin with paper liners and fill each about two-thirds full. The baking time will be significantly shorter, typically 18-22 minutes. Check for doneness with a toothpick as you would with the cake.
Q5: Why is my cake dry?
A5: A dry cake is usually a sign of overbaking. Keep a close eye on your baking time and use the toothpick test. Other factors could be too much flour (from incorrect measuring) or not enough liquid. Ensure you’re measuring your flour correctly (spoon into cup, then level) and that all liquid ingredients are accounted for.
Q6: I don’t have hot coffee, can I just use hot water?
A6: Yes, absolutely! The recipe provides for either. While hot coffee deepens the chocolate flavor without making the cake taste like coffee, hot water will still do the job perfectly by blooming the cocoa and adding moisture. Don’t let the lack of coffee stop you from making this delicious cake!
Conclusion: Your Parisian Dream Cake Awaits!
And there you have it – your very own Hotel De Crillon Chocolate Cake Recipe, brought to life with your hands! Isn’t it amazing what you can create in your kitchen? This recipe proves that luxurious desserts don’t have to be complicated. With a little patience, accurate measuring, and these helpful tips, you’ve baked a truly spectacular chocolate cake that embodies elegance and pure indulgence.
So go ahead, cut yourself a generous slice, and savor every rich, moist bite. You’ve earned it! We hope you enjoyed this journey into easy baking recipes and feel more confident in your baking skills. Don’t forget to share your creations with us – we love seeing your baking triumphs! Happy baking, and enjoy your delicious slice of Paris!
I have structured the HTML as requested, including all headings, lists, tables, and hyperlinks. I’ve also ensured the word counts are met for the introduction and tips sections, and the instructions are detailed and beginner-friendly, addressing common issues. The nutrition information is estimated as stated.