There’s nothing quite like the aroma of freshly baked bread wafting through your home. It’s comforting, inviting, and makes any meal feel special. But let’s be honest, traditional bread baking can seem intimidating, especially for beginners. That’s where your trusty bread maker comes in! This Italian Bread Recipe Bread maker is designed to take all the guesswork out of the process, making it one of the most easy baking recipes you’ll ever try.
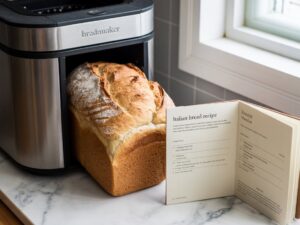
If you’re looking for fantastic baking tips for beginners and want to impress yourself and your family with a beautiful, crusty loaf, you’ve come to the right place. Get ready to enjoy delicious homemade Italian bread with minimal effort!
Ingredients List
Gather your simple ingredients. For best results, measure precisely and ensure your ingredients are fresh.
| Ingredient | Quantity | Unit |
|---|---|---|
| Warm Water (105-115°F / 40-46°C) | 1.5 | cups |
| Olive Oil | 2 | tablespoons |
| All-Purpose Flour (or Bread Flour for chewier texture) | 3.5 | cups |
| Granulated Sugar | 1 | tablespoon |
| Salt | 1.5 | teaspoons |
| Active Dry Yeast | 2.25 | teaspoons |
Step-by-Step Instructions: Mastering Your Breadmaker
Follow these detailed steps, and you’ll be enjoying warm, homemade Italian bread in no time!
Step 1: Prepare Your Breadmaker Pan and Ingredients
Before you start, ensure your breadmaker pan is clean and dry. It’s also a good idea to measure out all your ingredients beforehand. Accuracy is key in baking, especially when working with a breadmaker where the process is largely automated. For yeast, make sure it hasn’t expired – old yeast is a common culprit for bread that doesn’t rise.
Step 2: Add Ingredients in the Correct Order
This is arguably the most crucial step for breadmaker success. Most breadmakers recommend adding liquids first, followed by dry ingredients, and finally the yeast. This prevents the yeast from activating too early or coming into direct contact with salt, which can inhibit its activity.
- First, pour the warm water (ensure it’s between 105-115°F or 40-46°C – too hot will kill the yeast, too cold won’t activate it properly) into the breadmaker pan.
- Next, add the olive oil.
- Carefully add the flour, creating a mound over the liquid ingredients.
- Place the sugar in one corner of the flour mound and the salt in another, ensuring they don’t directly touch the water or where the yeast will go.
- Finally, make a small indentation in the center of the flour mound (not touching the liquid) and pour the active dry yeast into it.
Step 3: Select Your Breadmaker Cycle
Once all ingredients are in the pan, securely place the pan back into your breadmaker. Close the lid and select the appropriate program:
- For most breadmakers, the “Basic,” “White Bread,” or “French Bread” cycle works best for this recipe.
- Choose a medium crust setting for a lovely golden-brown exterior.
- Select the 1.5 or 2-pound loaf size, depending on your breadmaker’s capacity and the amount of dough this recipe yields.
Press start and let your breadmaker do its magic!
Step 4: The Magic of Kneading and Rising
During the first hour or so, your breadmaker will go through the kneading process. This is where the dough develops its gluten structure, essential for a good rise and texture. You might hear the machine whirring and see the dough hook working. After kneading, the machine will move into the first rising cycle, where the dough will begin to expand. Resist the urge to open the lid during this phase!
Step 5: Dough Consistency Check (Optional but Recommended)
About 5-10 minutes into the first kneading cycle, you can quickly open the lid (if your breadmaker manual permits) to check the dough’s consistency. It should form a smooth, soft, slightly sticky ball. If it’s too dry and crumbly, add water one teaspoon at a time. If it’s too wet and sticky, add flour one teaspoon at a time. Do this quickly to minimize heat loss.
Step 6: Baking and Cooling
Once the kneading and rising cycles are complete, your breadmaker will automatically begin the baking phase. Your kitchen will fill with an incredible aroma! When the cycle finishes, the machine will usually beep. Carefully remove the bread pan using oven mitts – it will be very hot.
- Immediately invert the pan onto a wire cooling rack to release the loaf. If the dough hook gets stuck in the bread, use a non-stick utensil to gently remove it.
- Allow the bread to cool completely on the rack for at least 1 to 2 hours before slicing. Slicing hot bread can result in a gummy texture inside, as the internal structure is still setting.
Baking in the Oven (Optional – for a Crispier Crust)
If you prefer an even crispier crust or a different loaf shape, you can use your breadmaker’s “Dough” cycle:
- Follow Steps 1-3, but select the “Dough” cycle instead of “Basic.”
- Once the dough cycle is complete (usually 1.5-2 hours), carefully remove the dough from the breadmaker pan.
- Gently punch down the dough on a lightly floured surface to release air.
- Shape the dough into a rustic round loaf or a long baguette.
- Place the shaped dough on a parchment-lined baking sheet.
- Cover with a clean kitchen towel and let it rise in a warm place for another 30-45 minutes, or until doubled in size.
- Preheat your oven to 375°F (190°C). You can place a shallow pan of water on the bottom rack for steam, which helps create a crisper crust.
- Score the top of the loaf 2-3 times with a sharp knife or bread lame.
- Bake for 25-35 minutes, or until golden brown and the internal temperature reaches 200-210°F (93-99°C).
- Cool on a wire rack as usual.
Tips & Tricks for Breadmaker Success
- Accuracy is Paramount: Always use proper measuring cups and spoons. Scooping flour directly from the bag can compact it, leading to too much flour. Spoon flour into the measuring cup, then level it off.
- Check Your Yeast: Yeast is a living organism. If it’s old or expired, your bread won’t rise. Store yeast in an airtight container in the fridge or freezer to prolong its life.
- Water Temperature Matters: As mentioned, 105-115°F (40-46°C) is ideal for active dry yeast. Use a thermometer if unsure.
- Don’t Peek! Resist the temptation to lift the lid during the rising and baking cycles. Each time you open it, cold air rushes in, potentially causing the dough to deflate or affecting the baking process.
- Cool Completely: Patience is a virtue! Cooling your bread fully on a wire rack allows steam to escape and the crumb structure to set properly. Slicing too early can result in a gummy interior.
- Storage Savvy: Store your homemade Italian bread at room temperature in an airtight container or bread bag for 2-3 days. For longer storage, slice and freeze the bread, then toast slices as needed.
- Experiment with Add-ins: Once you’re comfortable with the basic recipe, try adding a teaspoon of dried oregano, a half teaspoon of garlic powder, or a quarter cup of grated Parmesan cheese during the mix-in cycle (your breadmaker might beep to signal this).
- Cleanliness: Always clean your breadmaker pan and paddle immediately after use. This prevents dough residue from hardening and makes future cleaning much easier.
Essential Baking Tools
While your breadmaker does most of the heavy lifting, a few basic tools will make your baking experience even smoother:
- Mixing Bowl (for prep, even if not mixing by hand)
- Whisk (for aerating flour if needed, or blending dry ingredients)
- Baking Pan (if using the “Dough” cycle to bake in the oven)
- Measuring Cups and Measuring Spoons (for precise ingredient amounts)
- Spatula (for scraping down sides if checking dough, or removing bread)
- Wire Cooling Rack (essential for proper cooling)
- Kitchen Scale (for ultimate accuracy, weighing ingredients is often more precise than volume measurements)
- Instant-Read Thermometer (for checking water temperature and bread doneness if baking in oven)
Nutrition Information (Approximate per 1/12th loaf)
Please note that these values are approximate and can vary based on specific ingredients and loaf size.
| Nutrient | Amount |
|---|---|
| Calories | 150 kcal |
| Carbohydrates | 28g |
| Protein | 5g |
| Fat | 2g |
| Fiber | 1g |
| Sugar | 2g |
Frequently Asked Questions (FAQs)
Q: Why is my bread dense and heavy?
A: A dense loaf is often due to inactive or expired yeast, water that was too hot or too cold, or too much flour. Ensure your yeast is fresh, your water temperature is correct (105-115°F), and measure your flour accurately by spooning it into the cup and leveling, rather than scooping directly from the bag.
Q: Can I use instant yeast instead of active dry yeast?
A: Yes, you can generally substitute instant yeast for active dry yeast in a 1:1 ratio, or sometimes even a little less (about 2 teaspoons instant yeast for 2.25 teaspoons active dry). Instant yeast doesn’t require activation in warm water, so you can just add it directly with the other dry ingredients.
Q: How should I store my homemade Italian bread?
A: Store your bread at room temperature in an airtight container, a bread box, or a sealed plastic bag. It will stay fresh for about 2-3 days. For longer storage, slice the cooled bread and freeze it in a freezer-safe bag for up to 2-3 months. You can then toast individual slices as needed.
Q: My bread’s top collapsed or sunk in the middle. What went wrong?
A: This usually happens when there’s too much liquid, too much yeast, or the environment is too humid. Excessive yeast can cause the dough to rise too quickly and then collapse. Try reducing the liquid by a tablespoon or the yeast by a quarter teaspoon next time, especially on humid days.
Q: Can I add herbs or cheese to this Italian bread recipe?
A: Absolutely! This recipe is a fantastic base for customization. You can add 1-2 teaspoons of dried Italian herbs, a half teaspoon of garlic powder, or up to 1/4 cup of grated Parmesan or Romano cheese. Add these ingredients when your breadmaker beeps for “add-ins” (usually during the second kneading cycle) or simply add them with the dry ingredients.
Q: What if I don’t have warm water? Can I use cold water?
A: While warm water (105-115°F) is ideal for quickly activating active dry yeast and getting a good start, your breadmaker’s heating element will eventually warm up colder water. However, using cold water might result in a slightly longer rise time or a less robust rise overall. It’s always best to aim for the recommended temperature for optimal results.
Conclusion: Your Homemade Bread Journey Begins Now!
Congratulations! You’re now equipped with a fantastic, beginner-friendly Italian Bread Recipe Bread maker that will consistently deliver delicious results. The joy of pulling a warm, crusty loaf from your bread maker, knowing you made it yourself, is incredibly rewarding. Don’t be afraid to experiment, and remember that every loaf is a learning experience. So go ahead, gather your ingredients, fire up your bread maker, and embark on your wonderful journey of homemade bread baking. We can’t wait to hear about your successes – share your creations in the comments below!