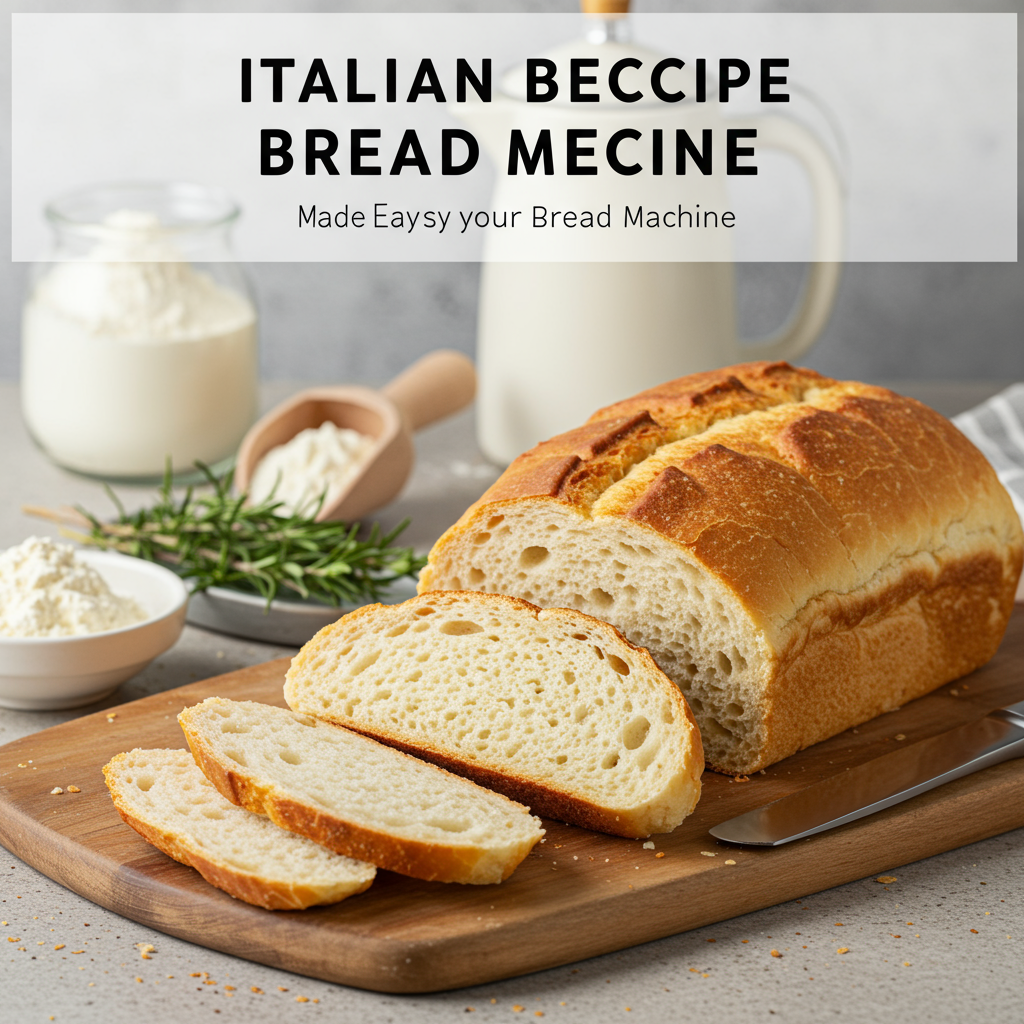
Forget store-bought loaves; with just a few simple ingredients and your trusty bread machine, you’ll be pulling out golden, crusty Italian bread in no time. We’ve packed this post with essential baking tips for beginners to ensure your first (and every!) loaf is a resounding success. Get ready to impress yourself and your loved ones with this incredibly simple yet utterly delicious bread!
Ingredients List
Gathering your ingredients is the first step to baking success. Remember to measure accurately!
| Ingredient | Quantity | Unit |
|---|---|---|
| Warm Water (105-115°F) | 1 | cup |
| Olive Oil | 2 | tablespoons |
| All-Purpose Flour (or Bread Flour for a chewier texture) | 3 | cups |
| Granulated Sugar | 1 | tablespoon |
| Salt | 1 | teaspoon |
| Active Dry Yeast (or Instant Yeast) | 2 | teaspoons |
Beginner Tip: Ensure your water is the correct temperature! Too hot will kill the yeast, too cold won’t activate it. A simple kitchen thermometer is your best friend here.
Step-by-Step Instructions
Let’s get baking! Follow these detailed steps for a perfect loaf every time.
Step 1: Gather Your Tools and Ingredients
Before you even open the bread machine lid, lay out all your ingredients and measuring tools. This helps ensure you don’t forget anything and that you can add them in the correct order without rushing. Having everything ready is a great habit for baking tips for beginners.
Step 2: Add Liquids to the Bread Machine Pan
Carefully pour the 1 cup of warm water into the bread machine pan. Follow this with the 2 tablespoons of olive oil. The order of ingredients is crucial in a bread machine to prevent the yeast from prematurely activating or coming into contact with salt, which can inhibit its activity.
Beginner Tip: Use a liquid measuring cup for liquids, and ensure it’s at eye level to get an accurate reading.
Step 3: Add Dry Ingredients (Except Yeast)
Next, carefully spoon the 3 cups of all-purpose flour over the liquids. Try to create a small mound or ‘well’ in the center of the flour. On one side of the pan, away from the center, add the 1 tablespoon of granulated sugar. On the opposite side, add the 1 teaspoon of salt. Keeping the salt and yeast separate initially is key.
Common Mistake & Fix: Don’t just dump the flour in! Spooning it lightly prevents it from compacting, leading to a more accurate measurement. If you scoop flour directly with your measuring cup, you might end up with too much, resulting in dry, dense bread. Use a knife or straight edge to level off the top of your measuring cup.
Step 4: Add the Yeast
Now, gently add the 2 teaspoons of active dry yeast (or instant yeast) directly into the well you made in the flour. Ensure the yeast is sitting on top of the flour and not touching the water, salt, or sugar directly. This helps to protect the yeast until the machine begins its mixing cycle.
Beginner Tip: Always check the expiration date on your yeast! Old yeast is a common culprit for bread that doesn’t rise. If you’re unsure, you can “proof” a small amount in warm water with a pinch of sugar; if it bubbles, it’s good to go.
Step 5: Select Your Bread Machine Settings
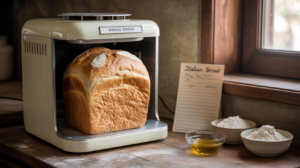
Place the bread machine pan securely back into the bread machine. Close the lid. Select the “Basic,” “White Bread,” or “Italian Bread” cycle (depending on your machine’s options). Choose a 1.5 lb loaf size and your preferred crust setting (light, medium, or dark – medium is a great starting point for beginners).
Alternative: If your machine has a “Dough” cycle, you can use that, then remove the dough, shape it by hand, let it rise, and bake it in a conventional oven for a more traditional look. However, for full automation, stick to the bread cycle.
Step 6: Monitor the Dough During Mixing (Optional but Recommended)
During the first mixing cycle (usually within the first 5-10 minutes), briefly open the lid to check the dough’s consistency. It should form a smooth, elastic ball that cleans the sides of the pan. It shouldn’t be too sticky (sticking excessively to the bottom) or too dry (crumbling apart).
- If the dough is too dry: Add water, 1 teaspoon at a time, until it reaches the desired consistency.
- If the dough is too sticky: Add flour, 1 teaspoon at a time, until it forms a cohesive ball.
This little adjustment can make a huge difference in the final texture of your bread!
Step 7: Let the Bread Machine Do Its Work
Close the lid and let the bread machine complete its full cycle. This typically takes 3-4 hours, including kneading, rising, and baking.
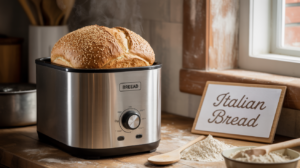
Step 8: Remove and Cool the Bread
Once the cycle is complete and the machine beeps, carefully remove the bread pan (it will be very hot!). Invert the pan onto a wire cooling rack and shake gently to release the bread. If the kneading paddle is stuck in the loaf, use a non-stick utensil to carefully remove it.
Crucial Beginner Tip: Let the bread cool completely on the wire rack for at least 1-2 hours before slicing. Slicing hot bread can result in a gummy texture inside, as the internal structure is still setting.
Step 9: Slice and Enjoy!
Once cooled, slice your beautiful homemade Italian bread with a serrated knife and enjoy! Serve it with olive oil and balsamic vinegar, alongside a hearty pasta dish, or as the base for your favorite sandwiches. You’ve done it!
Tips & Tricks for Perfect Italian Bread
To elevate your bread-making game even further, keep these baking tips for beginners in mind:
- Freshness is Key: Always use fresh, good-quality ingredients, especially your yeast. Store yeast in the refrigerator or freezer to extend its shelf life. Flour can also go stale, so try to use it within a few months of opening.
- The Power of Olive Oil: Using a good quality extra virgin olive oil not only adds a lovely flavor but also contributes to a softer crumb and a delicious aroma. You can even brush the top of your loaf with a little olive oil before the baking cycle starts for an extra golden crust.
- Experiment with Crust Settings: Don’t be afraid to try different crust settings on your bread machine. A “dark” crust often yields a chewier, more rustic exterior, which many people love for Italian bread.
- Additions for Flavor: Feeling adventurous? Try adding 1-2 teaspoons of dried Italian herbs (like oregano, basil, or a mixed Italian seasoning) or 1 teaspoon of garlic powder to the flour along with the sugar and salt. You can also mix in 1/2 cup of shredded Parmesan cheese during the last 5 minutes of the mixing cycle.
- Humidity Matters: On very humid days, you might need slightly less water or a tiny bit more flour, and vice-versa on very dry days. Your bread machine dough check (Step 6) is perfect for adjusting for environmental factors.
- Proper Storage: Once completely cool, store your Italian bread in an airtight container or a bread bag at room temperature for up to 3-4 days. For longer storage, slice the bread and freeze it in a freezer-safe bag for up to 3 months. Thaw slices as needed, or pop them straight into the toaster!
Essential Baking Tools
Having the right tools makes all the difference, especially for **easy baking recipes** like this one.
- Bread Machine (Essential for this recipe!)
- Measuring Cups
- Measuring Spoons
- Kitchen Thermometer (for water temperature)
- Wire Cooling Rack
- Serrated Bread Knife
- Spatula (for removing paddle, if needed)
Nutrition Info (Approximate per slice, 1/12th of a 1.5lb loaf)
While homemade bread is always a treat, here’s an approximate nutritional breakdown:
| Nutrient | Amount |
|---|---|
| Calories | 120 kcal |
| Carbohydrates | 23g |
| Protein | 4g |
| Fat | 1.5g |
| Fiber | 1g |
| Sugar | 2g |
Please note: These values are estimates and can vary based on specific ingredients and brands used.
Frequently Asked Questions (FAQs)
Q1: Why didn’t my bread rise properly?
A: The most common reasons are inactive or old yeast, incorrect water temperature (too hot kills yeast, too cold doesn’t activate it), or forgetting to add the yeast altogether! Also, make sure you’re using the correct amount of flour and liquids – too much flour can weigh down the dough.
Q2: Can I use bread flour instead of all-purpose flour?
A: Absolutely! Bread flour has a higher protein content, which results in a chewier texture and a stronger structure, often preferred for artisan-style breads. If you use bread flour, you might need to add an extra tablespoon or two of water, as it absorbs more liquid. Just keep an eye on the dough consistency during the initial mixing.
Q3: How should I store homemade Italian bread?
A: Once completely cooled, store your bread in an airtight container, a clean bread bag, or wrapped in plastic wrap at room temperature for up to 3-4 days. For longer storage, slice the loaf and freeze the slices in a freezer-safe bag for up to 3 months. You can toast frozen slices directly.
Q4: My bread machine loaf has a tough or very hard crust. What can I do?
A: The crust setting on your bread machine directly impacts this. If your crust is too hard, try selecting a “light” crust setting next time. Also, allowing the bread to cool completely on a wire rack helps prevent steam from being trapped, which can sometimes soften a crust that’s meant to be crisp. A little olive oil brushed on top before baking can also help.
Q5: Can I add other ingredients like cheese or herbs?
A: Yes, definitely! For herbs like dried oregano, basil, or rosemary, add 1-2 teaspoons along with the flour, sugar, and salt. If you want to add shredded cheese (like Parmesan or a hard Italian blend), wait until the “add-ins” beep (if your machine has one), or about 5-10 minutes into the first mixing cycle. This ensures the cheese is evenly distributed without interfering with the initial dough formation.
Conclusion
Congratulations, future bread-baking pro! You’ve just discovered how incredibly simple and rewarding it is to make your own delicious Italian Bread Recipe For The Bread Machine. No more complicated kneading or proofing schedules just amazing, fresh bread with minimal effort. This recipe is truly one of the most easy baking recipes you’ll find, making it perfect for anyone looking for baking tips for beginners.
So go ahead, give it a try! The warm, yeasty aroma filling your kitchen and the taste of your own homemade loaf will be your reward. Don’t hesitate to experiment with different additions, and soon you’ll be customizing your Italian bread to perfection. Happy baking!
“`