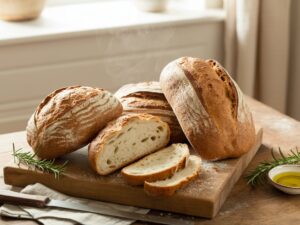
Welcome, aspiring bakers! Are you ready to embark on a truly rewarding culinary journey? There’s nothing quite like the aroma of freshly baked bread wafting through your home, and the good news is, achieving that dream is far easier than you might think. Today, we’re diving into the wonderful world of the King Arthur White Bread Recipe a classic, foolproof method designed to give you a perfect loaf every single time. This isn’t just another one of those easy baking recipes;
it’s a foundational skill builder. We’ve packed this guide with essential baking tips for beginners, ensuring you understand not just the ‘how,’ but also the ‘why’ behind each step. Get ready to transform simple ingredients into a golden, tender, and utterly delicious homemade white bread that will impress everyone!
Ingredients You’ll Need
Gathering your ingredients is the first step to baking success. Quality ingredients make a difference, and King Arthur Flour is renowned for its consistency. For the best results, we recommend using their unbleached all-purpose flour.
| Ingredient | Quantity | Unit |
|---|---|---|
| King Arthur Unbleached All-Purpose Flour | 3 | cups (360g) |
| Instant Yeast | 2 | teaspoons |
| Salt | 1 1/4 | teaspoons |
| Granulated Sugar | 2 | tablespoons |
| Warm Water (105-115°F / 40-46°C) | 1 to 1 1/4 | cups (227g to 283g) |
| Unsalted Butter, softened | 2 | tablespoons |
Step-by-Step Instructions: Your Path to Perfect White Bread
Follow these detailed steps carefully, and you’ll be pulling a beautiful loaf out of your oven in no time. We’ve included plenty of beginner-friendly advice along the way!
Step 1: Activate Your Yeast & Combine Dry Ingredients
- Prepare Your Yeast (Optional but recommended for confidence): If you’re using instant yeast, you don’t strictly *have* to proof it, but for beginners, it’s a great way to ensure your yeast is active. In a small bowl, combine 1/4 cup of the warm water (from your total amount) with a pinch of the sugar and all of the instant yeast. Let it sit for 5-10 minutes. It should become foamy and bubbly, indicating your yeast is alive and ready to work! If it doesn’t foam, your yeast might be old or the water was too hot/cold, and it’s best to start with fresh yeast.
- Measure Your Flour Accurately: In a large mixing bowl (or the bowl of your stand mixer), whisk together the King Arthur Unbleached All-Purpose Flour, salt, and the remaining granulated sugar. Beginner Tip: For the most accurate results, especially with flour, use a kitchen scale to measure by weight (360g) rather than volume (cups). Scooping flour directly from the bag can compact it, leading to too much flour and a dry, dense loaf. Lightly spoon flour into your measuring cup and level it off with a straight edge.
Step 2: Mix the Dough
- Add Wet Ingredients: Create a well in the center of your dry ingredients. Pour in the activated yeast mixture (if you proofed it) and the remaining warm water. Add the softened unsalted butter. Beginner Tip: The temperature of your water is crucial! It should feel warm to the touch, like a baby’s bath – not hot. If it’s too hot (above 120°F / 49°C), it can kill the yeast. If it’s too cold (below 100°F / 38°C), the yeast won’t activate properly. Use a kitchen thermometer for accuracy.
- Combine Everything:
- By Hand: Use a sturdy spoon or a dough whisk to mix everything until a shaggy dough forms and no dry flour remains. It will be sticky at this stage, which is perfectly normal.
- With a Stand Mixer: Attach the dough hook. Mix on low speed until all the ingredients are combined and a shaggy dough forms, about 1-2 minutes.
Step 3: Knead the Dough
Kneading is essential for developing the gluten structure, which gives bread its chewiness and ability to rise. Don’t skip this step!
- Knead Until Smooth and Elastic:
- By Hand: Turn the dough out onto a lightly floured surface. Knead for 8-10 minutes. Push the dough away from you with the heels of your hands, fold it back over, rotate, and repeat. You’ll feel the dough transform from sticky and shaggy to smooth, elastic, and less sticky. It should spring back when gently poked.
- With a Stand Mixer: Increase the speed to medium-low and knead for 6-8 minutes. The dough should gather around the hook and pull away from the sides of the bowl. It should look smooth and feel elastic.
Beginner Tip: The Windowpane Test: To check if your dough is sufficiently kneaded, pinch off a small piece (about a golf ball size). Gently stretch it with your fingers. If you can stretch it thin enough to see light through it without tearing, like a windowpane, your gluten is well-developed, and the dough is ready! If it tears quickly, continue kneading for a couple more minutes.
Step 4: First Rise (Bulk Fermentation)
This is where the yeast gets to work, producing gases that expand and create air pockets in your bread.
- Prepare for Rising: Lightly grease a clean large bowl with a little oil (vegetable oil or olive oil works well). Place the kneaded dough into the bowl, turning it once to coat the top with oil. This prevents a dry skin from forming.
- Let it Rise: Cover the bowl tightly with plastic wrap or a clean kitchen towel. Place it in a warm, draft-free spot. An oven with just the light on (not heated!) is a great warm environment. Let the dough rise for 1 to 1 1/2 hours, or until it has visibly doubled in size. Beginner Tip: Patience is key! Don’t rush this step. The exact time will vary depending on your kitchen temperature.
Step 5: Shape the Loaf
Shaping isn’t just for aesthetics; it builds tension in the dough, which helps the loaf hold its structure and rise beautifully in the oven.
- Prepare Your Pan & Punch Down: Lightly grease a 9×5-inch loaf pan. Gently punch down the risen dough to release the air. Turn it out onto a lightly floured surface.
- Shape for a Loaf Pan:
- Gently flatten the dough into a rectangle, roughly 8-9 inches wide.
- Fold the top third of the dough down towards the center, pressing firmly to seal.
- Fold the bottom third up over the center, pressing firmly to seal. You should now have a long, rectangular log.
- Rotate the dough 90 degrees. Starting from one end, roll the dough tightly into a log, pressing firmly with your thumbs as you go. This creates tension.
- Pinch the seam firmly to seal it closed. Tuck the ends under slightly.
Beginner Tip: The goal is to create a tight, even log without trapping large air bubbles. A tight surface tension will give you a better oven spring and a more uniform crumb.
- Place in Pan: Place the shaped dough seam-side down into your prepared loaf pan.
Step 6: Second Rise (Proofing)
This final rise ensures your bread is light and airy. It’s often called ‘proofing.’
- Proof the Loaf: Cover the loaf pan loosely with plastic wrap or a clean kitchen towel. Return it to your warm, draft-free spot. Let it rise for another 45-60 minutes, or until the dough has risen about 1 inch above the rim of the pan. It should look puffy and soft. Beginner Tip: To test if it’s ready, gently poke the dough with a floured finger. If the indentation slowly springs back halfway, it’s ready to bake. If it springs back completely, it needs more time. If it collapses, it’s likely over-proofed.
Step 7: Bake Your Bread
- Preheat Oven: About 15-20 minutes before the second rise is complete, preheat your oven to 375°F (190°C).
- Bake the Loaf: Place the loaf pan in the center of the preheated oven. Bake for 30-35 minutes, or until the crust is golden brown and the internal temperature reaches 200-210°F (93-99°C). Beginner Tip: A reliable way to check for doneness is to use an instant-read thermometer. Insert it into the center of the loaf. If you don’t have a thermometer, tap the bottom of the loaf; it should sound hollow.
Step 8: Cool Completely
This step is absolutely crucial for the texture and flavor of your bread!
- Remove and Cool: Immediately remove the bread from the loaf pan after baking. Place it on a wire rack to cool completely. Beginner Tip: Do not cut into hot bread! It’s tempting, but cutting hot bread can result in a gummy texture inside, as the starches are still setting. Allow it to cool for at least 1-2 hours (or longer for a larger loaf) before slicing.
Congratulations! You’ve just baked a magnificent loaf of homemade King Arthur White Bread. Enjoy it with butter, jam, or for sandwiches!
Tips & Tricks for Beginner Bread Bakers
Mastering bread baking takes practice, but these actionable tips will set you up for success with your King Arthur White Bread Recipe:
- Invest in a Kitchen Scale: Measuring flour by weight (grams) is far more accurate than by volume (cups). This is the single most impactful change you can make for consistent baking results.
- Know Your Yeast: Always check the expiration date on your yeast. If you’re unsure, proof it as described in Step 1. Dead yeast means no rise!
- Control Water Temperature: Use a thermometer to ensure your water is in the sweet spot (105-115°F / 40-46°C). Too hot kills yeast, too cold slows it down.
- Be Patient with Rising: Don’t rush the fermentation process. The yeast needs time to work its magic. A longer, slower rise often results in more flavorful bread.
- Don’t Be Afraid to Adjust Hydration: Depending on humidity and your flour, you might need a tiny bit more flour or water during kneading. The dough should be soft and slightly tacky, but not overly sticky.
- Score Your Loaf: Just before baking, use a sharp knife or a bread lame to make a few shallow cuts (slashes) on the top of your loaf. This allows the bread to expand predictably in the oven, prevents uncontrolled tearing, and creates a beautiful crust.
- Cool Completely: We can’t stress this enough! Cooling on a wire rack allows steam to escape, preventing a gummy interior and ensuring a perfect texture.
- Storage: Once completely cool, store your bread in an airtight container or bread bag at room temperature for 2-3 days. For longer storage, slice and freeze.
Essential Baking Tools
Having the right tools makes the baking process smoother and more enjoyable. Here are a few essentials:
- Mixing Bowl
- Whisk
- Baking Pan (9×5 inch loaf pan)
- Measuring Cups & Spoons
- Kitchen Scale (highly recommended!)
- Spatula / Dough Scraper
- Instant-Read Thermometer
- Wire Cooling Rack
Nutrition Information (Estimated per slice)
This information is an estimate based on a standard white bread recipe and a loaf yielding 12 slices. Actual values may vary.
| Nutrient | Amount |
|---|---|
| Calories | 160 kcal |
| Carbohydrates | 30g |
| Protein | 6g |
| Fat | 3g |
| Fiber | 1g |
| Sugar | 2g |
Frequently Asked Questions (FAQs)
Q1: Why is my homemade bread dense and heavy?
A: This is a common issue for beginners! It’s usually due to one of three things: under-kneading (not enough gluten development), insufficient rise time (the yeast didn’t produce enough gas), or too much flour (leading to a dry, stiff dough). Ensure you knead until the dough passes the windowpane test, allow it to double in size for both rises, and measure your flour by weight if possible.
Q2: How do I know if my yeast is still good?
A: The best way is to “proof” it. Combine 1/4 cup warm water (105-115°F / 40-46°C) with a pinch of sugar and your yeast. Let it sit for 5-10 minutes. If it becomes bubbly and foamy, your yeast is active. If nothing happens, it’s likely dead, and you should get new yeast.
Q3: My dough isn’t rising. What went wrong?
A: Several factors can cause this. The most common culprits are dead yeast (see Q2), water that was too hot or too cold (killing or inactivating the yeast), or a cold environment that slows down yeast activity significantly. Ensure your water temperature is correct and your rising spot is warm and draft-free.
Q4: Can I substitute different flours, like whole wheat?
A: While this recipe is for white bread, you can experiment! However, substituting flours, especially whole wheat, will require adjustments. Whole wheat flour absorbs more water, so you’ll likely need to increase the hydration (add more water) and the dough might be heavier and denser. For best results with different flours, it’s often better to seek out recipes specifically designed for them.
Q5: How should I store my homemade white bread?
A: Once your bread has cooled completely (this is important!), store it in an airtight container, a bread box, or a sealed plastic bag at room temperature. It will stay fresh for 2-3 days. For longer storage, slice the cooled loaf and freeze the slices in a freezer-safe bag. You can then toast slices directly from frozen.
Conclusion: Your Baking Journey Begins!
Congratulations, you’ve reached the end of our comprehensive guide to baking the perfect King Arthur White Bread Recipe! We hope you feel empowered and excited to try your hand at this truly rewarding craft. There