Welcome, aspiring bakers! Are you ready to fill your home with the irresistible aroma of freshly baked bread? There’s nothing quite like the warmth and comfort of a homemade loaf, and with this Kitchenaid White Bread Recipe, you’ll discover just how simple and rewarding it can be. We know that diving into bread making can seem daunting,
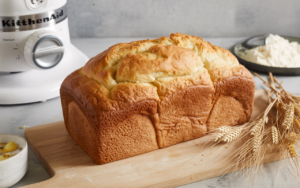
but with the help of your trusty Kitchenaid stand mixer, it becomes one of the most easy baking recipes you’ll master. This comprehensive guide is packed with essential baking tips for beginners, designed to help you avoid common pitfalls and achieve a perfect, fluffy loaf every single time. Get ready to impress yourself and everyone around you with your new baking prowess!
Ingredients List
Gather these simple ingredients – chances are, most are already in your pantry!
| Ingredient | Quantity |
|---|---|
| All-Purpose Flour | 3 cups (plus extra for dusting) |
| Warm Water (105-115°F / 40-46°C) | 1 cup |
| Active Dry Yeast | 2 ¼ teaspoons (1 packet) |
| Granulated Sugar | 2 tablespoons |
| Salt | 1 teaspoon |
| Unsalted Butter, melted | 2 tablespoons (or vegetable oil) |
Step-by-Step Instructions: Baking Your Perfect Loaf
Follow these detailed steps carefully, and you’ll be enjoying warm, homemade bread in no time!
Step 1: Activate the Yeast (The “Proof”)
This crucial first step ensures your yeast is alive and ready to make your bread rise beautifully.
- In the bowl of your Kitchenaid stand mixer, combine the **warm water** (make sure it’s between 105-115°F or 40-46°C – too hot will kill the yeast, too cold won’t activate it) with **1 tablespoon of the granulated sugar** and the **active dry yeast**.
- Gently whisk them together until the yeast dissolves.
- Let the mixture sit for **5-10 minutes**. During this time, the yeast should “bloom” – meaning it will become foamy and bubbly on the surface. This is a good sign that your yeast is active and ready to work!
- Beginner Tip: If your yeast doesn’t foam, it might be expired, the water might have been too hot or too cold. Don’t proceed; get new yeast or check your water temperature and try again. A non-foaming yeast means your bread won’t rise.
Step 2: Combine Wet & Dry Ingredients (Initial Mix)
Now, let’s bring everything together to form your dough.
- To the foamy yeast mixture in your Kitchenaid bowl, add the remaining 1 tablespoon of granulated sugar, the salt, and the melted butter (or vegetable oil). Give it a quick stir.
- Attach the dough hook to your Kitchenaid mixer.
- Gradually add the all-purpose flour, one cup at a time, to the wet ingredients. Start the mixer on low speed (Speed 2) as you add the flour.
- Continue mixing until all the flour is incorporated and a shaggy dough forms. It might look a bit rough at first, and that’s perfectly normal!
Step 3: Kneading the Dough (The Heart of Bread Making)
Kneading develops the gluten, which gives bread its structure and chewiness.
- Increase your mixer speed to medium-low (Speed 2-4) and let the dough hook do its magic. Knead for approximately 6-8 minutes.
- What to look for: The dough should become smooth, elastic, and pull away cleanly from the sides of the bowl. It might still stick a little to the bottom, which is fine.
- Troubleshooting:
- If the dough is too sticky and doesn’t form a ball (sticks excessively to the sides), add flour one tablespoon at a time until it’s more manageable.
- If the dough seems too stiff or dry, add warm water one teaspoon at a time until it reaches a smooth, elastic consistency.
- Advanced Tip (Windowpane Test): To check if your dough is adequately kneaded, pinch off a small piece, gently stretch it between your fingers. If you can stretch it thin enough to see light through it without tearing, your gluten is well developed!
Step 4: First Rise (Bulk Fermentation)
This is where your dough begins its transformation, doubling in size and developing flavor.
- Lightly grease a large bowl with a little vegetable oil or cooking spray.
- Remove the dough from the mixer bowl, shape it into a neat ball, and place it in the greased bowl, turning it once to coat the entire surface with oil. This prevents it from drying out.
- Cover the bowl tightly with plastic wrap or a clean kitchen towel.
- Place the bowl in a warm, draft-free place in your kitchen. An oven with just the light on (not heated!) is often a perfect spot, or a sunny countertop.
- Let the dough rise for **1 to 1.5 hours**, or until it has **doubled in size**.
- Beginner Tip: To check if it’s doubled, gently poke two fingers into the dough. If the indentations remain, it’s ready. If they spring back quickly, it needs more time. Patience is key here!
Step 5: Punch Down & Shape the Loaf
Deflating the dough helps redistribute the yeast and creates a finer crumb.
- Gently “punch down” the risen dough to release the air. This doesn’t mean hitting it hard; a gentle push with your fist is enough.
- Turn the dough out onto a lightly floured surface.
- Gently shape the dough into a rectangular loaf. The easiest way for beginners is to flatten it into a rectangle, then roll it up tightly from one of the longer sides, pinching the seam closed at the bottom. Tuck in the ends.
- Lightly grease a **9×5 inch loaf pan**.
- Carefully place the shaped loaf, seam-side down, into the prepared loaf pan.
Step 6: Second Rise (Proofing)
The final rise before baking, giving your bread its airy texture.
- Cover the loaf pan loosely with plastic wrap or a clean kitchen towel.
- Return the pan to your warm, draft-free spot.
- Let it rise for another **30-45 minutes**, or until the dough has nearly doubled in size again and looks puffy.
- Beginner Tip: Don’t let it over-rise (over-proof). If it looks too bubbly and starts to collapse slightly, it might be over-proofed, which can lead to a dense crumb.
Step 7: Preheat Oven & Bake
Almost there! The aroma will start to fill your kitchen soon.
- About 15 minutes before the second rise is complete, preheat your oven to **375°F (190°C)**.
- Carefully place the loaf pan into the preheated oven.
- Bake for **30-35 minutes**, or until the crust is golden brown and the internal temperature reaches **200-210°F (93-99°C)** when measured with a kitchen thermometer.
- Alternative Check: If you don’t have a thermometer, you can gently remove the loaf from the pan and tap the bottom. It should sound hollow.
- Optional: For an extra golden and slightly crispy crust, you can brush the top of the loaf with an egg wash (1 egg beaten with 1 tablespoon water) before baking.
Step 8: Cool Completely
This step is just as important as baking for the best texture.
- Once baked, immediately remove the bread from the loaf pan and transfer it to a **wire cooling rack**.
- Let the bread cool completely for at least **1-2 hours** before slicing.
- Beginner Tip: Slicing hot bread can make it gummy and dense. Resist the urge! Cooling allows the internal structure to set and steam to escape, resulting in a perfect crumb.
Tips & Tricks for Beginner Bread Bakers
- Accuracy is Key: Baking is a science! Use proper measuring cups and spoons. For flour, spoon it into your measuring cup and then level it off with a straight edge rather than scooping directly from the bag (this can pack too much flour).
- Yeast is Alive: Treat your yeast with care. Always check its expiration date, and ensure your water temperature is within the specified range (105-115°F). Too hot will kill it, too cold won’t activate it.
- Patience, Patience, Patience: Bread making isn’t a race. Don’t rush the rising times. The dough will tell you when it’s ready, not the clock. A warm, draft-free spot is crucial for successful rises.
- Don’t Over-Flour: While kneading, resist the urge to add too much extra flour. A slightly sticky dough is often better than a dry, stiff one. You can lightly flour your hands or work surface instead.
- Listen to Your Dough: Learning to “read” your dough comes with practice. Is it too sticky? Add a tiny bit more flour. Too stiff? A little water. It should feel smooth, elastic, and alive.
- Oven Temperature: An accurate oven temperature is vital. Consider investing in an inexpensive oven thermometer to ensure your oven is truly at the temperature you set.
- Proper Cooling: As mentioned, always cool your bread completely on a wire rack. This prevents a soggy bottom and allows the crumb to set properly.
- Storage: Once completely cool, store your homemade white bread in an airtight container or bread bag at room temperature for up to 3-4 days. For longer storage, slice and freeze it.
Essential Baking Tools
Having the right tools makes all the difference in your baking journey!
- Kitchenaid Stand Mixer (with dough hook)
- Large Mixing Bowl
- Whisk
- 9×5 inch Loaf Pan
- Measuring Cups and Spoons
- Rubber Spatula
- Wire Cooling Rack
- Kitchen Thermometer (for water temperature and internal bread temperature)
Nutrition Information (Approximate per slice)
Enjoying your delicious homemade bread also means knowing what’s in it! This is an approximate value for one slice (assuming 12-16 slices per loaf).
| Nutrient | Per Slice (approx.) |
|---|---|
| Calories | 110 kcal |
| Carbohydrates | 22 g |
| Protein | 3.5 g |
| Fat | 1.5 g |
| Fiber | 1 g |
| Sugar | 2.5 g |
*Nutritional values are estimates and may vary based on specific ingredients and preparation.
Frequently Asked Questions (FAQs)
Q: What if my yeast doesn’t foam after 10 minutes?
A: If your yeast doesn’t become foamy and bubbly, it likely means it’s inactive or “dead.” This can happen if the yeast is expired, or if the water temperature was too hot (which kills the yeast) or too cold (which won’t activate it). You’ll need to discard that mixture and start again with new yeast and correctly tempered water.
Q: Can I make this bread without a Kitchenaid mixer?
A: Absolutely! While the Kitchenaid makes kneading much easier, you can certainly knead the dough by hand. After combining ingredients, turn the dough out onto a lightly floured surface and knead vigorously for 10-15 minutes until it’s smooth and elastic. The principles of rising and baking remain the same.
Q: How do I know if my bread is fully baked?
A: The best way is to use a kitchen thermometer to check the internal temperature, which should be between 200-210°F (93-99°C). If you don’t have one, you can remove the loaf from the pan and tap the bottom – it should sound hollow. The crust should also be a deep golden brown.
Q: Why is my homemade bread dense and heavy?
A: Several factors can cause dense bread: inactive yeast, not enough kneading (gluten not developed), insufficient rising time (dough didn’t double), over-proofing (the dough rose too much then collapsed), or too much flour making the dough stiff. Review the steps, especially the yeast activation, kneading, and rising stages, to pinpoint where adjustments might be needed.
Q: How long does homemade white bread last, and how should I store it?
A: Once completely cooled, homemade white bread typically lasts 3-4 days at room temperature when stored in an airtight container, bread box, or plastic bag. For longer storage, you can slice the bread and freeze it in a freezer-safe bag for up to 2-3 months. Thaw slices as needed or toast directly from frozen.
Q: Can I substitute whole wheat flour for all-purpose flour in this recipe?
A: While you can use whole wheat flour, it’s not a direct 1:1 substitute, especially for beginners. Whole wheat flour absorbs more liquid and has more bran, which can inhibit gluten development, resulting in a denser loaf. For your first attempt, stick to all-purpose flour. Once you’re comfortable, you can experiment by substituting up to 50% whole wheat flour, you might need to add a little more liquid and knead a bit longer.
Conclusion
Congratulations, you’ve reached the end of your bread-making journey (for now)! We hope this detailed Kitchenaid White Bread Recipe has demystified the process and empowered you to create truly delicious bread from scratch. Remember, baking is a skill that improves with practice, so don’t be afraid to try again if your first loaf isn’t absolutely perfect. Each attempt teaches you something new.
There’s immense satisfaction in pulling a warm, fragrant loaf of bread from your oven, knowing you made it yourself. So go ahead, slice into your masterpiece, spread some butter, and savor the incredible taste of homemade. We can’t wait to hear about your baking success! Share your photos and experiences in the comments below – happy baking!