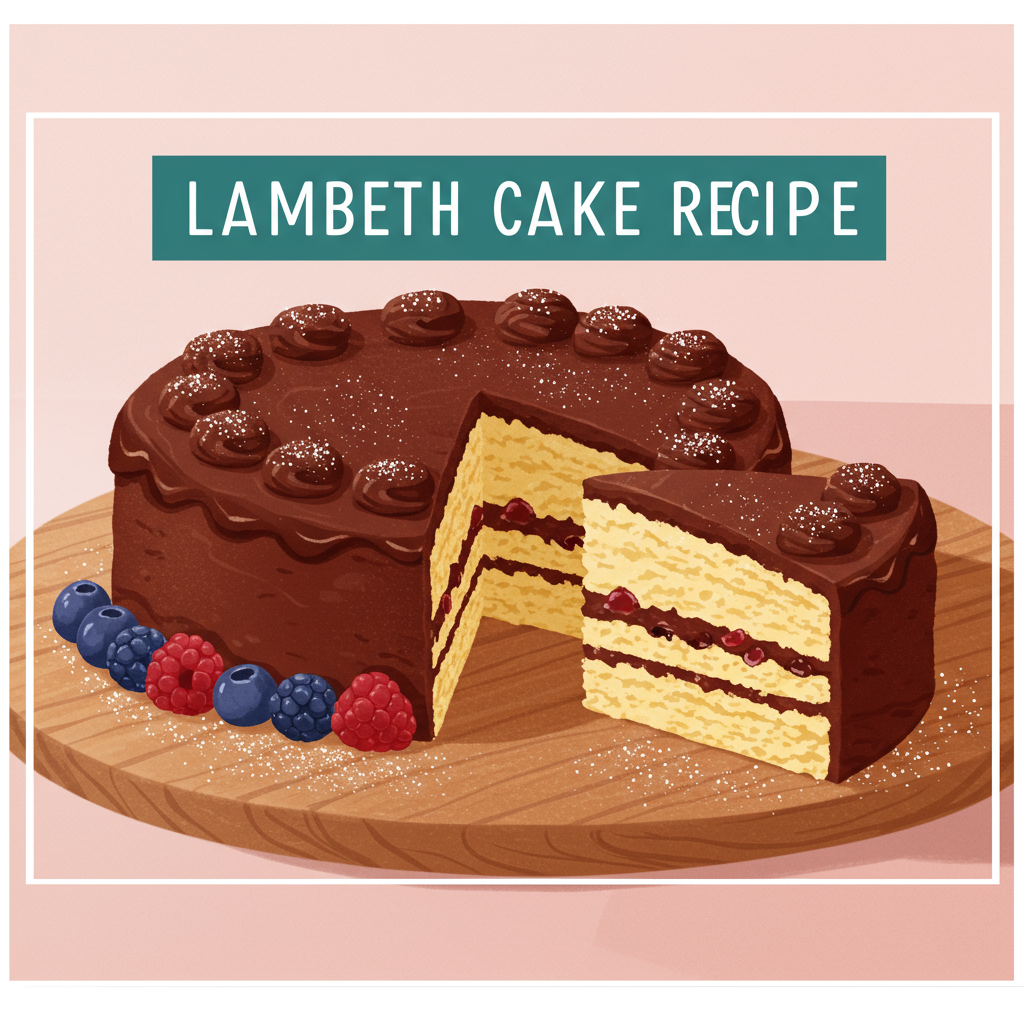
Are you ready to create a show-stopping dessert that looks incredibly intricate but is surprisingly achievable, even if you’re new to baking? You’ve come to the right place! Today, we’re diving into the enchanting world of the Lambeth Cake Recipe. Originating from a traditional English over-piping technique, this style creates stunning, ornate cakes that look like edible works of art. While true Lambeth piping can be quite advanced, we’re going to guide you through a beginner-friendly version that captures its elegant essence.
This post is packed with easy baking recipes and invaluable baking tips for beginners to ensure your Lambeth-inspired cake turns out perfectly. We’ll cover everything from the perfect cake base to a stable, pipeable buttercream, and even some simple techniques to get that signature regal look. Get ready to impress your friends and family with a cake that’s as delicious as it is beautiful!
Ingredients You’ll Need
Accuracy is key in baking, especially for beginners! Make sure to measure your ingredients carefully.
For the Vanilla Cake:
| Quantity | Unit | Ingredient |
|---|---|---|
| 2 ½ | cups | All-purpose flour, sifted |
| 1 ½ | cups | Granulated sugar |
| 1 | tablespoon | Baking powder |
| ½ | teaspoon | Salt |
| 1 | cup (2 sticks) | Unsalted butter, softened |
| 4 | large | Eggs, room temperature |
| 1 | cup | Whole milk, room temperature |
| 2 | teaspoons | Vanilla extract |
For the American Buttercream:
| Quantity | Unit | Ingredient |
|---|---|---|
| 2 | cups (4 sticks) | Unsalted butter, softened |
| 6-8 | cups | Powdered sugar (confectioners’ sugar), sifted |
| ¼ – ½ | cup | Heavy cream or whole milk |
| 2 | teaspoons | Vanilla extract |
| Pinch | Salt | |
| Optional | Food coloring (gel preferred) |
Step-by-Step Lambeth Cake Instructions for Beginners
Follow these detailed steps carefully, and you’ll be amazed at what you can create!
Part 1: Baking the Perfect Vanilla Cake
- Prepare Your Oven and Pans: Preheat your oven to 350°F (175°C). Grease and flour two 8-inch round cake pans, or line them with parchment paper circles at the bottom and grease the sides. This prevents your cake from sticking, which is a common beginner frustration!
- Combine Dry Ingredients: In a large mixing bowl, whisk together the sifted all-purpose flour, granulated sugar, baking powder, and salt. Sifting the flour is crucial for a light and airy cake texture, breaking up any lumps. Give it a good whisk to ensure everything is evenly distributed.
- Cream Butter and Sugar: In a separate, even larger bowl (or the bowl of a stand mixer with the paddle attachment), beat the softened unsalted butter on medium speed until creamy, about 1-2 minutes. Gradually add the granulated sugar and beat on medium-high speed for 3-5 minutes, until the mixture is light in color and fluffy. This “creaming” process incorporates air, which helps the cake rise and gives it a tender crumb. Beginner Tip: Don’t rush this step! It’s vital for a good cake texture.
- Add Eggs and Vanilla: Add the eggs one at a time, beating well after each addition. Scrape down the sides of the bowl with a rubber spatula after every other egg to ensure everything is fully incorporated. Once all eggs are in, beat in the vanilla extract. The mixture might look a little curdled at this point, but don’t worry, it will come together with the dry ingredients.
- Alternate Dry and Wet Ingredients: With the mixer on low speed, add about one-third of the dry ingredients to the butter mixture, mixing just until combined. Then, pour in half of the whole milk and mix until just incorporated. Repeat this process: another third of the dry ingredients, the remaining milk, and finally the last third of the dry ingredients. Crucial Beginner Tip: Mix only until the flour streaks disappear. Overmixing develops the gluten in the flour, leading to a tough, dense cake. We want a tender, soft cake!
- Divide and Bake: Divide the batter evenly between your two prepared 8-inch cake pans. Use a spatula to gently smooth the tops. Bake for 28-35 minutes, or until a wooden skewer or toothpick inserted into the center of the cakes comes out clean. Common Mistake: Opening the oven door too early can cause cakes to sink. Resist the urge to peek until at least 25 minutes have passed!
- Cooling Process: Let the cakes cool in their pans on a wire rack for 10-15 minutes. This allows them to firm up slightly. Then, carefully invert them onto the wire rack to cool completely. Do not try to frost warm cakes, as the frosting will melt and slide off – patience is a virtue here!
Part 2: Crafting the Perfect American Buttercream
- Soften Your Butter: In a large mixing bowl (or stand mixer with paddle attachment), beat the softened unsalted butter on medium speed for 3-4 minutes until it’s very light, fluffy, and pale in color. This is another key step for a smooth, airy buttercream.
- Gradually Add Powdered Sugar: With the mixer on low speed, gradually add the sifted powdered sugar, about 1 cup at a time. Mix until each addition is incorporated before adding more. This prevents a “sugar cloud” explosion in your kitchen! Once all the sugar is in, increase the speed to medium-high and beat for another 2-3 minutes.
- Add Liquid and Flavor: Pour in the vanilla extract and the pinch of salt. Now, add the heavy cream or milk, 1 tablespoon at a time, until your buttercream reaches a smooth, spreadable, and pipeable consistency. You might not need all of it, or you might need a tiny bit more – it depends on your butter and sugar. The goal is firm enough to hold its shape but soft enough to pipe easily. Beginner Tip: If your buttercream is too stiff, add more liquid (milk/cream) by the teaspoon. If it’s too soft, add more sifted powdered sugar, 1/4 cup at a time, until desired consistency is reached.
- Color Your Buttercream (Optional): If you want to color your buttercream, divide it into separate bowls and add gel food coloring sparingly with a toothpick. Gel colors are best as they don’t thin out the frosting like liquid colors can. Mix until the desired shade is achieved.
Part 3: Assembling and Decorating Your Lambeth-Inspired Cake
- Level Your Cakes: Once completely cool, use a serrated knife or a cake leveler to level the tops of your cakes if they have domed. This creates flat surfaces for stacking.
- Crumb Coat: Place one cake layer on your serving plate or cake stand. Spread a thin layer of buttercream over the top. Place the second cake layer on top. Apply a very thin layer of buttercream all over the entire cake (top and sides). This is called a “crumb coat” and it traps any loose crumbs, preventing them from getting into your final frosting layer. Essential Beginner Tip: Chill the crumb-coated cake in the refrigerator for at least 15-30 minutes until the frosting is firm. This step is a game-changer for a smooth final coat!
- Final Frosting Layer: Once the crumb coat is firm, apply a thicker, even layer of buttercream to the entire cake. Use an offset spatula or a bench scraper to smooth the sides and top as much as possible. Aim for a clean, even base for your decorations.
- Prepare for Piping: Divide your buttercream into separate bowls if using different colors. Fit your piping bags with your chosen tips (e.g., small round tip for dots, star tip for shells, petal tip for rosettes). Don’t overfill your piping bags; about half full is perfect for control.
- Begin Lambeth-Inspired Piping: For a beginner-friendly Lambeth look, focus on creating borders and simple patterns.
- Bottom Border: Using a star tip (like a Wilton 21 or 1M), pipe a decorative shell border around the base of the cake. Hold the bag at a 45-degree angle, squeeze, let the frosting build up, then release pressure and pull away to form a tail. Overlap each shell slightly.
- Top Border: Repeat a similar shell border or create a simple rope border around the top edge of the cake.
- Side Details: Use a small round tip (like a Wilton 3 or 4) to pipe small dots, pearls, or simple swags on the sides of the cake. You can create “overpiping” by piping a second, smaller line or dots directly on top of your initial border for a dimensional effect.
- Rosettes (Optional): Use a petal tip (like a Wilton 104) to pipe small rosettes on the top or sides for added elegance.
Piping Practice: If you’re new to piping, practice on a piece of parchment paper before going straight to the cake. You can scrape the practice frosting back into the bag! This builds confidence and helps you get a feel for the pressure needed.
- Chill to Set: Once decorated, chill your cake for at least 30 minutes to allow the buttercream to firm up. This helps preserve your beautiful designs.
Tips & Tricks for Baking Success
Baking is a science, but with these simple tips, you’ll feel like a pro in no time!
- Room Temperature Ingredients are Key: For both cake and buttercream, make sure your butter, eggs, and milk are at room temperature. This allows them to emulsify (mix smoothly) better, creating a more uniform batter and creamier frosting.
- Measure Accurately: Use proper measuring cups and spoons. For flour, spoon it into your measuring cup and then level it off with a straight edge – don’t scoop directly from the bag, as this compacts the flour and you’ll end up with too much.
- Don’t Overmix: This is perhaps the most common beginner mistake. Overmixing develops gluten, leading to a tough, dense cake. Mix only until ingredients are just combined.
- Sift Dry Ingredients: Sifting flour, powdered sugar, and cocoa powder (if using) removes lumps and aerates them, resulting in a lighter texture.
- Cool Cakes Completely: Patience! Frosting a warm cake will lead to a melted, sliding mess. Ensure your cakes are completely cool, preferably chilled, before frosting.
- Crumb Coat is Your Best Friend: Don’t skip the crumb coat! It seals in crumbs and provides a stable, smooth base for your final frosting layer, making your decorating much easier and cleaner.
- Practice Piping: If you’re new to piping, practice on a piece of parchment paper. You can scrape the frosting back into the bag and reuse it. This helps you get a feel for pressure and movement before decorating your actual cake.
- Use Quality Ingredients: Good butter, fresh eggs, and quality vanilla extract truly make a difference in the flavor of your cake.
- Adjust Buttercream Consistency: If your buttercream is too stiff, add a teaspoon of milk or cream. If it’s too soft, add a tablespoon of sifted powdered sugar. Adjust slowly until you reach the desired consistency.
Essential Baking Tools
Having the right tools makes all the difference, especially when you’re starting out. Here are some essentials for this **Lambeth Cake Recipe**:
- Mixing Bowls (various sizes)
- Whisk
- Electric Mixer (Stand Mixer or Hand Mixer)
- 8-inch Round Baking Pans (2)
- Parchment Paper
- Wire Rack
- Measuring Cups and Spoons
- Rubber Spatula
- Offset Spatula (for frosting)
- Piping Bags
- Piping Tips (star, round, and petal tips are great for Lambeth-style designs)
- Cake Leveler or Serrated Knife (optional, but helpful)
Nutrition Information (Estimated per serving)
Please note that these values are estimates and can vary based on specific ingredients and serving sizes.
| Nutrient | Amount |
|---|---|
| Calories | 420 kcal |
| Carbohydrates | 65g |
| Protein | 4g |
| Fat | 18g |
| Saturated Fat | 11g |
| Fiber | 1g |
| Sugar | 48g |
Frequently Asked Questions for Beginners
Got questions? We’ve got answers!
Q: What makes a Lambeth cake unique?
A: The Lambeth cake style is known for its elaborate, ornate piping, often featuring over-piping (piping on top of existing piping) to create a three-dimensional, regal look. It uses a variety of piping tips and techniques to achieve intricate borders, swags, and scrollwork, inspired by royal icing techniques.
Q: Can I make this cake ahead of time?
A: Absolutely! You can bake the cake layers up to 2-3 days in advance. Once cooled, wrap them tightly in plastic wrap and store at room temperature or in the freezer for up to 2 months. The buttercream can be made 3-4 days ahead and stored in an airtight container in the fridge; just re-whip it to lighten before use. The fully assembled and decorated cake can be stored at room temperature for 1-2 days (if not too warm) or in the refrigerator for up to 3-4 days.
Q: Why did my cake sink in the middle?
A: This is a common issue for beginners! It can happen for several reasons: opening the oven door too early (before the cake is set), an oven temperature that’s too low or inconsistent, using old or expired leavening agents (baking powder), or overmixing the batter. Ensure your oven temperature is accurate and try not to disturb the cakes during the first 2/3 of their baking time.
Q: My buttercream is too soft/stiff, what do I do?
A: If your buttercream is too soft and won’t hold its shape, it might be too warm or have too much liquid. Try chilling it in the refrigerator for 15-20 minutes, then re-whip. If it’s still too soft, add more sifted powdered sugar, 1/4 cup at a time, until it reaches the desired consistency. If it’s too stiff and hard to pipe, add a teaspoon of heavy cream or milk at a time, mixing well after each addition, until it’s smooth and pliable.
Q: Do I need special piping tips for a Lambeth cake?
A: While advanced Lambeth techniques use a wide array of specialized tips, for a beginner-friendly approach, you can create a beautiful cake with just a few basic tips. A medium star tip (like Wilton 1M or 21) for borders, a small round tip (like Wilton 3 or 4) for dots and finer lines, and a petal tip (like Wilton 104) for simple rosettes or ruffles are excellent starting points. Don’t feel pressured to buy a whole set – start simple and expand as you gain confidence!
Your Lambeth Cake Journey Begins Now!
Congratulations, aspiring baker! You’ve just walked through the steps to create a beautiful, delicious, and impressive Lambeth-inspired cake. Don’t be intimidated by the ornate look; remember that every master baker started somewhere. This Lambeth Cake Recipe is designed to empower you with the knowledge and confidence to tackle what might seem like a complex dessert. The joy of baking isn’t just in the final product, but in the process itself – the aroma filling your kitchen, the creativity of decorating, and the sheer delight of sharing something homemade. So, grab your apron, preheat your oven, and embark on this delightful baking adventure. We can’t wait to see your stunning creations!