Are you ready to bake something truly spectacular, even if you’re just starting your culinary journey? This Lemon Berry Mascarpone Cake Recipe is your ticket to creating a show-stopping dessert that tastes as incredible as it looks. Forget about intimidating techniques we’re going to break down every step, making it one of the most easy baking recipes you’ll ever try. With our detailed baking tips for beginners, you’ll gain confidence and skills that will serve you well in all your future baking adventures. This cake is a symphony of flavors: bright, zesty lemon, sweet mixed berries, and a rich, creamy mascarpone frosting, all layered with tender, moist cake. It’s perfect for celebrations, potlucks, or just a delightful weekend treat. Let’s get baking!
Ingredients You’ll Need
Gathering all your ingredients before you start is a crucial step for easy baking recipes. This is called “mise en place” and it makes the process so much smoother!

For the Lemon Cake Layers:
| Ingredient | Quantity | Unit |
|---|---|---|
| All-purpose flour | 2 ½ | cups |
| Baking powder | 2 ½ | teaspoons |
| Salt | ½ | teaspoon |
| Unsalted butter, softened | 1 | cup (2 sticks) |
| Granulated sugar | 1 ¾ | cups |
| Large eggs, room temperature | 4 | |
| Vanilla extract | 2 | teaspoons |
| Lemon zest (from 2-3 lemons) | 2 | tablespoons |
| Whole milk, room temperature | 1 | cup |
| Fresh lemon juice | ¼ | cup |
For the Quick Berry Compote:
| Ingredient | Quantity | Unit |
|---|---|---|
| Mixed berries (fresh or frozen) | 2 | cups |
| Granulated sugar | ¼ | cup (or to taste) |
| Lemon juice | 1 | tablespoon |
For the Lemon Curd (store-bought is fine for beginners!):
| Ingredient | Quantity | Unit |
|---|---|---|
| Store-bought lemon curd | 1 | cup |
| (Alternatively, homemade lemon curd ingredients) | ||
| Egg yolks | 3 | large |
| Granulated sugar | ½ | cup |
| Lemon juice | ½ | cup |
| Lemon zest | 1 | tablespoon |
| Unsalted butter, cold, cubed | 4 | tablespoons |
For the Mascarpone Whipped Cream Frosting:
| Ingredient | Quantity | Unit |
|---|---|---|
| Heavy whipping cream, very cold | 2 | cups |
| Mascarpone cheese, cold | 8 | ounces (1 block) |
| Powdered sugar (confectioners’ sugar) | ½ | cup (or to taste) |
| Vanilla extract | 1 | teaspoon |
Step-by-Step Instructions: Your Guide to a Perfect Cake
Take your time, read through each step before you start, and remember that baking is a journey, not a race! These **baking tips for beginners** will help you achieve success.
Step 1: Prepare Your Cake Pans & Preheat Oven
- Preheat your oven to 350°F (175°C). This is crucial for even baking.
- Grease and flour two 8-inch round cake pans. You can also line the bottoms with parchment paper for extra insurance against sticking. Beginner Tip: To grease, use butter or non-stick spray, then add a tablespoon of flour to the pan, tilt and tap until the flour coats all surfaces, then tap out the excess. This creates a non-stick barrier.
Step 2: Whisk Dry Ingredients
- In a medium bowl, whisk together the all-purpose flour, baking powder, and salt. Whisking ensures these dry ingredients are evenly distributed and aerated, which contributes to a light cake texture. Set aside.
Step 3: Cream Butter, Sugar & Zest
- In a large bowl, using an electric mixer (handheld or stand mixer), beat the softened unsalted butter, granulated sugar, and lemon zest on medium-high speed for 3-5 minutes. You want this mixture to become light, fluffy, and pale in color. This process, called “creaming,” incorporates air, which is essential for a tender cake. Common Mistake & Tip: If your butter isn’t softened, it won’t cream properly. Let it sit out at room temperature for at least an hour or two.
Step 4: Add Eggs & Vanilla
- Add the eggs one at a time, beating well after each addition until just combined. Scrape down the sides of the bowl as needed to ensure everything is incorporated. Then, beat in the vanilla extract.
Step 5: Alternate Dry & Wet Ingredients
- In a separate small bowl or liquid measuring cup, combine the whole milk and fresh lemon juice. The lemon juice will curdle the milk slightly, creating a “buttermilk” effect, which adds moisture and tenderness to the cake.
- With the mixer on low speed, gradually add the dry ingredients to the butter mixture in three additions, alternating with the milk mixture in two additions.
- Start and end with the dry ingredients. So, dry, wet, dry, wet, dry.
- Mix just until combined after each addition. Crucial Beginner Tip: Do NOT overmix! Overmixing develops the gluten in the flour, leading to a tough, dry cake. A few small lumps of flour are okay.
Step 6: Bake the Cake Layers
- Divide the batter evenly between the two prepared cake pans. Smooth the tops with a spatula.
- Bake for 28-32 minutes, or until a wooden skewer or toothpick inserted into the center comes out clean.
- Baking Tip: Avoid opening the oven door frequently, especially in the first 20 minutes, as this can cause the cakes to sink.
- Once baked, let the cakes cool in the pans on a wire rack for 10-15 minutes. Then, carefully invert them onto the wire rack to cool completely. Ensure they are completely cool before frosting! Warm cakes will melt your frosting.
Step 7: Make the Quick Berry Compote
- While the cakes cool, combine the mixed berries, granulated sugar, and lemon juice in a small saucepan.
- Bring to a gentle simmer over medium heat, stirring occasionally. Cook for 5-7 minutes, or until the berries have softened and released their juices, and the mixture has thickened slightly.
- Remove from heat and let cool completely. You can mash some of the berries with a fork if you prefer a smoother compote.
Step 8: Prepare the Lemon Curd (if making homemade)
- If using store-bought, simply have it ready.
- For homemade: In a heatproof bowl set over a saucepan of simmering water (a double boiler), whisk together the egg yolks, granulated sugar, lemon juice, and lemon zest. Do not let the bowl touch the water.
- Whisk constantly for 8-10 minutes, until the mixture thickens enough to coat the back of a spoon.
- Remove from heat and whisk in the cold, cubed butter until fully melted and incorporated.
- Strain the curd through a fine-mesh sieve into a clean bowl to remove any zest or cooked egg bits, ensuring a silky smooth texture.
- Cover the surface directly with plastic wrap to prevent a skin from forming and refrigerate until completely chilled (at least 2 hours, or overnight).
Step 9: Make the Mascarpone Whipped Cream Frosting
- In a large, very cold bowl (you can chill the bowl and whisk attachment in the freezer for 10-15 minutes), combine the very cold heavy whipping cream, cold mascarpone cheese, powdered sugar, and vanilla extract.
- Using an electric mixer, start on low speed to combine, then increase to medium-high speed. Beat until medium-stiff peaks form. This means when you lift the whisk, the frosting holds its shape but the tip curls slightly. Beginner Tip: Watch carefully! Whipped cream can go from perfect to over-whipped (grainy and curdled) very quickly. Stop once it reaches the desired consistency.
Step 10: Assemble Your Lemon Berry Mascarpone Cake!
- Once the cake layers are completely cool, and all your fillings (compote and curd) are chilled:
- Place one cake layer on your serving plate or cake stand.
- Spread about half of the lemon curd evenly over the top, leaving a small border around the edge.
- Spread about half of the berry compote over the lemon curd.
- Spread a generous layer (about 1.5 cups) of the mascarpone frosting over the berry compote.
- Carefully place the second cake layer on top.
- Repeat with the remaining lemon curd, berry compote, and another layer of mascarpone frosting.
- Finally, use the remaining mascarpone frosting to frost the sides of the cake. You can do a rustic look or smooth it out with an offset spatula.
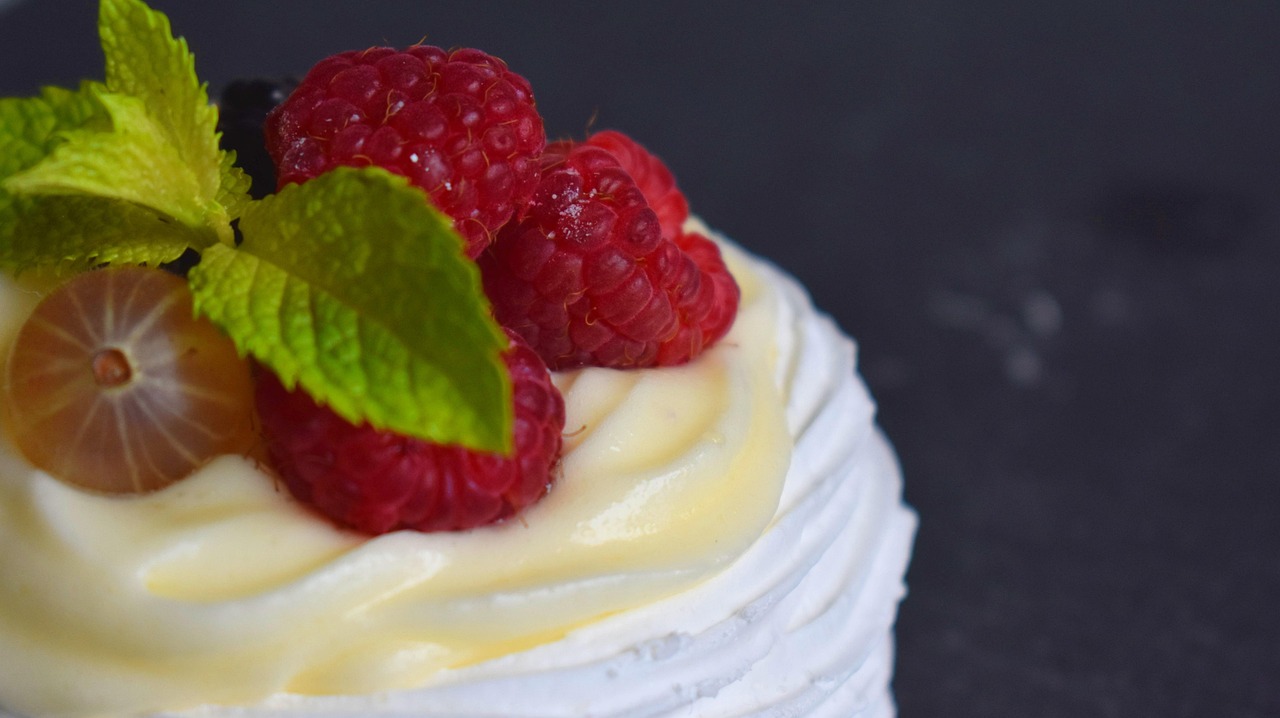
- Optional: Decorate with fresh berries and lemon slices.
- Refrigerate the cake for at least 30 minutes before slicing to allow the frosting to set.
Tips & Tricks for Baking Success
Baking is a science, but with a few simple rules, you’ll be a pro in no time! These **baking tips for beginners** are golden.
- Room Temperature Ingredients: This is not just a suggestion! Softened butter, room temperature eggs, and milk emulsify better, creating a smoother batter and a more uniform texture in your final cake. Plan ahead and take them out of the fridge an hour or two before you start.
- Accurate Measuring: Use proper measuring cups and spoons. For flour, spoon it into your measuring cup and then level it off with a straight edge (like the back of a knife). Don’t scoop directly from the bag, as this compacts the flour and you’ll end up with too much.
- Don’t Overmix: This is a recurring theme! Once you add flour to wet ingredients, mix only until just combined. Overmixing develops gluten, making your cake tough and chewy instead of tender and moist.
- Parchment Paper is Your Friend: For cake layers, cutting a circle of parchment paper to fit the bottom of your pan can prevent sticking and make removal incredibly easy.
- Know Your Oven: Ovens can vary widely in temperature. If you bake often, consider an oven thermometer to ensure your oven is truly at the temperature you set it to.
- Cool Completely: Patience is key! Do not attempt to frost a warm cake. Your frosting will melt and slide right off. Let cakes cool completely on a wire rack before even thinking about frosting.
- Chill Your Frosting Bowl: For whipped cream or mascarpone frostings, a cold bowl and whisk attachment (chilled in the freezer for 10-15 minutes) help the cream whip up faster and hold its shape better.
Essential Baking Tools
Having the right tools makes all the difference, especially when you’re starting out. Here are some basics you’ll want:
- Mixing Bowl
- Whisk
- Baking Pan (specifically 8-inch round cake pans for this recipe)
- Measuring Cups & Measuring Spoons
- Spatula (rubber and offset for frosting)
- Electric Mixer (handheld or stand mixer)
- Wire Rack
- Parchment Paper
Nutrition Information (Estimated per serving)
Please note that these are approximate values and can vary based on specific ingredients and serving size.
| Nutrient | Amount |
|---|---|
| Calories | 450-550 |
| Carbohydrates | 60-75g |
| Protein | 6-8g |
| Fat | 20-30g |
| Fiber | 2-4g |
| Sugar | 40-55g |
Frequently Asked Questions (FAQs)
Q: Can I use frozen berries for the compote?
A: Absolutely! Frozen mixed berries work perfectly for the compote. You might need to cook them a minute or two longer to reduce the extra liquid they release.
Q: My cake layers sunk in the middle! What went wrong?
A: This is a common issue for beginners! It can happen for several reasons: overmixing the batter (developing too much gluten), opening the oven door too early, or the oven temperature being too low. Ensure your oven is accurately preheated, avoid opening the door, and mix the batter just until combined.
Q: How can I prevent my cake from being dry?
A: The biggest culprits for dry cakes are overmixing the batter and overbaking. Mix only until the ingredients are just combined, and start checking for doneness a few minutes before the recommended bake time. A toothpick inserted into the center should come out with moist crumbs, not wet batter, and certainly not completely dry.
Q: Can I make this cake ahead of time?
A: Yes! You can bake the cake layers up to 2 days in advance, wrap them tightly in plastic wrap, and store them at room temperature or freeze them for longer. The berry compote and lemon curd can also be made 2-3 days ahead and stored in the refrigerator. Assemble the cake no more than 1 day before serving for the freshest taste, as the mascarpone frosting is best when fresh.
Q: How long does the Lemon Berry Mascarpone Cake last?
A: Due to the fresh ingredients and dairy in the frosting, this cake should be stored in an airtight container in the refrigerator for up to 3-4 days. It’s best enjoyed within the first 2 days.
Q: What if I don’t have mascarpone cheese?
A: While mascarpone cheese gives the frosting its unique richness and stability, you can substitute it with cream cheese (ensure it’s softened, then whip with the heavy cream and sugar) for a cream cheese frosting. The flavor profile will be slightly different, but still delicious! Alternatively, you can just use a classic stabilized whipped cream frosting.
Enjoy Your Delicious Creation!
Congratulations, you’ve baked a magnificent Lemon Berry Mascarpone Cake! We hope you found this easy baking recipe guide clear, helpful, and inspiring. Don’t be afraid to experiment with different berries or even a touch of mint for garnish. Baking is a fantastic way to express creativity and share joy with others. You’ve just taken a huge step in your baking journey, and we’re so proud of you! We’d love to see your creations – share your photos and experiences in the comments below. Happy baking!