
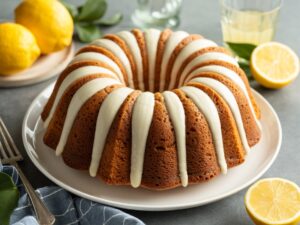
Are you ready to bake something truly special, even if you’re just starting your baking journey? Get ready to fall in love with our Lemon Nothing Bundt Cake Recipe This isn’t just any cake; it’s a ray of sunshine in dessert form, bursting with bright, zesty lemon flavor and boasting an incredibly tender, moist crumb that will have everyone asking for more. We’ve designed this recipe to be one of the most easy baking recipes you’ll ever try, perfect for anyone looking to impress without the stress.
Forget complicated techniques and intimidating instructions. We’re here to guide you through every single step, offering valuable baking tips for beginners along the way. Whether you’re making it for a special occasion, a weekend treat, or just because you crave something delicious, this Bundt cake promises a delightful experience from mixing bowl to first bite. So, tie on your apron, gather your ingredients, and let’s create some baking magic together!
Ingredients List
Before we dive into the fun, let’s make sure you have all your ingredients ready. Having everything measured and prepped (this is called “mise en place”!) makes the baking process so much smoother and more enjoyable, especially for beginners.
| Ingredient | Quantity | Unit |
|---|---|---|
| All-Purpose Flour | 2 ½ | cups |
| Granulated Sugar | 1 ¾ | cups |
| Baking Powder | 2 | teaspoons |
| Salt | ½ | teaspoon |
| Unsalted Butter, softened | 1 | cup (2 sticks) |
| Large Eggs, room temperature | 4 | |
| Whole Milk, room temperature | 1 | cup |
| Fresh Lemon Zest (from 2-3 lemons) | 2 | tablespoons |
| Fresh Lemon Juice | ¼ | cup |
| Vanilla Extract | 1 | teaspoon |
| For the Lemon Glaze: | ||
| Powdered Sugar (Confectioners’ Sugar) | 1 ½ | cups |
| Fresh Lemon Juice | 3-4 | tablespoons |
| Optional: Extra Lemon Zest | ½ | teaspoon |
Step-by-Step Instructions: Your Guide to a Perfect Bundt Cake
Follow these detailed steps carefully, and you’ll be amazed at the delicious results. We’ve included plenty of tips to help you succeed!
Step 1: Prepare Your Bundt Pan Like a Pro
- Preheat Your Oven: Adjust your oven rack to the middle position and preheat your oven to 350°F (175°C). This ensures a consistent baking temperature from the moment your cake goes in.
- Grease and Flour Your Bundt Pan: This is arguably the most crucial step for a Bundt cake, especially for beginners! You need a 10-12 cup Bundt pan.
- Method 1 (Butter & Flour): Use a pastry brush or your fingers to generously coat every nook and cranny of your Bundt pan with softened butter or shortening. Make sure to get into all the grooves. Then, sprinkle about 2 tablespoons of all-purpose flour into the pan, rotating it and tapping the sides to ensure the flour coats all the buttered surfaces evenly. Invert the pan and tap out any excess flour. This creates a non-stick barrier.
- Method 2 (Baking Spray with Flour): If you have a baking spray specifically designed with flour (like Baker’s Joy or Pam Baking), use that! Spray thoroughly, making sure all surfaces are covered. This is a great shortcut for beginners.
Beginner Tip: Don’t skimp on this step! A poorly greased pan is the number one reason Bundt cakes stick. Take your time here.
Step 2: Whisk the Dry Ingredients
- In a large mixing bowl, combine the 2 ½ cups all-purpose flour, 1 ¾ cups granulated sugar, 2 teaspoons baking powder, and ½ teaspoon salt. Use a whisk to gently mix these ingredients together for about 30 seconds. This helps to evenly distribute the leavening agents (baking powder) and prevent lumps in your batter. Set this bowl aside.
Step 3: Cream the Butter and Sugar (The Foundation of Flavor)
- In a separate, larger mixing bowl (or the bowl of your stand mixer), place the 1 cup (2 sticks) softened unsalted butter. If your butter isn’t quite room temperature, you can microwave it for 10-15 seconds, but be careful not to melt it completely. Room temperature butter creams better and incorporates more air.
- Using an electric mixer (handheld or stand mixer with a paddle attachment), beat the butter on medium speed for about 1-2 minutes until it’s light and creamy.
- Gradually add the 1 ¾ cups granulated sugar (from the dry ingredients bowl, or if you prefer to measure it separately, do so now). Beat on medium-high speed for another 3-5 minutes, scraping down the sides of the bowl occasionally with a spatula. The mixture should become very light in color, fluffy, and significantly increased in volume. This process, called “creaming,” incorporates air into the batter, which is essential for a tender cake.
Step 4: Incorporate the Eggs, One by One
- Add the 4 large eggs to the butter-sugar mixture, one at a time. After each egg, beat on medium speed until it is fully incorporated into the batter. This means you shouldn’t see any streaks of egg yolk or white.
- Beginner Tip: Adding eggs one at a time helps emulsify the batter, preventing it from separating. Scrape down the sides of the bowl after each egg addition to ensure everything is well combined.
Step 5: Add the Wet and Dry Ingredients Alternately
- In a small bowl or measuring cup, whisk together the 1 cup whole milk, ¼ cup fresh lemon juice, 2 tablespoons fresh lemon zest, and 1 teaspoon vanilla extract. This is your “wet” mixture.
- Now, you’re going to add the dry ingredients and the wet ingredients to the creamed butter mixture alternately, starting and ending with the dry. This technique helps build the cake’s structure and keeps the batter smooth.
- First, add about one-third of the dry ingredients to the butter mixture. Beat on low speed until just combined.
- Next, add about one-half of the wet ingredients. Beat on low speed until just combined.
- Then, add another one-third of the dry ingredients. Beat on low speed until just combined.
- Follow with the remaining one-half of the wet ingredients. Beat on low speed until just combined.
- Finally, add the last one-third of the dry ingredients. Beat on low speed until just combined.
Beginner Tip: The key here is to mix only until just combined after each addition. Overmixing develops the gluten in the flour too much, leading to a tough, dry cake. Use the lowest speed on your mixer.
- Once all ingredients are added, give the batter a final gentle stir with a spatula, scraping down the sides and bottom of the bowl, to ensure everything is evenly incorporated without overmixing.
Step 6: Fill the Pan and Bake!
- Pour the cake batter evenly into your meticulously prepared Bundt pan. Use your spatula to spread it evenly and gently tap the pan on your counter a couple of times to release any large air bubbles. This helps prevent large holes in your finished cake.
- Place the Bundt pan into your preheated 350°F (175°C) oven.
- Bake for 50-60 minutes, or until a wooden skewer or toothpick inserted into the thickest part of the cake (usually near the center) comes out clean or with only a few moist crumbs attached.
- Beginner Tip: Ovens can vary! Start checking around 45-50 minutes. If the top of the cake starts to brown too quickly, you can loosely tent it with aluminum foil.
Step 7: Cool and Unmold Your Masterpiece
- Once baked, carefully remove the Bundt pan from the oven. Let the cake cool in the pan on a wire rack for exactly 10-15 minutes. This cooling period in the pan is crucial – it allows the cake to firm up slightly, making it less likely to break when you unmold it.
- After 10-15 minutes, place your wire rack on top of the Bundt pan. With oven mitts or a clean towel, carefully and confidently invert the pan onto the wire rack. The cake should slide out easily. If it doesn’t, give the bottom of the pan a gentle tap.
- Allow the cake to cool completely on the wire rack before glazing, which can take 1-2 hours. Glazing a warm cake will cause the glaze to melt and soak in too much, rather than forming a nice coating.
Step 8: Prepare and Apply the Lemon Glaze
- While the cake cools, prepare the glaze. In a small bowl, whisk together the 1 ½ cups powdered sugar and 3-4 tablespoons fresh lemon juice. Start with 3 tablespoons of juice and add more, a teaspoon at a time, until you reach your desired consistency. You want a thick but pourable glaze, not too thin or too thick.
- Stir in the optional ½ teaspoon extra lemon zest for an extra pop of lemon flavor and visual appeal.
- Once the cake is completely cool, place the wire rack (with the cake on it) over a piece of parchment paper or a baking sheet. This will catch any drips from the glaze, making cleanup a breeze.
- Slowly drizzle or pour the lemon glaze over the cooled Bundt cake, allowing it to drip down the sides. For a thicker coating, you can wait for the first layer to set slightly (about 15-20 minutes) and then apply a second layer.
- Let the glaze set for at least 30 minutes before slicing and serving.
Tips & Tricks for Beginner Bakers
Baking is a science, but it’s also an art that gets easier with practice. Here are some extra pointers to ensure your Lemon Nothing Bundt Cake is a resounding success:
- Room Temperature Matters: Ensure your butter, eggs, and milk are all at room temperature. This allows them to emulsify better, creating a smoother, more uniform batter and a finer crumb in your cake. Plan ahead by taking them out of the fridge at least 30 minutes to an hour before you start baking.
- Measure Accurately: Baking is precise! Use proper measuring cups and spoons. For flour, spoon it into your measuring cup and then level it off with a straight edge (like the back of a knife) – don’t scoop directly from the bag, as this can pack the flour and lead to too much flour.
- Don’t Overmix: This is a golden rule for cakes! Overmixing develops gluten, which can make your cake tough and dry. Mix only until ingredients are just combined.
- Invest in an Oven Thermometer: Oven temperatures can vary greatly from what the dial says. An inexpensive oven thermometer can tell you the true temperature, helping prevent under or over-baking.
- Patience is a Virtue: Resist the urge to open the oven door frequently while baking, especially in the first 30 minutes, as this can cause the cake to sink. Also, allow the cake to cool completely before glazing for the best results.
- Zest Before Juicing: Always zest your lemons before you cut and juice them. It’s much easier!
Essential Baking Tools
Having the right tools makes all the difference in your baking experience. Here are some essentials you’ll need for this recipe, with convenient links to find them:
- Mixing Bowls (various sizes)
- Whisk
- Bundt Pan (10-12 cup)
- Measuring Cups and Spoons
- Rubber Spatula
- Electric Mixer (handheld or stand mixer)
- Wire Cooling Rack
- Pastry Brush (optional, for greasing pan)
Nutrition Information (Estimated per serving)
This information is an estimate based on dividing the entire cake into 12 servings. Actual values may vary depending on specific ingredients and brands used.
| Nutrient | Amount |
|---|---|
| Calories | 400-450 kcal |
| Carbohydrates | 60-70 g |
| Protein | 4-5 g |
| Fat | 18-22 g |
| Fiber | 1-2 g |
| Sugar | 40-50 g |
Frequently Asked Questions (FAQs)
Q: My Bundt cake stuck to the pan! What went wrong?
A: This is a very common issue for beginners! The most likely culprit is insufficient greasing and flouring of the pan. Make sure you get into every crevice. Also, be sure to let the cake cool in the pan for the recommended 10-15 minutes before inverting. Unmolding too soon or too late can both cause sticking. Using a high-quality non-stick Bundt pan or baking spray with flour can also help.
Q: Can I use bottled lemon juice instead of fresh?
A: While fresh lemon juice and zest provide the best, brightest, and most authentic lemon flavor, you can use bottled lemon juice in a pinch. However, for a true “Lemon Nothing” experience, we highly recommend fresh! You’ll miss out on the aromatic oils from the zest if you only use bottled juice.
Q: How do I know when my cake is truly done baking?
A: The best way is the “toothpick test.” Insert a long wooden skewer or toothpick into the thickest part of the cake (usually the center near the tube). If it comes out clean or with only a few moist crumbs attached, it’s done. If you see wet batter, continue baking for 5-minute intervals and retest. The cake should also spring back slightly when gently pressed.
Q: How should I store leftover Lemon Nothing Bundt Cake?
A: Store your cake at room temperature, loosely covered with plastic wrap or in an airtight cake dome, for up to 3-4 days. If your kitchen is very warm, you can store it in the refrigerator, but bring it to room temperature before serving for the best texture and flavor.
Q: Can I add poppy seeds to this recipe?
A: Absolutely! Lemon and poppy seeds are a classic combination. You can gently fold in 1-2 tablespoons of poppy seeds with your dry ingredients for a delicious twist. Just be aware it might slightly alter the texture and appearance, but the flavor will be fantastic!
Conclusion: Your Lemon Nothing Bundt Cake Awaits!
Congratulations, you’ve done it! You’ve successfully baked a beautiful and delicious Lemon Nothing Bundt Cake! We hope this detailed, beginner-friendly guide has made your baking experience enjoyable and stress-free. There’s nothing quite like the satisfaction of creating something wonderful from scratch, and this cake is proof that amazing results are within reach for every home baker.
So go ahead, slice into your masterpiece, and savor that incredible lemon flavor. Don’t be shy about sharing your creation with friends and family – they’ll be begging for the recipe! Remember, every bake is a learning experience, and with each cake, you’ll gain confidence and skill. Keep baking, keep experimenting, and most importantly, keep enjoying the sweet rewards of your efforts. Happy baking!