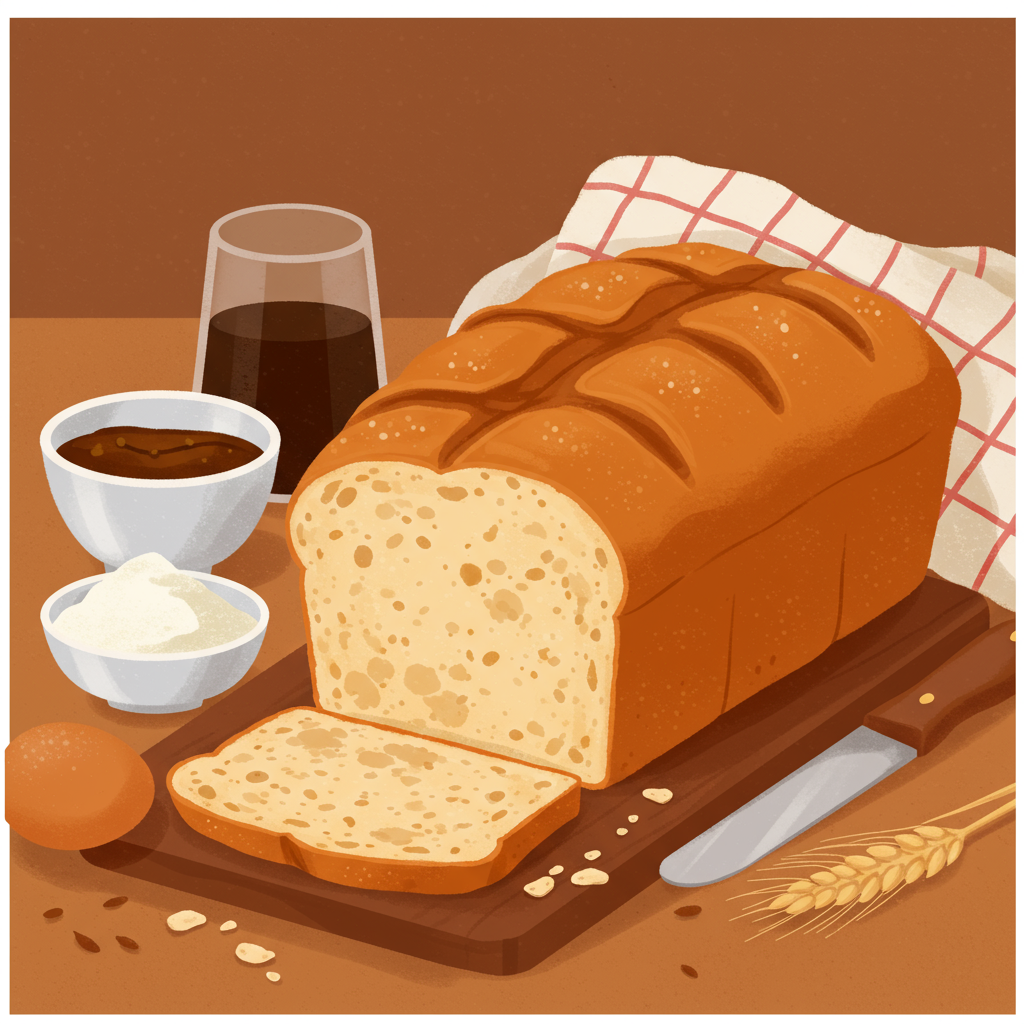
Essential Ingredients for Your Manna Bread
The beauty of Manna Bread lies in its simplicity. You only need a few high-quality ingredients to create something truly special. We’ll be using sprouted wheat berries, which are the heart and soul of this recipe. If you’re new to sprouting, don’t worry – we’ll guide you through it!
Ingredients List:
| Ingredient | Quantity | Unit |
|---|---|---|
| Organic Hard Red Wheat Berries (unsprouted) | 2 | cups |
| Filtered Water (for soaking/rinsing) | as needed | |
| Filtered Water (for grinding) | ½ – ¾ | cup |
| Fine Sea Salt | ½ | teaspoon |
| Optional: Honey or Maple Syrup | 1-2 | tablespoons |
| Optional: Ground Cinnamon | ¼ | teaspoon |
Step-by-Step Instructions: Baking Your Perfect Manna Bread
This recipe might seem a little different from traditional bread, especially with the sprouting step, but each stage is straightforward. Take your time, follow these detailed instructions, and you’ll be enjoying homemade Manna Bread in no time!
Step 1: Sprouting Your Wheat Berries (The Foundation of Manna Bread)
This is the most time-consuming but crucial step. Sprouting unlocks nutrients and makes the grains easier to digest. It takes about 2-3 days.
- Day 1 – Soaking: Place the 2 cups of dry organic hard red wheat berries in a large bowl or a quart-sized mason jar. Cover them with at least 3-4 inches of filtered water (they will expand significantly). Let them soak at room temperature for 8-12 hours, or overnight.
- Day 2 & 3 – Rinsing & Draining: After soaking, drain the water completely. Rinse the wheat berries thoroughly under cool running water, then drain them again completely. You want no standing water.
- Setting Up for Sprouting: Transfer the rinsed and drained wheat berries to a colander, a mesh sprouting lid on a jar, or a breathable bag. Place it in an area with good air circulation, away from direct sunlight.
- Repeat Rinsing: Rinse and drain the wheat berries every 8-12 hours (2-3 times a day) until you see tiny “tails” emerge, about ⅛ to ¼ inch long. This usually takes 1-2 additional days after the initial soak. They should smell fresh, not sour. Once sprouted, they’re ready!
- Beginner Tip: Ensure complete drainage after each rinse. Excess moisture can lead to mold. If you see any signs of mold or a sour smell, discard and start over.
Step 2: Preparing Your Sprouted Grains for Grinding
Once your wheat berries have successfully sprouted, it’s time to prepare them for turning into dough.
- Final Rinse: Give your sprouted wheat berries one last good rinse and drain them as thoroughly as possible.
- Pat Dry (Optional but helpful): For a slightly less watery dough, you can spread them out on a clean kitchen towel for about 30 minutes to air dry slightly. This isn’t strictly necessary but can help with dough consistency.
Step 3: Grind the Sprouted Grains into Dough
This is where the magic happens! You’ll transform the sprouted berries into a smooth, thick dough.
- Using a Food Processor: Place about half of your sprouted wheat berries into the bowl of a powerful food processor. Add about ¼ cup of the filtered water.
- Process: Process on high speed, scraping down the sides as needed, until the mixture forms a thick, sticky dough. It should be relatively smooth, with no whole berries remaining. This might take 3-5 minutes.
- Repeat: Transfer the first batch to a large mixing bowl. Repeat with the remaining sprouted wheat berries and another ¼ cup of water. You might need to add a tablespoon or two more water if the mixture is struggling to come together or seems too dry. The goal is a thick, pliable dough, similar to thick hummus or cookie dough.
- Common Mistake: Too Dry/Too Wet: If your dough is too dry and crumbly, add water one tablespoon at a time until it comes together. If it’s too wet and soupy, you might need to add a small amount of sprouted wheat flour (if you have it) or try to gently squeeze out some excess moisture from the dough (though this is rare if you drained correctly).
Step 4: Mix the Dough
Now, let’s incorporate the flavorings.
- Add Salt: To the ground sprouted wheat dough in your mixing bowl, add the ½ teaspoon of fine sea salt.
- Optional Flavorings: If you’re using honey or maple syrup and ground cinnamon, add them now.
- Mix Thoroughly: Use your hands (the best tools for bread!) to knead and mix the ingredients together for 2-3 minutes. Ensure the salt and any optional additions are evenly distributed throughout the dough. The dough will be very sticky.
Step 5: Shape Your Manna Bread Loaf
Time to give your bread its form.
- Prepare Your Pan: Line a small baking sheet (or an 8×4 inch loaf pan for a taller loaf) with parchment paper. This will prevent sticking.
- Shape the Dough: With damp hands (this helps prevent sticking), gather the dough and form it into a loaf shape. You can make a traditional rectangular loaf, or smaller, flatter rounds (like discs) if you prefer. A rectangular loaf will be denser and take longer to bake. A flatter shape will bake quicker and be slightly crispier.
- Smooth It Out: Gently smooth the top and sides of your loaf.
Step 6: Preheat Your Oven
Manna Bread is baked at a lower temperature for a longer time, almost like a slow dehydration process, which helps preserve its unique nutritional properties.
- Set Temperature: Preheat your oven to a very low temperature, around 250°F (120°C).
Step 7: Bake Low and Slow
Patience is a virtue when baking Manna Bread!
- Bake Time: Carefully transfer your shaped loaf (on the parchment paper) to the preheated oven. Bake for a long time, typically 3-4 hours for a denser loaf, or 2-3 hours for flatter rounds.
- Check for Doneness: The bread is done when it feels firm to the touch, and the crust is dry. It won’t get golden brown like regular bread; it will remain fairly light in color but should feel solid. A good test is to tap the bottom – it should sound hollow.
- Alternative: Dehydrator: If you have a food dehydrator, you can bake Manna Bread at an even lower temperature (around 105-115°F or 40-46°C) for 10-14 hours or until firm. This method is often preferred for maximum enzyme preservation.
Step 8: Cool Completely
This final step is crucial for the bread’s texture.
- Cool on a Rack: Once baked, remove the Manna Bread from the oven and transfer it to a wire cooling rack.
- Full Cool Down: Allow it to cool completely to room temperature before slicing. This can take several hours. Slicing it warm will result in a gummy texture.
Tips & Tricks for Manna Bread Success
Mastering Manna Bread is all about understanding its unique characteristics. Here are some extra tips to help you along the way:
- Quality Grains Matter: Always use high-quality, organic hard red wheat berries. Their freshness and viability directly impact sprouting success and the final flavor.
- Don’t Rush Sprouting: Patience is key in the sprouting phase. Ensure the “tails” are visible and the grains smell fresh. Under-sprouted grains can lead to a denser, harder-to-digest bread.
- Dough Consistency is Key: The ideal dough should be thick and somewhat sticky, but manageable. If it’s too wet, it will be hard to shape and take longer to bake. Too dry, and it won’t bind properly. Adjust water during grinding carefully.
- Flavor Variations: Get creative! Besides honey/maple syrup and cinnamon, you can add raisins, chopped dates, walnuts, pecans, or even a pinch of ginger or nutmeg for different flavor profiles. Add these during Step 4.
- Storage: Manna Bread is best stored in an airtight container in the refrigerator for up to 5-7 days. For longer storage, slice the cooled bread and freeze it in an airtight freezer bag for up to 3 months. Thaw slices as needed.
- Serving Suggestions: Manna Bread is delicious on its own, but also great toasted with a smear of nut butter, avocado, or your favorite jam. It makes a fantastic base for open-faced sandwiches or a hearty side with soup.
- Low-Temperature Baking: Resist the urge to crank up the oven temperature. The low and slow baking process is what gives Manna Bread its distinct dense, chewy texture and helps preserve the natural enzymes and nutrients from the sprouted grains.
Essential Baking Tools for Manna Bread
Having the right tools makes any baking project smoother. Here are some essentials for your Manna Bread journey:
- Mixing Bowl
- Whisk (for optional dry ingredients, though hands are best for dough)
- Baking Pan (small baking sheet or 8×4 inch loaf pan)
- Measuring Cups
- Spatula (for scraping down food processor)
- Food Processor: A powerful food processor is essential for grinding the sprouted grains into a smooth dough.
- Sprouting Jar/Colander: For the sprouting process.
- Parchment Paper: Crucial for preventing sticking.
- Wire Cooling Rack: For proper cooling and air circulation.
Nutrition Information (Estimated per serving, 1/12th of a loaf)
Please note that these values are estimates and can vary based on exact ingredients and portion sizes. Manna Bread is known for being nutrient-dense!
| Nutrient | Amount |
|---|---|
| Calories | ~180 kcal |
| Carbohydrates | ~35 g |
| Protein | ~7 g |
| Total Fat | ~1 g |
| Dietary Fiber | ~6 g |
| Sugars | ~1 g (before optional sweeteners) |
Frequently Asked Questions About Manna Bread
Q1: What exactly is Manna Bread?
Manna Bread is an ancient type of unleavened bread traditionally made from sprouted grains (often wheat) that are ground into a dough and then baked at a low temperature. It’s known for its dense texture, slightly sweet flavor (even without added sugar), and high nutritional value due to the sprouting process.
Q2: Can I use regular flour instead of sprouted wheat berries?
For this authentic Manna Bread Recipe, no. The core of Manna Bread lies in using *sprouted* grains, which are then ground into a dough. This process is what gives it its unique texture, flavor, and nutritional benefits. Using regular flour would result in a very different type of bread, not true Manna Bread.
Q3: How do I know if my wheat berries have sprouted correctly?
You’ll know they’ve sprouted correctly when you see tiny white “tails” (radicles) emerging from the end of each berry, typically about 1/8 to 1/4 inch long. They should also smell fresh and earthy, not sour or moldy. If you don’t see tails or detect a bad smell, it’s best to discard and try again.
Q4: My dough is too sticky/dry, what should I do?
If your dough is too sticky to handle, you can try adding a very small amount (1-2 tablespoons) of sprouted wheat flour if you have it, or a tablespoon of ground oats, and mix well. If it’s too dry and crumbly, add water one tablespoon at a time during the grinding process until it comes together into a thick, pliable dough. The consistency can vary slightly depending on your grains and environment.
Q5: How long does Manna Bread last, and how should I store it?
Manna Bread is best stored in an airtight container in the refrigerator for up to 5-7 days. Because it’s a moist, dense bread, refrigeration prevents spoilage. For longer storage, slice the cooled bread and freeze it in an airtight freezer bag for up to 3 months. You can toast individual slices directly from the freezer.
Q6: Can I add other ingredients like nuts or dried fruit?
Absolutely! Manna Bread is wonderful with additions. During Step 4, when you’re mixing the dough, feel free to fold in chopped nuts (like walnuts or pecans), dried fruits (such as raisins, cranberries, or chopped dates), or even other spices like nutmeg or ginger. Just be mindful not to add too much, as it can affect the bread’s structure.
Your Manna Bread Journey Begins Now!
Congratulations! You’ve just discovered the ancient art of making Manna Bread, a truly wholesome and satisfying baking experience. This Manna Bread Recipe might require a little patience, especially with the sprouting, but the reward is a dense, flavorful, and incredibly nutritious loaf that you made with your own hands. It’s a testament to how simple, natural ingredients can create something extraordinary.

Don’t be intimidated by the process; think of it as a mindful journey into traditional baking. Each step, from sprouting to shaping, is a part of creating something truly special. We hope these baking tips for beginners have given you the confidence to dive in. So go ahead, gather your ingredients, and bring a piece of ancient history into your kitchen. We can’t wait to hear about your delicious results!