Wholesome Goodness: Your Beginner-Friendly Manna Bread Recipe!
Welcome, aspiring bakers! Are you ready to embark on a truly rewarding journey into the world of homemade bread? Today, we’re diving into a **Manna Bread Recipe** that’s not only incredibly wholesome and delicious but also perfectly suited for anyone just starting their baking adventure. Forget intimidating techniques; this is one of those **easy baking recipes** designed to build your confidence and fill your kitchen with the irresistible aroma of freshly baked bread.
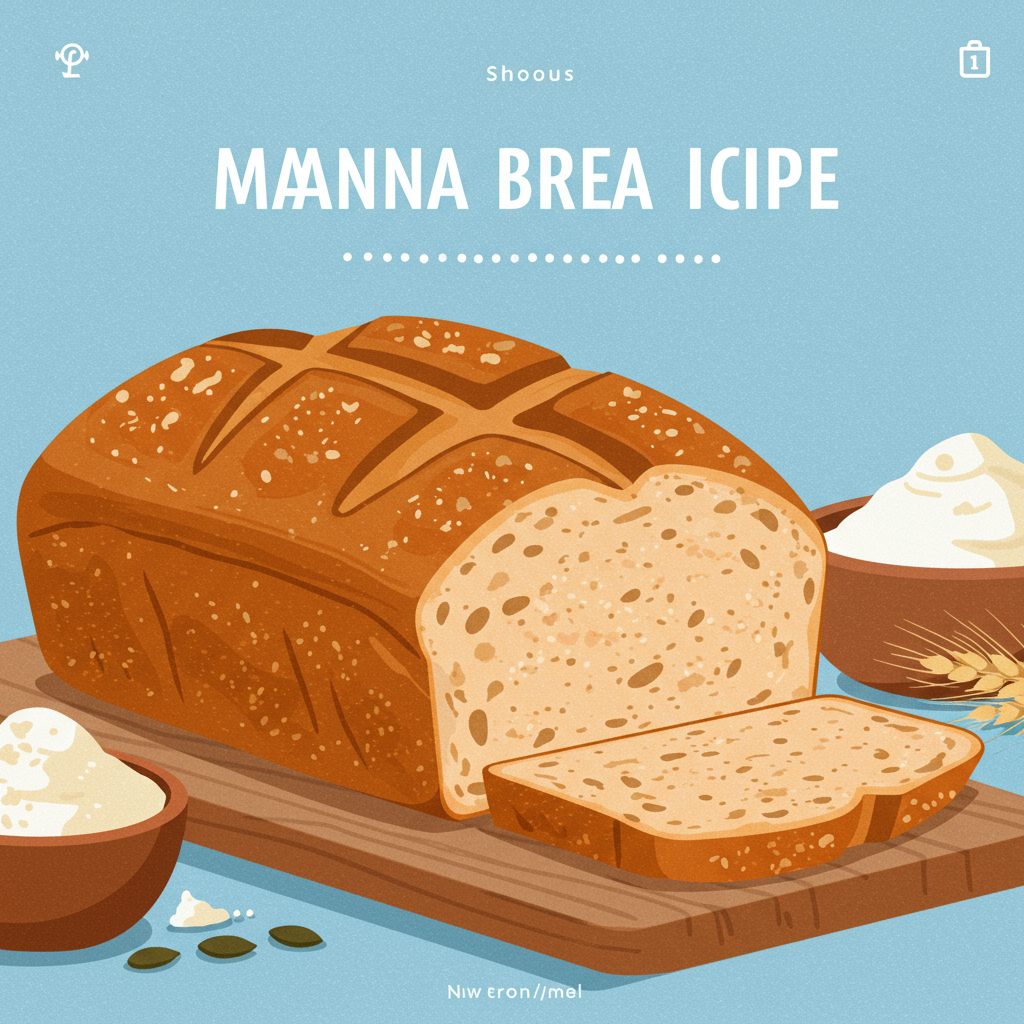
Manna bread, often inspired by ancient grains and simple ingredients, offers a rustic, hearty texture and a naturally sweet, nutty flavor. It’s a wonderful alternative to highly processed store-bought loaves. We’ll walk through every single step, providing all the essential **baking tips for beginners** to ensure your first loaf is a resounding success. Get ready to impress yourself and your loved ones with this incredible Manna Bread!
Ingredients List
Gather your ingredients! Precision is key in baking, so make sure to measure everything accurately.
| Ingredient | Quantity | Unit |
|---|---|---|
| Warm Water (105-115°F / 40-46°C) | 1 ½ | cups |
| Active Dry Yeast | 2 ¼ | teaspoons (1 packet) |
| Honey or Maple Syrup | 2 | tablespoons |
| Olive Oil | 2 | tablespoons |
| Fine Sea Salt | 1 ½ | teaspoons |
| Whole Wheat Flour | 3 ½ – 4 | cups |
Step-by-Step Instructions: Baking Your Perfect Manna Bread
Follow these detailed steps carefully, and you’ll be enjoying your homemade Manna Bread in no time!
Step 1: Activate Your Yeast (Proofing)
- In a large mixing bowl (or the bowl of your stand mixer), combine the **warm water** (ensure it’s not too hot, or it will kill the yeast, nor too cold, or it won’t activate) and **honey or maple syrup**. Stir gently until the sweetener dissolves.
- Sprinkle the **active dry yeast** over the water. Do not stir it in immediately. Let it sit undisturbed for about 5-10 minutes.
- Beginner Tip: You’ll know your yeast is active and healthy if it becomes foamy and bubbly on the surface. This process is called “proofing.” If it doesn’t foam, your yeast might be old or the water temperature was off. It’s best to start over with fresh yeast and correctly tempered water.
Step 2: Mix the Dough
- Once your yeast is proofed, add the **olive oil** and **salt** to the bowl. Give it a quick stir.
- Gradually add the **whole wheat flour**, about 1 cup at a time, mixing well after each addition. You can use a wooden spoon, a sturdy spatula, or the dough hook attachment of your stand mixer on low speed.
- Continue adding flour until the dough starts to come together and pull away from the sides of the bowl. It will be sticky at first, which is normal for whole wheat dough.
- Common Mistake & Fix: Don’t add all the flour at once! Whole wheat flour absorbs liquid differently depending on humidity and brand. Start with 3 ½ cups, and only add more if the dough is excessively sticky and won’t form a cohesive ball.
Step 3: Knead the Dough
- If using a stand mixer: Attach the dough hook and knead on medium-low speed for 6-8 minutes. The dough should become smoother and more elastic.
- If kneading by hand: Turn the dough out onto a lightly floured surface. Knead by pushing the dough away with the heels of your hands, folding it back over, rotating, and repeating. Do this for 10-12 minutes.
- Beginner Tip: The dough is properly kneaded when it feels smooth, elastic, and springs back slowly when gently poked with your finger. Whole wheat dough will not be as smooth or elastic as white flour dough, but it should still show some give.
Step 4: First Rise (Bulk Fermentation)
- Lightly grease a clean large bowl with a little olive oil.
- Place the kneaded dough into the greased bowl, turning it once to coat the top.
- Cover the bowl tightly with plastic wrap or a clean kitchen towel.
- Place the bowl in a warm, draft-free place to rise for 1 to 1 ½ hours, or until doubled in size.
- Beginner Tip: A good warm spot can be inside a slightly warmed (but turned off!) oven, a microwave with a cup of hot water, or simply on your kitchen counter if it’s warm enough. Don’t rush this step; the rise is crucial for texture and flavor.
Step 5: Shape the Loaf
- Once the dough has doubled, gently punch it down to release the air. This is called “degassing.”
- Turn the dough out onto a lightly floured surface.
- Gently shape the dough into a loaf. You can do this by flattening it into a rectangle, then rolling it up tightly from one of the longer sides, pinching the seam closed. Place it seam-side down.
- Alternative Shapes: For a round loaf, simply gently tuck the edges under to form a tight ball. For a flatter, rustic bread, you can skip the rolling and just form a simple oval.
Step 6: Second Rise (Proofing the Loaf)
- Lightly grease a 9×5 inch loaf pan.
- Carefully transfer the shaped dough into the prepared loaf pan.
- Cover the loaf pan loosely with plastic wrap or a kitchen towel.
- Let it rise again in a warm, draft-free place for another 30-45 minutes, or until it has nearly doubled in size and extends slightly above the rim of the pan.
- Beginner Tip: To check if it’s ready, gently poke the dough with a floured finger. If the indentation springs back slowly, it’s ready to bake. If it springs back quickly, it needs more time. If it collapses, it’s over-proofed (though still usually salvageable!).
Step 7: Bake Your Manna Bread
- While the dough is on its second rise, preheat your oven to 375°F (190°C).
- Once the oven is preheated and the dough is ready, place the loaf pan into the preheated oven.
- Bake for 30-40 minutes, or until the crust is golden brown and the internal temperature reaches 200-210°F (93-99°C) with an instant-read thermometer.
- Beginner Tip: If the top is browning too quickly, you can loosely tent it with aluminum foil for the last 10-15 minutes of baking.
Step 8: Cool and Enjoy!
- Once baked, immediately remove the bread from the loaf pan and transfer it to a wire rack to cool completely.
- Crucial Beginner Tip: Do NOT slice into hot bread! It’s tempting, but cooling allows the internal structure to set, preventing a gummy texture. Let it cool for at least 1-2 hours.
- Slice, slather with butter, jam, or your favorite spread, and savor the incredible taste of your homemade Manna Bread!
Tips & Tricks for Beginner Bakers
Baking bread is a wonderful skill, and these extra pointers will help you succeed and grow your confidence:
- Accurate Measuring: Always use proper measuring cups and spoons. For flour, spoon it into the measuring cup and level it off with a straight edge (like a knife). Don’t scoop directly from the bag, as this can compact the flour and add too much.
- Yeast Temperature is Key: Ensure your water is between 105-115°F (40-46°C). Too cold, and the yeast won’t activate; too hot, and it will die. An instant-read thermometer is a great investment.
- Don’t Over-Flour: Whole wheat dough is often stickier than white dough. Resist the urge to add too much extra flour during kneading or shaping, as this can lead to a dry, dense loaf. A lightly floured surface is all you need.
- Patience with Rising: Bread baking requires patience. Don’t rush the rising times. The “doubled in size” visual cue is more important than the clock time, as ambient temperature affects rise speed.
- Know Your Oven: Ovens can vary wildly in temperature. Consider getting an oven thermometer to ensure your oven is truly at the temperature you set. This can drastically impact baking results.
- Listen to Your Loaf: A perfectly baked loaf, when tapped on the bottom, will sound hollow. This is another good indicator alongside visual cues and internal temperature.
Essential Baking Tools
Having the right tools makes all the difference for a smooth baking experience. Here are some essentials:
- Mixing Bowl
- Whisk
- Baking Pan (specifically a 9×5 inch loaf pan)
- Measuring Cups & Measuring Spoons
- Spatula (a sturdy rubber or silicone one)
- Instant-Read Thermometer (for water temp and bread doneness)
- Wire Cooling Rack
Nutrition Information (Estimated per slice, 1/12th of loaf)
Please note: These are estimated values and can vary based on exact ingredients and portion sizes.
| Nutrient | Amount |
|---|---|
| Calories | 180-200 kcal |
| Carbohydrates | 35-40 g |
| Protein | 6-8 g |
| Fat | 3-5 g |
| Fiber | 4-6 g |
| Sugar | 2-4 g |
Frequently Asked Questions (FAQs)
Q1: Can I use different types of flour for Manna Bread?
A: While this recipe is designed for whole wheat flour to give it that authentic Manna Bread heartiness, you can certainly experiment! For a lighter texture, you could substitute up to half of the whole wheat flour with all-purpose or bread flour. Keep in mind that different flours absorb liquid differently, so you might need to adjust the water slightly.
Q2: My dough isn’t rising. What went wrong?
A: The most common culprits for dough not rising are inactive yeast or incorrect water temperature. Ensure your yeast is fresh (check the expiry date!) and that your water is between 105-115°F (40-46°C). Also, make sure your rising environment is warm and free of drafts. If your yeast didn’t foam during proofing, it’s best to start over.
Q3: Why is my Manna Bread dense?
A: Density in bread can be caused by a few things: not enough kneading (which develops the gluten structure), not enough rise time (the yeast didn’t produce enough gas), or too much flour added during mixing/kneading. Try to stick to the flour measurements, ensure thorough kneading, and allow your dough to double in size for both rises.
Q4: How do I store homemade Manna Bread?
A: Once completely cooled, store your Manna Bread at room temperature in an airtight container, a bread box, or a sealed plastic bag. It will stay fresh for 3-4 days. For longer storage, slice the cooled loaf and freeze the slices in a freezer-safe bag for up to 2-3 months. You can then toast individual slices directly from frozen!
Q5: Can I add seeds or nuts to this recipe?
A: Absolutely! Adding seeds (like sunflower, pumpkin, or flax) or chopped nuts (walnuts, pecans) can add wonderful texture and flavor. Stir them in during the last minute or two of kneading, after the dough has come together, to ensure they are evenly distributed without tearing the gluten too much.
Conclusion
Congratulations, you’ve just baked your very own Manna Bread! Isn’t it amazing what you can create with a few simple ingredients and a little patience? This **Manna Bread Recipe** is more than just food; it’s a testament to the joy of baking and the satisfaction of nourishing yourself and your loved ones with wholesome, homemade goodness.
Don’t worry if your first loaf isn’t absolutely perfect; every baking experience is a learning opportunity. The most important thing is that you tried, you learned, and you created something delicious. Keep practicing, keep experimenting, and most importantly, keep enjoying the process. We can’t wait to see your wonderful Manna Bread creations!
“`