you’re in the right place! This comprehensive guide is designed to be one of the most easy baking recipes you’ll ever tackle, perfect for embracing new baking tips for beginners. We’ll walk you through every step, from activating yeast to achieving that iconic marble swirl, ensuring your first (or fiftieth!) loaf is a resounding success. Get ready to impress your taste buds and your friends with this delightful, aromatic bread!
Ingredients You’ll Need
Accuracy is key in baking, so gather all your ingredients before you begin. Using a kitchen scale for flour is highly recommended for the best results!
For the Light Rye Dough:
| Quantity | Unit | Ingredient |
|---|---|---|
| 1 ½ | cups | Warm Water (105-115°F / 40-46°C) |
| 2 ¼ | teaspoons | Active Dry Yeast (1 standard packet) |
| 2 | tablespoons | Granulated Sugar |
| 1 ½ | teaspoons | Salt |
| 2 | tablespoons | Vegetable Oil or Olive Oil |
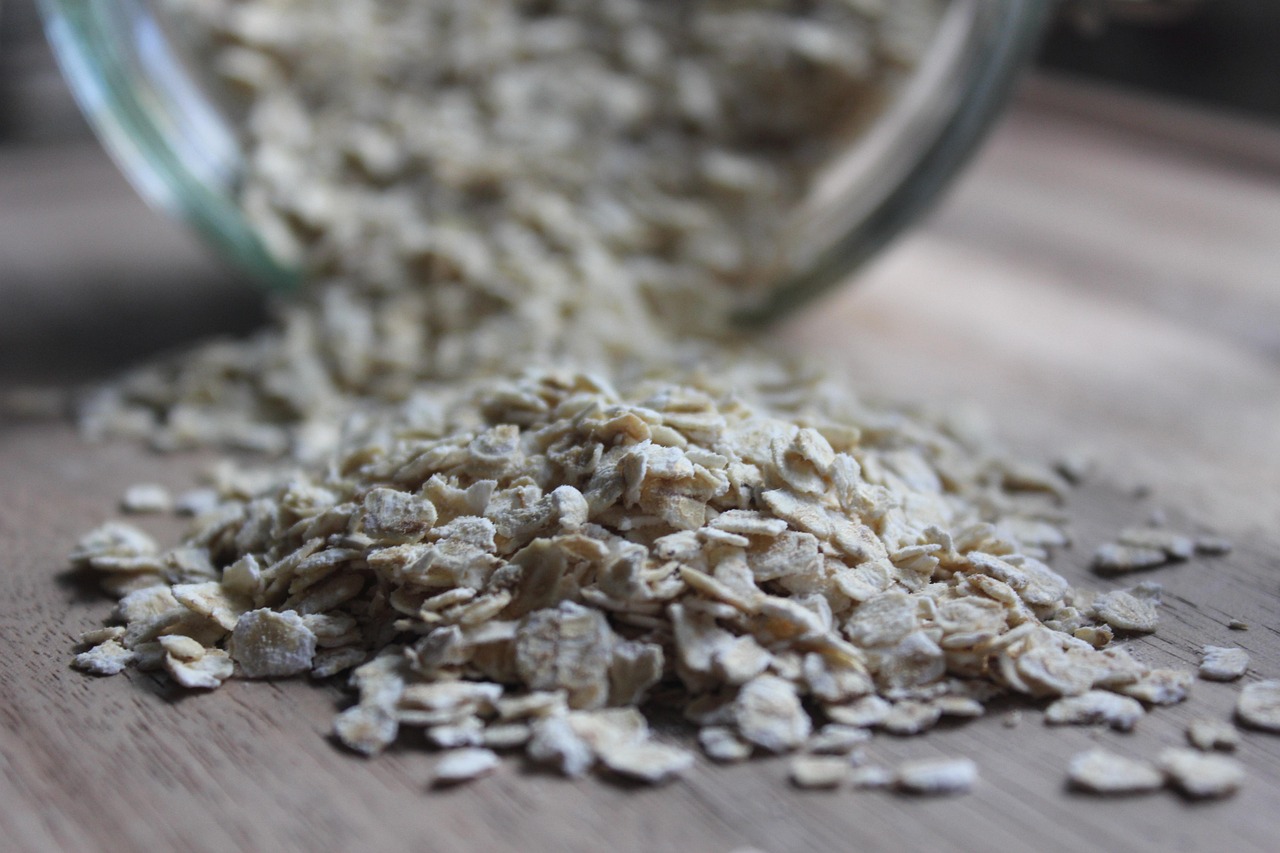
| 1 ½ | cups | Rye Flour |
| 1 ½ to 2 | cups | All-Purpose Flour (or Bread Flour), plus more for dusting |
| 1 | tablespoon | Caraway Seeds (optional, but recommended) |
For the Dark Rye Dough:
| Quantity | Unit | Ingredient |
|---|---|---|
| 1 ½ | cups | Warm Water (105-115°F / 40-46°C) |
| 2 ¼ | teaspoons | Active Dry Yeast (1 standard packet) |
| 2 | tablespoons | Granulated Sugar |
| 1 ½ | teaspoons | Salt |
| 2 | tablespoons | Vegetable Oil or Olive Oil |
| 1 ½ | cups | Rye Flour |
| 1 ½ to 2 | cups | All-Purpose Flour (or Bread Flour), plus more for dusting |
| 2 | tablespoons | Unsweetened Cocoa Powder (Dutch-processed for darker color) |
| 1 | tablespoon | Molasses (for color and flavor) |
| 1 | tablespoon | Caraway Seeds (optional, but recommended) |
For the Egg Wash (Optional, for a shiny crust):
| Quantity | Unit | Ingredient |
|---|---|---|
| 1 | Large Egg | |
| 1 | tablespoon | Water or Milk |
Step-by-Step Instructions: Bake Your Own Marble Rye Bread!
Step 1: Activate the Yeast (for both doughs, separately!)
In two separate large mixing bowls, pour 1 ½ cups of warm water into each. The water should feel warm to the touch, like a baby’s bath – not too hot (which kills the yeast) and not too cold (which won’t activate it). Sprinkle 2 ¼ teaspoons of active dry yeast and 2 tablespoons of granulated sugar into each bowl. Give it a gentle stir. Let it sit for 5-10 minutes. You’ll know the yeast is active when it becomes foamy and bubbly on the surface. If it doesn’t foam, your yeast might be old, or your water temperature was off. Start over!
Step 2: Prepare the Light Rye Dough
To one of the foamy yeast mixtures, add 1 ½ teaspoons of salt, 2 tablespoons of vegetable oil, 1 ½ cups of rye flour, and 1 tablespoon of caraway seeds (if using). Stir well with a wooden spoon or spatula. Gradually add 1 ½ to 2 cups of all-purpose flour, ½ cup at a time, mixing until a shaggy dough forms. You might not need all the flour; stop when the dough starts to pull away from the sides of the bowl.
Step 3: Prepare the Dark Rye Dough
To the second foamy yeast mixture, add 1 ½ teaspoons of salt, 2 tablespoons of vegetable oil, 1 ½ cups of rye flour, 2 tablespoons of unsweetened cocoa powder, 1 tablespoon of molasses, and 1 tablespoon of caraway seeds (if using). Stir well. Gradually add 1 ½ to 2 cups of all-purpose flour, ½ cup at a time, mixing until a shaggy dough forms. The cocoa and molasses will give this dough its signature dark color and a subtle depth of flavor.
Step 4: Knead the Doughs (Separately)
Lightly flour a clean work surface. Turn out the light dough onto the floured surface. Knead the dough for 8-10 minutes. To knead, push the dough away from you with the heels of your hands, fold it back over, turn it a quarter turn, and repeat. The dough should become smooth, elastic, and less sticky. It should spring back when gently poked. Repeat this process for the dark dough, cleaning your surface or using a separate area to avoid mixing the colors prematurely. If using a stand mixer with a dough hook, knead on medium-low speed for 6-8 minutes, until the dough is smooth and passes the “windowpane test” (you can stretch a small piece thin enough to see light through it without tearing).
Step 5: First Rise (Bulk Fermentation)
Lightly grease two separate large bowls with a little oil. Place each kneaded dough ball into its own bowl, turning once to coat the top. Cover the bowls tightly with plastic wrap or a clean kitchen towel. Place them in a warm, draft-free spot (like a slightly warm oven that’s been turned off, or near a sunny window). Let the doughs rise for 1 to 1 ½ hours, or until they have doubled in size. This is where the yeast does its magic, creating air pockets that give bread its light texture.
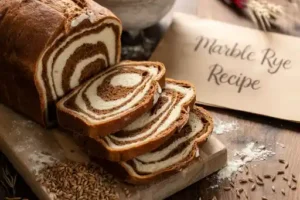
Step 6: Shape the Marble Rye Loaf
Once the doughs have doubled, gently punch each down to release the air. This is called “degassing.”
- On a lightly floured surface, roll out the light dough into a rectangle, approximately 12×9 inches.
- Repeat with the dark dough, aiming for a similar size rectangle.
- Carefully lay the dark dough rectangle directly on top of the light dough rectangle, aligning the edges as best you can.
- Starting from one of the longer sides, tightly roll up the layered dough into a log. Press the seam closed along the bottom.
- Now for the marble! Gently twist the log a few times, end-to-end. Don’t overdo it, or the colors will blend too much. Just a few twists will create that beautiful swirl.
- Pinch the ends of the log to seal them.
- Lightly grease a standard 9×5-inch loaf pan. Carefully place the twisted dough log into the prepared loaf pan, seam-side down.
Step 7: Second Rise (Proofing)
Cover the loaf pan loosely with plastic wrap or a clean kitchen towel. Return it to your warm, draft-free spot. Let the dough rise again for another 45-60 minutes, or until it has risen about 1 inch above the rim of the pan. This second rise is crucial for a light, airy texture.
Step 8: Preheat Oven & Prepare Egg Wash
About 15 minutes before the end of the second rise, preheat your oven to 375°F (190°C). If using an egg wash, whisk together 1 large egg with 1 tablespoon of water or milk in a small bowl. This will give your baked bread a beautiful, shiny, golden-brown crust.
Step 9: Bake Your Marble Rye
Gently brush the top of the risen loaf with the egg wash (if using). Place the loaf pan in the preheated oven. Bake for 30-40 minutes, or until the crust is deeply golden brown and the internal temperature of the bread reaches 200-210°F (93-99°C) when measured with an instant-read thermometer. If the top is browning too quickly, you can loosely tent it with aluminum foil.
Step 10: Cool Completely
Once baked, immediately remove the bread from the loaf pan and place it on a wire rack to cool completely. This step is often overlooked but is absolutely essential! Cutting into warm bread causes the steam to escape, resulting in a gummy texture. Let it cool for at least 1-2 hours (or longer!) before slicing. Patience will be rewarded with perfect slices of your homemade Marble Rye Bread.
Tips & Tricks for Beginner Bread Bakers
Baking bread is a craft, and these insights will help you achieve success every time:
- Check Your Yeast: Always ensure your yeast is fresh. If it doesn’t foam in warm, sugary water, it’s dead, and your bread won’t rise. Toss it and get new yeast!
- Water Temperature is Crucial: Too hot kills yeast, too cold doesn’t activate it. Aim for 105-115°F (40-46°C). An instant-read thermometer is a great investment.
- Don’t Add Too Much Flour: A common beginner mistake! Adding too much flour makes bread dense and dry. The dough should be slightly sticky but manageable. Resist the urge to keep adding flour.
- Knead Properly: Kneading develops gluten, which gives bread its structure. Don’t skimp on this step. If hand-kneading feels tiring, consider a stand mixer.
- Create a Warm Proofing Environment: Yeast loves warmth. A slightly warm oven (turned off!), a sunny spot, or even a microwave with a cup of hot water (turned off!) can create the perfect environment for rising.
- Know When It’s Done: The internal temperature test is foolproof. 200-210°F (93-99°C) ensures your bread is fully baked through.
- Cooling is Non-Negotiable: Seriously, let it cool! The bread continues to cook and set as it cools, resulting in the best texture.
- Use a Kitchen Scale: For ultimate accuracy, especially with flour, weighing ingredients instead of measuring by volume can make a huge difference in consistency.
- Embrace Imperfection: Your first loaf might not be picture-perfect, and that’s okay! Every bake is a learning experience. The taste will still be incredible.
Essential Baking Tools
Having the right tools makes the baking process smoother and more enjoyable. Here are a few essentials:
- Mixing Bowl
- Whisk
- Loaf Pan (9×5 inches)
- Measuring Cups & Spoons
- Spatula
- Kitchen Scale (highly recommended!)
- Instant-Read Thermometer
- Wire Cooling Rack
Nutrition Information (Estimated per slice, 1/12 of loaf)
Please note: These are estimated values and can vary based on specific ingredients and brands used.
| Nutrient | Amount |
|---|---|
| Calories | 180-200 kcal |
| Carbohydrates | 35-40 g |
| Protein | 6-8 g |
| Fat | 2-4 g |
| Fiber | 2-3 g |
| Sugar | 3-5 g |
Frequently Asked Questions (FAQs)
Q1: Why didn’t my bread rise?
A: The most common reasons are inactive yeast (check the expiration date!), water that was too hot (killed the yeast) or too cold (didn’t activate it), or an environment that was too cold for rising. Ensure your water temperature is correct and your rising spot is warm and draft-free.
Q2: Can I use a stand mixer for this recipe?
A: Absolutely! A stand mixer with a dough hook makes kneading much easier. Follow the same steps, but instead of hand-kneading, mix on low speed for 2 minutes, then increase to medium-low for 6-8 minutes, or until the dough is smooth and elastic. Remember to mix each dough separately!
Q3: How do I get a good marble swirl? Mine just looked mixed.
A: The key is to roll each dough into a distinct rectangle, layer them evenly, and then roll tightly. The twisting step is crucial for the marble effect – a few gentle twists are enough; over-twisting or over-kneading after combining will blend the colors too much. Don’t be afraid to experiment with the twist on your next loaf!
Q4: How should I store homemade Marble Rye Bread?
A: Once completely cooled, store your bread in an airtight container or a bread bag at room temperature for up to 3-4 days. For longer storage, slice the bread and freeze it in a freezer-safe bag or container for up to 3 months. Thaw slices as needed, or pop them straight into the toaster.
Q5: Can I skip the caraway seeds if I don’t like them?
A: Yes, the caraway seeds are entirely optional! While they add a classic rye flavor, the bread will still be delicious without them. Feel free to omit them or substitute with other seeds like fennel or poppy seeds if you prefer.
Conclusion: Your Marble Rye Masterpiece Awaits!
Congratulations, aspiring baker! You’ve just created a stunning loaf of homemade Marble Rye Bread. There’s truly nothing quite like the aroma of freshly baked bread filling your home, and the taste of a warm slice with butter, jam, or your favorite deli meat is pure bliss. Don’t be discouraged if your first attempt isn’t perfect; every baker has a learning curve. What matters is the joy of the process and the delicious reward at the end. Keep practicing, keep experimenting, and most importantly, keep enjoying the magic of baking. We hope this recipe becomes a cherished staple in your kitchen. Happy baking!