
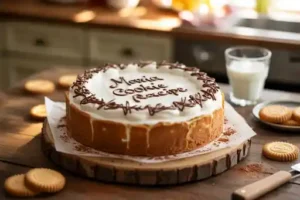
This delightful no-bake cake, popular in many parts of the world, features layers of crisp Maria cookies softened with a touch of coffee or milk, nestled between generous dollops of a rich, creamy filling. It’s the perfect dessert for parties, potlucks, or just a sweet craving on a warm day. We’ll walk you through every step, providing essential baking tips for beginners to ensure your first (or fiftieth!) Maria Cookie Cake is nothing short of spectacular. Get ready to impress everyone with minimal effort!
Ingredients List: What You’ll Need
Gathering your ingredients is the first step to success! Here’s everything you’ll need for this delicious Maria Cookie Cake:
| Ingredient | Quantity | Unit |
|---|---|---|
| Maria Cookies (or similar plain tea biscuits like rich tea) | 2-3 | Packs (approx. 600g total) |
| Heavy Whipping Cream (cold) | 2 | Cups (480ml) |
| Sweetened Condensed Milk | 1 | Can (14 oz / 397g) |
| Unsalted Butter (softened) | 1/2 | Cup (113g) |
| Powdered Sugar (optional, to taste) | 1/4 | Cup (30g) |
| Vanilla Extract | 1 | Teaspoon |
| Instant Espresso Powder or strong brewed coffee (cooled) | 2 | Tablespoons (or 1 cup brewed coffee) |
| Milk (any kind, for dipping) | 1 | Cup |
| Unsweetened Cocoa Powder (for dusting, optional) | 2 | Tablespoons |
| Chocolate Shavings or Sprinkles (for garnish, optional) | 1/4 | Cup |
Step-by-Step Instructions: Creating Your Masterpiece
Follow these detailed steps, and you’ll have a stunning Maria Cookie Cake ready to chill in no time!
Step 1: Prepare Your Coffee Mixture for Dipping
In a shallow dish (like a pie plate or a wide bowl), combine the 1 cup of milk with the 2 tablespoons of instant espresso powder or 1 cup of cooled brewed coffee. Stir well until the espresso powder is fully dissolved. This will be your dipping liquid for the cookies. If you prefer a less intense coffee flavor, you can use just milk, or half milk and half coffee. Set this aside.
Beginner Tip: Ensure your coffee is cooled! Dipping warm cookies into warm liquid will make them too soggy and difficult to handle. If you don’t like coffee, simply use plain milk or a splash of vanilla in your milk.
Step 2: Make the Rich & Creamy Filling
In a large mixing bowl, using an electric mixer (or a whisk and a lot of arm strength!), beat the softened unsalted butter until it’s light and fluffy, about 2-3 minutes. Gradually add the sweetened condensed milk and continue to beat until well combined and smooth. This step creates a stable and incredibly rich base for our cream.
Now, pour in the cold heavy whipping cream, vanilla extract, and the optional powdered sugar. Start beating on low speed, then gradually increase to medium-high. Continue beating until stiff peaks form. This means when you lift the beaters, the cream stands up firmly without collapsing. Be careful not to overbeat, or the cream might start to curdle and turn grainy.
Beginner Tip: For best results with whipping cream, make sure your heavy cream is very cold. You can even chill your mixing bowl and beaters in the freezer for 10-15 minutes beforehand! If your cream doesn’t seem to be thickening, it might not be cold enough or you might need to beat it for a bit longer. Don’t give up!
Step 3: Assemble Your Maria Cookie Cake Layers
Choose your serving dish or pan. A rectangular dish (like a 9×13 inch baking dish) works perfectly for a classic layered look, or a springform pan for a round cake. Spread a thin layer of your creamy filling at the bottom of your dish. This acts as an “adhesive” to hold your first layer of cookies in place.
One by one, quickly dip each Maria cookie into your coffee-milk mixture. Dip for just 1-2 seconds per side – you want them to soften slightly, not become completely saturated and fall apart. Arrange the dipped cookies in a single layer over the cream in your dish, breaking some cookies as needed to fit any gaps.
Beginner Tip: The dipping is crucial! Too long, and your cake will be mushy; too short, and it will be too firm. A quick dip is all you need. You’ll get the hang of it after a few cookies. If a cookie breaks, don’t worry! You can still use the pieces to fill in gaps in your layers.
Step 4: Layering and Repeating
Once you have a full layer of dipped cookies, spread another generous layer of the creamy filling evenly over the cookies. Aim for about 1/2 to 3/4 inch thickness. Repeat the process: dip cookies, layer them, then add more cream. Continue until you’ve used all your cookies and cream, typically creating 4-6 layers depending on the size of your dish and the thickness of your cream layers.
Finish with a final, smooth layer of the creamy filling on top. You can use an offset spatula or the back of a spoon to create pretty swirls or smooth the top evenly.
Beginner Tip: Try to keep your cream layers as even as possible for a beautiful, uniform cake. Don’t press down too hard on the cookies when spreading the cream, as this can squeeze out the cream and make the cake uneven.
Step 5: Chill for Perfection
This is arguably the most important step for a no-bake cake! Cover your assembled Maria Cookie Cake tightly with plastic wrap. Place it in the refrigerator for at least 4-6 hours, or ideally, overnight. Chilling allows the cookies to fully soften and absorb the flavors of the cream, and it helps the entire cake set firmly, making it much easier to slice and serve.
Common Mistake: Not chilling long enough! If you try to cut it too soon, the cake will be messy and won’t hold its shape. Patience is a virtue here!
Step 6: Garnish and Serve!
Once your cake is beautifully chilled and set, it’s time for the finishing touches! You can dust the top with unsweetened cocoa powder using a fine-mesh sieve for an elegant finish. Alternatively, sprinkle with chocolate shavings, sprinkles, or even a few extra crushed Maria cookies. Slice into squares or wedges and serve cold.
Beginner Tip: For clean slices, dip your knife in hot water and wipe it clean between each cut. This helps to prevent the cream from sticking and dragging.
Tips & Tricks for No-Bake Maria Cookie Cake Success
Even though this is an easy recipe, a few extra pointers can elevate your Maria Cookie Cake from good to absolutely phenomenal!
- Chill Your Tools: For super fluffy whipped cream, chill your mixing bowl and whisk attachment (or beaters) in the freezer for 10-15 minutes before whipping. Cold tools help the cream whip up faster and hold its shape better.
- Don’t Over-Soak: The biggest mistake with cookie cakes is over-soaking the cookies. A quick dip is all you need – just enough to moisten them slightly. They will continue to soften as the cake chills.
- Customize Your Dipping Liquid: Not a coffee fan? Use plain milk, chocolate milk, orange juice, or even a splash of liqueur (like Kahlúa or rum for an adult version) for dipping.
- Vary the Flavor of the Cream: Feel free to experiment! Add a tablespoon of cocoa powder to the cream for a chocolate version, a bit of lemon zest for a citrusy twist, or a dash of almond extract for a nutty flavor.
- Clean Slices: To get neat, clean slices, use a sharp knife. For each cut, dip the knife in hot water and wipe it clean with a paper towel. This prevents the cream from sticking and dragging.
- Plan Ahead: This cake is even better the next day! Make it the evening before you plan to serve it to allow ample chilling time for the flavors to meld and the cake to set perfectly.
- Storage: Store any leftover cake covered tightly in the refrigerator for up to 3-4 days.
Essential Baking Tools for This Recipe
You don’t need a lot of fancy equipment for this no-bake wonder, but these few tools will make your life much easier:
- Mixing Bowl: Essential for preparing your creamy filling.
- Whisk (or Electric Mixer): For whipping the cream to perfection.
- Baking Pan (or Serving Dish): A 9×13 inch rectangular dish or a 9-inch springform pan works great.
- Measuring Cups & Spoons: For accurate ingredient quantities.
- Spatula (Rubber or Offset): For spreading the cream evenly and scraping bowls.
Nutrition Info (Estimated per serving, assuming 12 servings)
Please note, these are approximate values and can vary based on specific brands and exact quantities used.
| Nutrient | Amount |
|---|---|
| Calories | 380-450 kcal |
| Carbohydrates | 45-55g |
| Protein | 5-7g |
| Fat | 20-28g |
| Fiber | 0-1g |
| Sugar | 30-40g |
Frequently Asked Questions (FAQs)
Q1: Can I make this Maria Cookie Cake ahead of time?
A: Absolutely! This cake is actually best when made ahead. Prepare it the day before you plan to serve it and let it chill in the refrigerator overnight. This gives the cookies ample time to soften and the flavors to meld beautifully, resulting in a perfectly set and delicious cake.
Q2: How should I store leftover Maria Cookie Cake?
A: Store any leftover cake tightly covered with plastic wrap or in an airtight container in the refrigerator. It will stay fresh and delicious for 3-4 days.
Q3: Can I use other types of cookies instead of Maria Cookies?
A: Yes! While Maria cookies are traditional, you can substitute them with other plain, crisp tea biscuits like Rich Tea biscuits, digestive biscuits, or even plain shortbread cookies. Just be mindful of their thickness and how quickly they absorb liquid when dipping.
Q4: What if I don’t like coffee? Can I still make this recipe?
A: Of course! The coffee in the dipping liquid is optional. You can simply use plain milk (regular or plant-based) for dipping. You could also add a splash of vanilla extract or a different flavoring to the milk if you wish.
Q5: My cream didn’t whip up properly. What went wrong?
A: The most common reasons for cream not whipping are: 1) the cream wasn’t cold enough, 2) the mixing bowl or beaters weren’t cold, or 3) you didn’t whip it long enough. Ensure all your equipment and cream are very cold, and keep beating on medium-high speed until stiff peaks form. Avoid over-whipping, as this can turn it grainy.
Q6: How do I get clean slices without the cake falling apart?
A: The key is proper chilling time – at least 4-6 hours, but ideally overnight. Also, for super clean cuts, use a sharp knife that has been dipped in hot water and wiped clean between each slice. This prevents the cream from sticking and tearing the layers.
Conclusion: Your Delicious Dessert Awaits!
Congratulations, future dessert maestro! You’ve just learned how to create a stunning and incredibly delicious Maria Cookie Cake. This easy baking recipe is a testament to the fact that you don’t need a hot oven or complex techniques to make something truly special. Whether you’re a complete novice in the kitchen or just looking for a fuss-free treat, this recipe is designed for your success.
The layers of tender cookies and rich, creamy filling create a symphony of textures and flavors that will delight everyone who tries it. So go ahead, gather your ingredients, follow these baking tips for beginners, and enjoy the sweet satisfaction of making this delightful Maria Cookie Cake Recipe. Don’t forget to share your creations with us – happy baking (or rather, no-baking)!