Welcome, fellow baking enthusiasts and especially, our wonderful baking tips for beginners! Are you looking for a recipe that delivers incredible homemade bread with minimal effort? Look no further! This Mary Berry Soda Bread Recipe is an absolute game-changer. Forget long hours of kneading and proofing; this rustic,
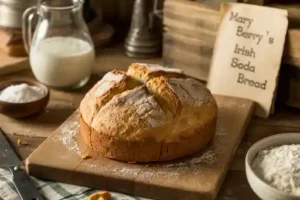
wholesome loaf comes together in a flash, making it one of the most satisfying and easy baking recipes you’ll ever try. It’s perfect for a cozy breakfast, alongside a hearty soup, or simply slathered with butter and jam. Prepare to impress yourself with how simple and delicious homemade bread can be!
Ingredients You’ll Need
Gather these simple ingredients – you likely have most of them in your pantry already!
| Ingredient | Quantity | Unit |
|---|---|---|
| All-Purpose Flour (or Bread Flour for a chewier crumb) | 3.5 | cups |
| Baking Soda | 1 | teaspoon |
| Salt | 1 | teaspoon |
| Granulated Sugar (optional, for a slightly softer crumb) | 1 | tablespoon |
| Buttermilk | 1.5 | cups |
Step-by-Step Instructions: Baking Your Perfect Soda Bread
Follow these detailed steps carefully, and you’ll have a gorgeous loaf in no time. Remember, the key to great soda bread is gentle handling!
Step 1: Preheat and Prepare Your Baking Surface
- First things first, preheat your oven to a steady 400°F (200°C). This is crucial because soda bread relies on a hot oven to get a good initial rise, helping the baking soda react quickly and effectively.
- Next, line a baking sheet with parchment paper. This simple step prevents your delicious bread from sticking to the pan and makes cleanup an absolute breeze. If you don’t have parchment paper on hand, a light dusting of flour over your baking sheet will also do the trick.
Step 2: Combine the Dry Ingredients
- In a large mixing bowl, carefully measure out your 3.5 cups of all-purpose flour. For beginners, a great tip for measuring flour accurately is to lightly spoon the flour into your measuring cup and then level off the top with a straight edge (like the back of a knife). Avoid scooping directly from the bag or packing it down, as this can lead to too much flour and a dry loaf.
- To the flour, add 1 teaspoon of baking soda, 1 teaspoon of salt, and if you’re opting for a slightly softer crumb, 1 tablespoon of granulated sugar.
- Using a whisk, gently mix these dry ingredients together until they are thoroughly combined. This ensures that the baking soda is evenly distributed throughout the flour, which is absolutely critical for achieving an even rise in your bread.
Step 3: Introduce the Buttermilk
- Once your dry ingredients are mixed, make a shallow well in the center of the flour mixture. This creates a little basin for your liquid.
- Pour in the 1.5 cups of buttermilk. Buttermilk is the star ingredient here! Its natural acidity is what reacts with the baking soda to produce carbon dioxide gas, which gives soda bread its signature rise without the need for yeast.
- Beginner Tip: No buttermilk in the fridge? No problem at all! You can easily create a homemade substitute. For 1.5 cups of ‘buttermilk,’ simply measure out 1.5 cups of regular milk (whole or 2% works best) and stir in 1.5 tablespoons of white vinegar or lemon juice. Let this mixture sit for 5-10 minutes until it slightly curdles and thickens. This homemade version works perfectly!
Step 4: Mix Gently – This Is Your Golden Rule!
- Now for the most important step: using a wooden spoon or even your hands, gently mix the wet and dry ingredients together. The key here is to mix just until the flour is incorporated and a sticky, shaggy dough forms.
- Common Mistake & How to Avoid It: This is where many beginners go wrong – do NOT overmix! Overmixing develops the gluten in the flour too much, which will result in a tough, dense, and unappetizingly chewy soda bread. We’re aiming for a tender, slightly crumbly texture. It’s perfectly okay if there are a few streaks of flour visible; a slightly rustic, shaggy dough is exactly what you want. Stop mixing the moment everything comes together.
Step 5: Shape the Dough with a Light Hand
- Lightly flour your hands and a clean work surface (like your countertop or a large cutting board). This will prevent the sticky dough from adhering.
- Carefully turn the sticky dough out onto your floured surface.
- With very light hands, gently form the dough into a round, flat disc, approximately 1.5 to 2 inches thick. Remember, the less you handle it, the better the texture will be. Avoid kneading it excessively; just bring it together into a neat, uniform shape.
- Once shaped, carefully transfer the dough to your prepared baking sheet.
Step 6: Score the Top for Perfect Baking
- Using a sharp knife, make a deep cross on the top of the dough. This cross should extend almost to the edges of your loaf. This isn’t just for classic aesthetics; it serves a practical purpose too! The scoring helps the bread cook more evenly all the way through, allowing heat to penetrate the center. Traditionally, it was also believed to let good spirits in or ward off bad ones – a fun bit of folklore to go with your bake!
Step 7: Bake to Golden Perfection
- Place the baking sheet with your scored soda bread into your preheated oven.
- Bake for approximately 35-45 minutes. Keep an eye on it! The bread is done when it’s beautifully golden brown on the outside and, crucially, sounds hollow when you tap its bottom.
- Beginner Tip: How to check for doneness? Beyond the visual cues and hollow sound, if you have an instant-read thermometer, the internal temperature of a fully baked soda bread should register between 200-210°F (93-99°C).
Step 8: Cool and Savor Your Creation!
- Once your soda bread is baked to perfection, immediately transfer it from the hot baking sheet to a wire rack to cool. This step is essential! Cooling on a wire rack allows air to circulate all around the entire loaf, preventing the bottom from becoming soggy due to trapped steam.
- While it’s incredibly tempting to slice right away, allowing it to cool for at least 15-20 minutes will make it much easier to slice cleanly.
- Slice thickly and enjoy your homemade masterpiece! It’s fantastic served warm with a generous spread of butter, your favorite jam, a slice of cheese, or as a comforting accompaniment to a hearty soup or stew.
Tips & Tricks for Soda Bread Success
Mastering soda bread is incredibly easy, but these actionable pointers will ensure your loaf is perfect every single time, making you feel like a seasoned baker:
- Prioritize Gentle Mixing: This cannot be stressed enough – it is the most crucial tip! A light touch is the secret to a tender, crumbly texture. Mix only until the ingredients are just combined, and resist the urge to keep stirring.
- Verify Baking Soda Freshness: Always ensure your baking soda is fresh and active. Old baking soda loses its leavening power, which means your bread won’t rise properly. A quick test: mix a tiny amount with a drop of vinegar; if it fizzes vigorously, it’s good to go!
- Embrace DIY Buttermilk: Don’t let a lack of buttermilk deter you. As mentioned in the steps, making your own with milk and lemon juice or vinegar is a fantastic and perfectly effective substitute.
- The Cross is More Than Decorative: Don’t skip scoring the top of your dough. Beyond its classic appearance, it genuinely aids in even baking and helps prevent the loaf from cracking unpredictably.
- Best Served Warm: While delicious at any temperature, soda bread truly shines when served slightly warm. The aroma, the soft interior, and the crusty exterior are heavenly, especially with a generous slather of good quality butter.
- Smart Storage Solutions: Store leftover soda bread in an airtight container or wrapped snugly in foil at room temperature. It will stay wonderfully fresh for 2-3 days. For longer preservation, you can slice it and freeze individual slices, well-wrapped, for up to 2 months. Thaw and reheat gently.
- Get Creative with Add-ins: While Mary Berry’s recipe is a classic, soda bread is wonderfully versatile! Feel free to experiment. Add about 1/2 cup of dried fruit like raisins or currants for a sweeter bread, or incorporate some grated cheese (like cheddar) and 1 tablespoon of fresh herbs (such as rosemary or chives) for a savory twist. Add these with your dry ingredients.
Essential Baking Tools
Having the right tools makes the baking process smoother and more enjoyable. Here are some basics you’ll find indispensable for this and many other baking adventures:
- Mixing Bowl (A large one is best for easy mixing)
- Whisk (For combining dry ingredients thoroughly)
- Baking Pan (A baking sheet lined with parchment paper works perfectly)
- Measuring Cups (For precise ingredient measurements)
- Spatula (Or a sturdy wooden spoon for gentle mixing)
- Sharp Knife (Essential for scoring the top of your loaf)
- Wire Rack (Crucial for proper cooling and preventing a soggy bottom)
Nutrition Information (per serving, assuming 12 servings per loaf)
Please note: These values are estimates and can vary based on specific ingredient brands, exact measurements, and any optional additions you make.
| Nutrient | Amount |
|---|---|
| Calories | 220-250 kcal |
| Carbohydrates | 45-50 g |
| Protein | 6-7 g |
| Fat | 1-2 g |
| Fiber | 2-3 g |
| Sugar | 2-4 g |
Frequently Asked Questions (FAQs)
Q1: Can I use regular milk instead of buttermilk for this recipe?
A: Yes, absolutely! If you don’t have buttermilk, you can easily ‘sour’ regular milk to mimic it. For 1.5 cups of buttermilk, use 1.5 cups of regular milk (whole or 2% works best) and stir in 1.5 tablespoons of white vinegar or lemon juice. Let it sit for 5-10 minutes until it slightly curdles and thickens. This acidity is crucial for reacting with the baking soda to help the bread rise.
Q2: Why did my soda bread turn out tough and dense?
A: The most common reason for tough, dense soda bread is overmixing the dough. Unlike yeast breads that require kneading, soda bread needs very little handling. Mix only until the dry ingredients are just incorporated into the wet ones, and the dough barely comes together. A few flour streaks are perfectly acceptable and even desirable for a tender crumb!
Q3: How do I know when my soda bread is fully cooked through?
A: Your soda bread is perfectly cooked when it has a beautiful golden brown crust all over, and when you gently tap the bottom of the loaf, it sounds hollow. For an extra layer of certainty, an instant-read thermometer inserted into the very center of the loaf should register between 200-210°F (93-99°C).
Q4: Can I add fruits, nuts, or other ingredients to this Mary Berry soda bread recipe?
A: Absolutely! Soda bread is wonderfully versatile and adaptable. You can easily add about 1/2 cup of dried fruits like raisins or currants, or even some chopped nuts, along with your dry ingredients for a sweeter loaf. For savory variations, try mixing in about 1/2 cup of grated cheddar cheese and a tablespoon of chopped fresh herbs (like chives, rosemary, or thyme) with the flour mixture.
Q5: What’s the best way to store leftover soda bread?
A: Once your soda bread has cooled completely, store it in an airtight container, or wrap it tightly in plastic wrap or aluminum foil. It will stay fresh and delicious at room temperature for about 2-3 days. For longer storage, you can slice the cooled bread and freeze individual slices, well-wrapped, for up to 2 months. Thaw at room temperature or gently reheat in a toaster or oven.
Q6: My soda bread didn’t rise much in the oven, what could have gone wrong?
A: A lack of rise in soda bread can often be attributed to a few factors. First, ensure your baking soda is fresh and active (a quick fizz test with vinegar can confirm this!). Second, make sure your buttermilk (or homemade substitute) is sufficiently acidic, as this acidity is key to activating the baking soda. Finally, ensure your oven was fully preheated to the correct temperature; a cold oven can hinder the initial burst of rise that soda bread relies on.
Bake, Enjoy, and Share Your Homemade Success!
There you have it – the incredibly simple yet utterly satisfying Mary Berry Soda Bread Recipe! This no-fuss bread is a testament to the fact that delicious homemade baking doesn’t have to be complicated or time-consuming. Whether you’re a seasoned baker looking for a quick fix or just starting your journey with easy baking recipes, this soda bread will surely become a cherished staple in your kitchen.
We hope these **baking tips for beginners** have empowered you to confidently create your own beautiful, rustic loaf. So go ahead, tie on that apron, gather your ingredients, and savor the wonderful aroma and taste of freshly baked bread. Don’t forget to share your baking triumphs with us happy baking!