
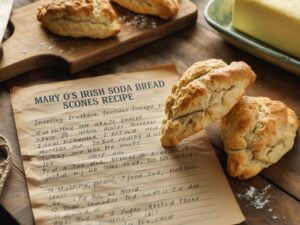
Welcome, fellow baking enthusiasts and especially our wonderful baking tips for beginners crew! If you’ve been searching for an easy baking recipe that delivers warmth, comfort, and incredible flavor without the fuss, you’ve landed in the right spot. Today, we’re diving into the delightful world of Mary O’S Irish Soda Bread Scones Recipe.
Imagine a scone that perfectly marries the rustic charm of traditional Irish soda bread with the tender, buttery texture of a classic scone. It’s truly the best of both worlds! This recipe is designed to be incredibly forgiving and straightforward, making it an absolute joy for anyone new to baking or looking for a quick, impressive treat. Get ready to fill your kitchen with the irresistible aroma of freshly baked goods – your journey to becoming a scone-making superstar starts here!
Ingredients List
Gather your ingredients! Using high-quality, fresh ingredients will always yield the best results. Remember to measure everything accurately for baking success.
| Ingredient | Quantity | Unit |
|---|---|---|
| All-Purpose Flour | 2 | cups |
| Granulated Sugar | 1/4 | cup |
| Baking Soda | 1 | teaspoon |
| Salt | 1/2 | teaspoon |
| Cold Unsalted Butter | 1/2 | cup (1 stick) |
| Buttermilk | 3/4 | cup (plus 1-2 tbsp if needed) |
| Raisins or Currants (optional) | 1/2 | cup |
| Egg (for egg wash) | 1 | large |
| Milk (for egg wash) | 1 | tablespoon |
Step-by-Step Instructions
Follow these detailed steps carefully, and you’ll be enjoying delicious homemade scones in no time. We’ve included plenty of **baking tips for beginners** to ensure your success!
Step 1: Prepare Your Workspace and Oven
- Preheat your oven: Set your oven to 400°F (200°C). This ensures the oven is at the correct temperature when your scones are ready to bake, helping them rise properly.
- Line a baking sheet: Line a large baking sheet with parchment paper. This prevents sticking and makes cleanup a breeze.
Step 2: Combine Dry Ingredients
- In a large mixing bowl, add the 2 cups of all-purpose flour, 1/4 cup of granulated sugar, 1 teaspoon of baking soda, and 1/2 teaspoon of salt.
- Using a whisk, gently combine these dry ingredients. Whisking ensures everything is evenly distributed, so you don’t get pockets of salt or baking soda in your scones.
- Beginner Tip: When measuring flour, remember to spoon the flour into your measuring cup and then level it off with a straight edge (like the back of a knife). Don’t scoop directly from the bag, as this can compact the flour and lead to adding too much, resulting in dry scones.
Step 3: Cut in the Cold Butter
- Take your 1/2 cup (1 stick) of cold unsalted butter. It’s crucial that the butter is cold, straight from the fridge!
- Cut the butter into small, pea-sized cubes. The smaller the pieces, the easier they are to incorporate.
- Add the cold butter cubes to your dry ingredient mixture.
- Now, you need to “cut” the butter into the flour. You can do this in a few ways:
- Using your fingers: Rub the butter into the flour mixture between your fingertips until it resembles coarse crumbs with some pea-sized pieces remaining. Work quickly to prevent the butter from melting.
- Using a pastry blender: If you have one, a pastry blender is ideal for this step. Press the blades into the butter and flour until the butter is broken down and incorporated.
- Using a food processor (alternative): If you’re looking for a super quick method, you can pulse the dry ingredients and cold butter in a food processor a few times until the butter is incorporated into pea-sized bits. Be careful not to overmix!
- Why cold butter? As the cold butter melts in the hot oven, it creates steam, which in turn creates pockets of air, resulting in those wonderfully flaky layers that make scones so delicious. If your butter is warm, it will just blend into the dough and you’ll lose that flakiness.
- If using, stir in the 1/2 cup of raisins or currants into the flour and butter mixture now. This helps them get coated in flour and prevents them from sinking to the bottom of your scones.
Step 4: Add Buttermilk and Form the Dough
- Make a well (a small hollow) in the center of your dry ingredient and butter mixture.
- Pour in 3/4 cup of cold buttermilk.
- Using a fork or a spatula, gently mix the wet and dry ingredients. Start from the center and gradually work your way outwards, incorporating the flour.
- Crucial Beginner Tip: Do NOT overmix! Mix just until the flour is mostly moistened and the dough comes together in a shaggy ball. Overmixing develops the gluten in the flour, which will make your scones tough instead of tender and flaky. A few dry streaks are perfectly fine. If the dough seems too dry and isn’t coming together, add another tablespoon or two of buttermilk, one at a time, until it just barely forms a cohesive ball.
Step 5: Shape and Cut the Scones
- Lightly flour a clean work surface (your countertop or a large cutting board).
- Turn the shaggy dough out onto the floured surface.
- Gently pat the dough into a round disc, about 1-inch thick. Avoid kneading or rolling the dough too much. Remember, less handling equals more tender scones!
- Now, it’s time to cut your scones:
- For traditional round scones: Use a 2-inch or 2.5-inch round cookie cutter (or even the rim of a small glass). Dip the cutter in flour before each cut to prevent sticking. Press straight down, do not twist the cutter, as twisting can seal the edges and prevent a good rise.
- For rustic wedge scones: Use a large knife or a bench scraper to cut the 1-inch thick disc into 8 or 12 wedges, like a pizza.
- Carefully transfer the cut scones to your prepared baking sheet, leaving about an inch between each scone.
- Optional: Chill the dough. For an even better rise and flakier texture, you can place the cut scones in the refrigerator for 15-20 minutes before baking. This re-chills the butter.
Step 6: Egg Wash and Bake
- In a small bowl, whisk together the 1 large egg and 1 tablespoon of milk. This is your egg wash.
- Lightly brush the tops of each scone with the egg wash. This will give them a beautiful golden-brown, glossy finish.
- Place the baking sheet in your preheated 400°F (200°C) oven.
- Bake for 15-20 minutes, or until the scones are golden brown on top and bottom, and feel firm to the touch. Baking time can vary slightly depending on your oven and the size of your scones.
Step 7: Cool and Serve
- Once baked, remove the scones from the oven and transfer them to a wire rack to cool slightly.
- Scones are best enjoyed warm, ideally within an hour or two of baking. Serve them plain, or with butter, jam, clotted cream, or a dollop of whipped cream.
Tips & Tricks for Perfect Scones Every Time
Achieving bakery-quality scones is easier than you think with these actionable **baking tips for beginners**:
- Keep it Cold: The golden rule for flaky scones is to use very cold butter and buttermilk. This prevents the butter from melting too early, creating steam pockets during baking for a light, airy texture. You can even cube your butter and freeze it for 10-15 minutes before using!
- Don’t Overmix: This cannot be stressed enough! Overmixing develops gluten, leading to tough, dense scones. Mix just until the dough barely comes together, even if it looks a bit shaggy.
- Measure Flour Correctly: Always spoon flour into your measuring cup and level it off with a straight edge. Scooping directly from the bag can compact the flour, adding too much and resulting in dry scones.
- Avoid Twisting the Cutter: When cutting round scones, press your cutter straight down and lift straight up. Twisting seals the edges of the dough, which can inhibit the scone’s rise and prevent it from becoming light and fluffy.
- Chill Before Baking (Optional but Recommended): Pop the cut scones into the refrigerator for 15-20 minutes before baking. This re-chills the butter, promoting an even better rise and flakier texture.
- Customize Your Scones: Feel free to experiment with different add-ins! Try dried cranberries, chocolate chips, orange zest, or a pinch of cinnamon. Just be mindful not to add too many wet ingredients that might alter the dough consistency.
- Buttermilk Substitute: No buttermilk on hand? No problem! Add 1 tablespoon of white vinegar or lemon juice to a liquid measuring cup, then fill the rest with regular milk (dairy or non-dairy) until you reach 3/4 cup. Let it sit for 5-10 minutes until it slightly curdles.
- Storage: Store leftover scones in an airtight container at room temperature for up to 2-3 days. For longer storage, freeze them in a single layer, then transfer to a freezer bag for up to 2-3 months. Reheat gently in a warm oven.
Essential Baking Tools
Having the right tools makes baking easier and more enjoyable. Here are some essentials for this recipe:
- Mixing Bowl
- Whisk
- Baking Pan
- Measuring Cups
- Spatula
- Pastry Blender (highly recommended for cutting in butter)
- Round Cookie Cutter (optional, for shaping)
- Parchment Paper
Nutrition Info (Estimated per Scone)
Here’s an estimated nutritional breakdown for one scone, based on a batch of 12. Please note that these are estimates and actual values may vary depending on exact ingredient brands and quantities, especially with optional additions like raisins.
| Nutrient | Amount |
|---|---|
| Calories | 280-320 |
| Carbohydrates | 40-45g |
| Protein | 5-7g |
| Fat | 12-15g |
| Fiber | 1-2g |
| Sugar | 10-15g |
Frequently Asked Questions
Q1: Why is my scone dough too sticky or too dry?
A: This is a common issue for beginners and usually comes down to the balance of flour and buttermilk. If your dough is too sticky, you might have added too much buttermilk or your flour wasn’t measured correctly (too little). Add a tablespoon of flour at a time until it’s manageable but still soft. If it’s too dry and crumbly, you likely need more liquid. Add buttermilk one tablespoon at a time until the dough just comes together, remembering not to overmix.
Q2: Can I substitute buttermilk if I don’t have any?
A: Absolutely! You can easily make a homemade buttermilk substitute. For 3/4 cup of buttermilk, measure 3/4 cup of regular milk (dairy or non-dairy). Remove 1 tablespoon of milk and replace it with 1 tablespoon of white vinegar or lemon juice. Stir gently and let it sit for 5-10 minutes until it slightly curdles. This acidity is key for activating the baking soda and giving scones their tender crumb.
Q3: My scones came out tough. What went wrong?
A: The most common culprit for tough scones is overmixing the dough. When you mix flour too much, you develop the gluten, which makes baked goods chewy and tough. For scones, you want a very light touch – mix just until the ingredients are combined and the dough is shaggy. Another reason could be warm butter, which melts into the dough instead of creating flaky layers.
Q4: Can I add different mix-ins to this recipe?
A: Yes, this recipe is very adaptable! Feel free to swap out or add different ingredients. Great options include dried cranberries, chopped dried apricots, chocolate chips, a tablespoon of orange or lemon zest, or even a pinch of ground cinnamon or nutmeg for a spiced scone. Just keep the total amount of “wet” add-ins to about 1/2 cup to maintain the dough’s consistency.
Q5: How do I store leftover scones, and can I freeze them?
A: Store cooled leftover scones in an airtight container at room temperature for up to 2-3 days. To refresh them, you can warm them in a microwave for a few seconds or in a preheated oven (300°F/150°C) for about 5-10 minutes. For longer storage, scones freeze beautifully! Once completely cooled, place them in a single layer on a baking sheet to freeze solid, then transfer to a freezer-safe bag or container. They can be frozen for up to 2-3 months. Thaw at room temperature or reheat from frozen in a low oven.
Q6: Can I prepare the dough ahead of time?
A: Yes, you can! Prepare the dough up to the point of cutting the scones. Place the cut scones on a parchment-lined baking sheet, cover loosely with plastic wrap, and refrigerate for up to 12 hours. When ready to bake, remove them from the fridge, brush with egg wash, and bake as directed, adding a few extra minutes to the baking time if needed.
Conclusion: Your Scone Success Story Awaits!
And there you have it! Your complete guide to baking the most delightful **Mary O’S Irish Soda Bread Scones**. This **easy baking recipe** is truly a game-changer, proving that you don’t need years of experience to create something incredibly delicious and impressive. We’ve packed this post with all the **baking tips for beginners** you need to feel confident and successful in the kitchen.
So, go ahead, grab your apron, and embrace the joy of baking. There’s nothing quite like the smell of warm, fresh scones straight from your own oven. Serve them with a dollop of jam, a smear of butter, or a generous helping of clotted cream, and savor every tender bite. You’ve got this! We can’t wait to hear about your scone-making adventures. Happy baking!
“`