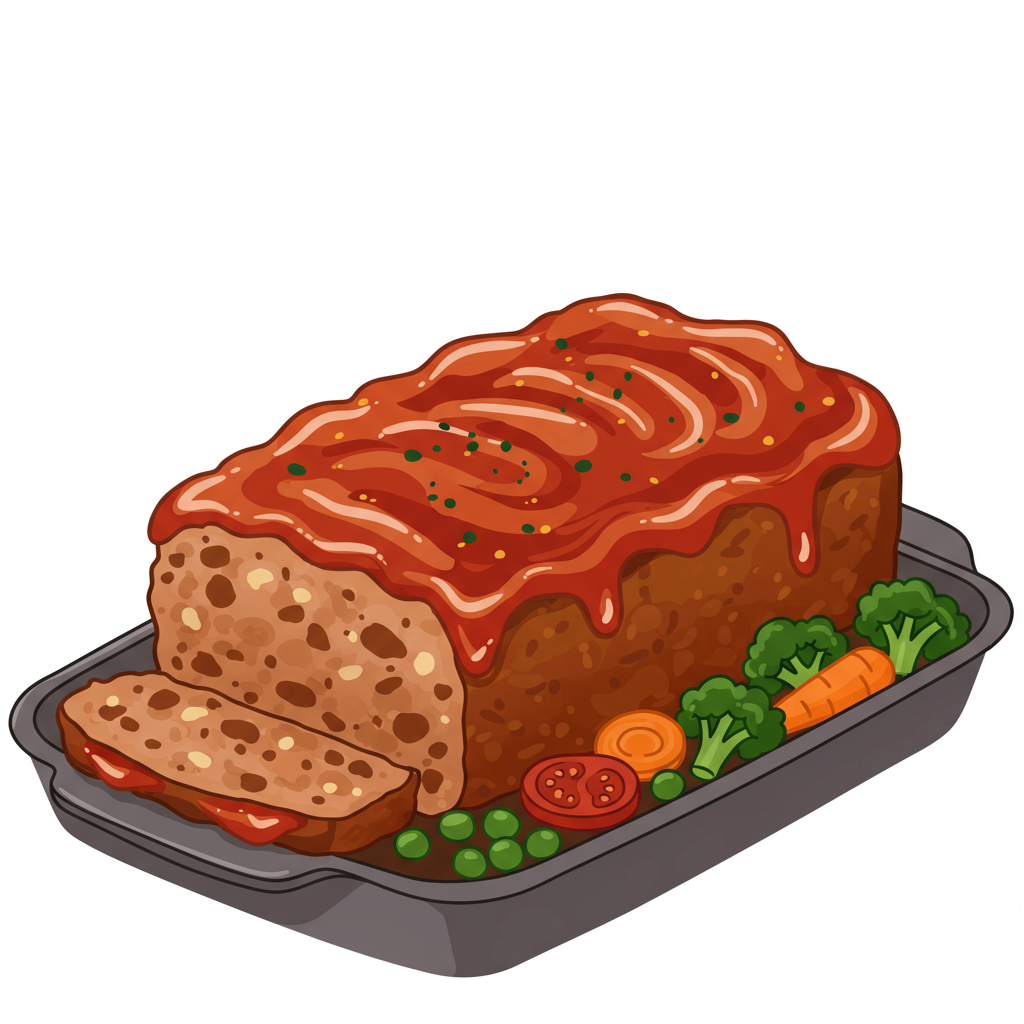
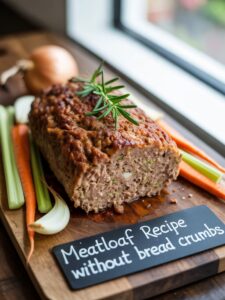
Are you craving that classic, comforting taste of homemade meatloaf but find yourself without bread crumbs, or perhaps you’re looking for a gluten-free alternative? You’ve come to the right place! This Meatloaf Recipe Without Bread Crumbs is designed to be incredibly flavorful, moist, and unbelievably simple, making it one of the best Meatloaf Recipe Without Bread Crumbs for beginners. Forget dry, crumbly meatloaf – we’re going to achieve perfection with readily available ingredients and straightforward steps. Get ready to master a timeless dish that will impress your family and friends, all while learning valuable Meatloaf Recipe Without Bread Crumbs along the way. Let’s dive into creating a delicious, hearty meal that everyone will adore!
Why No Bread Crumbs?
Traditional meatloaf often relies on bread crumbs as a binder, helping the meatloaf hold its shape and
adding moisture. However, we can achieve the same fantastic results – or even better –
using other binders like eggs and milk. This method not only caters to those
avoiding gluten or simply out of bread crumbs, but it also results in a wonderfully
tender texture that truly lets the savory meat flavors shine through. It’s a testament
to how versatile and adaptable easy baking recipes can be!
Ingredients You’ll Need
Gathering all your ingredients before you start is one of the best baking tips for beginners. It makes the process smooth and stress-free!
| Ingredient | Quantity | Unit |
|---|---|---|
| Lean Ground Beef (80/20 or 85/15 recommended) | 1.5 | lbs |
| Large Eggs | 2 | |
| Milk (whole or 2%) | 1/2 | cup |
| Yellow Onion, finely diced | 1 | medium |
| Garlic, minced | 2-3 | cloves |
| Worcestershire Sauce | 1 | tbsp |
| Salt | 1 | tsp |
| Black Pepper | 1/2 | tsp |
| For the Glaze: | ||
| Ketchup | 1/2 | cup |
| Brown Sugar, packed | 2 | tbsp |
| Apple Cider Vinegar (optional, for tang) | 1 | tsp |
Step-by-Step Instructions for Your Perfect Meatloaf
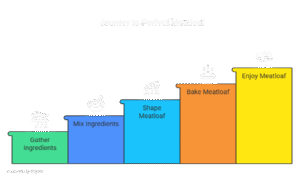
Follow these detailed steps carefully, and you’ll be enjoying a delicious, moist meatloaf in no time! Remember, even experienced bakers started as beginners, so take your time and have fun!
Step 1: Preheat Your Oven and Prepare Your Pan
Begin by preheating your oven to a steady 350°F (175°C). This is a crucial first step for any baking recipe, as it ensures your oven is at the correct temperature before the meatloaf goes in, promoting even cooking from the start. While the oven heats, lightly grease a 9×5-inch loaf pan with cooking spray or a small amount of oil. For even easier cleanup and to help drain excess fat, you can line the pan with parchment paper, leaving an overhang on the sides. This creates “handles” to lift the meatloaf out later. Alternatively, for a slightly crispier exterior and less fat, you can bake it on a baking sheet with a wire rack set inside – this allows fat to drip away from the loaf.
Step 2: Prepare Your Aromatics
Next, finely dice your yellow onion. The key here is “finely” – the smaller the pieces, the better they will integrate into the meatloaf and prevent unwanted crunchy bits of onion in your tender meatloaf. Now, mince your garlic cloves. If you’re a beginner and your knife skills aren’t perfect yet, don’t worry; just aim for small, consistent pieces. You can even use a garlic press for the garlic or a small food processor for the onion if you prefer, but be careful not to turn the onion into a watery paste. Some experienced cooks like to sauté the onion and garlic briefly before adding them to the mixture to mellow their flavor, but it’s not strictly necessary for this recipe and we’re keeping it simple for our easy baking recipes approach.
Step 3: Combine Wet Binders and Seasonings
In a large Mixing Bowl, whisk together the two large eggs, 1/2 cup milk, and 1 tablespoon Worcestershire sauce.
The eggs act as a crucial binder, holding the meatloaf together beautifully without the need for bread crumbs,
while the milk adds essential moisture and helps create that tender, succulent texture we’re aiming for. Worcestershire sauce
is a fantastic secret weapon for adding a deep, savory umami flavor that really enhances the beef. Stir in the 1 teaspoon salt and 1/2 teaspoon black pepper.
Ensure everything is well combined using your Whisk.
Step 4: Gently Mix the Meatloaf Mixture
Now, add the 1.5 lbs lean ground beef, your finely diced onion, and minced garlic to the bowl with the wet ingredients. Here comes one of the most important baking tips for beginners for meatloaf success:
DO NOT OVERMIX! This is critical. Use your clean hands (wearing gloves if you prefer) or a sturdy
Spatula to gently combine all the ingredients. Mix just until everything is incorporated and evenly distributed. Overmixing can lead to a dense, tough meatloaf, as it develops the proteins in the meat too much, similar to how overworking dough makes bread tough. Think of it like making a burger patty – you want it just mixed enough to hold its shape, no more.
Step 5: Form the Meatloaf
Transfer the meat mixture into your prepared loaf pan. Gently press it down evenly to fill the pan, but remember, do not pack it too tightly, as this can also lead to a dense texture. If you’re baking on a baking sheet with a rack, shape the mixture into a loaf shape directly on the rack. A traditional loaf shape is typically about 9 inches long and 4-5 inches wide, with slightly rounded edges. Ensure the top is relatively smooth for an even glaze application in the next steps.
Step 6: Prepare the Glaze
In a small bowl, whisk together the 1/2 cup ketchup, 2 tablespoons packed brown sugar, and optional 1 teaspoon apple cider vinegar. The brown sugar adds a touch of sweetness that caramelizes beautifully during baking, creating a delightful crust, and the vinegar (if you choose to use it) provides a slight tang to cut through the richness of the meat, balancing the flavors perfectly. This glaze is a classic meatloaf topping and truly elevates the dish.
Step 7: First Bake and Glaze Application
Place the meatloaf in the preheated oven and bake for an initial 30 minutes. This first bake
allows the meatloaf to set its shape and begin cooking before you apply the glaze. After 30 minutes,
carefully remove the meatloaf from the oven. Using a spoon or brush, spread about half of the prepared
glaze evenly over the top of the meatloaf. This creates the first layer of that delicious sweet and tangy crust.
Step 8: Continue Baking and Final Glaze
Return the meatloaf to the oven and continue baking for another 30-40 minutes. The total baking time will be around 60-70 minutes. The most reliable way to check for doneness is to use an instant-read meat thermometer inserted into the center of the loaf. It should register an internal temperature of 160°F (71°C). About 10-15 minutes before you anticipate it being done, spread the remaining glaze over the top for a final delicious layer and to deepen that caramelized flavor. Common mistake for beginners: pulling it out of the oven too early! Always trust your thermometer over visual cues. The cooking time can vary based on your specific oven and the thickness of your meatloaf, so keep an eye on that temperature.
Step 9: Rest, Slice, and Serve
Once the meatloaf reaches 160°F, remove it from the oven. This next step is absolutely crucial for a
moist, easy-to-slice meatloaf: LET IT REST! Tent it loosely with foil (don’t cover tightly, just create a little dome) and let it rest on a cutting board for 10-15 minutes before slicing. This allows the juices to redistribute throughout the meatloaf, ensuring every slice is tender and flavorful. If you cut
it too soon, all the delicious juices will run out onto your cutting board, leaving you with a dry, crumbly meatloaf. After resting, slice into generous portions and serve your incredible homemade meatloaf! It pairs wonderfully with mashed potatoes and green beans.
Tips & Tricks for Meatloaf Success
Even though this is an easy baking recipe, these **baking tips for beginners** will elevate your meatloaf game from good to absolutely fantastic!
- Don’t Overmix: This cannot be stressed enough! Gently combine ingredients until just incorporated to ensure a tender, rather than tough, meatloaf. Overmixing is the most common reason for a dense meatloaf.
- Use Lean Ground Beef: An 80/20 or 85/15 fat-to-lean ratio is ideal for a juicy but not overly greasy meatloaf. Too lean (e.g., 93/7) can result in a dry meatloaf without bread crumbs, while too much fat can leave you with a pool of grease in your pan.
- Rest is Best: Always allow your meatloaf to rest for at least 10-15 minutes after baking. This crucial step redistributes juices, making for a significantly moister and easier-to-slice result. Patience is key here!
- Customize Your Glaze: Feel free to experiment with the glaze! Add a pinch of cayenne pepper for a subtle kick, a dash of smoked paprika for depth, or even a spoonful of Dijon mustard for extra tang. Make it your own!
- Meat Thermometer is Your Friend: For perfect doneness every time and to ensure food safety, invest in an instant-read meat thermometer. It takes the guesswork out of baking and ensures your meatloaf is safe to eat and perfectly cooked. Aim for 160°F (71°C).
- Finely Chop Aromatics: Ensure your onion and garlic are very finely diced. This helps them integrate seamlessly into the meatloaf and prevents large, crunchy pieces that can detract from the texture.
- Batch Baking/Freezing: Meatloaf freezes wonderfully! Consider making a double batch. Bake one for now, and freeze the other (cooked or uncooked) for a quick, convenient meal later. Wrap tightly to prevent freezer burn.
Essential Baking Tools
Having the right tools makes all the difference when you’re exploring easy baking recipes and aiming for consistent results!
- Mixing Bowl – A large, sturdy bowl is essential for comfortably combining all your meatloaf ingredients without making a mess.
- Whisk – Perfect for blending your wet ingredients and smoothly combining your delicious glaze.
- Baking Pan – A 9×5 inch loaf pan is standard and will give you the classic meatloaf shape. Alternatively, a baking sheet with a wire rack works great for draining fat.
- Measuring Cups – Accurate measurements are key for consistent results, especially when you’re starting with **baking tips for beginners**.
- Spatula – Great for gently mixing ingredients and scraping down the bowl to ensure nothing goes to waste.
- Instant-Read Meat Thermometer – (Highly Recommended!) This is your secret weapon for perfect doneness every single time, eliminating guesswork and ensuring food safety.
Nutrition Information (Estimated per serving)
This information is an estimate based on approximately 1/8 of the loaf and may vary based on specific ingredients, fat content of meat, and exact serving size.
| Nutrient | Amount |
|---|---|
| Calories | 380 kcal |
| Carbohydrates | 18 g |
| Protein | 32 g |
| Fat | 20 g |
| Saturated Fat | 8 g |
| Fiber | 1 g |
| Sugar | 10 g |
Frequently Asked Questions (FAQs)
Q1: Can I use ground turkey or chicken instead of beef?
Absolutely! Ground turkey or chicken can be excellent alternatives, especially if you’re looking for a leaner option.
Keep in mind that poultry tends to be drier than beef, so you might want to add an extra tablespoon or two of milk
or a little olive oil to the mixture to ensure your meatloaf stays moist. The cooking temperature and internal temperature (160°F/71°C) remain the same.
Q2: How do I know when my meatloaf is fully cooked?
The most accurate and safest way to check for doneness is by using an instant-read meat thermometer.
Insert it into the thickest part of the meatloaf; it should register precisely 160°F (71°C).
Don’t rely solely on visual cues, as meatloaf can often look cooked on the outside but still be undercooked inside.
Q3: My meatloaf fell apart when I sliced it. What went wrong?
There are a few common culprits. You might have sliced it too soon; always allow it to rest for
10-15 minutes after baking so the juices can redistribute and the loaf firms up. This is a vital **baking tip for beginners**.
Another reason could be insufficient binding; ensure your eggs were large and fully incorporated.
Lastly, if your meat was too lean or you didn’t press it firmly enough into shape, it can sometimes be more crumbly.
Q4: Can I prepare this meatloaf ahead of time?
Yes, this **Meatloaf Recipe Without Bread Crumbs** is great for meal prep! You can mix all the meatloaf ingredients and form the loaf up to 24 hours in advance.
Cover it tightly with plastic wrap and refrigerate until you’re ready to bake. You can also prepare the glaze
ahead of time and store it in a separate container in the fridge. Just remember to add a few extra minutes to the
baking time if baking from cold.
Q5: What can I use instead of milk if I have a dairy allergy or no milk on hand?
You can easily substitute dairy milk with unsweetened non-dairy milk like almond milk,
soy milk, or oat milk. Water or beef broth can also work in a pinch, though milk tends to
add a bit more richness and moisture to the meatloaf. Just ensure it’s an unsweetened variety to avoid altering the flavor profile.
Q6: Can I freeze cooked meatloaf?
Yes, cooked meatloaf freezes beautifully! Allow it to cool completely to room temperature, then slice it or
wrap the entire loaf tightly in plastic wrap and then foil. It can be frozen for up to
3 months. To reheat, thaw overnight in the refrigerator and then warm in the oven at 300°F (150°C)
until heated through, or microwave individual slices. This is another great **baking tip for beginners** to save time later!
Conclusion: Your Delicious Journey Begins Now!
There you have it – a truly fantastic and **Meatloaf Recipe Without Bread Crumbs** that’s perfect for anyone,
especially those just starting their baking adventures. We’ve covered everything from
the simple ingredients to crucial **baking tips for beginners**, ensuring your success
in the kitchen. This recipe proves that you don’t need fancy ingredients or complex
techniques to create a deeply satisfying, flavorful meal that will become an instant family favorite.
So, roll up your sleeves, gather your ingredients, and get ready to enjoy the
comforting aroma and taste of homemade meatloaf. Don’t be afraid to make it your own
with slight variations on the glaze or added herbs. We’re confident this will become
a beloved staple in your collection of **easy baking recipes**. We’d love to hear how yours turns out – share your results in the comments below! Happy baking, and happy eating!
“`