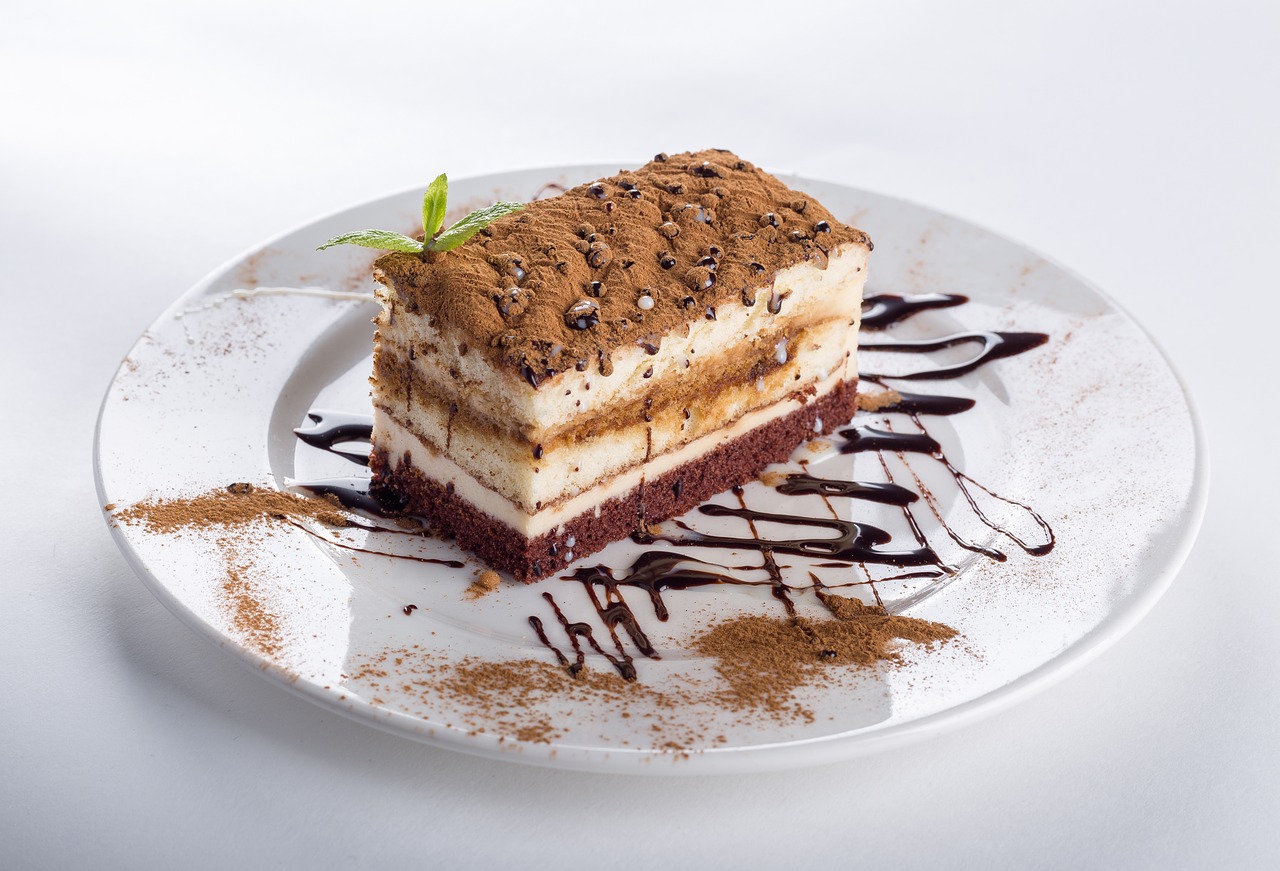
Are you ready to dive headfirst into a world of rich, decadent chocolate? If you’ve been searching for an easy baking recipe that delivers an explosion of flavor and an impressive dessert, look no further! This Nestles Toll House Death By Chocolate Cake Recipe is an absolute game-changer. It’s not just a cake; it’s an experience moist, intensely chocolatey, and topped with a luscious chocolate frosting that will have everyone asking for seconds (and the recipe!).

Baking can seem daunting, especially for newcomers, but I promise this recipe is designed with you in mind. We’ll walk through every step together, providing clear instructions and helpful baking tips for beginners to ensure your first (or fiftieth!) chocolate cake is a resounding success. Get ready to impress your friends and family, or simply treat yourself to the ultimate chocolate indulgence. Let’s get baking!
Ingredients You’ll Need
Gathering all your ingredients before you start is a crucial first step for any baker. This is called “mise en place” (everything in its place) and it makes the baking process so much smoother!
| Ingredient | Quantity | Unit |
|---|---|---|
| All-Purpose Flour | 2 ½ | cups |
| Granulated Sugar | 2 | cups |
| Unsweetened Cocoa Powder | ¾ | cup |
| Baking Soda | 2 | teaspoons |
| Salt | 1 | teaspoon |
| Large Eggs | 2 | |
| Buttermilk | 1 | cup |
| Vegetable Oil | ½ | cup |
| Vanilla Extract | 2 | teaspoons |
| Boiling Water | 1 | cup |
| Nestlé Toll House Semi-Sweet Chocolate Morsels | 1 | cup |
| For the Death by Chocolate Frosting: | ||
| Unsalted Butter (softened) | 1 | cup (2 sticks) |
| Unsweetened Cocoa Powder | ¾ | cup |
| Powdered Sugar (confectioners’ sugar) | 4 | cups |
| Milk (whole or 2%) | ½ | cup |
| Vanilla Extract | 1 | teaspoon |
| Nestlé Toll House Semi-Sweet Chocolate Morsels (for garnish) | ½ | cup |
Step-by-Step Baking Instructions
Follow these detailed steps carefully, and you’ll be on your way to a truly spectacular chocolate cake. Remember, baking is a science, so precise measurements and following the order of operations are key!
1. Prepping Your Workspace & Pan
- Preheat Oven: Start by preheating your oven to 350°F (175°C). It’s important to have a fully preheated oven when your cake goes in to ensure even baking.
- Prepare Baking Pan: Grease and flour a 9×13 inch baking pan (or two 8-inch round pans). To do this, rub the inside of the pan with butter or shortening, ensuring all surfaces are covered. Then, sprinkle a tablespoon or two of flour into the pan, tilting and tapping it to coat the greased surfaces. Dump out any excess flour. This creates a non-stick barrier, making sure your cake comes out easily. Beginner Tip: You can also use baking spray with flour for an even easier solution!
- Measure Everything: Measure all your ingredients and have them ready. This prevents you from scrambling mid-recipe.
2. Mixing the Dry Ingredients
- In a large mixing bowl, whisk together the all-purpose flour, granulated sugar, unsweetened cocoa powder, baking soda, and salt.
- Why whisk? This step isn’t just about combining; it’s about aerating the flour and distributing the leavening agents (baking soda) evenly. This prevents lumps and ensures your cake rises uniformly.
3. Mixing the Wet Ingredients
- In a separate medium-sized bowl, lightly whisk the eggs.
- Add the buttermilk, vegetable oil, and vanilla extract to the eggs. Whisk until just combined.
- What if I don’t have buttermilk? No problem! You can make your own substitute. For 1 cup of buttermilk, add 1 tablespoon of white vinegar or lemon juice to a liquid measuring cup, then fill the rest of the way to the 1-cup line with regular milk. Let it sit for 5 minutes until it slightly curdles.
4. Combining Wet and Dry
- Pour the wet ingredients mixture into the bowl with the dry ingredients.
- Using a whisk or a rubber spatula, mix until just combined. Be careful not to overmix! Overmixing develops the gluten in the flour too much, which can lead to a tough, dry cake. A few small lumps are perfectly fine.
- The Secret Ingredient: Boiling Water! Carefully pour the boiling water into the batter. This step seems unusual, but it’s magical! It blooms the cocoa powder, intensifying the chocolate flavor, and helps create a super moist, tender crumb.
- Stir until the batter is smooth. It will be quite thin – don’t worry, that’s exactly how it should be!
- Finally, stir in the Nestlé Toll House Semi-Sweet Chocolate Morsels. These will melt into gooey pockets of extra chocolatey goodness.
5. Baking the Cake
- Pour the thin batter evenly into your prepared 9×13 inch baking pan.
- Bake for 30-35 minutes, or until a wooden skewer or toothpick inserted into the center of the cake comes out clean.
- How to check for doneness: If it comes out with wet batter, bake for a few more minutes. If it comes out with moist crumbs attached, it’s perfect! If it’s completely dry, it might be slightly overbaked, but still delicious.
- Once baked, remove the cake from the oven and let it cool in the pan on a wire rack for about 10-15 minutes. This allows the cake to firm up before you remove it.
- After 10-15 minutes, carefully invert the cake onto the wire rack to cool completely. This is crucial! Attempting to frost a warm cake will result in melted, messy frosting. Be patient!
6. Making the Death by Chocolate Frosting
While your cake is cooling, let’s make that irresistible frosting!
- In a large mixing bowl, using an electric mixer (handheld or stand mixer with paddle attachment), beat the softened unsalted butter on medium speed until light and fluffy. This usually takes 2-3 minutes.
- Gradually add the unsweetened cocoa powder, beating until well combined.
- Next, gradually add the powdered sugar, one cup at a time, alternating with splashes of milk. Start and end with powdered sugar. Beat on low speed until combined, then increase to medium-high and beat until light and fluffy. You might not need all the milk, or you might need a tiny bit more – adjust to reach your desired consistency.
- Finally, beat in the vanilla extract. Continue beating for another 1-2 minutes until the frosting is smooth, creamy, and spreadable.
- Common Mistake: Frosting too thick or thin? If your frosting is too thick, add milk, one teaspoon at a time, beating after each addition until desired consistency. If it’s too thin, add more powdered sugar, a tablespoon at a time, until it thickens up.
7. Assembling and Decorating
- Once the cake is completely cool (seriously, don’t rush this!), use an offset spatula or knife to spread the generous amount of chocolate frosting evenly over the top of the cake.
- For an extra touch of chocolate, sprinkle the remaining Nestlé Toll House Semi-Sweet Chocolate Morsels over the frosted cake.
- Slice, serve, and enjoy your masterpiece!
Tips & Tricks for Baking Success
Baking is an art and a science, and these little nuggets of wisdom will elevate your game, especially with an easy baking recipe like this one.
- Room Temperature Ingredients: This is not just a suggestion! For butter and eggs, room temperature ensures they cream together smoothly and emulsify better with other ingredients, leading to a lighter, more evenly textured cake. If your butter isn’t soft, cut it into small pieces and let it sit for 15-20 minutes, or microwave for 10-15 seconds.
- Accurate Measuring: For dry ingredients like flour, spoon it into your measuring cup and then level it off with the back of a knife. Don’t scoop directly from the bag, as this can compact the flour and lead to using too much. For liquids, measure at eye level.
- Don’t Overmix: Once you add the dry ingredients to the wet, mix only until just combined. Overmixing develops the gluten in the flour, making your cake tough and chewy instead of tender and moist.
- Invest in an Oven Thermometer: Oven temperatures can vary greatly from what the dial says. An inexpensive oven thermometer will help you know the true temperature, preventing under or over-baking.
- Cool Completely: We can’t stress this enough! Frosting a warm cake will cause the frosting to melt and slide off, making a sticky mess. Patience is a virtue in baking.
- Read the Entire Recipe First: Before you even get out a single ingredient, read the recipe from start to finish. This helps you understand the process, identify any steps that might need extra time, and ensure you have all the necessary tools and ingredients.
Essential Baking Tools
Having the right tools makes all the difference, especially when you’re just starting out. Here are some essentials for this recipe:
- Mixing Bowl
- Whisk
- Baking Pan (9×13 inch or two 8-inch rounds)
- Measuring Cups
- Spatula (rubber spatula and/or offset spatula for frosting)
- Electric Mixer (handheld or stand mixer for frosting)
- Wire Cooling Rack
Nutrition Info (Estimated per serving)
Please note that these values are estimates and can vary based on specific brands and exact measurements. This recipe yields approximately 16 servings.
| Nutrient | Amount |
|---|---|
| Calories | 450-550 kcal |
| Carbohydrates | 60-75 g |
| Protein | 5-7 g |
| Fat | 20-30 g |
| Fiber | 2-4 g |
| Sugar | 45-60 g |
Frequently Asked Questions (FAQs)
Here are some common questions beginners often ask when baking a cake like this:
Q1: Why did my cake sink in the middle?
A1: This can happen for a few reasons: the oven door was opened too early during baking (before the cake structure was set), the cake was underbaked, or there was too much leavening (baking soda). Ensure your oven temperature is accurate and don’t open the door until at least two-thirds of the way through the baking time.
Q2: How do I know when the cake is done?
A2: The most reliable method is the toothpick test. Insert a wooden skewer or toothpick into the center of the cake. If it comes out clean or with a few moist crumbs attached (not wet batter), your cake is done! The edges should also be pulling slightly away from the pan.
Q3: Can I make this cake ahead of time?
A3: Absolutely! The unfrosted cake can be baked, cooled completely, and then wrapped tightly in plastic wrap (and then foil) and stored at room temperature for up to 2 days, or frozen for up to 1 month. The frosting can also be made a day ahead and stored in the fridge, then re-whipped before use.
Q4: My frosting is too sweet. How can I fix it?
A4: You can try adding a pinch of salt to balance the sweetness, or a tiny bit more unsweetened cocoa powder. A splash of strong brewed coffee (cooled) can also deepen the chocolate flavor and cut through sweetness without adding much liquid.
Q5: What’s the best way to store leftover cake?
A5: Store the frosted cake in an airtight container at room temperature for up to 3-4 days. If your kitchen is very warm, or if it contains fresh fruit, refrigerate it. Bring refrigerated cake back to room temperature before serving for the best texture and flavor.
Conclusion
Congratulations! You’ve just mastered the Nestles Toll House Death By Chocolate Cake Recipe, and hopefully, picked up some invaluable baking tips for beginners along the way. This isn’t just a recipe; it’s an invitation to create joy, to share warmth, and to indulge in the pure bliss of homemade chocolate goodness. Don’t be afraid to experiment, to make it your own, and most importantly, to have fun in the kitchen!
Baking is a journey, and every cake you make adds to your skills and confidence. So go ahead, take a bite of your magnificent creation, and savor the rich, chocolatey reward. We’d love to hear about your experience – share your photos and comments below!