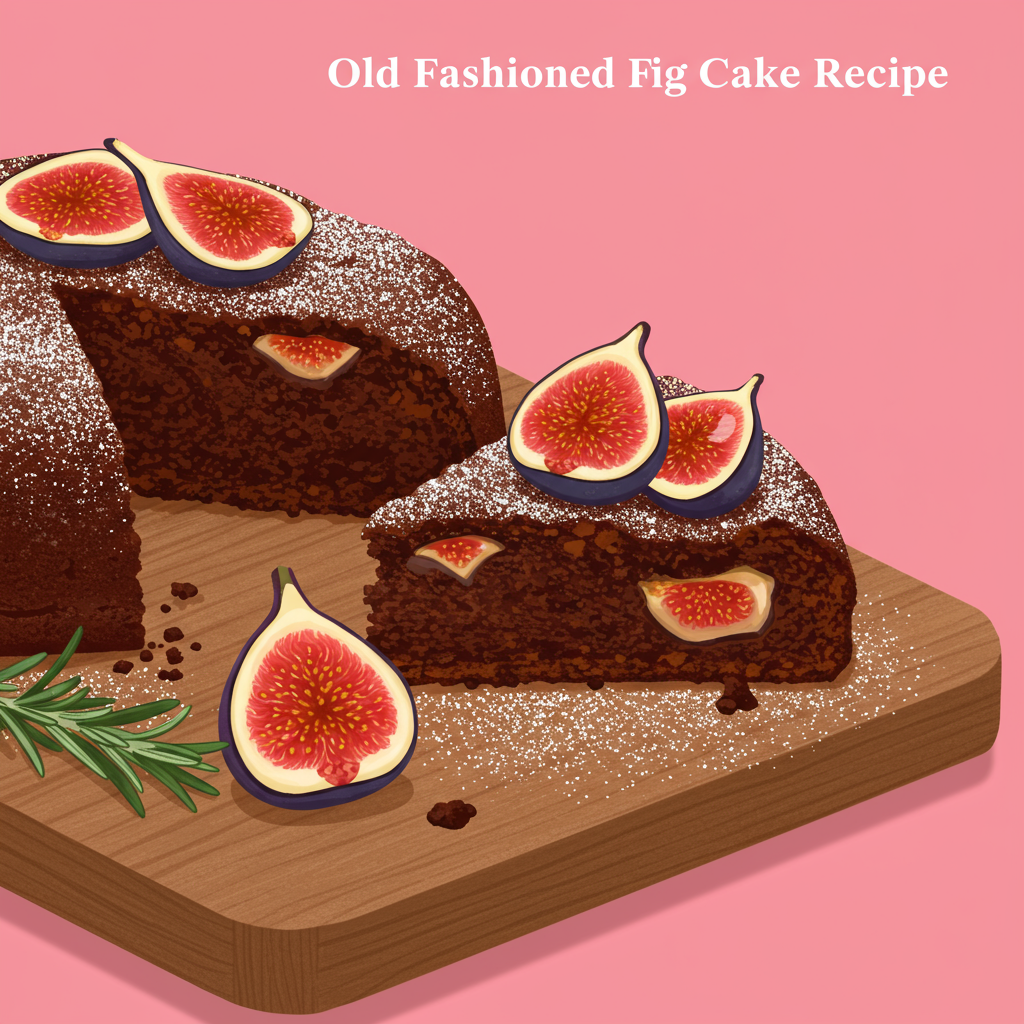
Welcome, fellow baking enthusiasts and kitchen adventurers! Are you ready to embark on a delicious journey that combines the timeless charm of classic baking with the delightful sweetness of figs? Today, we’re diving deep into the world of our cherished Old Fashioned Fig Cake Recipe. This isn’t just any cake; it’s a comforting hug in dessert form, perfect for sharing with loved ones or savoring with a cup of coffee.
If you’re new to the oven, don’t fret! This recipe is crafted to be one of the most easy baking recipes you’ll ever try. We’ve packed it with practical baking tips for beginners, ensuring your first (or fiftieth!) fig cake turns out perfectly moist, fragrant, and utterly irresistible. Say goodbye to baking anxieties and hello to a kitchen filled with the aroma of cinnamon, nutmeg, and sweet, plump figs. Let’s get baking!
Ingredients for Your Old Fashioned Fig Cake
Gathering your ingredients is the first step to baking success. Ensure everything is measured accurately and, for best results, bring your butter and eggs to room temperature before you begin!
| Ingredient | Quantity | Unit |
|---|---|---|
| All-Purpose Flour | 2 ½ | cups |
| Granulated Sugar | 1 ½ | cups |
| Baking Soda | 1 | teaspoon |
| Ground Cinnamon | 1 | teaspoon |
| Ground Nutmeg | ½ | teaspoon |
| Salt | ½ | teaspoon |
| Unsalted Butter (softened) | ½ | cup (1 stick) |
| Large Eggs (room temperature) | 2 | |
| Buttermilk (room temperature) | 1 | cup |
| Vanilla Extract | 1 | teaspoon |
| Dried Figs (chopped) | 1 ½ | cups |
| For the Simple Glaze (Optional) | ||
| Powdered Sugar | 1 | cup |
| Milk or Lemon Juice | 2-3 | tablespoons |
| Vanilla Extract | ¼ | teaspoon |
Step-by-Step Instructions: Baking Your Perfect Fig Cake
Follow these detailed steps carefully, and you’ll be enjoying a magnificent fig cake in no time. Remember, baking is a science, but also an art – enjoy the process!
H3. Step 1: Prepare Your Figs and Oven
- Preheat Oven: Start by preheating your oven to 350°F (175°C). This ensures the oven is at the correct temperature when your cake is ready to go in, preventing uneven baking.
- Prepare Pan: Grease and flour a 9×13 inch baking pan (or two 8-inch round pans if you prefer layers). You can also line the bottom with parchment paper for extra non-stick insurance.
- Prep Figs: Take your 1 ½ cups of chopped dried figs. To prevent them from sinking to the bottom of your cake batter, **lightly toss them with 1-2 tablespoons of the all-purpose flour** (taken from the measured amount for the recipe). This creates a barrier that helps them suspend evenly throughout the batter. Set aside.
H3. Step 2: Combine Dry Ingredients
- In a large mixing bowl, whisk together the remaining all-purpose flour, granulated sugar, baking soda, ground cinnamon, ground nutmeg, and salt.
- Beginner Tip: Sifting your dry ingredients (especially flour, baking soda, and spices) can help eliminate lumps and ensure they are evenly distributed, leading to a lighter, more uniform cake texture. If you don’t have a sifter, whisking vigorously for 30 seconds works well too!
H3. Step 3: Cream Wet Ingredients
- In a separate, medium-sized mixing bowl, cream together the softened unsalted butter and granulated sugar until light and fluffy. This can take 2-3 minutes with an electric mixer.
- Common Mistake: Using cold butter. Cold butter won’t cream properly, leading to a denser cake. Ensure your butter is truly at room temperature (it should be soft enough to indent easily with your finger, but not melted).
- Beat in the room temperature eggs one at a time, mixing well after each addition. Then, stir in the vanilla extract.
- Why Room Temperature Eggs? They emulsify better with the butter and sugar, creating a smoother batter and a lighter cake.
H3. Step 4: Combine Wet and Dry Mixtures
- Gradually add the dry ingredients to the wet ingredients, alternating with the buttermilk. Start and end with the dry ingredients.
- For example, add about a third of the dry ingredients, mix briefly until just combined, then add half of the buttermilk, mix, then another third of dry, then the remaining buttermilk, and finally the last third of dry.
- Critical Beginner Tip: Do NOT overmix! Overmixing develops the gluten in the flour too much, resulting in a tough, chewy cake. Mix only until the ingredients are just combined and no streaks of flour remain. A few small lumps are okay.
H3. Step 5: Fold in the Figs
- Gently fold in your flour-dusted chopped figs using a spatula. Be careful not to overmix here either, just enough to distribute the figs evenly.
- Alternative: If you love nuts, you can also fold in ½ cup of chopped walnuts or pecans at this stage for added crunch and flavor.
H3. Step 6: Bake Your Cake
- Pour the batter into your prepared baking pan, spreading it evenly.
- Bake for 30-40 minutes, or until a wooden skewer or toothpick inserted into the center of the cake comes out clean.
- Checking for Doneness: Besides the toothpick test, gently press the center of the cake; if it springs back, it’s likely done. If your cake is browning too quickly on top, you can loosely tent it with aluminum foil for the last 10-15 minutes of baking.
H3. Step 7: Cool and Glaze
- Once baked, remove the cake from the oven and let it cool in the pan on a wire rack for about 10-15 minutes.
- Then, carefully invert the cake onto the wire rack to cool completely. Cooling completely is crucial before glazing or frosting, otherwise, your glaze will melt right off!
- For the Simple Glaze (Optional): In a small bowl, whisk together the powdered sugar, milk (or lemon juice), and vanilla extract until smooth. Add more liquid a tiny bit at a time if it’s too thick, or more powdered sugar if it’s too thin. Drizzle generously over the cooled cake.
Tips & Tricks for Baking Success
Baking can be incredibly rewarding, and these extra nuggets of wisdom will help you achieve perfection with your Old Fashioned Fig Cake Recipe every single time:
- Room Temperature is Key: We can’t stress this enough! Butter and eggs at room temperature emulsify better, creating a smoother batter and a more tender, well-textured cake. Plan ahead and take them out of the fridge at least 30-60 minutes before you start.
- Accurate Measuring: Baking is precise! Use proper measuring cups and spoons. For flour, spoon it into your measuring cup and then level it off with a straight edge (like the back of a knife) rather than scooping directly from the bag, which can compact the flour and lead to using too much.
- Don’t Peek Too Soon: Resist the urge to open the oven door frequently, especially during the first 20 minutes of baking. This can cause the temperature to drop and the cake to fall or bake unevenly.
- Know Your Oven: Ovens can vary! If you find your cakes consistently bake faster or slower than recipes suggest, consider getting an oven thermometer. Adjust baking times accordingly – it’s better to check early than to overbake.
- Storage: Store your cooled and glazed fig cake at room temperature, covered tightly, for up to 3-4 days. For longer storage, you can refrigerate it for up to a week, or freeze individual slices (well-wrapped) for up to 3 months.
- Serving Suggestion: This cake is wonderful on its own, but also pairs beautifully with a dollop of whipped cream, a scoop of vanilla bean ice cream, or a warm cup of tea or coffee.
Essential Baking Tools for Your Kitchen
Having the right tools makes all the difference, especially for beginners. Here are a few essentials you’ll want for this recipe and many more!
- Mixing Bowl – A set of various sizes is always handy.
- Whisk – For combining dry ingredients and making glazes.
- Baking Pan – A good quality 9×13 inch pan is versatile.
- Measuring Cups and Spoons – Accuracy is crucial in baking.
- Spatula – For scraping bowls and gently folding ingredients.
- Electric Mixer (Handheld or Stand) – While not strictly essential, it makes creaming butter and sugar much easier.
- Wire Cooling Rack – Essential for even cooling and preventing soggy bottoms.
Nutrition Information (Per Serving, estimated for 1/12 of cake)
Please note: This is an approximate nutritional breakdown and can vary based on specific ingredient brands and exact measurements.
| Nutrient | Amount |
|---|---|
| Calories | 380 kcal |
| Carbohydrates | 65 g |
| Protein | 4 g |
| Fat | 16 g |
| Fiber | 3 g |
| Sugar | 40 g |
Frequently Asked Questions (FAQs)
H3. Q1: Can I use fresh figs instead of dried figs?
A: While dried figs offer a more concentrated sweetness and chewiness that’s classic for this recipe, you *can* use fresh figs. If using fresh, make sure they are ripe. You’ll need about 2 cups of chopped fresh figs. They will release more moisture, so the cake might be slightly softer, and you might need to bake it for a few extra minutes. For a more traditional “old fashioned” result, dried figs are recommended.
H3. Q2: How do I prevent the figs from sinking to the bottom of the cake?
A: This is a common issue! The best trick is to lightly toss your chopped figs (or any fruit/nuts) with a tablespoon or two of the all-purpose flour from your measured amount before adding them to the batter. The flour creates a slight coating that helps them “stick” to the batter and prevents them from sinking due to gravity during baking.
H3. Q3: My cake turned out dry. What went wrong?
A: A dry cake is usually a sign of one of two things: either you overbaked it, or you used too much flour. Always check for doneness with a toothpick and remove the cake from the oven as soon as it comes out clean. Also, ensure you’re measuring your flour correctly by spooning it into the measuring cup and leveling it off, rather than scooping directly from the bag.
H3. Q4: How long does this Old Fashioned Fig Cake last, and how should I store it?
A: This cake, if stored properly, will stay fresh and delicious at room temperature for 3-4 days when covered tightly (e.g., under a cake dome or in an airtight container). For longer storage, you can refrigerate it for up to a week. If you plan to keep it longer, individual slices can be wrapped well in plastic wrap and then foil, and frozen for up to 3 months. Thaw at room temperature before serving.
H3. Q5: What if I don’t have buttermilk? Can I make a substitute?
A: Absolutely! You can easily make a homemade buttermilk substitute. For 1 cup of buttermilk, measure 1 cup of regular milk (whole or 2% works best) and stir in 1 tablespoon of white vinegar or lemon juice. Let it sit for 5-10 minutes until it slightly curdles. Voila! You have a perfect substitute for buttermilk in this recipe.
Conclusion: Your Fig Cake Masterpiece Awaits!
And there you have it – your complete guide to baking a truly exceptional Old Fashioned Fig Cake Recipe! From the careful selection of ingredients to those crucial beginner tips, we’ve walked through every step to ensure your success. This cake is more than just a dessert; it’s a testament to the joy of homemade goodness and a beautiful way to bring warmth and comfort into your home.
Don’t be afraid to get your hands a little floury, embrace the process, and most importantly, have fun! We’re confident that even if this is your very first cake, you’ll be incredibly proud of the delicious results. We can’t wait to hear how your fig cake turns out. Happy baking!