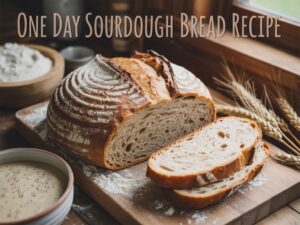
Welcome, aspiring bakers! Are you ready to dive into the wonderful world of sourdough but feel intimidated by the multi-day processes and complex terminology? You’re in the right place! This One Day Sourdough Bread Recipe is specifically designed for you. Forget the lengthy cold proofs and endless waiting we’re going to bake a beautiful, crusty, and delicious loaf from start to finish in a single day.
This post is packed with easy baking recipes principles and crucial baking tips for beginners to ensure your success. Get ready to impress yourself and your loved ones with homemade sourdough, without the usual sourdough time commitment!
Ingredients List
Gather your ingredients! For best results, we recommend weighing your flour and water for accuracy, but we’ve included cup measurements for convenience.
| Ingredient | Quantity | Unit |
|---|---|---|
| Active Sourdough Starter | 100 | grams (approx. 1/2 cup) |
| Warm Water (filtered preferred) | 350 | grams (approx. 1 1/2 cups) |
| Bread Flour (unbleached) | 500 | grams (approx. 4 cups) |
| Fine Sea Salt | 10 | grams (approx. 1 1/2 teaspoons) |
Step-by-Step Instructions: Bake Your Sourdough Today!
Follow these detailed steps carefully, and you’ll be enjoying fresh sourdough by dinner!
Step 1: Activate Your Sourdough Starter (Morning – approx. 7 AM)
For a successful “one-day” bake, your starter needs to be at its peak activity. This means it should be fed, bubbly, and have doubled in size after 4-6 hours. If you just took it out of the fridge, feed it twice over 12-24 hours until it’s consistently active.
- Feed your starter: In a clean jar, combine 25g (1 tbsp) of your mature starter, 50g (1/4 cup) warm water, and 50g (1/4 cup) bread flour. Stir until smooth.
- Wait for activity: Cover loosely and let it sit at room temperature (70-75°F / 21-24°C) for 4-6 hours until it’s very bubbly, has doubled in size, and passes the float test (a small spoonful floats in water). This is crucial! If it’s not active, your bread won’t rise.
Step 2: Autolyse (Late Morning – approx. 11 AM)
The autolyse step is simple but powerful. It allows the flour to fully hydrate, which helps develop gluten without much kneading.
- In a large mixing bowl, combine the 350g warm water and 500g bread flour.
- Mix with your hands or a spatula until no dry flour remains. It will be a shaggy, somewhat stiff dough. Don’t worry about developing gluten at this stage.
- Cover the bowl with a damp cloth or plastic wrap and let it rest for 30 minutes to 1 hour. This resting period is called the autolyse.
Step 3: Mix in Starter and Salt (approx. 12 PM)
Now it’s time to introduce the magic!
- Add the 100g active sourdough starter on top of your autolysed dough.
- Sprinkle the 10g fine sea salt over the dough.
- With wet hands, gently incorporate the starter and salt into the dough. It might feel a bit messy at first, but keep squeezing and folding the dough until everything is evenly distributed. This can take 5-10 minutes. The dough will become smoother as you work it.
- Once mixed, cover the bowl again.
Step 4: Bulk Fermentation & Stretch and Folds (Early Afternoon – approx. 12:30 PM – 3:00 PM)
This is where the dough develops flavor and strength. For a “one-day” recipe, we’ll keep this at room temperature.
- Let the dough rest for 30 minutes after mixing in the starter and salt.
- First Set of Stretch and Folds (1:00 PM): With wet hands, grab a portion of the dough from one side, stretch it upwards, and fold it over itself to the center of the bowl. Rotate the bowl a quarter turn and repeat this process 3-4 more times until you’ve stretched and folded all sides. This helps build gluten structure.
- Cover and let rest for 30 minutes.
- Repeat Stretch and Folds: Perform 3 more sets of stretch and folds, each with a 30-minute rest in between. (Approximate schedule: 1:30 PM, 2:00 PM, 2:30 PM).
- After the final set of folds, let the dough rest for an additional 30-60 minutes, or until it has visibly increased in volume by about 30-50%. It should feel lighter, airier, and have some bubbles on the surface. Common mistake: Under-proofing. If your dough doesn’t feel airy or hasn’t expanded, give it more time. Over-proofing can make it too slack to handle.
Step 5: Pre-Shape & Bench Rest (approx. 3:00 PM)
This step helps create tension in the dough, making final shaping easier.
- Lightly flour your work surface.
- Gently scrape the dough out of the bowl onto the floured surface. Avoid deflating it too much.
- Gently shape the dough into a loose ball (a “boule”) using a bench scraper or your hands to pull it towards you, creating surface tension.
- Cover the dough with the bowl or a damp cloth and let it rest for 20-30 minutes. This allows the gluten to relax.
Step 6: Final Shaping & Short Proof (approx. 3:30 PM)
Time to give your loaf its final form! We’ll do a room temperature proof for this “one-day” recipe.
- Lightly flour your proofing basket (banneton) or a bowl lined with a floured kitchen towel.
- Gently flip the pre-shaped dough over so the seam side is up.
- Shape for a Boule (round loaf): Gently flatten the dough into a rough rectangle. Fold the top third down to the center, then the bottom third up over that. Rotate 90 degrees and repeat, gently creating tension by pulling the edges and tucking them under. Finally, bring all edges into the center and pinch them together to create a tight seam.
- Place the dough seam-side up into your prepared banneton or bowl. This means the smooth side will be facing down, forming the top crust.
- Cover the banneton with plastic wrap or a shower cap.
- Let the dough proof at room temperature (70-75°F / 21-24°C) for 45-60 minutes. The dough should feel puffy and spring back slowly when gently poked. Alternative: If you prefer, you can do a short cold proof (1-2 hours) in the fridge at this stage while your oven preheats, but it’s not strictly necessary for this one-day method.
Step 7: Preheat Oven & Dutch Oven (approx. 3:45 PM)
Preheating is crucial for a great crust and oven spring.
- Place your Dutch oven (with its lid on) into your oven.
- Preheat your oven to 500°F (260°C) for at least 30-45 minutes. This ensures the Dutch oven is scorching hot.
Step 8: Score & Bake (approx. 4:30 PM)
The moment of truth!
- Carefully remove the hot Dutch oven from the oven. Be extremely cautious!
- Gently invert your proofed dough onto a piece of parchment paper, or directly into the hot Dutch oven.
- Score the dough: Using a very sharp knife or a bread lame, make a deep score (about 1/2 inch deep) across the top of the dough. This allows the bread to expand predictably. Get creative with designs if you like!
- Carefully lower the dough (using the parchment paper as a sling if preferred) into the hot Dutch oven.
- Place the lid back on the Dutch oven.
- Bake for 20 minutes at 500°F (260°C) with the lid on.
- After 20 minutes, carefully remove the lid. Reduce the oven temperature to 450°F (230°C).
- Continue baking for another 25-30 minutes, or until the crust is a beautiful golden brown and sounds hollow when tapped on the bottom.
Step 9: Cool (approx. 5:20 PM)
This is the hardest part – waiting! But it’s essential for the bread’s texture and flavor.
- Carefully remove the bread from the Dutch oven and transfer it to a wire cooling rack.
- Let it cool for at least 1-2 hours before slicing. Slicing too early will result in a gummy texture.
Congratulations! You’ve just baked your very own **One Day Sourdough Bread**! Enjoy the fruits of your labor.
Tips & Tricks for Beginner Sourdough Bakers
- Active Starter is Key: Your starter is the heart of your bread. Ensure it’s active and bubbly. If it’s sluggish, feed it a couple of times before attempting a bake.
- Temperature Matters: Room temperature significantly impacts fermentation speed. Warmer rooms (75°F/24°C) will ferment faster, cooler rooms (68°F/20°C) slower. Adjust bulk fermentation and proofing times accordingly.
- Don’t Fear the Stickiness: Sourdough dough, especially for beginners, can be sticky. Wet hands are your best friend during stretch and folds, and a light dusting of flour on your work surface for shaping helps immensely.
- Practice Makes Perfect: Your first loaf might not be Instagram-perfect, and that’s okay! Each bake is a learning experience. Pay attention to how the dough feels and responds.
- Hydration: This recipe uses a moderate hydration level, making it easier for beginners to handle. As you gain confidence, you can experiment with slightly higher water content for a more open crumb.
- Read Your Dough, Not Just the Clock: While times are provided, they are guidelines. Learn to feel and observe your dough. Look for visual cues like bubbles, increased volume, and a jiggly, airy texture.
- Cool Completely: It’s tempting to cut into a warm loaf, but resist! Cooling allows the internal structure to set and steam to escape, preventing a gummy crumb.
Essential Baking Tools
Having the right tools makes the process smoother and more enjoyable. Here are some essentials:
- Large Mixing Bowl
- Whisk (for starter, though a fork works too!)
- Dutch Oven (essential for that amazing crust and oven spring!)
- Measuring Cups & Spoons (and ideally a digital kitchen scale for precision!)
- Rubber Spatula (or bowl scraper)
- Bench Scraper (highly recommended for handling dough)
- Proofing Basket (Banneton) or a bowl lined with a floured towel
- Parchment Paper
- Sharp Knife or Bread Lame (for scoring)
- Wire Cooling Rack
Nutrition Information (per 1/10th loaf serving)
Please note these are estimated values and can vary based on exact ingredients and preparation.
| Nutrient | Amount |
|---|---|
| Calories | 180-200 kcal |
| Carbohydrates | 35-40 g |
| Protein | 6-8 g |
| Fat | 0.5-1.5 g |
| Fiber | 2-3 g |
| Sugar | 0-1 g |
Frequently Asked Questions (FAQs)
1. What if my sourdough starter isn’t active enough?
An inactive starter is the most common reason for a flat loaf. If your starter isn’t consistently doubling in size after feeding and passing the float test, it needs more attention. Try feeding it every 12 hours for a day or two, keeping it in a warm spot (75-80°F) until it’s robust and bubbly. Don’t proceed with the recipe until it’s super active!
2. Can I use all-purpose flour instead of bread flour?
Yes, you can! Bread flour has a higher protein content, which contributes to a stronger gluten structure and a chewier crumb. All-purpose flour will still work, but your loaf might be slightly less airy and have a softer texture. For best results, especially as a beginner, stick to bread flour if possible.
3. Why is my bread flat and dense?
Several factors can lead to a flat, dense loaf:
- Inactive starter: As mentioned, this is critical.
- Under-proofed dough: The dough didn’t have enough time to develop sufficient gas.
- Over-proofed dough: The dough rose too much and then collapsed, losing its structure.
- Insufficient gluten development: Not enough stretch and folds, or too gentle handling during shaping.
- Not enough steam in the oven: The Dutch oven helps trap steam, which allows the crust to expand before hardening.
Review the steps, especially bulk fermentation and proofing, to identify potential issues.
4. How do I know when my dough is perfectly proofed?
The “poke test” is your best friend! Gently flour a finger and lightly poke the dough.
- If it springs back immediately, it’s under-proofed and needs more time.
- If it springs back slowly, leaving a slight indentation, it’s perfectly proofed.
- If it leaves a deep indentation and doesn’t spring back, it’s over-proofed. Handle very gently, as it may be prone to collapsing.
5. Can I bake this recipe without a Dutch oven?
While a Dutch oven is highly recommended for achieving the best crust and oven spring, you can still bake sourdough without one. You’ll need to create a steamy environment in your oven. Place a baking stone or heavy baking sheet in the oven during preheating. Just before baking, place your dough on the hot stone/sheet and quickly pour a cup of boiling water into a preheated pan on the bottom rack. Close the oven door quickly to trap the steam. Be aware that the crust might not be as thick or shiny as with a Dutch oven.
Conclusion
You did it! Embracing the art of sourdough baking, especially with a “one-day” approach, is incredibly rewarding. This One Day Sourdough Bread Recipe proves that you don’t need days of waiting to enjoy a truly homemade, delicious loaf. Each bake is an opportunity to learn and grow, so don’t be discouraged by imperfections. Celebrate your efforts, savor that incredible aroma, and enjoy your fantastic bread. Happy baking, and we hope this beginner-friendly guide helps you fall in love with sourdough!