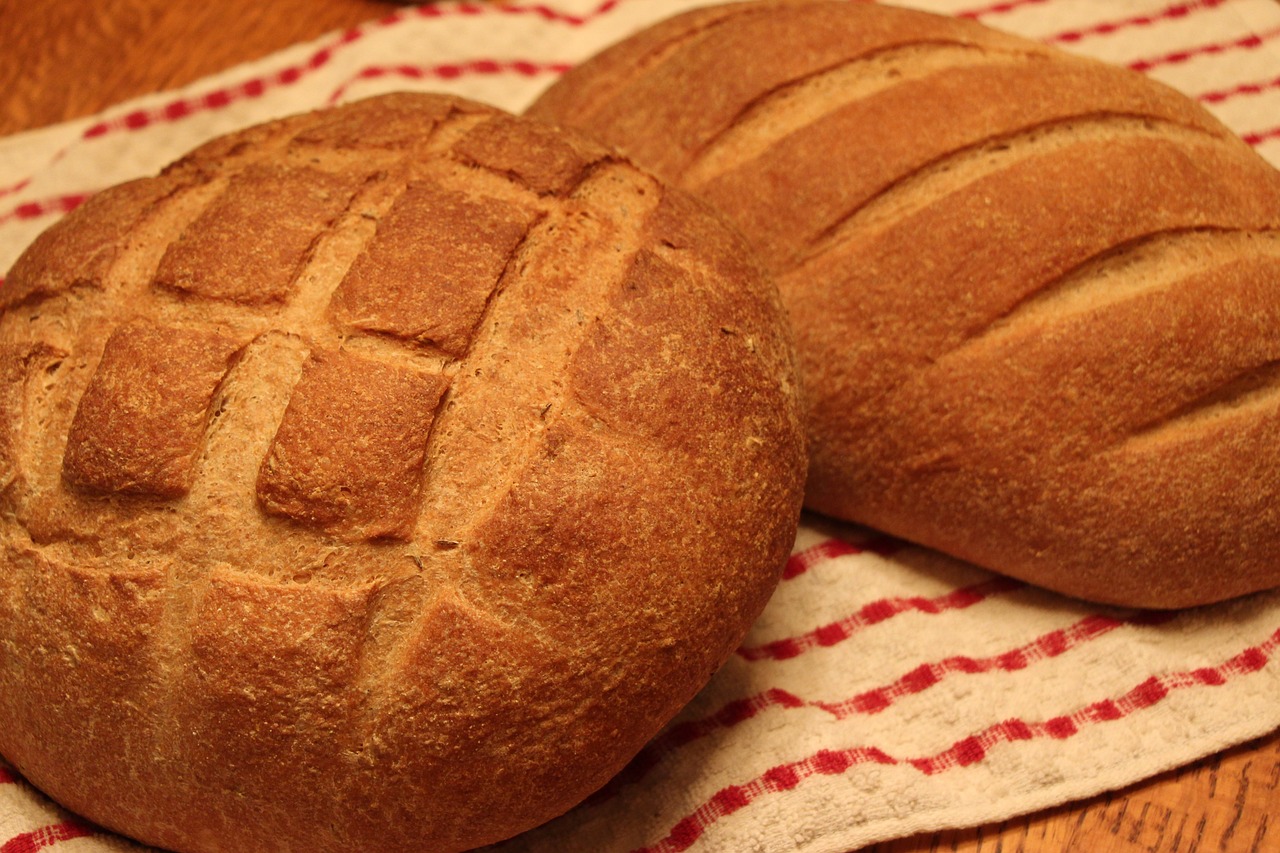
Welcome, aspiring bakers! Are you ready to unlock the magic of fresh, homemade bread with minimal effort? If you own a Panasonic Bread Machine, you’re in for a treat! This comprehensive guide will walk you through creating a delicious, fluffy Classic White Bread loaf that will fill your home with an irresistible aroma. Say goodbye to store-bought bread and hello to warm, comforting slices straight from your kitchen.
Our Panasonic Bread Machine Recipes are designed to be incredibly beginner-friendly, ensuring success even if you’ve never baked before. We’ll provide you with all the essential baking tips for beginners and make sure this is one of the easiest easy baking recipes you’ll ever master. Let’s get started on your journey to becoming a bread-making pro!
Ingredients List for Classic White Bread (1.5 lb Loaf)
Getting your ingredients measured precisely is the first step to bread-making success. Here’s what you’ll need:
| Ingredient | Quantity | Unit |
|---|---|---|
| Warm Water (approx. 80-90°F / 27-32°C) | 1 | cup |
| Milk Powder (optional, for softer crumb) | 2 | tablespoons |
| Unsalted Butter (softened or melted) | 2 | tablespoons |
| Granulated Sugar | 2 | tablespoons |
| Salt | 1 ½ | teaspoons |
| Bread Flour | 3 | cups |
| Active Dry Yeast or Bread Machine Yeast | 2 | teaspoons |
Ingredient Tip for Beginners: Ensure your yeast is fresh! If your yeast is old or inactive, your bread won’t rise. You can test active dry yeast by dissolving 1 teaspoon of sugar in 1/4 cup warm water (105-115°F) and sprinkling 2 1/4 teaspoons of yeast on top. If it foams within 5-10 minutes, it’s good to go!
Step-by-Step Instructions: Baking Your Perfect Loaf
Follow these detailed steps to ensure a perfect loaf every time. Remember, the order of ingredients is crucial for bread machines!
-
Prepare Your Bread Machine Pan:
First, remove the baking pan from your Panasonic bread machine. Ensure the kneading paddle is securely in place at the bottom of the pan. A quick check now prevents issues later!
-
Add Liquids First:
Pour the warm water into the baking pan. If using, add the softened or melted butter and the milk powder. For beginners, it’s essential to get the water temperature right – too hot will kill the yeast, too cold won’t activate it properly. Aim for lukewarm, like a baby’s bath.
Common Mistake & Fix: Using water that’s too hot. This is the number one reason bread fails to rise. Always feel the water; it should be warm to the touch, not hot. If in doubt, err on the side of slightly cooler.
-
Add Dry Ingredients (Except Yeast):
Carefully add the granulated sugar and salt to the pan. Try to place them in separate corners or away from where the yeast will eventually go. Next, gently scoop in the bread flour, making sure it covers the liquid ingredients completely. Use a measuring cup that allows for a “level” scoop rather than compacting the flour.
Baking Tip for Beginners: When measuring flour, spoon it into your measuring cup and then level it off with the back of a knife. Do not scoop directly from the bag with the measuring cup, as this can compact the flour, leading to too much flour and a dense loaf.
-
Create a Flour Well for Yeast:
Using your finger, create a small indentation or “well” in the center of the flour mound. This is where your yeast will go. The goal is to keep the yeast separate from the liquids and salt until the machine starts kneading. Salt can inhibit yeast activity if it comes into direct contact for too long.
-
Add the Yeast Last:
Carefully add the active dry yeast (or bread machine yeast) into the well you created. Do not mix it in. Just let it sit on top of the flour. This separation is crucial for the yeast to activate at the right time during the machine’s cycle.
-
Place Pan into Bread Machine:
Place the baking pan securely back into your Panasonic bread machine. Close the lid firmly.
-
Select Your Settings:
Turn on your bread machine. Select the “Basic” or “White Bread” cycle. For the crust, we recommend starting with “Medium” crust setting. If your machine has a loaf size option, select “1.5 lb.”
Alternative: If you prefer a lighter crust, select “Light.” For a darker, crispier crust, choose “Dark.” Experiment to find your perfect preference!
-
Start the Machine and Wait:
Press the “Start” button. Your bread machine will now begin its magical process of kneading, rising, and baking. This typically takes around 3 to 4 hours, depending on your machine and selected cycle.
Observation Tip: During the first kneading cycle (usually within the first 10-15 minutes), briefly lift the lid and observe the dough. It should form a smooth, soft ball. If it looks too dry and crumbly, add 1-2 teaspoons of water. If it looks too wet and sticky, add 1-2 teaspoons of flour. Do this sparingly, one small addition at a time, until the consistency is right.
-
Remove the Loaf:
Once the cycle is complete, the machine will beep. Immediately put on oven mitts and carefully remove the hot baking pan from the machine. Be cautious, as the pan will be very hot!
-
Cool the Bread:
Invert the pan onto a wire cooling rack. The loaf should slide out easily. If the kneading paddle sticks in the bread, carefully remove it with a utensil once the bread has cooled slightly. Allow the bread to cool on the wire rack for at least 30-60 minutes before slicing. This allows the internal structure of the bread to set and prevents a gummy texture.
Why Cooling is Crucial: Slicing hot bread can result in a gummy, dense texture. Cooling allows the steam to escape and the starches to set, giving you a perfect slice.
-
Slice and Enjoy!
Once cooled, use a serrated bread knife to slice your homemade masterpiece. Enjoy it fresh with butter, jam, or for your favorite sandwiches!
Tips & Tricks for Bread Machine Success
Mastering your bread machine is all about understanding a few key principles. These tips will help you consistently bake perfect loaves and troubleshoot common issues:
- Measure Accurately: This is paramount! Use proper measuring cups and spoons, and level off dry ingredients. Too much or too little of any ingredient can throw off the delicate balance of bread making. Kitchen scales are excellent for accuracy, especially for flour.
- Fresh Ingredients: Always use fresh yeast. Store it in the refrigerator or freezer for longevity. Ensure your flour hasn’t expired, as old flour can affect taste and texture.
- Room Temperature Ingredients (Mostly): While the bread machine will warm up, having liquids at a warm but not hot temperature (around 80-90°F / 27-32°C) gives the yeast a head start. Butter should be softened or melted for even distribution.
- Order Matters: Stick to the recommended loading order (liquids, then dry, then yeast) for your Panasonic machine. This prevents premature yeast activation or interaction with salt, which can hinder rising.
- Don’t Peek Too Much: While a quick check during the first knead is fine, resist the urge to constantly open the lid during the rising cycles. This releases heat and can cause the dough to deflate.
- Altitude Adjustments: If you live at a high altitude, you might need to make slight adjustments. High altitudes can cause dough to rise too quickly and then collapse. Try reducing yeast by 1/4 teaspoon and/or slightly decreasing liquid by 1-2 tablespoons.
- Clean Your Machine: Regularly clean your bread pan and kneading paddle. Dough residue can affect future loaves or cause the paddle to stick.
Essential Baking Tools
While your bread machine does most of the heavy lifting, a few basic tools will make your baking experience even smoother:
- Mixing Bowl (for pre-measuring or general kitchen tasks)
- Whisk (useful for blending dry ingredients if not using milk powder)
- Baking Pan (the one that comes with your bread machine, but useful for other baking too!)
- Measuring Cups
- Spatula (for scraping down ingredients if needed)
- Wire Cooling Rack (essential for cooling your bread evenly)
- Serrated Bread Knife (for clean slices)
Nutrition Information (per slice, approx. 1/16th of a 1.5 lb loaf)
Please note: These are estimated values and can vary based on exact ingredient brands and measurements.
| Nutrient | Amount |
|---|---|
| Calories | 95 kcal |
| Carbohydrates | 18 g |
| Protein | 3 g |
| Fat | 1.5 g |
| Fiber | 1 g |
| Sugar | 2 g |
Frequently Asked Questions (FAQs)
Q: My bread didn’t rise. What went wrong?
A: The most common culprits are inactive yeast (check the expiration date or perform a yeast proofing test), water that was too hot (killing the yeast), or too much salt (inhibiting yeast activity). Ensure your yeast is fresh and your water temperature is just warm, not hot.
Q: Why is my bread dense and heavy?
A: This often points to too much flour or not enough liquid. Make sure you’re measuring your flour correctly (spoon and level, don’t scoop directly from the bag). Also, high altitude can sometimes cause density; a slight reduction in flour or increase in liquid might help.
Q: The crust is too thick/thin. How can I fix it?
A: Your bread machine likely has a “Crust” setting (light, medium, dark). Adjust this setting on your next loaf to achieve your desired crust thickness and color. For a softer crust, you can also try adding a little more butter or oil to the recipe.
Q: My bread collapsed in the middle. What happened?
A: A collapsed loaf can be due to too much liquid, too much yeast, or over-proofing (the dough rises too high and then falls). High humidity or high altitude can also contribute. Try slightly reducing the liquid or yeast by a tiny amount (e.g., 1/2 teaspoon for yeast).
Q: Can I use all-purpose flour instead of bread flour?
A: While you can, bread flour has a higher protein content, which develops more gluten and results in a chewier, more structured loaf. All-purpose flour will still work, but your bread might be slightly less chewy and rise a little less.
Q: How do I store homemade bread?
A: Store your cooled bread in an airtight container or bread bag at room temperature for 3-4 days. For longer storage, slice the loaf and freeze the slices in a freezer-safe bag for up to 2-3 months. Toasting from frozen works wonderfully!
Conclusion: Enjoy Your Homemade Masterpiece!
Congratulations, you’ve just baked a fantastic loaf of Classic White Bread with your Panasonic Bread Machine! Isn’t it wonderful how easy it is to create something so delicious and satisfying right in your own kitchen? Don’t be afraid to experiment with different settings or even slightly adjust ingredients as you gain confidence. Every loaf is a learning experience, and soon you’ll be baking perfect bread every time. Share your creations, enjoy the aroma, and savor every bite of your homemade goodness. Happy baking!