Indulge in Southern Comfort: Your Guide to the Perfect Paula Deen Banana Bread Recipe!
Welcome, fellow baking enthusiasts (and soon-to-be enthusiasts)! There’s something undeniably comforting about the aroma of freshly baked banana bread wafting through your home. It’s a classic for a reason – simple, satisfying, and a delicious way to use up those overripe bananas sitting on your counter. Today, we’re diving into a beloved version that promises rich flavor and a moist, tender crumb: the **Paula Deen Banana Bread Recipe**. Known for her Southern hospitality and delicious, often indulgent, cooking, Paula Deen’s take on this classic is a true winner. This post is designed to be one of the most **easy baking recipes** you’ll ever tackle, packed with practical **baking tips for beginners** to ensure your success. Get ready to transform humble bananas into a loaf of pure joy!
Whether you’re a seasoned baker or just starting your culinary journey, this recipe is incredibly forgiving and yields fantastic results every time. We’ll walk you through each step, offering guidance and demystifying common baking challenges. So, tie on your apron, gather your ingredients, and let’s create a masterpiece that will have everyone asking for seconds. You’ve got this!
Ingredients You’ll Need for Paula Deen’s Banana Bread
Gathering your ingredients before you start is a key step to smooth baking. This list is designed for one standard loaf (8×4 or 9×5 inch pan).
Wet Ingredients:
| Quantity | Unit | Ingredient |
|---|---|---|
| 3-4 | medium | Very Ripe Bananas, mashed (about 1.5 cups) |
| 1/2 | cup | Unsalted Butter, softened |
| 1/2 | cup | Granulated Sugar |
| 1/2 | cup | Light Brown Sugar, packed |
| 2 | large | Eggs, room temperature |
| 1 | teaspoon | Vanilla Extract |
| 1/4 | cup | Buttermilk (or milk + 1/2 tsp lemon juice/vinegar) |
Dry Ingredients:
| Quantity | Unit | Ingredient |
|---|---|---|
| 1 3/4 | cups | All-Purpose Flour |
| 1 | teaspoon | Baking Soda |
| 1/2 | teaspoon | Salt |
| 1/2 | teaspoon | Ground Cinnamon (optional, but recommended) |
Optional Mix-ins:
| Quantity | Unit | Ingredient |
|---|---|---|
| 1/2 – 1 | cup | Chopped Pecans or Walnuts |
| 1/2 – 1 | cup | Chocolate Chips (milk, semi-sweet, or dark) |
Step-by-Step Instructions: Baking Your Perfect Banana Bread
Follow these detailed instructions carefully, and you’ll be enjoying a delicious loaf in no time!
Step 1: Prep Your Workspace & Oven
- Preheat Oven: Adjust your oven rack to the middle position and preheat your oven to 350°F (175°C). This ensures the oven is consistently hot when your bread goes in, promoting even baking.
- Prepare Pan: Lightly grease and flour a 9×5-inch loaf pan (or 8×4-inch for a taller loaf). You can also line it with parchment paper, leaving an overhang on the long sides to easily lift the bread out later. Beginner Tip: To grease and flour, first spread a thin layer of butter or cooking spray, then add a spoonful of flour, tilting the pan to coat all surfaces. Tap out any excess flour. This prevents sticking!
Step 2: Prepare the Bananas
- Mash Bananas: In a medium bowl, mash your very ripe bananas with a fork or potato masher. You want them mostly smooth, but a few small lumps are perfectly fine and can add nice texture to the finished bread. Beginner Tip: The riper the bananas (brown spots, almost black skin), the sweeter and more flavorful your bread will be. Don’t use yellow or green bananas!
- Set Aside: Keep the mashed bananas nearby; you’ll need them soon.
Step 3: Cream Butter and Sugars
- Combine Wet Ingredients: In a large mixing bowl, using an electric mixer (handheld or stand mixer with paddle attachment), cream together the softened unsalted butter, granulated sugar, and light brown sugar. Beat on medium speed for 2-3 minutes until the mixture is light, fluffy, and pale in color. Beginner Tip: Softened butter means it’s pliable but still cool to the touch, not melted or greasy. If your butter is too cold, microwave it for 10-15 seconds; if too warm, pop it in the fridge for a few minutes.
- Add Eggs and Vanilla: Beat in the two room temperature eggs, one at a time, mixing well after each addition until fully incorporated. Scrape down the sides of the bowl as needed. Stir in the vanilla extract.
Step 4: Combine Dry Ingredients
- Whisk Dry Ingredients: In a separate medium bowl, whisk together the all-purpose flour, baking soda, salt, and (optional) ground cinnamon. Whisking ensures these ingredients are evenly distributed, especially the leavening agents. Beginner Tip: To measure flour accurately, spoon it into your measuring cup and then level off the top with a straight edge (like a knife). Don’t scoop directly from the bag, as this compacts the flour and you’ll end up with too much.
Step 5: Combine Wet and Dry Mixtures
- Alternate Additions: With the mixer on low speed, gradually add the dry ingredient mixture to the wet mixture, alternating with the mashed bananas and buttermilk. Start and end with the dry ingredients.
- Add about one-third of the dry ingredients, mix just until combined.
- Add half of the mashed bananas and buttermilk, mix just until combined.
- Add another third of the dry ingredients, mix just until combined.
- Add the remaining bananas and buttermilk, mix just until combined.
- Finish with the last third of the dry ingredients, mixing until just combined.
- Do NOT Overmix: This is crucial for tender banana bread! Mix only until no streaks of flour remain. Overmixing develops gluten, which leads to tough, dense bread. A few small lumps are okay.
- Fold in Mix-ins (Optional): If using chopped nuts or chocolate chips, gently fold them into the batter with a spatula at this stage.
Step 6: Bake Your Banana Bread
- Pour into Pan: Pour the batter evenly into your prepared loaf pan. You can gently tap the pan on the counter a couple of times to release any large air bubbles.
- Bake: Place the pan in the preheated oven and bake for 55-70 minutes. Baking times can vary depending on your oven and pan material.
- Check for Doneness: The banana bread is done when a wooden skewer or toothpick inserted into the center comes out clean or with a few moist crumbs attached (no wet batter). If the top is browning too quickly, you can loosely tent the loaf with aluminum foil for the last 15-20 minutes of baking.
Step 7: Cool and Serve
- Cool in Pan: Once baked, remove the loaf pan from the oven and let it cool in the pan on a wire rack for 10-15 minutes. This allows the bread to set and prevents it from crumbling when you remove it.
- Remove from Pan: After 10-15 minutes, carefully run a knife around the edges of the pan (if not using parchment paper) and invert the loaf onto the wire rack. Let it cool completely before slicing. Beginner Tip: While tempting to slice warm, banana bread slices much cleaner and tastes better once fully cooled, as the flavors meld and the texture firms up.
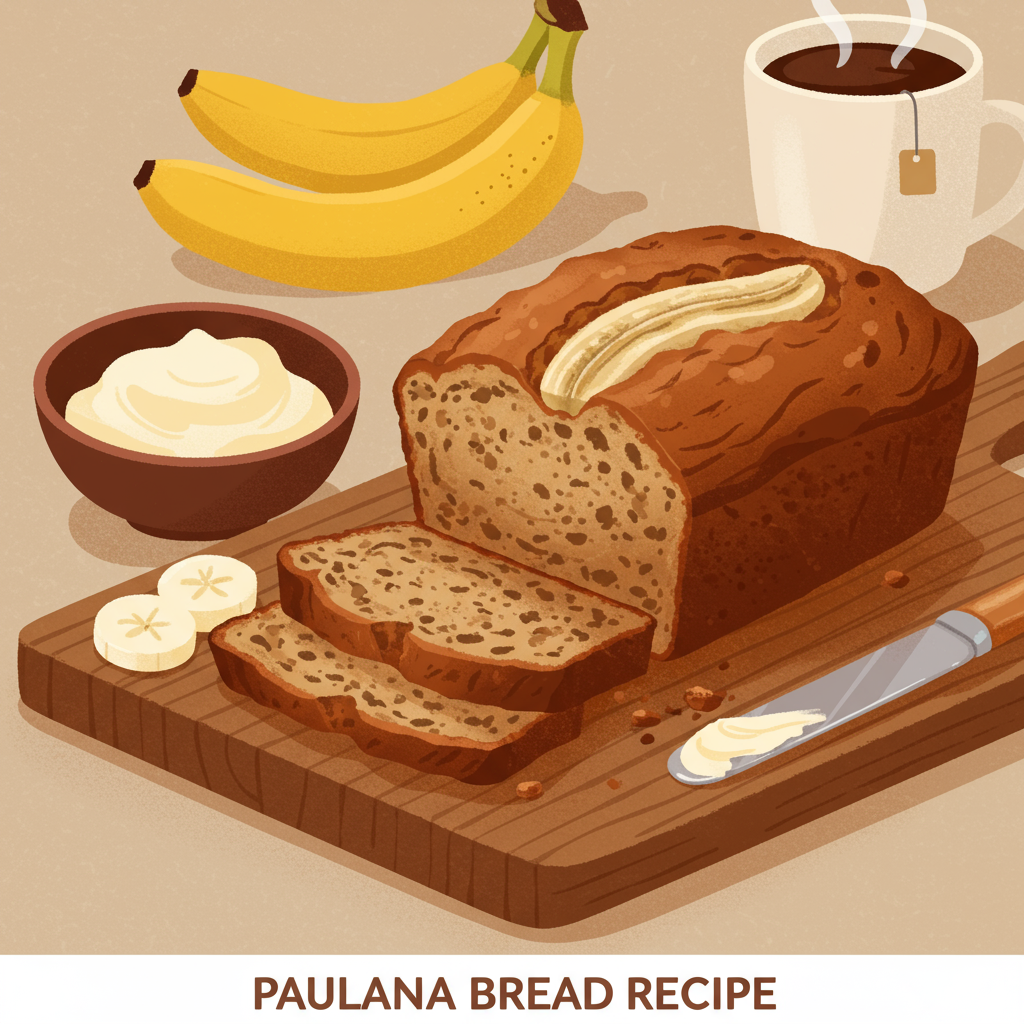
- Slice and Enjoy: Once cool, slice with a serrated knife and serve. It’s delicious on its own, with a pat of butter, or even a dollop of whipped cream!
Tips & Tricks for Banana Bread Perfection
Elevate your banana bread game with these actionable tips, perfect for any beginner!
- The Ripeness Factor: We can’t stress this enough – **very ripe bananas** are non-negotiable! They provide the natural sweetness and intense banana flavor that makes this bread so good. Look for bananas with significant brown or black spots. If your bananas aren’t ripe enough, you can speed up the process by baking them in their peels on a baking sheet at 300°F (150°C) for 15-30 minutes until they’re black and soft.
- Room Temperature Ingredients: Ensure your butter and eggs are at room temperature. This allows them to cream together more effectively, creating a smoother, more emulsified batter that traps air better, resulting in a lighter and fluffier texture.
- Don’t Overmix: This is the golden rule of quick breads! Overmixing develops gluten, leading to a tough, dense, and less moist loaf. Mix only until the ingredients are just combined and no dry streaks of flour remain.
- To Mix-in or Not to Mix-in? Nuts (walnuts, pecans), chocolate chips, or even dried fruit (raisins, cranberries) are wonderful additions. Add about 1/2 to 1 cup to the batter in the final mixing stage. For an extra touch, sprinkle a few over the top of the batter before baking.
- Patience is a Virtue (for Cooling): It’s hard to wait, but cooling the banana bread completely on a wire rack allows it to set properly, making it easier to slice and enhancing its flavor and texture. Warm banana bread can be crumbly and less flavorful.
- Storage Secrets: Store your banana bread at room temperature, tightly wrapped in plastic wrap or in an airtight container, for up to 3-4 days. For longer storage, it freezes beautifully! Wrap slices or the whole loaf tightly in plastic wrap, then aluminum foil, and freeze for up to 3 months. Thaw at room temperature.
- Pan Power: Darker metal pans tend to bake quicker and can sometimes lead to darker crusts. If you’re using a dark pan, keep a closer eye on your bread and consider reducing the baking time slightly or tenting with foil earlier. Lighter metal or glass pans often require a bit more time.
Essential Baking Tools for This Recipe
Having the right tools makes baking a breeze! Here are a few essentials you might need (or already have!):
- Mixing Bowl
- Whisk
- Baking Pan (9×5 inch loaf pan)
- Measuring Cups
- Spatula
- Electric mixer (handheld or stand mixer) – optional but highly recommended for creaming butter and sugar
- Rubber scraper (for scraping down bowls)
- Wire rack (for cooling)
Estimated Nutrition Information (per serving)
Please note: This is an estimate based on a typical 1/12th slice of banana bread from the recipe. Actual values may vary depending on specific ingredients, brands, and portion sizes.
| Nutrient | Amount |
|---|---|
| Calories | 320-380 kcal |
| Carbohydrates | 45-55 g |
| Protein | 4-6 g |
| Fat | 15-20 g |
| Fiber | 1-2 g |
| Sugar | 25-35 g |
Frequently Asked Questions (FAQs) for Beginner Bakers
Q1: My bananas aren’t ripe enough. What can I do?
A1: If your bananas are still yellow, you can ripen them quickly! Place them (unpeeled) on a baking sheet in a 300°F (150°C) oven for 15-30 minutes, or until the skins are completely black and shiny. Let them cool before peeling and mashing. They’ll be surprisingly sweet!
Q2: Can I use frozen bananas for this recipe?
A2: Absolutely! Frozen ripe bananas are excellent for banana bread. Thaw them completely at room temperature (they’ll release a lot of liquid, which you should drain off) or gently in the microwave. They’ll be very soft and easy to mash. The flavor will be just as good!
Q3: Why is my banana bread dry/gummy?
A3: A dry loaf is often due to too much flour (always spoon and level!) or overbaking. A gummy texture usually points to overmixing the batter, which develops too much gluten, making it dense and chewy. Ensure you mix only until the ingredients are just combined.
Q4: I don’t have buttermilk. What’s a good substitute?
A4: No problem! You can easily make a homemade buttermilk substitute. For 1/4 cup of buttermilk, measure 1/4 cup of regular milk (any fat percentage will work), remove 1/2 teaspoon of milk, and replace it with 1/2 teaspoon of white vinegar or lemon juice. Stir gently and let it sit for 5-10 minutes until it slightly curdles. It works perfectly in this recipe!
Q5: How long does homemade banana bread typically last?
A5: When stored properly at room temperature, tightly wrapped in plastic wrap or in an airtight container, your banana bread will stay fresh and moist for about 3-4 days. You can also refrigerate it for up to a week, or freeze it for up to 3 months.
Q6: Can I add chocolate chips or nuts?
A6: Yes, and we highly recommend it if you enjoy them! You can add 1/2 to 1 cup of chocolate chips (milk, semi-sweet, or dark) or chopped nuts (walnuts or pecans are classic) to the batter in the final mixing stage. Just fold them in gently with a spatula after the dry ingredients are almost fully incorporated.
Your Delicious Journey Begins Now!
And there you have it – your comprehensive guide to baking the most delightful **Paula Deen Banana Bread Recipe**! From selecting the perfect ripe bananas to understanding the nuances of mixing and baking, you now have all the knowledge and **baking tips for beginners** to create a truly memorable loaf. This isn’t just a recipe; it’s an invitation to experience the joy and satisfaction of homemade baking.
Imagine that first warm slice, tender and fragrant, perhaps with a cup of coffee or tea. It’s a small moment of pure bliss that you created with your own hands. Don’t be afraid to experiment with your favorite mix-ins, or simply enjoy it in its classic form. We encourage you to try this **easy baking recipe** and share your results. Happy baking, y’all!
“`