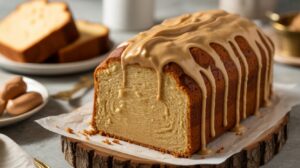
Are you ready to bake something truly spectacular, even if you’re just starting your culinary journey? Look no further! This Peanut Butter Pound Cake Recipe is your ticket to a world of rich, buttery, and utterly delicious homemade goodness. Forget complicated techniques and intimidating ingredient lists; we’re diving into one of the most satisfyingly easy baking recipes that promises a moist, dense crumb and that unmistakable, comforting peanut butter flavor you adore.
We know that for many, baking can seem daunting. That’s why we’ve packed this post with all the essential baking tips for beginners, ensuring your first (or fiftieth!) pound cake turns out perfectly every single time. From understanding ingredient temperatures to mastering the art of not overmixing, we’ve got your back. Get ready to fill your home with the incredible aroma of freshly baked cake and impress everyone with your newfound baking prowess!
What You’ll Need: Ingredients List
Gather your ingredients! For the best results, ensure your butter, eggs, and milk are at room temperature. This helps them emulsify properly, creating a smoother, more uniform batter.
| Ingredient | Quantity | Unit |
|---|---|---|
| Unsalted Butter, softened | 1 | cup (2 sticks / 226g) |
| Granulated Sugar | 2 | cups (400g) |
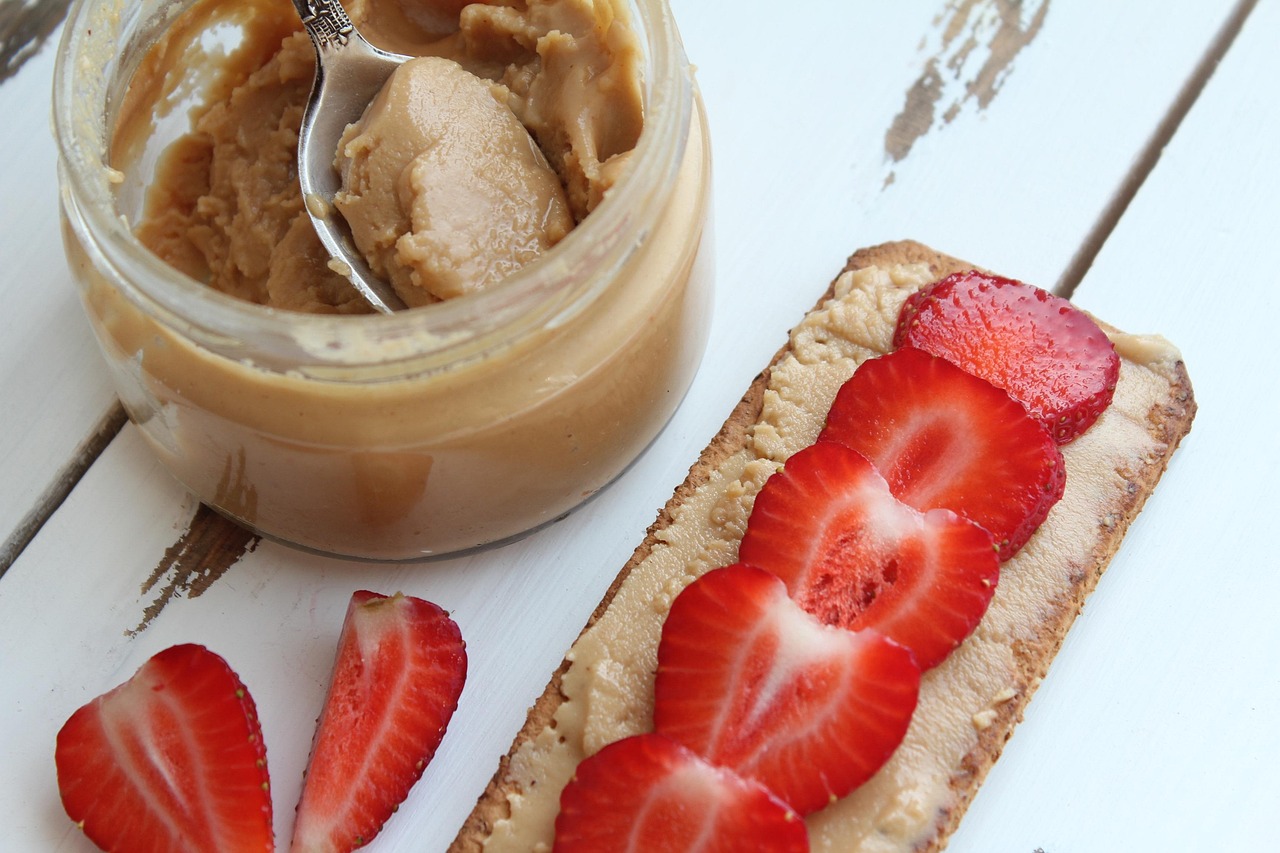
| Creamy Peanut Butter | 1 | cup (250g) |
| Large Eggs, room temperature | 4 | |
| All-Purpose Flour | 3 | cups (360g) |
| Baking Powder | 1 | teaspoon |
| Salt | ½ | teaspoon |
| Whole Milk, room temperature | ½ | cup (120ml) |
| Vanilla Extract | 1 | teaspoon |
| For the Optional Peanut Butter Glaze: | ||
| Powdered Sugar | 1 ½ | cups |
| Creamy Peanut Butter | ¼ | cup |
| Milk (any kind) | 2-3 | tablespoons |
| Vanilla Extract (optional) | ¼ | teaspoon |
Step-by-Step Instructions: Your Path to Pound Cake Perfection
Step 1: Prepare Your Pan and Preheat Your Oven
- Preheat your oven: Set your oven to 325°F (160°C). Pound cakes bake best at a slightly lower temperature for a longer time, which helps prevent over-browning and ensures a thoroughly cooked center.
- Prepare your baking pan: Take a 9×5 inch loaf pan or a 10-12 cup Bundt pan. Grease it thoroughly with butter or a non-stick baking spray. Then, lightly flour the pan, tapping out any excess. This creates a non-stick barrier, ensuring your beautiful cake releases easily after baking. Beginner Tip: Don’t skip this step! A well-prepped pan prevents sticking disasters.
Step 2: Whisk Together Your Dry Ingredients
- In a medium bowl, whisk together the all-purpose flour, baking powder, and salt. Whisking ensures these ingredients are evenly distributed, so you don’t end up with a pocket of salt or baking powder in one bite. Set this bowl aside.
Step 3: Cream the Butter and Sugar (The Foundation of Flavor!)
- In a large mixing bowl, using an electric mixer (stand or hand-held) with the paddle attachment, cream together the softened unsalted butter and granulated sugar on medium-high speed.
- Beat for 3-5 minutes, until the mixture is light in color and fluffy. This “creaming” process incorporates air into the butter and sugar, which is crucial for the pound cake’s light yet dense texture. Beginner Tip: If your butter isn’t soft enough, it won’t cream properly. Let it sit on the counter for at least an hour before you start!
Step 4: Incorporate Peanut Butter and Eggs
- Reduce the mixer speed to medium. Add the creamy peanut butter to the butter and sugar mixture, beating until well combined, scraping down the sides of the bowl as needed.
- Now, add the large eggs one at a time, mixing well after each addition. Beat each egg in until it’s fully incorporated before adding the next. This helps create a stable emulsion and prevents the mixture from curdling. Beginner Tip: If your mixture looks a little lumpy after adding eggs, don’t worry! It will smooth out as you add the dry ingredients.
- Finally, stir in the vanilla extract.
Step 5: Alternate Dry and Wet Ingredients (The Key to a Tender Crumb!)
- With the mixer on low speed, begin adding the dry ingredient mixture (from Step 2) and the whole milk alternately to the wet mixture, starting and ending with the dry ingredients.
- Add about one-third of the flour mixture, mix until just combined.
- Add half of the milk, mix until just combined.
- Add another third of the flour mixture, mix until just combined.
- Add the remaining milk, mix until just combined.
- Finish with the remaining flour mixture, mixing just until no streaks of flour remain.
- CRITICAL Beginner Tip: Do NOT overmix! Overmixing develops the gluten in the flour too much, leading to a tough, dry cake. Mix only until the ingredients are just combined. Use a rubber spatula to give a final gentle fold to ensure everything is incorporated without overworking the batter.
Step 6: Bake Your Pound Cake to Golden Perfection
- Pour the batter evenly into your prepared loaf or Bundt pan. Smooth the top with a spatula.
- Bake in the preheated oven for 60-75 minutes for a loaf pan, or 70-90 minutes for a Bundt pan. Baking times can vary depending on your oven and pan material.
- How to check for doneness: Insert a wooden skewer or toothpick into the center of the cake. If it comes out clean or with a few moist crumbs attached (but no wet batter), your cake is done! Beginner Tip: Resist the urge to open the oven door during the first 45 minutes of baking, especially with pound cake, as this can cause the cake to sink in the middle.
Step 7: Cool and Enjoy!
- Once baked, remove the cake from the oven and let it cool in the pan on a wire rack for 15-20 minutes. This allows the cake to set and prevents it from breaking when you remove it.
- After 15-20 minutes, carefully invert the cake onto the wire rack to cool completely. Cooling completely is important for the cake’s structure and flavor.
Step 8: Optional Peanut Butter Glaze (For Extra Indulgence!)
- While the cake cools, prepare the glaze. In a small bowl, whisk together the powdered sugar, ¼ cup creamy peanut butter, 2 tablespoons of milk, and optional vanilla extract until smooth.
- If the glaze is too thick, add more milk a teaspoon at a time until you reach your desired drizzling consistency. If too thin, add a bit more powdered sugar.
- Once the cake is completely cool, drizzle the glaze generously over the top. Let the glaze set for a few minutes before slicing and serving.
Baking Tips & Tricks for Beginners
Baking is a science, but it doesn’t have to be intimidating! Here are some actionable tips to ensure your Peanut Butter Pound Cake is a roaring success:
- Room Temperature is Non-Negotiable: We mentioned it, but it’s worth repeating! Softened butter, room temperature eggs, and milk emulsify better, creating a smooth, homogenous batter that traps air for a lighter crumb. If your butter is too cold, it won’t cream properly. If it’s too warm (melted), your cake will be dense.
- Measure Accurately, Especially Flour: For flour, use the “spoon and level” method. Spoon flour into your measuring cup until it overflows, then level it off with a straight edge (like the back of a knife). Don’t scoop directly from the bag, as this compacts the flour and you’ll end up with too much, leading to a dry cake.
- Don’t Overmix (Seriously!): This is the most common mistake in baking. Once you add flour, mix only until just combined. Overmixing develops gluten, making your cake tough and chewy instead of tender and moist.
- Know Your Oven: Ovens can vary wildly in temperature. Consider buying an inexpensive oven thermometer to ensure your oven is truly preheated to the correct temperature. This can make a huge difference in baking consistency.
- Patience is a Virtue: Don’t rush the cooling process. Cooling in the pan for the recommended time, then completely on a wire rack, allows the cake’s structure to set, preventing it from crumbling or sticking.
- Storage Secrets: Store your cooled pound cake tightly wrapped in plastic wrap at room temperature for up to 3-4 days, or in the refrigerator for up to a week. It also freezes beautifully for up to 2-3 months – just wrap it well!
- Flavor Boosters: Feel free to customize! Add ½ cup of mini chocolate chips or chopped roasted peanuts to the batter in the final mixing stage for extra texture and flavor.
Essential Baking Tools for Your Kitchen
Having the right tools makes all the difference! Here are some basics that will help you master this recipe and many more:
- Mixing Bowl (a set of various sizes is ideal)
- Whisk (for dry ingredients and glaze)
- Baking Pan (9×5 inch loaf pan or 10-12 cup Bundt pan)
- Measuring Cups (for dry ingredients)
- Measuring Spoons (for smaller quantities like baking powder and salt)
- Spatula (rubber spatula for scraping bowls and folding batter)
- Electric Mixer (stand mixer or hand mixer)
- Wire Cooling Rack
Nutrition Information (Estimated Per Slice)
Please note that these values are approximate and can vary based on specific ingredients and serving size. This estimate is for one slice of cake, assuming 12 servings per cake.
| Nutrient | Amount |
|---|---|
| Calories | 420 kcal |
| Carbohydrates | 55 g |
| Protein | 9 g |
| Fat | 28 g |
| Saturated Fat | 12 g |
| Fiber | 2 g |
| Sugar | 35 g |
Frequently Asked Questions (FAQs)
Q1: Why is my pound cake dry?
A: A dry pound cake is usually a result of overbaking or overmixing the batter. Overbaking removes too much moisture, while overmixing develops the gluten in the flour, leading to a tough, dry texture. Ensure you measure your flour correctly (spoon and level!) and mix only until just combined.
Q2: Can I use crunchy peanut butter instead of creamy?
A: Yes, you can! However, be aware that it will change the texture of the pound cake, adding small bits of peanuts throughout. If you prefer a smoother, more uniform crumb, stick with creamy peanut butter.
Q3: How do I know when my pound cake is done baking?
A: The best way is to insert a wooden skewer or toothpick into the very center of the cake. If it comes out clean or with only a few moist crumbs attached (no wet batter), it’s done. The top should also be golden brown and spring back slightly when gently touched.
Q4: My cake sank in the middle, what happened?
A: This is a common issue! It can happen if the oven door was opened too early during baking (causing a sudden temperature drop), if the cake was underbaked, if your oven temperature was too high (causing the outside to cook too fast while the inside lags), or if there was too much leavening agent (baking powder) in the batter.
Q5: Can I make this Peanut Butter Pound Cake ahead of time?
A: Absolutely! Pound cakes are wonderful make-ahead desserts. You can bake it a day or two in advance, wrap it tightly, and store it at room temperature. The flavors often deepen overnight! It also freezes exceptionally well for longer storage.
Ready, Set, Bake!
And there you have it – your complete guide to baking a truly exceptional Peanut Butter Pound Cake Recipe! We hope this detailed, beginner-friendly post has equipped you with the confidence and knowledge to tackle this delicious project. There’s nothing quite like the pride of pulling a perfectly golden, fragrant cake from your oven, especially one as comforting and satisfying as this.
Don’t be afraid to get your hands a little messy, follow the steps, and remember that every baker started somewhere. This recipe is designed to be forgiving and utterly delicious, making it one of the best easy baking recipes to add to your repertoire. So, grab your apron, preheat that oven, and get ready to enjoy the rich, nutty goodness of your very own homemade peanut butter pound cake. Happy baking!