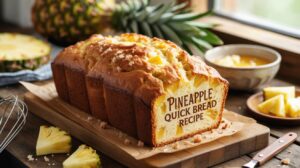
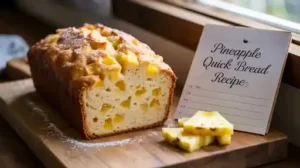
Welcome, fellow baking enthusiasts and aspiring home bakers! Are you ready to dive into the wonderful world of quick breads? Today, we’re making a bright, sweet, and incredibly moist treat that’s perfect for breakfast, a snack, or even dessert: our Pineapple Quick Bread Recipe! If you’re looking for easy baking recipes that deliver big on flavor without requiring hours in the kitchen, you’ve come to the right place. This recipe is specifically designed with baking tips for beginners in mind, guiding you through each step with clarity and encouragement. Forget complicated techniques; this bread comes together in a snap, promising a delightful tropical escape with every slice. Get ready to impress yourself and your loved ones with this simple yet sensational bake!
Ingredients List
Gather your ingredients! For the best results, have everything measured out and ready to go before you begin.
| Quantity | Unit | Ingredient |
|---|---|---|
| 2 | cups | All-Purpose Flour |
| 1 | cup | Granulated Sugar |
| 1 | teaspoon | Baking Powder |
| 1/2 | teaspoon | Baking Soda |
| 1/2 | teaspoon | Salt |
| 1/2 | teaspoon | Ground Cinnamon (optional, but recommended!) |
| 1 | large | Egg |
| 1/2 | cup | Vegetable Oil (or melted unsalted butter) |
| 1/2 | cup | Milk (any kind works: whole, 2%, or even buttermilk for extra tang) |
| 1 | teaspoon | Vanilla Extract |
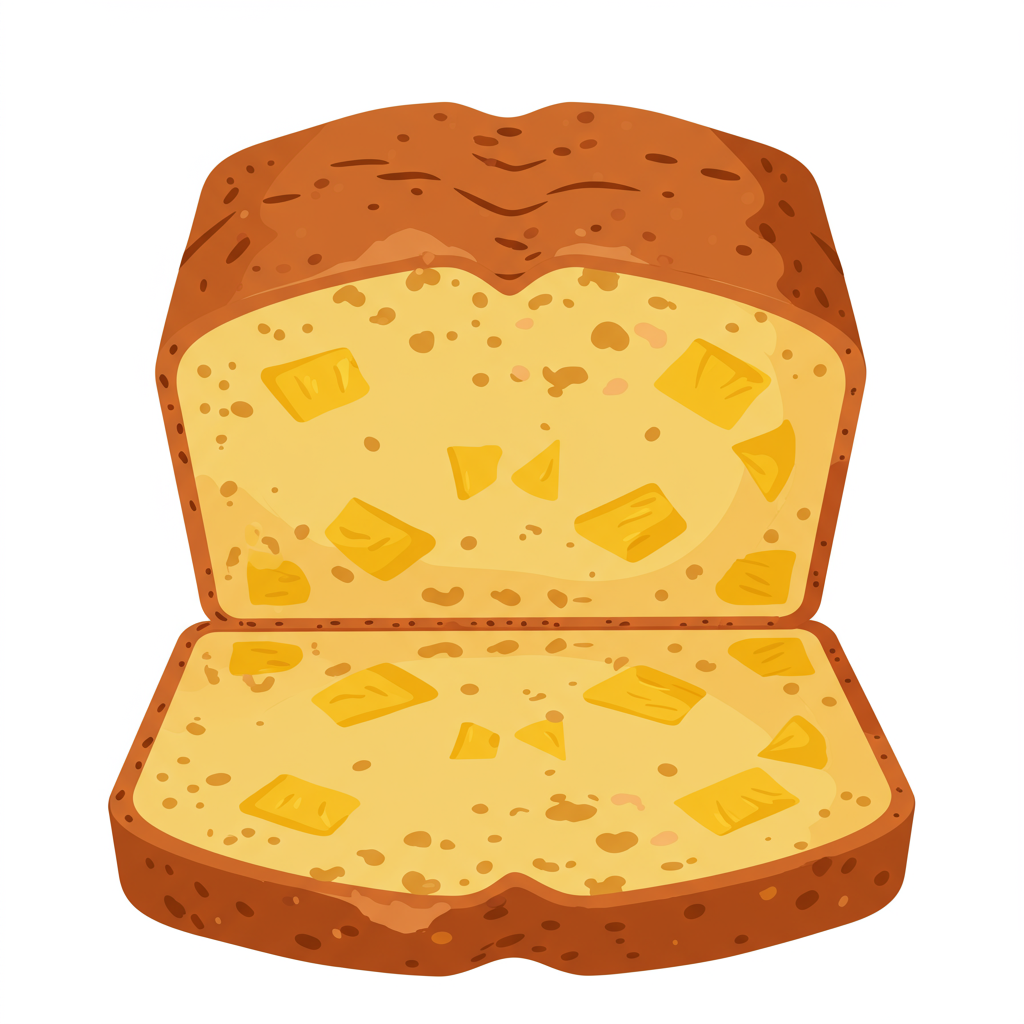
| 1 (8-ounce) | can | Crushed Pineapple, well-drained |
| 1/2 | cup | Chopped Pecans or Walnuts (optional) |
Step-by-Step Instructions: Your Guide to Perfect Pineapple Quick Bread
Follow these detailed steps, and you’ll have a gorgeous, fragrant quick bread baking in no time!
-
Prepare Your Pan and Preheat Oven:
Preheat your oven to 350°F (175°C). This is crucial for even baking! Take a 9×5 inch loaf pan and either grease it thoroughly with butter or non-stick spray, or line it with parchment paper, leaving an overhang on the sides for easy lifting. Beginner Tip: A well-greased pan prevents your bread from sticking, making removal a breeze. If using parchment, make sure it covers the bottom and two long sides.
-
Combine Dry Ingredients:
In a large mixing bowl, whisk together the all-purpose flour, granulated sugar, baking powder, baking soda, salt, and ground cinnamon (if using). Whisking ensures that all the leavening agents (baking powder and soda) and salt are evenly distributed, which is key for a consistent rise and flavor. This also helps break up any lumps in your flour.
-
Combine Wet Ingredients:
In a separate medium bowl, lightly beat the large egg. Then, add the vegetable oil (or melted butter), milk, and vanilla extract. Whisk these wet ingredients together until they are well combined.
-
Gently Combine Wet and Dry Mixtures:
Pour the wet ingredient mixture into the bowl with the dry ingredients. Using a spatula or wooden spoon, gently mix until *just* combined. This is a critical step for quick breads: do NOT overmix! Overmixing develops the gluten in the flour too much, leading to a tough, dense, and chewy bread instead of a tender, moist one. A few streaks of flour are perfectly fine.
-
Add the Pineapple and Optional Nuts:
Add the well-drained crushed pineapple to the batter. If you’re using chopped pecans or walnuts, fold them in now as well. Gently fold them into the batter until evenly distributed. Make sure your pineapple is *really* well-drained; excess moisture can make your bread soggy. You can even press it in a paper towel to remove extra liquid.
-
Transfer to Pan and Bake:
Pour the batter into your prepared loaf pan, spreading it evenly with your spatula. Place the pan in the center of your preheated oven.
-
Bake Until Golden and Done:
Bake for approximately 50-65 minutes. The exact baking time can vary depending on your oven. To check for doneness, insert a wooden skewer or toothpick into the center of the bread. If it comes out clean or with a few moist crumbs attached (but no wet batter), your bread is ready. If the top starts to brown too quickly, you can loosely tent it with aluminum foil for the last 15-20 minutes of baking.
-
Cool Before Slicing:
Once baked, remove the loaf pan from the oven and let the bread cool in the pan for about 10-15 minutes on a wire rack. This allows the bread to set and prevents it from falling apart when removed.
-
Remove from Pan and Finish Cooling:
After 10-15 minutes, carefully invert the bread onto the wire rack, or use the parchment paper overhangs to lift it out. Let it cool completely on the wire rack before slicing. Beginner Tip: Slicing warm quick bread can cause it to crumble, so patience is key for neat slices!
Tips & Tricks for Quick Bread Success
Mastering quick breads is all about a few simple principles. Keep these in mind for consistently delicious results!
- Don’t Overmix! Seriously: This is the golden rule for quick breads. Mix until just combined. Lumps are okay! Overmixing develops gluten, leading to a tough, rubbery texture.
- Measure Accurately: Especially with flour, use the “spoon and level” method. Spoon flour into your measuring cup until it overflows, then level it off with a straight edge (like the back of a knife). Don’t scoop directly from the bag, as this compacts the flour and you’ll end up with too much.
- Room Temperature Ingredients: For eggs and milk, bringing them to room temperature helps them incorporate more smoothly into the batter, creating a more uniform emulsion and a better texture in your final bread.
- Drain Your Pineapple Well: Excess moisture from the pineapple can make your bread soggy. Press it firmly to remove as much liquid as possible.
- Know Your Oven: Ovens can vary significantly. If you notice your bread bakes faster or slower than the recipe suggests, adjust your baking time accordingly in the future. An oven thermometer can be a great investment!
- Test for Doneness: Always use the toothpick test. If it comes out clean, your bread is done. If it has wet batter, give it more time.
- Patience with Cooling: Resist the urge to slice into your quick bread too soon. Cooling completely allows the internal structure to set, resulting in clean, perfect slices.
Essential Baking Tools You’ll Need
Having the right tools makes all the difference! Here are the basics for this recipe:
- Mixing Bowls (large and medium)
- Whisk
- 9×5 inch Loaf Pan
- Measuring Cups
- Measuring Spoons
- Rubber Spatula or Wooden Spoon
- Wire Cooling Rack
- Toothpicks or Wooden Skewers
Nutrition Information (Estimate per serving)
This information is an estimate based on approximately 12 servings per loaf and standard ingredient values. Actual values may vary.
| Nutrient | Amount |
|---|---|
| Calories | 280-320 kcal |
| Carbohydrates | 45-55g |
| Protein | 4-6g |
| Fat | 10-15g |
| Fiber | 1-2g |
| Sugar | 25-35g |
Frequently Asked Questions (FAQs)
Can I use fresh pineapple instead of canned?
Yes, you absolutely can! If using fresh pineapple, ensure you finely dice it and then press it very well with paper towels to remove as much excess moisture as possible. Fresh pineapple contains more liquid than canned and needs thorough draining to prevent a soggy bread.
How do I store Pineapple Quick Bread?
Once completely cooled, wrap the bread tightly in plastic wrap or aluminum foil, or store it in an airtight container at room temperature for up to 3-4 days. For longer storage, you can freeze it for up to 3 months. Wrap individual slices or the whole loaf tightly in plastic wrap, then again in foil, before freezing.
Why is my quick bread tough or dense?
The most common culprit for tough quick bread is overmixing the batter. Mixing too much develops the gluten in the flour, leading to a chewy, dense texture. Remember to mix until just combined, with a few lumps still visible!
Can I add other ingredients to this recipe?
Absolutely! This quick bread is quite versatile. You can add 1/2 cup of shredded coconut for an extra tropical flair, or a handful of white chocolate chips for a sweeter treat. Just be mindful not to overload the batter, as it can affect baking time and structure.
What if my quick bread is raw in the middle?
This usually means it needs more time in the oven. Ensure your oven temperature is accurate (an oven thermometer can help!), and continue baking until a toothpick inserted into the center comes out clean. If the top is browning too quickly, loosely tent it with aluminum foil.
Conclusion
And there you have it! Your very own delicious Pineapple Quick Bread Recipe, baked with love and confidence. We hope this beginner-friendly guide has demystified the art of quick bread baking and empowered you to create something wonderful.
Whether you’re enjoying a slice with your morning coffee, sharing it with friends, or simply savoring a sweet moment, this recipe is sure to become a cherished favorite. Don’t be afraid to experiment, and most importantly, have fun in the kitchen. Happy baking!
“`
1 thought on “Pineapple Quick Bread Recipe – Yummy & Simple”