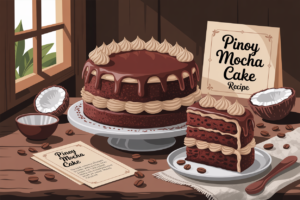
Are you ready to embark on a delicious baking adventure? If you’ve ever dreamt of creating a show-stopping dessert that’s both rich in flavor and surprisingly approachable, then you’ve come to the right place! This Pinoy Mocha Cake Recipe is a true delight, combining the comforting notes of coffee with the indulgent sweetness of chocolate, all wrapped up in a moist, tender cake and a luscious mocha buttercream.
Perfect for celebrations or simply elevating your everyday, this recipe is designed with baking tips for beginners in mind, proving that anyone can bake something extraordinary. Forget complicated techniques; we’re here to guide you through every step, making easy baking recipes not just a dream, but a delicious reality. Get ready to impress yourself and everyone you share this amazing cake with!
Gather Your Ingredients: What You’ll Need
For the Mocha Cake
| Ingredient | Quantity | Unit |
|---|---|---|
| All-purpose flour | 2 | cups |
| Granulated sugar | 1 ¾ | cups |
| Unsweetened cocoa powder | ¾ | cup |
| Baking soda | 1 ½ | teaspoons |
| Baking powder | 1 | teaspoon |
| Salt | 1 | teaspoon |
| Large eggs | 2 | |
| Milk | 1 | cup |
| Vegetable oil | ½ | cup |
| Vanilla extract | 2 | teaspoons |
| Hot strong brewed coffee (or instant coffee dissolved in hot water) | 1 | cup |
For the Mocha Buttercream Frosting
| Ingredient | Quantity | Unit |
|---|---|---|
| Unsalted butter (softened to room temperature) | 1 ½ | cups (3 sticks) |
| Powdered sugar (confectioners’ sugar) | 4-5 | cups |
| Unsweetened cocoa powder | ¼ | cup |
| Strong brewed coffee (cooled) or instant coffee powder | 3-4 | tablespoons |
| Vanilla extract | 1 | teaspoon |
| Pinch of salt |
Baking Bliss: Your Step-by-Step Guide to Pinoy Mocha Cake Perfection
Part 1: The Mocha Cake Layers
- Preheat and Prep: Start by preheating your oven to **350°F (175°C)**. Grease and flour two 8-inch round baking pans, or line them with parchment paper circles at the bottom. This prevents sticking and ensures your beautiful cakes come out easily!
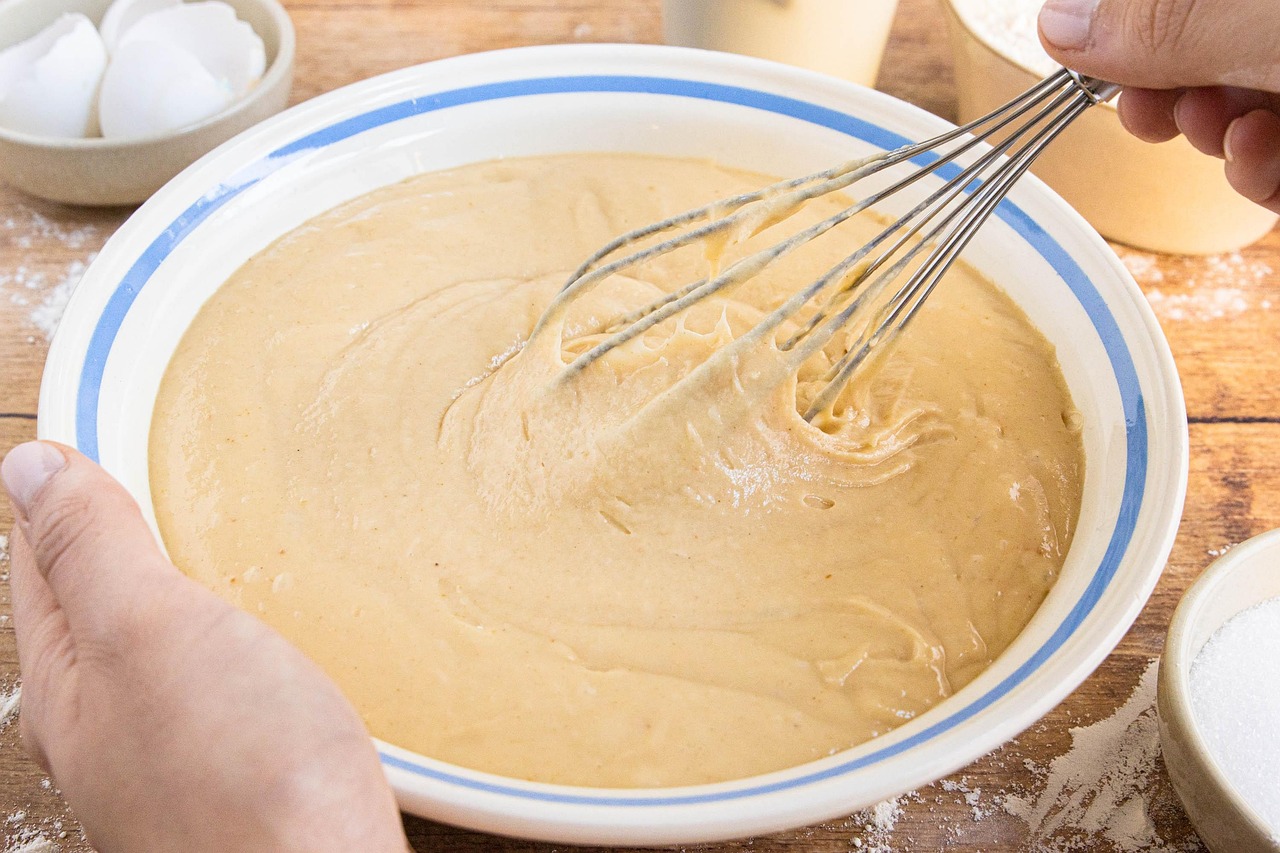
- Combine Dry Ingredients: In a large mixing bowl, whisk together the **flour, granulated sugar, cocoa powder, baking soda, baking powder, and salt**. Whisking thoroughly ensures all ingredients are evenly distributed, which is key for a consistent cake texture.
- Add Wet Ingredients (Except Coffee): Create a well in the center of your dry ingredients. Add the **eggs, milk, vegetable oil, and vanilla extract**. Mix on medium speed with an electric mixer (or by hand with a whisk) until just combined. Don’t overmix at this stage; we just want everything wet to come together.
- The Coffee Secret: Carefully pour in the **hot strong brewed coffee**. Mix on low speed until the batter is smooth. The batter will be quite thin, and that’s perfectly normal for this recipe! The hot coffee helps to “bloom” the cocoa powder, intensifying the chocolate flavor.
- Divide and Bake: Divide the batter evenly between your two prepared baking pans. Bake for **25-30 minutes**, or until a wooden skewer or toothpick inserted into the center of the cakes comes out clean.
- Cool Down: Once baked, remove the cakes from the oven and let them cool in their pans on a wire rack for about **10-15 minutes**. This allows them to firm up. Then, carefully invert them onto the wire rack to cool completely. **Crucial Beginner Tip:** Do NOT attempt to frost warm cakes! They will crumble and your frosting will melt. Patience is key here!
Part 2: The Mocha Buttercream Frosting
- Cream the Butter: In a large mixing bowl, using an electric mixer, beat the **softened unsalted butter** on medium speed for about 2-3 minutes until it’s light and fluffy. Room temperature butter is essential for a smooth, lump-free frosting. If it’s too cold, it won’t cream properly; if it’s too warm, your frosting might be too runny.
- Sift Dry Ingredients: In a separate bowl, **sift together the powdered sugar and cocoa powder**. Sifting removes lumps and ensures a silky-smooth frosting. This is a common mistake beginners make – skipping the sifting can lead to gritty frosting!
- Gradually Add Sugar Mixture: With the mixer on low speed, gradually add the sifted powdered sugar and cocoa powder to the butter, about a cup at a time. Mix until fully incorporated before adding more. This prevents a powdered sugar cloud from erupting in your kitchen!
- Add Flavorings: Once all the sugar is added and mixed, add the **cooled strong brewed coffee (or instant coffee dissolved in a tiny bit of water), vanilla extract, and a pinch of salt**. The salt enhances the flavors and balances the sweetness.
- Beat to Fluffiness: Increase the mixer speed to medium-high and beat the frosting for another 3-5 minutes, until it’s light, fluffy, and spreadable. If the frosting seems too thick, add a tiny bit more cooled coffee or milk (½ teaspoon at a time). If it’s too thin, add a tablespoon or two more sifted powdered sugar.
Part 3: Assembling and Decorating Your Cake
- Level the Cakes (Optional but Recommended): If your cake layers have domed tops, you can carefully use a long serrated knife to level them. This creates a more stable and professional-looking cake. You can save the scraps for a little chef’s snack!
- First Layer & Filling: Place one cooled cake layer on your serving plate or cake stand. Spread about 1 cup of mocha buttercream evenly over the top.
- Second Layer & Crumb Coat: Carefully place the second cake layer on top. Apply a thin layer of frosting all over the cake – sides and top. This is called a **crumb coat**, and it’s a beginner’s best friend! It traps any loose crumbs, preventing them from mixing into your final frosting layer.
- Chill Time: Transfer the cake to the refrigerator for **15-20 minutes** to allow the crumb coat to firm up. This step makes applying the final layer of frosting much easier and neater.
- Final Frosting: Once chilled, take the cake out of the fridge. Apply the remaining mocha buttercream frosting evenly around the sides and top of the cake. You can use an offset spatula or a bench scraper for smooth sides. Don’t worry about perfection; rustic swirls look great too!
- Decorate (Optional): For an extra touch, you can pipe decorative borders, sprinkle with chocolate shavings, cocoa powder, or even whole coffee beans. Let your creativity shine!
- Serve and Enjoy: Slice your beautiful Pinoy Mocha Cake and serve! Store any leftovers in an airtight container at room temperature for up to 2 days, or in the refrigerator for up to 5 days.
Pro Tips for Baking Success: Elevate Your Mocha Cake Game!
Baking is a science, but it’s also an art that gets easier with a few insider tricks! Here are some essential **baking tips for beginners** to ensure your Pinoy Mocha Cake turns out perfectly every time:
- Room Temperature is Your Friend: Ensure your butter, eggs, and milk are all at room temperature for the cake and frosting. This allows ingredients to emulsify properly, creating a smoother batter and fluffier frosting. Cold ingredients result in lumpy batters and frosting.
- Don’t Overmix: When combining wet and dry ingredients for the cake, mix *just until combined*. Overmixing develops the gluten in the flour, leading to a tough, dense cake.
- Sift Dry Ingredients: Sifting flour, cocoa powder, and powdered sugar removes lumps and aerates the ingredients, resulting in a lighter cake and smoother frosting. Don’t skip this step!
- Measure Accurately: Baking is precise. Use proper measuring cups and spoons. For flour, spoon it into the measuring cup and level it off with a straight edge rather than scooping directly, which can compact the flour and lead to too much being used.
- Cool Cakes Completely: This cannot be stressed enough! Frosting a warm cake is a recipe for disaster. The frosting will melt, and the cake will likely tear. Patience pays off.
- Crumb Coat is a Must: Especially for beginners, a thin crumb coat (and chilling) will make your final frosting layer look much cleaner and professional, trapping all those loose crumbs.
- Know Your Oven: Ovens can vary. If you find your cakes baking too fast or too slow, consider investing in an oven thermometer to ensure your oven is truly at the temperature you set.
- Quality Ingredients: While not strictly necessary for beginners, using good quality cocoa powder and vanilla extract can truly elevate the flavor of your cake.
Your Baking Arsenal: Essential Tools for This Recipe
Having the right tools makes all the difference in your baking journey. Here are some essentials you’ll need for this Pinoy Mocha Cake:
- Mixing Bowl (Large & Medium)
- Whisk
- Electric Mixer (Stand or Handheld)
- Two 8-inch Round Baking Pans
- Parchment Paper
- Measuring Cups and Spoons
- Rubber Spatula
- Wire Cooling Rack
- Sifter or Fine-Mesh Strainer
- Offset Spatula (for frosting)
- Serrated Knife (for leveling cakes, optional)
Nutrition At A Glance (Per Serving)
(Approximate values per slice, assuming 12 servings per cake)
| Nutrient | Value |
|---|---|
| Calories | 450-500 kcal |
| Carbohydrates | 60-70 g |
| Protein | 5-7 g |
| Fat | 20-25 g |
| Fiber | 2-3 g |
| Sugar | 40-50 g |
Frequently Asked Questions (FAQs)
Can I use instant coffee instead of brewed coffee?
Absolutely! For the cake, dissolve 2 tablespoons of instant coffee granules (or espresso powder) in 1 cup of hot water. For the frosting, you can dissolve 1-2 teaspoons of instant coffee or espresso powder in 2-3 tablespoons of hot water, then let it cool completely before adding.
Why is my cake dry?
A dry cake is usually a sign of overbaking. Keep an eye on the oven and remove the cakes as soon as a toothpick comes out clean. Another culprit can be measuring too much flour; always spoon flour into the measuring cup and level it off.
Can I make this cake ahead of time?
Yes! The cake layers can be baked a day or two in advance, cooled completely, wrapped tightly in plastic wrap, and stored at room temperature. The frosting can also be made a day ahead and stored in an airtight container in the refrigerator; let it come to room temperature and re-whip it until fluffy before frosting.
My buttercream is too runny/too thick. How can I fix it?
If your buttercream is too runny, add more sifted powdered sugar (1-2 tablespoons at a time) and beat until it reaches the desired consistency. If it’s too thick, add a tiny bit more cooled coffee or milk (½ teaspoon at a time) until it’s spreadable. Remember, room temperature butter is key!
What if I don’t have two 8-inch pans?
You can use two 9-inch pans, but the baking time might be slightly shorter (around 20-25 minutes), and the layers will be a bit thinner. Alternatively, you can bake the batter in two batches using one pan, ensuring you clean and re-grease/flour the pan between batches.
Your Delicious Journey Begins Now!
Congratulations, future master baker! You now have all the tools, tips, and steps to create a truly irresistible Pinoy Mocha Cake. Don’t be intimidated; baking is a skill that grows with practice and passion. Every swirl of frosting and every fragrant aroma from the oven is a step towards your next culinary triumph. This Pinoy Mocha Cake Recipe is more than just a dessert; it’s a testament to the joy of homemade goodness. We can’t wait to see your creations! Share your beautiful cakes with us, and happy baking!