Welcome, fellow baking enthusiasts and kitchen novices! Are you ready to dive into the wonderful world of home baking with a recipe that’s as delightful to make as it is to eat? Today, we’re sharing our ultimate Pistachio Nut Bread Recipe, a truly irresistible treat that combines the subtle sweetness and unique crunch of pistachios with a moist, tender crumb. If you’ve been searching for easy baking recipes that deliver impressive results without the fuss, you’ve hit the jackpot.
This recipe is specifically designed with baking tips for beginners in mind, breaking down each step into simple, actionable instructions. We’ll guide you through everything, from perfectly measuring your ingredients to knowing when your bread is just right. Forget complicated techniques; our goal is to empower you to create a bakery-quality loaf right in your own kitchen. Get ready to fill your home with the most amazing aroma and enjoy a slice of pure comfort!
Ingredients List
Gather your ingredients! Using good quality ingredients will always elevate your final product.
| Ingredient | Quantity | Unit |
|---|---|---|
| All-Purpose Flour | 1 ½ | cups |
| Granulated Sugar | ½ | cup |
| Baking Powder | 1 ½ | teaspoons |
| Salt | ½ | teaspoon |
| Large Eggs | 2 | |
| Milk (whole or 2%) | ½ | cup |
| Vegetable Oil (or melted unsalted butter) | ¼ | cup |
| Vanilla Extract | 1 | teaspoon |
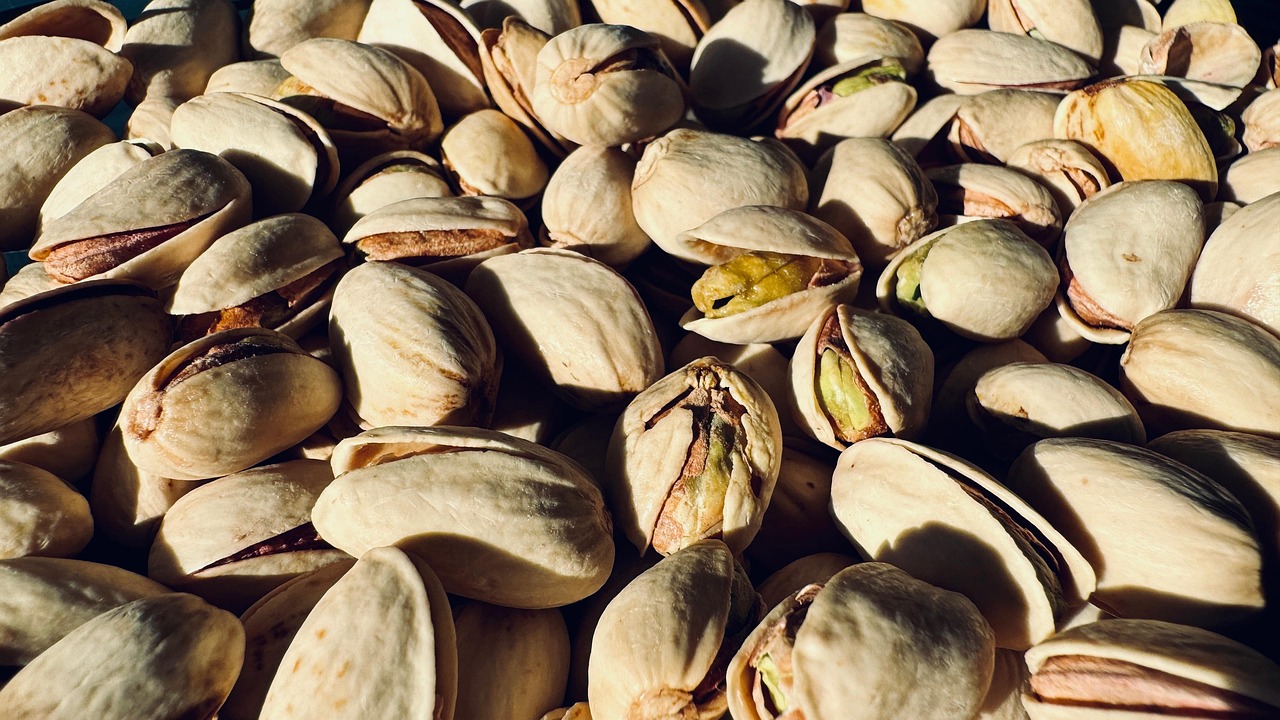
| Shelled Pistachios (chopped) | ¾ | cup |
| For the Optional Glaze: | ||
| Powdered Sugar | ½ | cup |
| Milk or Water | 1-2 | tablespoons |
| Almond Extract (optional, for extra flavor) | ¼ | teaspoon |
Step-by-Step Instructions: Baking Your Perfect Pistachio Nut Bread
Follow these detailed steps carefully, and you’ll be enjoying a delicious loaf in no time!
-
Preheat and Prepare Your Pan:
Start by preheating your oven to 350°F (175°C). This ensures your oven is at the correct temperature when your batter is ready, which is crucial for even baking. Next, take a 9×5-inch loaf pan. You’ll want to grease it thoroughly with butter or non-stick cooking spray, then lightly flour it. This creates a non-stick barrier, making it super easy to remove your beautiful bread once it’s baked. Don’t skip this step, especially if you’re new to baking!
-
Combine Dry Ingredients:
In a large mixing bowl, whisk together your all-purpose flour, granulated sugar, baking powder, and salt. Whisking isn’t just for fun; it evenly distributes the leavening agents (baking powder) and salt throughout the flour, preventing pockets of unmixed ingredients and ensuring your bread rises uniformly. For beginners, use a kitchen scale for flour if you have one, or spoon flour into your measuring cup and level it off with a straight edge rather than scooping directly, which can compact the flour and lead to a denser bread.
-
Combine Wet Ingredients:
In a separate, medium-sized bowl, lightly beat the two large eggs. Then, add the milk, vegetable oil (or melted butter), and vanilla extract. Whisk these together until they are well combined. Using room temperature eggs and milk can actually help your batter come together more smoothly and result in a more tender bread, as they emulsify better with the fats.
-
Gently Mix Wet into Dry:
Now, pour the wet ingredients mixture into the bowl with your dry ingredients. Using a spatula or a wooden spoon, mix until *just* combined. This is one of the most critical **baking tips for beginners**: do not overmix! Overmixing develops the gluten in the flour too much, leading to a tough, dense, and chewy bread instead of a soft, tender one. A few lumps are perfectly fine and actually preferred. Stop mixing as soon as you no longer see streaks of dry flour.
-
Fold in the Pistachios:
Once your batter is just mixed, gently fold in the chopped pistachios. Folding means using your spatula to scoop from the bottom of the bowl and bring it up over the top of the batter, turning the bowl as you go. This evenly distributes the nuts without overmixing the batter. If you like, you can reserve a tablespoon or two of chopped pistachios to sprinkle on top of the bread before baking for extra visual appeal.
-
Pour into Pan and Bake:
Pour your prepared batter into the greased and floured loaf pan, spreading it evenly with your spatula. Place the loaf pan in the preheated oven. Bake for approximately 50-60 minutes. Baking times can vary slightly depending on your oven, so keep an eye on it.
Beginner’s Tip for Doneness: To check if your bread is done, insert a wooden skewer or a toothpick into the center of the loaf. If it comes out clean (without wet batter attached), your bread is ready! If it comes out with wet batter, continue baking for another 5-10 minutes and test again. Avoid opening the oven door too frequently during the first 30-40 minutes of baking, as this can cause the bread to sink.
-
Cooling Process:
Once baked, remove the loaf pan from the oven and let the bread cool in the pan for about 10-15 minutes. This allows the bread to firm up slightly and makes it easier to remove without breaking. After this initial cooling, carefully invert the pan onto a wire rack and remove the bread. Let it cool completely on the wire rack before slicing. Slicing warm bread can sometimes make it crumble or seem gummy. Patience is a virtue here!
-
Optional Glaze (for extra sweetness and shine):
While the bread is cooling (or once it’s completely cool), you can prepare a simple glaze. In a small bowl, whisk together the powdered sugar, 1 tablespoon of milk (or water), and the optional almond extract. Add more milk/water a tiny bit at a time until you reach your desired drizzling consistency – it should be thick enough to cling to the spoon but thin enough to pour. Drizzle generously over the cooled bread. Let the glaze set for a few minutes before slicing and serving.
Tips & Tricks for a Masterful Loaf
Even though this is an **easy baking recipe**, these little nuggets of wisdom will elevate your baking game!
- Don’t Overmix! Seriously: We can’t stress this enough. Overmixing is the most common mistake in quick bread baking. Mix until *just* combined. A few lumps are fine.
- Measure Flour Correctly: For accurate results, spoon your flour into the measuring cup and level it off with the back of a knife. Scooping directly from the bag can compact the flour, leading to using too much and a dry, dense bread.
- Room Temperature Ingredients: Eggs and milk at room temperature combine more easily and evenly with other ingredients, resulting in a smoother batter and a more tender, consistent crumb.
- Toasting Pistachios (Optional but Recommended): For an even deeper, nuttier flavor, lightly toast your chopped pistachios in a dry skillet over medium-low heat for 5-7 minutes, stirring frequently, before adding them to the batter. Let them cool completely before use.
- Parchment Paper Liner: For extra insurance against sticking, line your loaf pan with parchment paper, leaving an overhang on the sides. This creates “handles” to easily lift the bread out once baked.
- Storage: Store your cooled Pistachio Nut Bread in an airtight container at room temperature for up to 3-4 days. If you added the glaze, it’s best consumed within 2-3 days for optimal freshness. You can also freeze slices for up to 3 months; just thaw at room temperature.
Essential Baking Tools
Having the right tools makes all the difference, especially when you’re starting out. Here are some basics you’ll want in your kitchen:
- Mixing Bowl
- Whisk
- Baking Pan (specifically a 9×5-inch loaf pan)
- Measuring Cups
- Spatula (rubber or silicone for mixing and folding)
- Measuring Spoons
- Wire Cooling Rack
Nutrition Info (Estimated per serving, 1/12th of loaf)
Please note: These are estimated values and can vary based on specific ingredients and portion sizes.
| Nutrient | Amount |
|---|---|
| Calories | ~280-320 kcal |
| Carbohydrates | ~35-45 g |
| Protein | ~5-7 g |
| Fat | ~12-18 g |
| Fiber | ~2-3 g |
| Sugar | ~18-25 g |
Frequently Asked Questions (FAQs) for Beginners
Q1: Can I use salted pistachios for this recipe?
A: While unsalted pistachios are generally preferred for baking to control the overall saltiness, you can use lightly salted pistachios. If you do, consider reducing the amount of added salt in the recipe by half a teaspoon or omitting it entirely, then taste your batter (before adding eggs, for safety) or a small baked piece to adjust. Too much salt can overpower the delicate pistachio flavor.
Q2: My bread sank in the middle. What went wrong?
A: This is a common issue for beginners! It usually happens for a few reasons: opening the oven door too early (which lets cold air in and can collapse the structure), underbaking (the center wasn’t fully set), or too much leavening agent (baking powder) which causes it to rise too quickly and then fall. Ensure your oven temperature is accurate and resist peeking during the first 3/4 of the baking time.
Q3: Can I substitute any ingredients?
A: For beginners, it’s best to stick to the recipe as written. However, some common substitutions include: you can use melted butter instead of vegetable oil (it adds a richer flavor), or a non-dairy milk alternative (like almond or oat milk) for regular milk. Avoid substituting flour types without specific instructions, as it can drastically change the texture.
Q4: How do I know when my bread is fully baked?
A: The best way is the toothpick test! Insert a wooden skewer or toothpick into the very center of the loaf. If it comes out clean with no wet batter or sticky crumbs, it’s done. If it comes out with wet batter, put it back in the oven for another 5-10 minutes and test again. The top should also be golden brown and the edges pulling away slightly from the pan.
Q5: Can I add other nuts or dried fruit?
A: Absolutely! This recipe is quite versatile. You can swap out some of the pistachios for other nuts like chopped walnuts or pecans, or add a handful of dried cranberries or chopped apricots for a different twist. Just make sure the total amount of add-ins remains around ¾ to 1 cup to avoid weighing down the batter too much.
Q6: Why is my bread dry and crumbly?
A: A dry, crumbly bread often points to one of two things: overbaking or too much flour. Make sure you’re using the toothpick test to avoid overbaking. Also, accurately measuring your flour (spooning it into the measuring cup and leveling) is crucial to prevent adding excess flour, which absorbs too much moisture.
Time to Enjoy Your Homemade Masterpiece!
There you have it! A comprehensive, beginner-friendly guide to baking the most delicious Pistachio Nut Bread Recipe. We hope this detailed post, packed with easy baking recipes tips, has given you the confidence and excitement to get into the kitchen. Baking is a wonderfully rewarding experience, and there’s nothing quite like the smell and taste of a fresh loaf made with your own hands.
So go ahead, preheat that oven, gather your ingredients, and embark on this delicious journey. Don’t be afraid to experiment and make it your own once you’ve mastered the basics. We can’t wait to hear how your Pistachio Nut Bread turns out. Happy baking, and enjoy every single delightful slice!