
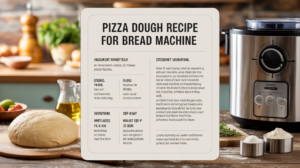
Tired of store-bought pizza crusts that lack that fresh, homemade touch? Imagine a warm, pliable dough, perfectly risen and ready to transform into your dream pizza, all with minimal effort. Sounds like a dream, right? Well, it’s about to become your reality! This Pizza Dough Recipe For Bread Machine is an absolute game-changer, especially for anyone looking for easy baking recipes to conquer their kitchen fears. We’re talking hands-off kneading, perfect proofing, and a foundation for the most delicious pizza you’ve ever made at home. Forget complex techniques; with our detailed baking tips for beginners , you’ll be a dough master in no time. Get ready to impress your family and friends with a pizza night experience that’s both simple to prepare and incredibly satisfying!
Ingredients You’ll Need
For the Dough:
| Ingredient | Quantity | Unit |
|---|---|---|
| Warm Water (105-115°F / 40-46°C) | 1 | cup |
| Olive Oil | 2 | tablespoons |
| Granulated Sugar | 1 | tablespoon |
| Salt | 1 | teaspoon |
| All-Purpose Flour (or Bread Flour for chewier crust) | 3 | cups |
| Active Dry Yeast (or Instant Yeast) | 2 ¼ | teaspoons |
Step-by-Step: Making Your Bread Machine Pizza Dough
Follow these detailed instructions to ensure a perfect pizza dough every single time. Don’t worry, we’ll walk you through it!
Preparation is Key!
- Gather Your Tools & Ingredients: Before you begin, lay out all your ingredients and measuring tools. This ensures you don’t miss anything and makes the process smoother. Make sure your water is truly warm (like bathwater, not hot!) to activate the yeast without killing it.
- Measure Precisely: Baking is a science, especially with yeast. Use proper measuring cups and spoons. For flour, spoon it into your measuring cup and then level it off with a straight edge (like the back of a knife) – avoid scooping directly from the bag, as this can compact the flour and result in too much.
The Bread Machine Cycle
- Add Liquids First: Carefully pour the warm water and olive oil into your bread machine pan. This is the standard order for most bread machines, as it prevents dry ingredients from sticking to the bottom and allows for better mixing.
- Add Dry Ingredients (Except Yeast): Next, add the granulated sugar and salt. Then, carefully spoon the flour over the liquid ingredients, forming a mound. Try to keep the flour from touching the water too much at this stage.
- Add Yeast Last: Make a small indentation or well in the center of the flour mound (don’t go all the way down to the liquid). Pour the active dry yeast into this well. It’s crucial that the yeast doesn’t directly touch the salt or sugar at this point, as they can inhibit its activation. If using instant yeast, this step is less critical, but still good practice.
- Select the “Dough” Cycle: Place the bread machine pan back into the machine. Close the lid and select the “Dough” or “Pizza Dough” cycle on your bread machine. This cycle typically includes a kneading phase, a rise phase, and sometimes a punch-down, but it won’t bake the dough. The total time usually ranges from 1 hour 20 minutes to 1 hour 50 minutes, depending on your machine.
- Monitor the Kneading (Optional but Recommended): About 5-10 minutes into the kneading cycle, open the lid briefly to check the dough’s consistency.
- If the dough looks too dry and crumbly: Add 1 teaspoon of warm water at a time, allowing it to incorporate before adding more. You want the dough to form a ball.
- If the dough looks too wet and sticky: Add 1 teaspoon of flour at a time, allowing it to incorporate. The dough should be tacky but not sticking excessively to the sides of the pan. It should clean the sides of the pan as it kneads.
Common Mistake: Adding too much flour or water too quickly. Always add small amounts and give the machine time to incorporate it.
- Let the Machine Do Its Work: Close the lid and let the bread machine complete its full dough cycle. Resist the urge to open the lid frequently, as this can affect the temperature and humidity inside, which are crucial for proper yeast activation and rising.
After the Cycle: Resting & Shaping
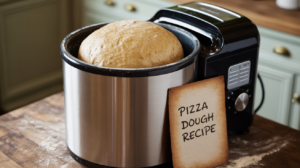
- Remove the Dough: Once the dough cycle is complete, carefully remove the bread machine pan. The dough should be light, airy, and significantly increased in volume. Gently remove the dough from the pan onto a lightly floured surface. Be mindful of the kneading paddle stuck in the bottom of the dough – remove it carefully to avoid tearing the dough too much.
- Rest and Shape: At this point, your pizza dough is ready to be used! You can gently punch it down (this means pressing out the air) and then divide it into one large pizza crust or two smaller ones. Shape it as desired for your pizza, calzones, or even breadsticks. If you’re not using it immediately, see our “Tips & Tricks” section for storage options.
Pro Tips for Perfect Pizza Dough Every Time
Achieving perfect pizza dough isn’t just about following steps; a few expert tips can elevate your results from good to glorious:

- Water Temperature is Crucial: Yeast is a living organism. Too cold water and it won’t activate; too hot and it will die. Aim for 105-115°F (40-46°C). A kitchen thermometer is your best friend here.
- Fresh Yeast Makes a Difference: Always check the expiration date on your yeast. Old yeast is often the culprit for dough that doesn’t rise. Store yeast in an airtight container in the refrigerator or freezer for maximum longevity.
- Flour Power: While all-purpose flour works, bread flour has a higher protein content, which develops more gluten. This results in a chewier, more authentic pizza crust. Experiment to find your preference!
- Don’t Over-Flour Your Surface: When shaping, use just enough flour to prevent sticking. Too much extra flour can make your dough tough and dry.
- Let It Warm Up: If you’re using refrigerated dough, let it sit at room temperature for 30-60 minutes before shaping. This relaxes the gluten, making it much easier to work with.
- Preheat Your Oven (and Pizza Stone!): For a truly crispy crust, preheat your oven to its highest setting (usually 450-500°F or 230-260°C) for at least 30 minutes, preferably with a pizza stone or steel inside.
- Storage Savvy: Leftover dough can be stored in an oiled, airtight container in the refrigerator for up to 3 days, or frozen for up to 3 months. Thaw frozen dough overnight in the fridge, then bring to room temp before using.
Your Baking Arsenal: Essential Tools
While your bread machine does most of the heavy lifting, these tools will make your pizza-making experience even smoother:
- Mixing Bowl (for light prep or if you ever try hand-kneading)
- Whisk (for combining dry ingredients if not using a machine)
- Baking Pan (or a pizza stone/steel for baking your pizza)
- Measuring Cups (and spoons, essential for accuracy)
- Spatula (for scraping down bowls or gently handling dough)
- Kitchen Scale (for precise flour measurement, though cups are fine for beginners)
- Kitchen Thermometer (for accurate water temperature)
Nutrition Information (Per Serving, Estimated)
(Based on 8 servings per recipe, plain dough before toppings)
| Nutrient | Amount |
|---|---|
| Calories | 210 kcal |
| Carbohydrates | 38 g |
| Protein | 7 g |
| Fat | 3 g |
| Fiber | 1 g |
| Sugar | 2 g |
Frequently Asked Questions (FAQs)
Can I use instant yeast instead of active dry yeast?
Absolutely! Instant yeast can often be used interchangeably with active dry yeast. You typically don’t need to proof instant yeast in warm water first; you can just add it directly with the other dry ingredients. For this recipe, the bread machine’s dough cycle provides ample time for either type to activate effectively.
My dough didn’t rise. What went wrong?
The most common reasons for dough not rising are expired yeast, water that was too hot (killing the yeast) or too cold (not activating it), or an incorrect flour-to-liquid ratio. Always check your yeast’s expiration date, ensure your water temperature is correct (105-115°F), and measure your ingredients accurately. Sometimes, simply letting the dough rest in a warmer spot can help.
How long can I store this pizza dough?
Once the dough cycle is complete, you can use the dough immediately. If you need to store it, place the dough in an oiled, airtight container or a Ziploc bag (squeezing out excess air) and refrigerate it for up to 3 days. For longer storage, you can freeze it for up to 3 months. Thaw frozen dough overnight in the refrigerator before bringing it to room temperature for shaping.
Can I make this dough by hand or with a stand mixer?
Yes, you can! While this recipe is optimized for a bread machine, the ingredients are standard for any pizza dough. If using a stand mixer, combine all ingredients and knead with the dough hook for 8-10 minutes until smooth and elastic. If kneading by hand, it will take about 10-15 minutes of vigorous kneading. Afterward, place the dough in an oiled bowl, cover, and let it rise in a warm place for 1-1.5 hours, or until doubled in size.
Can I use whole wheat flour?
You can certainly experiment with whole wheat flour! However, whole wheat flour absorbs more liquid and has less gluten-forming protein than all-purpose or bread flour. If substituting, start by replacing only 25-50% of the all-purpose flour with whole wheat, and be prepared to add a little more water if the dough seems too dry during kneading.
Ready for Your Best Pizza Night Yet?
And there you have it! A truly effortless path to homemade pizza dough, all thanks to your trusty bread machine. No more sticky hands from endless kneading, no more waiting anxiously for the dough to rise – just perfect, pliable dough ready for your culinary creations.
This recipe is designed to take the intimidation out of baking, proving that delicious, homemade food can be both achievable and incredibly rewarding. So go ahead, gather your ingredients, fire up that bread machine, and prepare to elevate your pizza nights to a whole new level. Don’t forget to share your pizza masterpieces with us! Happy baking!
“`
1 thought on “Pizza Dough Recipe For Bread Machine – For Baking Lovers”