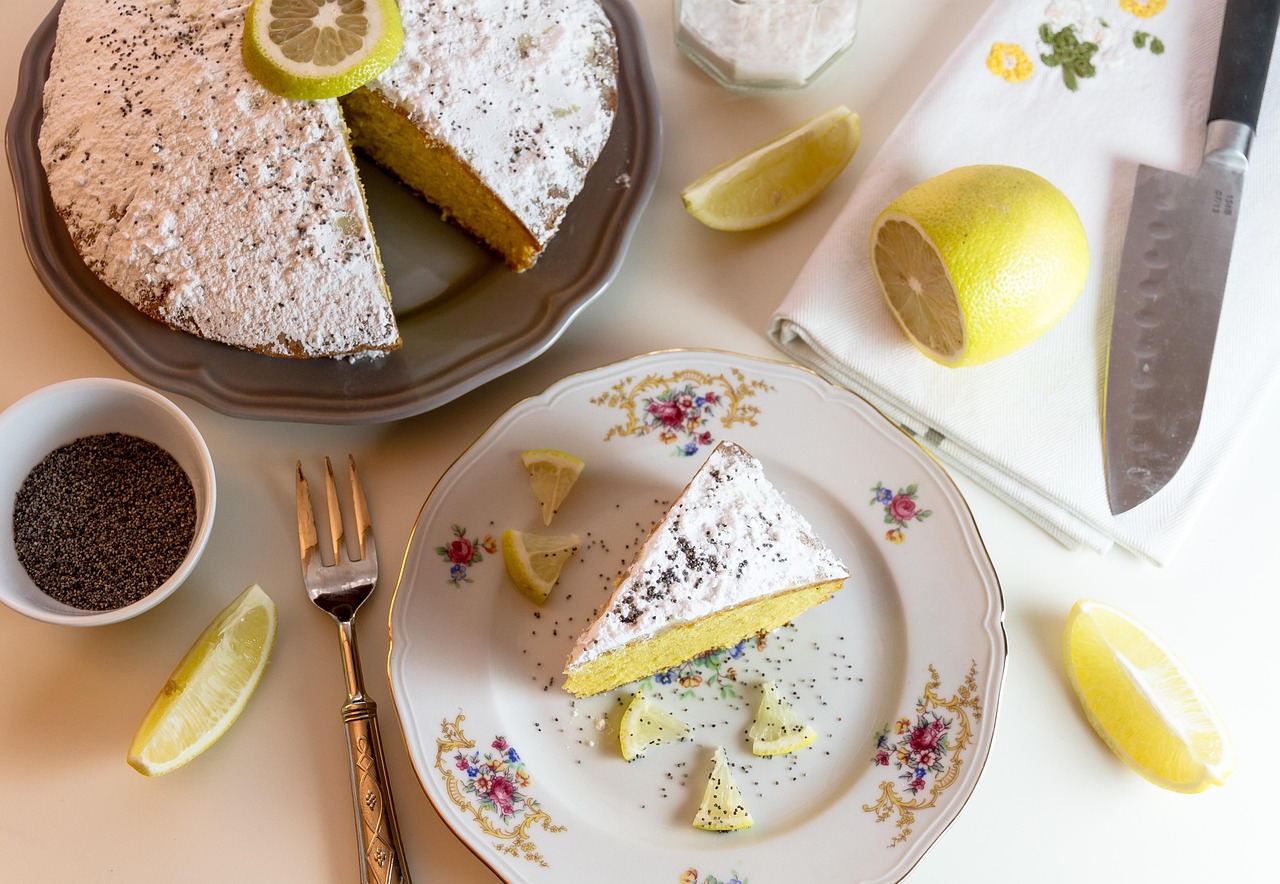
Are you ready to bring a slice of Chicago’s beloved Portillo’s straight into your kitchen? There’s something truly special about their iconic lemon cake – that perfect balance of tangy lemon and sweet, moist crumb, all wrapped in a delightful glaze. It’s a dessert that evokes nostalgia and pure joy with every bite. If you’ve ever dreamt of recreating that magic at home, you’re in the right place! This comprehensive guide to our Portillo’ S Lemon Cake Recipe is designed specifically for you, the home baker. We’ve broken down every step to make it incredibly easy, even if you’re just starting your baking journey. Get ready to impress yourself and your loved ones with an absolutely irresistible dessert, packed with helpful baking tips for beginners and clear instructions that will make this one of your favorite easy baking recipes!
Forget complex techniques or intimidating ingredient lists. Our goal is to make baking fun, accessible, and delicious. We’ll walk you through everything from perfectly measuring your ingredients to achieving that signature moist texture and luscious lemon glaze. So grab your apron, preheat your oven, and let’s embark on this delightful baking adventure together. You’re about to discover how simple it is to create a show-stopping lemon cake that tastes like it came straight from your favorite restaurant!
Yields: 1 (9×13 inch) cake | Prep time: 25 minutes | Bake time: 30-35 minutes | Cooling time: 1 hour
Ingredients You’ll Need
Gathering all your ingredients before you start is a crucial step for any successful bake. This ensures a smooth process and prevents any last-minute scrambling! For the best results, try to use room temperature ingredients for the cake batter.
For the Lemon Cake:
| Quantity | Unit | Ingredient |
|---|---|---|
| 2 ½ | cups | All-purpose flour, sifted |
| 1 ½ | teaspoons | Baking powder |
| ½ | teaspoon | Salt |
| 1 | cup | Unsalted butter, softened (2 sticks) |
| 2 | cups | Granulated sugar |
| 4 | large | Eggs, room temperature |
| 1 | cup | Whole milk, room temperature |
| 2 | tablespoons | Fresh lemon zest (from 2-3 lemons) |
| ¼ | cup | Fresh lemon juice |
| 1 | teaspoon | Vanilla extract |
For the Lemon Glaze:
| Quantity | Unit | Ingredient |
|---|---|---|
| 2 | cups | Powdered sugar (confectioners’ sugar) |
| ¼ | cup | Fresh lemon juice |
| 1-2 | tablespoons | Milk or water (for thinning, if needed) |
Step-by-Step Baking Instructions
Follow these detailed steps carefully, and you’ll be on your way to a perfectly baked Portillo’s-style lemon cake!
Step 1: Prepare Your Baking Pan and Oven
- Preheat Oven: Start by preheating your oven to 350°F (175°C). Consistency in temperature is key for even baking.
- Prepare Pan: Grease a 9×13 inch baking pan generously with butter or baking spray. For extra assurance against sticking, you can also lightly flour the greased pan, tapping out any excess. This step is crucial for easy removal of your beautiful cake!
Step 2: Combine Dry Ingredients
- Sift Dry Ingredients: In a medium bowl, whisk together the sifted all-purpose flour, baking powder, and salt. Sifting the flour helps to aerate it and prevent lumps, resulting in a lighter, more tender cake. Set aside.
- Beginner Tip: If you don’t have a sifter, you can use a fine-mesh sieve or simply whisk the ingredients very thoroughly for about 30 seconds to combine and aerate.
Step 3: Cream Butter and Sugar
- Cream Butter and Sugar: In a large mixing bowl (or the bowl of a stand mixer fitted with the paddle attachment), beat the softened unsalted butter and granulated sugar together on medium-high speed. Beat for 3-5 minutes, or until the mixture is light, fluffy, and pale yellow. This process incorporates air, which is vital for a tender cake texture.
- Beginner Tip: Ensure your butter is truly softened (not melted!) – it should yield slightly when pressed but still hold its shape. Cold butter won’t cream properly, and melted butter will result in a dense cake.
Step 4: Add Eggs and Flavorings
- Add Eggs: Add the eggs one at a time, beating well after each addition. Make sure each egg is fully incorporated before adding the next. Scrape down the sides of the bowl as needed to ensure everything is evenly mixed.
- Incorporate Lemon & Vanilla: Stir in the fresh lemon zest, fresh lemon juice, and vanilla extract. Mix until just combined. The lemon zest adds a wonderful aromatic burst of lemon flavor, so don’t skip it!
Step 5: Alternate Dry and Wet Ingredients
- Combine Wet and Dry: With the mixer on low speed, alternately add the dry ingredient mixture and the whole milk to the wet ingredients, beginning and ending with the dry ingredients.
- Add about one-third of the dry mixture, mix until just combined.
- Then add half of the milk, mix until just combined.
- Repeat with another third of the dry mixture, then the remaining milk.
- Finish with the last third of the dry mixture.
- Do Not Overmix: Mix only until the flour streaks have just disappeared. Overmixing develops the gluten in the flour, which can lead to a tough, dry cake. A few small lumps are better than an overmixed batter.
- Common Mistake: Overmixing is one of the most common pitfalls for beginners. Once you see no more dry flour, STOP MIXING!
Step 6: Bake the Cake
- Pour Batter: Pour the cake batter evenly into your prepared 9×13 inch baking pan. Gently spread it to the corners with a spatula.
- Bake: Bake for 30-35 minutes, or until a wooden skewer or toothpick inserted into the center of the cake comes out clean or with a few moist crumbs attached (no wet batter).
- Beginner Tip: Ovens can vary! Start checking your cake around the 28-minute mark. If the top is browning too quickly, you can loosely tent it with aluminum foil.
Step 7: Cool the Cake
- Cool in Pan: Once baked, remove the cake from the oven and let it cool in the pan on a wire rack for about 15-20 minutes. This allows the cake to set and prevents it from breaking when removed.
- Invert and Finish Cooling: After 15-20 minutes, carefully invert the cake onto the wire rack to cool completely. Cooling completely is important before glazing, otherwise, the glaze will melt right off. This usually takes at least 1 hour.
Step 8: Prepare the Lemon Glaze
- Mix Glaze Ingredients: While the cake cools, prepare the glaze. In a medium bowl, whisk together the powdered sugar and fresh lemon juice until smooth.
- Adjust Consistency: If the glaze is too thick, add milk or water one teaspoon at a time until you reach a pourable but still thick consistency. You want it to coat the back of a spoon and drip slowly.
Step 9: Glaze and Serve
- Glaze the Cooled Cake: Once the cake is completely cool, pour the lemon glaze evenly over the top. You can use an offset spatula or the back of a spoon to gently spread it to the edges, allowing some to drip down the sides for a rustic look.
- Set Glaze: Allow the glaze to set for about 15-20 minutes before slicing and serving. This gives it a nice slight crust.
- Enjoy! Slice into generous squares and serve your amazing homemade Portillo’s Lemon Cake!
Tips & Tricks for Lemon Cake Perfection
Baking is a science, but with a few insider tips, you can turn every recipe into a masterpiece. Here’s how to ensure your Portillo’s Lemon Cake is always a success:
- Room Temperature Ingredients are Key: This is not just a suggestion! Room temperature butter and eggs emulsify better, creating a smoother batter that traps more air, leading to a lighter, fluffier cake. Take them out of the fridge at least 30-60 minutes before you start.
- Measure Flour Correctly: Don’t scoop flour directly from the bag with your measuring cup. This compacts it, leading to too much flour and a dry cake. Instead, spoon the flour into your measuring cup and then level it off with a straight edge (like the back of a knife).
- Don’t Peek Too Early: Resist the urge to open the oven door during the first 20-25 minutes of baking. A sudden drop in temperature can cause your cake to sink in the middle.
- Zest Like a Pro: When zesting lemons, only remove the yellow part of the peel. The white pith underneath is bitter and can impart an unpleasant taste to your cake. A microplane zester works wonders for this!
- Storage: Store the cooled and glazed cake at room temperature, loosely covered, for up to 3 days. For longer storage, you can refrigerate it for up to a week. Bring to room temperature before serving for the best flavor and texture.
- Make Ahead: This cake is fantastic for making ahead! You can bake the cake a day in advance, cool it completely, and then glaze it just before serving.
Essential Baking Tools
Having the right tools makes baking a breeze! Here are some essentials that will help you create this delicious lemon cake:
- Mixing Bowl
- Whisk
- 9×13 Inch Baking Pan
- Measuring Cups & Spoons
- Rubber Spatula
- Electric Mixer (Stand or Handheld)
- Microplane Zester
- Wire Cooling Rack
Nutrition Information (Estimated per serving)
This information is an estimate based on standard ingredient values and a cake yielding 12 servings. Actual values may vary depending on specific brands and preparation methods.
| Nutrient | Amount |
|---|---|
| Calories | 380 kcal |
| Carbohydrates | 65 g |
| Protein | 4 g |
| Fat | 14 g |
| Fiber | 1 g |
| Sugar | 48 g |
Frequently Asked Questions (FAQs)
New to baking? No problem! Here are some common questions beginners often ask about making this lemon cake:
- Can I use bottled lemon juice instead of fresh?While fresh lemon juice provides the best, brightest flavor for both the cake and glaze, you can use bottled lemon juice in a pinch. However, be aware that the flavor might be slightly less vibrant and more concentrated. If using bottled, start with a little less and taste, adjusting as needed.
- How do I know when the cake is truly done?The best way is to insert a wooden skewer or toothpick into the very center of the cake. If it comes out clean (no wet batter), your cake is done! If it comes out with wet batter, continue baking for another 2-5 minutes and re-test. A few moist crumbs are okay.
- My cake sank in the middle, what happened?Several factors can cause a cake to sink. The most common reasons are opening the oven door too early (causing a temperature shock), underbaking, overmixing the batter, or an inaccurate oven temperature. Make sure your oven thermometer is calibrated and try not to open the oven door too frequently.
- Can I make this into cupcakes?Absolutely! This recipe can easily be adapted for cupcakes. Line a muffin tin with paper liners and fill each about two-thirds full. The baking time will be significantly shorter, typically 18-25 minutes, so start checking for doneness around the 18-minute mark.
- What if I don’t have whole milk? Can I use another type?Whole milk provides the richest flavor and most tender crumb. You can substitute with 2% milk, but avoid skim milk as it lacks the fat content needed for optimal texture. For an extra rich cake, you could even use buttermilk (replace regular milk with buttermilk, and increase baking powder by ½ teaspoon if using regular baking powder, or if using self-rising flour, adjust accordingly).
- How long does the cake stay fresh?When stored properly at room temperature (loosely covered) or in an airtight container, this lemon cake will stay fresh and delicious for about 3 days. If refrigerated, it can last up to a week, but the texture is best at room temperature.
Your Homemade Portillo’s Lemon Cake Awaits!
There you have it! Your complete guide to baking a truly spectacular Portillo’S Lemon Cake Recipe right in your own kitchen. We hope these detailed instructions and helpful beginner tips have empowered you to tackle this delightful dessert with confidence. Imagine the smiles when you present this beautiful, tangy, and incredibly moist cake it’s a taste of pure happiness!
Baking is a journey, and every cake you make adds to your skill and confidence. Don’t be afraid to experiment, and most importantly, have fun with it! We’re so excited for you to try this recipe and experience the joy of homemade baking. Share your creations with us, and let us know how your lemon cake turned out in the comments below. Happy baking!