Are you ready to bake a truly classic dessert that’s rich, buttery, and incredibly satisfying? You’ve come to the right place! This Pound Cake Recipe Using Self Rising Flour is designed specifically for home bakers, making it one of the most easy baking recipes you’ll ever try. Forget complicated steps or obscure ingredients; we’re breaking down everything you need to know to achieve a perfect, golden-brown pound cake every single time. Using self-rising flour simplifies the process significantly, as the leavening agents are already perfectly mixed in. This means less measuring and less room for error, making it ideal for anyone looking for solid baking tips for beginners.
Pound cake, with its dense yet tender crumb and wonderful flavor, is a timeless treat that pairs perfectly with a cup of coffee, fresh berries, or simply on its own. It’s the kind of cake that evokes warmth and nostalgia. If you’ve ever felt intimidated by baking, this recipe is your gateway to becoming a confident baker. We’ll walk through each step with detailed explanations, ensuring your journey from ingredients to delicious dessert is smooth and enjoyable. Get ready to impress yourself and everyone you share this delightful cake with!
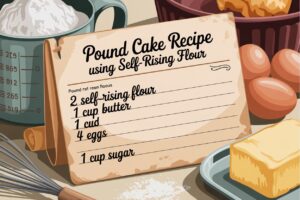
Ingredients You’ll Need
Gathering your ingredients before you start is a crucial step for smooth baking. Ensure your butter, eggs, and milk are at room temperature for the best results!
| Ingredient | Quantity | Unit |
|---|---|---|
| Unsalted Butter, softened | 1 | cup (2 sticks) |
| Granulated Sugar | 2 | cups |
| Large Eggs, room temperature | 4 | |
| Self-Rising Flour | 2 ½ | cups |
| Whole Milk or Buttermilk, room temperature | ½ | cup |
| Vanilla Extract | 1 | teaspoon |
| Pinch of Salt (optional, but enhances flavor) | ¼ | teaspoon |
Step-by-Step Instructions for a Perfect Pound Cake
Follow these detailed steps carefully for a moist, flavorful, and beautifully risen pound cake. Remember, baking is a science, so precision helps!
Step 1: Prepare Your Pan and Preheat Oven
First things first, let’s get ready! Preheat your oven to 325°F (160°C). This lower temperature is ideal for pound cakes, allowing them to bake through evenly without drying out or burning the edges. Next, prepare your baking pan. You can use a 9×5 inch loaf pan, a 10-inch Bundt pan, or a tube pan. For a loaf pan, grease it generously with butter or baking spray, then dust lightly with flour, tapping out any excess. For a Bundt or tube pan, be extra thorough: use a baking spray with flour (like Baker’s Joy) or grease every crevice with softened butter, then dust with flour, ensuring full coverage. This step is vital to prevent your cake from sticking!
Step 2: Cream Butter and Sugar
In a large mixing bowl, combine the softened unsalted butter and granulated sugar. Using an electric mixer (stand mixer or hand mixer), beat them together on medium-high speed for 5-7 minutes. This process, called “creaming,” is crucial. The goal is to incorporate air into the butter and sugar, making it light, fluffy, and pale yellow. This trapped air will expand during baking, giving your pound cake its signature tender crumb and helping it rise. Don’t rush this step – it’s the foundation of a great cake!
Beginner Tip: Softened butter should be pliable but not melted. If it’s too cold, it won’t cream properly. If it’s too warm, your cake might be greasy. Room temperature butter is key!
Step 3: Add Eggs One at a Time
Once your butter and sugar mixture is light and fluffy, begin adding the large eggs, one at a time. Beat well after each addition, ensuring the egg is fully incorporated before adding the next. This allows the mixture to emulsify properly, preventing it from curdling and creating a smooth, stable batter. Adding eggs slowly helps to maintain the airy structure you built in the creaming step. Scrape down the sides of the bowl with a spatula occasionally to ensure everything is evenly mixed.
Common Mistake: Adding all eggs at once can make the batter separate or look curdled. Patience here pays off!
Step 4: Incorporate Dry and Wet Ingredients Alternately
Now it’s time for the **self-rising flour** and **milk**. With the mixer on low speed, add about one-third of the self-rising flour to the batter, mixing just until combined. Then, add half of the milk, mixing until just incorporated. Repeat this process: another third of the flour, then the remaining milk, and finally the last third of the flour. Mix only until the flour streaks disappear. Overmixing at this stage will develop the gluten in the flour too much, resulting in a tough, dense, and dry cake, which is the opposite of what we want for a pound cake!
Beginner Tip: Self-rising flour already contains baking powder and salt. Do NOT add extra leavening agents unless specified, or your cake might rise too much and then collapse.
Step 5: Add Vanilla and Final Mix
Stir in the **vanilla extract** (and the optional pinch of salt if using) until just combined. Give the bowl one last scrape with your spatula to ensure no dry pockets of flour remain at the bottom. The batter should be thick, smooth, and uniform.
Step 6: Transfer to Pan and Bake
Pour the batter evenly into your prepared baking pan. If using a loaf pan, you can create a slight mound in the center; this helps the cake bake with a nice, even dome. Smooth the top with your spatula. Place the pan in the preheated oven. Bake for 60-75 minutes for a loaf pan, or 70-90 minutes for a Bundt or tube pan. Baking times can vary greatly depending on your oven, so start checking at the lower end of the time range.
How to Check for Doneness: The cake is done when a wooden skewer or toothpick inserted into the thickest part comes out clean or with a few moist crumbs attached, but no wet batter. The top should be golden brown and spring back when lightly touched. If the top is browning too quickly, you can loosely tent it with aluminum foil.
Step 7: Cool and Serve
Once baked, remove the cake from the oven and let it cool in the pan on a wire rack for 15-20 minutes. This allows the cake to set and firm up, making it less likely to break when removed. After this initial cooling, carefully invert the cake onto the wire rack to cool completely. Cooling completely before slicing is important; slicing a warm pound cake can make it crumble or seem gummy. Once cooled, slice and enjoy your perfectly baked pound cake!
Common Mistake: Removing the cake from the pan too soon can cause it to break apart. Give it time to cool and stabilize.
Tips & Tricks for Pound Cake Perfection
Achieving a perfect pound cake is easier than you think with these actionable tips:
- Room Temperature Ingredients are Non-Negotiable: This is arguably the most important tip! Softened butter, room temperature eggs, and milk emulsify better, creating a smooth, cohesive batter that traps air efficiently, leading to a lighter, fluffier cake.
- Measure Accurately: Especially with flour. Use the “spoon and level” method: spoon flour into your measuring cup until it overflows, then level it off with a straight edge (like the back of a knife) without packing it down. Too much flour will result in a dry cake.
- Don’t Overmix: After adding the flour, mix only until just combined. Overmixing develops gluten, making your cake tough and dense. A few small lumps are okay!
- Prepare Your Pan Thoroughly: Nothing is more frustrating than a cake sticking to the pan. Take your time to grease and flour every nook and cranny, especially with intricate Bundt pans.
- Know Your Oven: Oven temperatures can vary. If your oven tends to run hot or cold, adjust the temperature accordingly. An oven thermometer can be a great investment.
- Don’t Open the Oven Door Too Soon: Resist the urge to peek during the first 45-50 minutes of baking. Opening the door can cause the cake to deflate.
- Cool Completely: While tempting to slice into a warm cake, allow your pound cake to cool completely on a wire rack. This allows the cake’s structure to set fully, preventing crumbling and ensuring a perfect texture.
- Experiment with Flavors: While vanilla is classic, feel free to add lemon zest, almond extract, or even a touch of nutmeg for a different twist!
Essential Baking Tools
Having the right tools makes baking a breeze! Here are some essentials:
- Mixing Bowl
- Whisk (for dry ingredients or light mixing)
- Baking Pan (loaf, Bundt, or tube pan)
- Measuring Cups & Measuring Spoons
- Spatula (rubber or silicone for scraping bowls)
- Electric Mixer (handheld or stand mixer)
- Wire Rack (for cooling)
Nutrition Information (Estimated per serving)
Please note: These values are approximate and can vary based on exact ingredients and serving size (calculated for 1/12th of the cake).
| Nutrient | Amount |
|---|---|
| Calories | 380 kcal |
| Carbohydrates | 48 g |
| Protein | 5 g |
| Fat | 20 g |
| Fiber | 1 g |
| Sugar | 32 g |
Frequently Asked Questions (FAQs)
Q1: Can I use regular all-purpose flour instead of self-rising flour?
A1: While you technically can, you’ll need to add leavening agents. For every 1 cup of all-purpose flour, add 1 ½ teaspoons of baking powder and ¼ teaspoon of salt. However, for this specific recipe, using self-rising flour is recommended for consistent results and ease, as the leavening is perfectly balanced within the flour.
Q2: Why did my pound cake turn out dense and heavy?
A2: This is a common issue for beginners! The most likely culprits are overmixing the batter (which develops gluten too much) or using ingredients that weren’t at room temperature. Cold butter and eggs don’t cream properly, leading to less air incorporated into the batter, resulting in a denser cake.
Q3: How do I know when my pound cake is fully baked?
A3: The best way is the toothpick test! Insert a wooden skewer or toothpick into the center of the cake. If it comes out clean or with just a few moist crumbs attached (no wet batter), your cake is done. The top should also be golden brown and spring back when lightly touched.
Q4: My cake sank in the middle after baking. What went wrong?
A4: A sunken cake usually indicates it was underbaked, removed from the oven too soon, or the oven door was opened too frequently during baking, causing a sudden temperature drop. Ensure your oven temperature is accurate and that the cake passes the toothpick test before removing it.
Q5: How should I store leftover pound cake?
A5: Store pound cake tightly wrapped in plastic wrap or in an airtight container at room temperature for up to 3-4 days. For longer storage, you can freeze individual slices or the whole cake (well-wrapped) for up to 2-3 months. Thaw at room temperature before serving.
Q6: Can I add frosting or glaze to this pound cake?
A6: Absolutely! While delicious plain, a simple lemon glaze (powdered sugar, lemon juice, milk) or a dusting of powdered sugar adds an extra touch. You could also serve it with fresh berries and whipped cream.
Your Delicious Pound Cake Awaits!
Congratulations, you’re now equipped with all the knowledge and steps to bake a truly magnificent pound cake using self-rising flour! This recipe is a testament to how simple yet incredibly rewarding baking can be. From the rich, buttery aroma filling your kitchen to that first tender bite, you’ll feel a sense of accomplishment and pure delight.
Don’t be afraid to dive in and enjoy the process. Every bake is a learning experience, and even if your first attempt isn’t “perfect,” it will still be delicious. So, gather your ingredients, put on some music, and create something wonderful. We’re confident that this Pound Cake Recipe Using Self Rising Flour will quickly become a cherished favorite in your recipe collection. Happy baking!