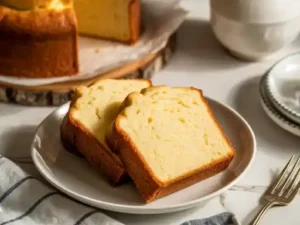
Welcome, aspiring bakers and sweet tooth enthusiasts! Are you ready to dive into the wonderful world of baking with a recipe that’s as comforting as it is delicious? Today, we’re tackling a true classic: the humble yet magnificent Pound Cake Recipe With Self Rising Flour. If you’ve ever felt intimidated by baking, fear not! This guide is designed to be your best friend in the kitchen, offering an incredibly easy baking recipes experience perfect for mastering those essential baking tips for beginners.
Why self-rising flour, you ask? It’s a game-changer! This pre-mixed flour already contains leavening agents (like baking powder) and salt, simplifying the ingredient list and reducing the chances of error. That means less measuring for you and more time to enjoy the delightful process. Get ready to bake a perfectly tender, rich, and golden pound cake that will have everyone asking for seconds. Let’s get baking!
Ingredients You’ll Need
Before we begin, remember the golden rule of baking: **room temperature ingredients are key!** This helps everything combine smoothly and creates a beautifully emulsified batter, leading to a lighter, more even cake texture.
| Quantity | Unit | Ingredient |
|---|---|---|
| 1 | cup (226g) | Unsalted Butter, softened to room temperature |
| 1 ¾ | cups (350g) | Granulated Sugar |
| 4 | large | Eggs, at room temperature |
| 2 | cups (250g) | Self-Rising Flour, sifted |
| ½ | cup (120ml) | Whole Milk or Buttermilk, at room temperature |
| 1 | teaspoon | Pure Vanilla Extract |
| ¼ | teaspoon | Salt (optional, if your self-rising flour is unsalted or you prefer a saltier flavor) |
Step-by-Step Instructions for Your Perfect Pound Cake
Step 1: Preheat and Prep Your Pan
First things first, let’s get that oven ready! Preheat your oven to **325°F (160°C)**. Lower temperatures are ideal for pound cakes as they allow the cake to bake evenly without over-browning the crust or leaving the center raw. Next, prepare your baking pan. You can use a 9×5 inch loaf pan, a 10-cup Bundt pan, or even an 8-inch square pan for this recipe. **Generously grease** your pan with butter or baking spray, making sure to get into every nook and cranny if using a Bundt pan. Then, **lightly flour** the greased pan, tapping out any excess flour. This creates a non-stick barrier, ensuring your beautiful cake slides out easily.
Beginner Tip: Don’t skip the greasing and flouring! It’s crucial for a clean release. For Bundt pans, a baking spray with flour (like Baker’s Joy) works wonders.
Step 2: Cream the Butter and Sugar
In a large mixing bowl, using an electric mixer (handheld or stand mixer with a paddle attachment), beat the **softened butter** on medium speed for about 1-2 minutes until it’s light and creamy. Now, gradually add the **granulated sugar**, beating for another **3-5 minutes** until the mixture is **light, fluffy, and pale yellow**. This process, known as “creaming,” incorporates air into the butter, which is vital for a tender cake texture. It creates tiny air pockets that expand during baking, making your cake lighter and less dense.
Beginner Tip: If your butter isn’t soft enough, you can microwave it for 10-15 seconds, but be careful not to melt it! Room temperature butter should yield easily to a gentle press of your finger.
Step 3: Add the Eggs
Add the **eggs one at a time**, beating well after each addition. Make sure each egg is fully incorporated before adding the next. Scrape down the sides of the bowl with a spatula occasionally to ensure everything is evenly mixed. This gradual addition helps prevent the batter from curdling and creates a smooth, emulsified mixture.
Common Mistake & Fix: If your batter looks a bit curdled, don’t panic! It often happens if your eggs are too cold or added too quickly. Continue mixing; it usually comes together once the flour is added. Adding a tablespoon of flour with the last egg can also help.
Step 4: Alternate Wet and Dry Ingredients
In a separate small bowl, combine your milk (or buttermilk) and vanilla extract. If you’re using the optional salt, whisk it into your sifted self-rising flour. Now, with your mixer on low speed, begin adding the sifted self-rising flour and the milk mixture to the butter-sugar-egg mixture, alternating between the two. Always start and end with the flour. So, add about one-third of the flour, mix just until combined, then half of the milk mixture, mix, then another third of the flour, mix, the remaining milk, mix, and finally the last third of the flour.
Beginner Tip: The key here is to mix just until combined after each addition. Do not overmix! Overmixing develops the gluten in the flour too much, which can result in a tough, dense cake. We want tender and moist!
Step 5: Final Mix and Pour
Once all the flour and milk are added, give the batter one final gentle mix on low speed for just a few seconds to ensure everything is incorporated, then stop. Use a rubber spatula to scrape down the sides and bottom of the bowl, giving it a few final folds by hand to catch any unmixed pockets. Pour the batter evenly into your prepared baking pan. Smooth the top with your spatula.
Alternative: For an extra touch of flavor, you can gently fold in 1-2 tablespoons of lemon zest or orange zest at this stage!
Step 6: Bake to Golden Perfection
Place the pan in your preheated oven. Bake for approximately 60-75 minutes for a loaf pan, or 70-90 minutes for a Bundt pan. Baking times can vary greatly depending on your oven and pan material, so keep an eye on it! The cake is done when a wooden skewer or toothpick inserted into the center comes out clean or with a few moist crumbs attached (but no wet batter). The top should be a beautiful golden-brown, and the edges will start to pull away slightly from the sides of the pan.
Common Mistake & Fix: If the top is browning too quickly but the inside isn’t done, loosely tent the top of the cake with aluminum foil for the remaining baking time.
Step 7: Cool and Serve
Once baked, remove the cake from the oven and let it cool in the pan on a wire rack for 15-20 minutes. This allows the cake to set and prevents it from crumbling when you remove it. After this initial cooling, carefully invert the cake onto the wire rack to cool completely. Allowing it to cool completely before slicing is crucial for a clean slice and to prevent the cake from collapsing.
Beginner Tip: While tempting, resist the urge to slice into a warm pound cake! Cooling allows the internal structure to firm up and the flavors to fully develop.
Tips & Tricks for Baking Success
Baking is a science, but with a few simple tricks, you’ll feel like a kitchen wizard! First, always measure accurately. Use proper measuring cups for dry ingredients (level with a straight edge) and liquid measuring cups for wet. Room temperature ingredients are non-negotiable for pound cake; they emulsify better, creating a smoother batter and a finer crumb. Invest in an oven thermometer to ensure your oven’s temperature is accurate – many ovens run hot or cold! When mixing, scrape down your bowl frequently to ensure all ingredients are incorporated evenly. Avoid opening the oven door too often during baking, especially in the first 30-40 minutes, as this can cause the cake to sink. Finally, don’t rush the cooling process. A properly cooled cake is easier to slice and has a better texture and flavor. Patience is a virtue in baking!
Essential Baking Tools
Having the right tools makes all the difference! Here are a few essentials to get you started:
- Mixing Bowl – Essential for combining ingredients.
- Whisk – For dry ingredients or light mixing.
- Electric Mixer (Handheld or Stand) – A must-have for creaming butter and sugar effectively.
- Baking Pan – A 9×5 inch loaf pan or 10-cup Bundt pan works perfectly.
- Measuring Cups & Spoons – For precise ingredient measurements.
- Rubber Spatula – For scraping bowls and folding.
- Wire Rack – For cooling your cake evenly.
Nutrition Information (Per Serving, estimated for 12 servings)
Please note: This is an estimate and can vary based on exact ingredients and portion size.
| Nutrient | Amount |
|---|---|
| Calories | 380 kcal |
| Carbohydrates | 48g |
| Protein | 5g |
| Fat | 19g |
| Fiber | 1g |
| Sugar | 32g |
Frequently Asked Questions (FAQs)
Q1: Can I use all-purpose flour instead of self-rising flour?
A: Yes, you can! If you don’t have self-rising flour, for every 1 cup of all-purpose flour, add 1 ½ teaspoons of baking powder and ¼ teaspoon of salt. So, for this recipe, you would use 2 cups of all-purpose flour, 3 teaspoons of baking powder, and ½ teaspoon of salt.
Q2: My cake sank in the middle! What went wrong?
A: This is a common issue! It can be caused by opening the oven door too early (before the cake is set), an oven temperature that’s too high (causing the outside to cook too fast while the inside lags), overmixing the batter (which creates too much air that collapses), or insufficient leavening (though less likely with self-rising flour).
Q3: How do I know when my pound cake is fully baked?
A: The best way is the toothpick or wooden skewer test. Insert it into the thickest part of the cake. If it comes out clean or with a few moist crumbs, it’s done. If it comes out with wet batter, it needs more time. Also, the cake’s edges will typically start to pull away from the sides of the pan, and the top will be golden brown and spring back slightly when gently pressed.
Q4: Can I add other flavors to this pound cake?
A: Absolutely! This classic recipe is a fantastic base. You can add the zest of 1-2 lemons or oranges for a citrusy kick, a teaspoon of almond extract in addition to or instead of vanilla, or even fold in ½ cup of chocolate chips or berries (tossed in a tablespoon of flour to prevent sinking) at the very end of mixing.
Q5: How should I store leftover pound cake?
A: Store your pound cake at room temperature, tightly wrapped in plastic wrap or in an airtight container, for up to 3-4 days. For longer storage, you can freeze individual slices or the whole cake (well-wrapped) for up to 2-3 months. Thaw at room temperature when ready to enjoy.
Conclusion
Congratulations, baker! You’ve just created a truly magnificent **Pound Cake Recipe With Self Rising Flour**. This recipe isn’t just about baking a cake; it’s about building confidence in the kitchen and discovering the joy of creating something delicious from scratch. With its tender crumb and rich flavor, this pound cake is perfect for any occasion – a quiet afternoon tea, a family gathering, or simply a treat for yourself.
Remember, every bake is a learning experience, and practice makes perfect. Don’t be afraid to experiment with flavors or try new techniques. We hope these **baking tips for beginners** have made your journey enjoyable and successful. Now, go ahead, slice yourself a generous piece, and savor the sweet reward of your efforts. Happy baking, and we can’t wait to hear about your pound cake adventures!
“`
“`html
Pound Cake Perfection: Your Easy Guide to a Classic With Self-Rising Flour!
Welcome, aspiring bakers and sweet tooth enthusiasts! Are you ready to dive into the wonderful world of baking with a recipe that’s as comforting as it is delicious? Today, we’re tackling a true classic: the humble yet magnificent Pound Cake Recipe With Self Rising Flour. If you’ve ever felt intimidated by baking, fear not! This guide is designed to be your best friend in the kitchen, offering an incredibly easy baking recipes experience perfect for mastering those essential baking tips for beginners.
Why self-rising flour, you ask? It’s a game-changer! This pre-mixed flour already contains leavening agents (like baking powder) and salt, simplifying the ingredient list and reducing the chances of error. That means less measuring for you and more time to enjoy the delightful process. Get ready to bake a perfectly tender, rich, and golden pound cake that will have everyone asking for seconds. Let’s get baking!
Ingredients You’ll Need
Before we begin, remember the golden rule of baking: room temperature ingredients are key! This helps everything combine smoothly and creates a beautifully emulsified batter, leading to a lighter, more even cake texture.
| Quantity | Unit | Ingredient |
|---|---|---|
| 1 | cup (226g) | Unsalted Butter, softened to room temperature |
| 1 ¾ | cups (350g) | Granulated Sugar |
| 4 | large | Eggs, at room temperature |
| 2 | cups (250g) | Self-Rising Flour, sifted |
| ½ | cup (120ml) | Whole Milk or Buttermilk, at room temperature |
| 1 | teaspoon | Pure Vanilla Extract |
| ¼ | teaspoon | Salt (optional, if your self-rising flour is unsalted or you prefer a saltier flavor) |
Step-by-Step Instructions for Your Perfect Pound Cake
Step 1: Preheat and Prep Your Pan
First things first, let’s get that oven ready! Preheat your oven to 325°F (160°C). Lower temperatures are ideal for pound cakes as they allow the cake to bake evenly without over-browning the crust or leaving the center raw. Next, prepare your baking pan. You can use a 9×5 inch loaf pan, a 10-cup Bundt pan, or even an 8-inch square pan for this recipe. Generously grease your pan with butter or baking spray, making sure to get into every nook and cranny if using a Bundt pan. Then, lightly flour the greased pan, tapping out any excess flour. This creates a non-stick barrier, ensuring your beautiful cake slides out easily.
Beginner Tip: Don’t skip the greasing and flouring! It’s crucial for a clean release. For Bundt pans, a baking spray with flour (like Baker’s Joy) works wonders.
Step 2: Cream the Butter and Sugar
In a large mixing bowl, using an electric mixer (handheld or stand mixer with a paddle attachment), beat the softened butter on medium speed for about 1-2 minutes until it’s light and creamy. Now, gradually add the granulated sugar, beating for another 3-5 minutes until the mixture is light, fluffy, and pale yellow. This process, known as “creaming,” incorporates air into the butter, which is vital for a tender cake texture. It creates tiny air pockets that expand during baking, making your cake lighter and less dense.
Beginner Tip: If your butter isn’t soft enough, you can microwave it for 10-15 seconds, but be careful not to melt it! Room temperature butter should yield easily to a gentle press of your finger.
Step 3: Add the Eggs
Add the eggs one at a time, beating well after each addition. Make sure each egg is fully incorporated before adding the next. Scrape down the sides of the bowl with a spatula occasionally to ensure everything is evenly mixed. This gradual addition helps prevent the batter from curdling and creates a smooth, emulsified mixture.
Common Mistake & Fix: If your batter looks a bit curdled, don’t panic! It often happens if your eggs are too cold or added too quickly. Continue mixing; it usually comes together once the flour is added. Adding a tablespoon of flour with the last egg can also help.
Step 4: Alternate Wet and Dry Ingredients
In a separate small bowl, combine your milk (or buttermilk) and vanilla extract. If you’re using the optional salt, whisk it into your sifted self-rising flour. Now, with your mixer on low speed, begin adding the sifted self-rising flour and the milk mixture to the butter-sugar-egg mixture, alternating between the two. Always start and end with the flour. So, add about one-third of the flour, mix just until combined, then half of the milk mixture, mix, then another third of the flour, mix, the remaining milk, mix, and finally the last third of the flour.
Beginner Tip: The key here is to mix just until combined after each addition. Do not overmix! Overmixing develops the gluten in the flour too much, which can result in a tough, dense cake. We want tender and moist!
Step 5: Final Mix and Pour
Once all the flour and milk are added, give the batter one final gentle mix on low speed for just a few seconds to ensure everything is incorporated, then stop. Use a rubber spatula to scrape down the sides and bottom of the bowl, giving it a few final folds by hand to catch any unmixed pockets. Pour the batter evenly into your prepared baking pan. Smooth the top with your spatula.
Alternative: For an extra touch of flavor, you can gently fold in 1-2 tablespoons of lemon zest or orange zest at this stage!
Step 6: Bake to Golden Perfection
Place the pan in your preheated oven. Bake for approximately 60-75 minutes for a loaf pan, or 70-90 minutes for a Bundt pan. Baking times can vary greatly depending on your oven and pan material, so keep an eye on it! The cake is done when a wooden skewer or toothpick inserted into the center comes out clean or with a few moist crumbs attached (but no wet batter). The top should be a beautiful golden-brown, and the edges will start to pull away slightly from the sides of the pan.
Common Mistake & Fix: If the top is browning too quickly but the inside isn’t done, loosely tent the top of the cake with aluminum foil for the remaining baking time.
Step 7: Cool and Serve
Once baked, remove the cake from the oven and let it cool in the pan on a wire rack for 15-20 minutes. This allows the cake to set and prevents it from crumbling when you remove it. After this initial cooling, carefully invert the cake onto the wire rack to cool completely. Allowing it to cool completely before slicing is crucial for a clean slice and to prevent the cake from collapsing.
Beginner Tip: While tempting, resist the urge to slice into a warm pound cake! Cooling allows the internal structure to firm up and the flavors to fully develop.
Tips & Tricks for Baking Success
Baking is a science, but with a few simple tricks, you’ll feel like a kitchen wizard! First, always measure accurately. Use proper measuring cups for dry ingredients (level with a straight edge) and liquid measuring cups for wet. Room temperature ingredients are non-negotiable for pound cake; they emulsify better, creating a smoother batter and a finer crumb. Invest in an oven thermometer to ensure your oven’s temperature is accurate – many ovens run hot or cold! When mixing, scrape down your bowl frequently to ensure all ingredients are incorporated evenly. Avoid opening the oven door too often during baking, especially in the first 30-40 minutes, as this can cause the cake to sink. Finally, don’t rush the cooling process. A properly cooled cake is easier to slice and has a better texture and flavor. Patience is a virtue in baking!
Essential Baking Tools
Having the right tools makes all the difference! Here are a few essentials to get you started:
- Mixing Bowl – Essential for combining ingredients.
- Whisk – For dry ingredients or light mixing.
- Electric Mixer (Handheld or Stand) – A must-have for creaming butter and sugar effectively.
- Baking Pan – A 9×5 inch loaf pan or 10-cup Bundt pan works perfectly.
- Measuring Cups & Spoons – For precise ingredient measurements.
- Rubber Spatula – For scraping bowls and folding.
- Wire Rack – For cooling your cake evenly.
Nutrition Information (Per Serving, estimated for 12 servings)
Please note: This is an estimate and can vary based on exact ingredients and portion size.
| Nutrient | Amount |
|---|---|
| Calories | 380 kcal |
| Carbohydrates | 48g |
| Protein | 5g |
| Fat | 19g |
| Fiber | 1g |
| Sugar | 32g |
Frequently Asked Questions (FAQs)
Q1: Can I use all-purpose flour instead of self-rising flour?
A: Yes, you can! If you don’t have self-rising flour, for every 1 cup of all-purpose flour, add 1 ½ teaspoons of baking powder and ¼ teaspoon of salt. So, for this recipe, you would use 2 cups of all-purpose flour, 3 teaspoons of baking powder, and ½ teaspoon of salt.
Q2: My cake sank in the middle! What went wrong?
A: This is a common issue! It can be caused by opening the oven door too early (before the cake is set), an oven temperature that’s too high (causing the outside to cook too fast while the inside lags), overmixing the batter (which creates too much air that collapses), or insufficient leavening (though less likely with self-rising flour).
Q3: How do I know when my pound cake is fully baked?
A: The best way is the toothpick or wooden skewer test. Insert it into the thickest part of the cake. If it comes out clean or with a few moist crumbs, it’s done. If it comes out with wet batter, it needs more time. Also, the cake’s edges will typically start to pull away from the sides of the pan, and the top will be golden brown and spring back slightly when gently pressed.
Q4: Can I add other flavors to this pound cake?
A: Absolutely! This classic recipe is a fantastic base. You can add the zest of 1-2 lemons or oranges for a citrusy kick, a teaspoon of almond extract in addition to or instead of vanilla, or even fold in ½ cup of chocolate chips or berries (tossed in a tablespoon of flour to prevent sinking) at the very end of mixing.
Q5: How should I store leftover pound cake?
A: Store your pound cake at room temperature, tightly wrapped in plastic wrap or in an airtight container, for up to 3-4 days. For longer storage, you can freeze individual slices or the whole cake (well-wrapped) for up to 2-3 months. Thaw at room temperature when ready to enjoy.
Conclusion
Congratulations, baker! You’ve just created a truly magnificent Pound Cake Recipe With Self Rising Flour. This recipe isn’t just about baking a cake; it’s about building confidence in the kitchen and discovering the joy of creating something delicious from scratch. With its tender crumb and rich flavor, this pound cake is perfect for any occasion – a quiet afternoon tea, a family gathering, or simply a treat for yourself.
Remember, every bake is a learning experience, and practice makes perfect. Don’t be afraid to experiment with flavors or try new techniques. We hope these baking tips for beginners have made your journey enjoyable and successful. Now, go ahead, slice yourself a generous piece, and savor the sweet reward of your efforts. Happy baking, and we can’t wait to hear about your pound cake adventures!
“`