As the leaves begin to turn and a crisp chill fills the air, there’s nothing quite like the comforting aroma of freshly baked pumpkin bread wafting through your home. If you’ve ever felt intimidated by baking, or simply crave delicious homemade treats without the fuss, then you’re in for a real treat! This Pumpkin Bread Machine Recipe is specifically designed for beginners, making it one of the most easy baking recipes you’ll ever encounter.
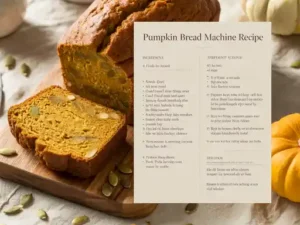
Forget complex mixing techniques or endless kneading; your trusty bread machine does all the hard work for you. We’ll walk you through every step, offering plenty of baking tips for beginners to ensure your pumpkin bread turns out perfectly moist, spiced, and utterly irresistible every single time. Get ready to embrace the flavors of autumn with minimal effort and maximum deliciousness!
Ingredients for Your Perfect Pumpkin Bread
Gathering your ingredients correctly is the first step to baking success. Remember to measure precisely!
| Ingredient | Quantity | Unit |
|---|---|---|
| Warm Water | 1/2 | cup (120ml) |
| Pumpkin Puree (100% pure, not pie filling) | 3/4 | cup (180g) |
| Unsalted Butter, melted and cooled | 1/4 | cup (56g) |
| Granulated Sugar | 1/2 | cup (100g) |
| Packed Light Brown Sugar | 1/4 | cup (50g) |
| All-Purpose Flour | 3 | cups (360g) |
| Dry Milk Powder (optional, but adds tenderness) | 2 | tablespoons |
| Salt | 1 | teaspoon |
| Pumpkin Pie Spice | 2 | teaspoons |
| Active Dry Yeast or Bread Machine Yeast | 2 1/4 | teaspoons (1 standard packet) |
| Chopped Pecans or Walnuts (optional) | 1/2 | cup |
Step-by-Step Instructions: Baking Pumpkin Bread in Your Machine
Follow these detailed steps for a flawless loaf. Precision is your friend, especially when starting out!
-
Prepare Your Bread Machine Pan:
Before adding any ingredients, ensure your bread machine pan is clean and dry. Some bakers like to lightly grease the pan, but most non-stick pans won’t require it for this recipe.
-
Add Wet Ingredients First:
This is a crucial step for bread machines! Pour the **warm water** into the bread machine pan. The water should be between 105-115°F (40-46°C) – warm to the touch but not hot, which could kill your yeast. Next, add the **pumpkin puree** and the **melted and cooled unsalted butter**. Make sure the butter isn’t hot, as this can also harm the yeast.
-
Layer the Dry Ingredients (Except Yeast):
Carefully add the **granulated sugar** and **brown sugar** over the wet ingredients. Then, gently spoon the **all-purpose flour** on top, forming a mound that covers the liquids. Don’t stir! Next, sprinkle the **dry milk powder** (if using), **salt**, and **pumpkin pie spice** over the flour. Try to keep the salt and yeast separate at this stage, as salt can inhibit yeast activation.
-
Add the Yeast Last:
Using your finger, make a small indentation or well on top of the flour mound (away from the edges where liquids might be pooling). Carefully add the **active dry yeast or bread machine yeast** into this well. This ensures the yeast stays dry and separate from the liquids and salt until the mixing cycle begins, giving it the best chance to activate properly.
-
Choose Your Bread Machine Cycle:
Place the bread machine pan back into the machine and close the lid. Select the **”Sweet Bread”** setting on your bread machine. If your machine doesn’t have a “Sweet Bread” setting, the “Basic/White Bread” or “Whole Wheat” (if it’s a longer cycle) setting might work, but “Sweet Bread” is ideal as it’s designed for richer, sweeter doughs with a longer rise time. Choose your desired crust color (light, medium, or dark) and loaf size, if applicable.
-
Add Optional Mix-ins (if using):
If you’re adding **chopped pecans or walnuts**, listen for your bread machine’s “mix-in” beep (usually about 20-30 minutes into the kneading cycle). When you hear it, carefully open the lid and add your nuts. Close the lid immediately. If your machine doesn’t have a beep, you can add them about 5-10 minutes into the first kneading cycle.
-
Let Your Bread Machine Do the Work:
Resist the urge to open the lid during the baking process! The machine will knead, rise, and bake the bread automatically. This typically takes 3-4 hours, depending on your machine and chosen cycle. Enjoy the incredible aroma filling your kitchen!
-
Remove and Cool Your Bread:
Once the cycle is complete, the machine will beep. Carefully remove the bread pan from the machine using oven mitts. Immediately invert the pan onto a wire cooling rack to release the loaf. If the paddle is stuck in the bread, carefully remove it using a utensil once the bread has cooled slightly.
-
Cool Completely Before Slicing:
Allow the pumpkin bread to cool on the wire rack for at least 1-2 hours (or even longer!) before slicing. This is crucial for the bread’s internal structure to set, preventing a gummy texture. Slicing warm bread also makes it crumble more easily.
-
Enjoy!:
Once cooled, slice your delicious homemade pumpkin bread and enjoy! It’s fantastic on its own, toasted, or with a smear of cream cheese.
Tips & Tricks for Bread Machine Success
Even with a bread machine, a few smart practices can elevate your baking game:
- **Measure Accurately:** Baking is a science! Use proper measuring cups and spoons, and for flour, spoon it into the measuring cup and level it off with a straight edge (don’t scoop directly from the bag, as this compacts the flour).
- **Ingredient Temperature:** Ensure liquids are warm (not hot!) and butter is melted but cooled. Cold ingredients can slow down yeast activity, while hot ingredients can kill it. Room temperature ingredients generally work best.
- **Check Your Yeast:** Yeast is a living organism! Always check the expiration date. If your yeast is old, your bread won’t rise. You can “proof” yeast by mixing it with warm water and a pinch of sugar; if it bubbles and foams after 5-10 minutes, it’s active.
- **Don’t Open the Lid:** During the rising and baking cycles, avoid opening the bread machine lid. This releases heat and moisture, which can cause your bread to collapse or not rise properly.
- **Dough Consistency Check:** About 5-10 minutes into the first kneading cycle, you can peek at the dough. It should form a smooth, elastic ball. If it’s too sticky, add flour a tablespoon at a time. If it’s too dry and crumbly, add warm water a teaspoon at a time.
- **Cool Completely:** Patience is a virtue! Cooling bread on a wire rack allows steam to escape, preventing a soggy bottom and ensuring the internal structure sets properly.
- **Storage:** Store cooled pumpkin bread in an airtight container at room temperature for up to 3-4 days. For longer storage, slice and freeze individual pieces for up to 2-3 months.
- **Customize Your Spice:** If you don’t have pumpkin pie spice, you can make your own! Combine 1 teaspoon ground cinnamon, 1/4 teaspoon ground ginger, 1/4 teaspoon ground nutmeg, and 1/8 teaspoon ground cloves for this recipe.
Essential Baking Tools for Beginners
Having the right tools makes baking even easier and more enjoyable. While your bread machine does most of the heavy lifting, these items are incredibly useful:
- Mixing Bowl (for prep, especially if adding mix-ins)
- Whisk (for combining dry ingredients evenly)
- Baking Pan (not strictly needed for the bread machine, but good for general baking)
- Measuring Cups (essential for accurate ingredient amounts)
- Spatula (for scraping bowls and general utility)
- Wire Cooling Rack (crucial for proper bread cooling)
- Kitchen Scale (for ultimate precision, highly recommended for advanced bakers)
Estimated Nutrition Information (per slice, 12 slices per loaf)
Please note that these are estimated values and can vary based on specific ingredient brands and preparation methods.
| Nutrient | Amount |
|---|---|
| Calories | 250-280 kcal |
| Carbohydrates | 45-50 g |
| Protein | 5-6 g |
| Fat | 8-10 g |
| Fiber | 2-3 g |
| Sugar | 18-22 g |
Frequently Asked Questions (FAQs)
Got questions? We’ve got answers to help you bake with confidence!
Q1: Can I use fresh pumpkin instead of canned pumpkin puree?
A1: While you technically can, it’s generally not recommended for bread machine recipes, especially for beginners. Fresh pumpkin can vary significantly in moisture content, which can throw off the delicate balance of a bread machine dough. If you do use it, make sure it’s very well drained and be prepared to adjust flour or liquid by small amounts during the kneading cycle.
Q2: My bread didn’t rise properly. What went wrong?
A2: There are a few common culprits:
- **Old or Inactive Yeast:** Always check the expiration date.
- **Liquid Temperature:** Water/milk that’s too hot will kill the yeast, too cold will prevent it from activating.
- **Too Much Salt:** Salt inhibits yeast, so ensure it doesn’t come into direct contact with the yeast initially.
- **Incorrect Measurements:** Too much flour or not enough liquid can result in a dense, heavy dough.
- **Opening the Lid:** Letting out heat during rising can cause the dough to collapse.
Q3: Can I add other mix-ins besides nuts?
A3: Absolutely! Chocolate chips (milk, dark, or white), dried cranberries, raisins, or even a combination are great additions. Add them at the “mix-in” beep of your bread machine, just like you would with nuts. Don’t add too many, as it can weigh down the dough – aim for about 1/2 to 3/4 cup total.
Q4: How do I store leftover pumpkin bread?
A4: Once completely cooled, store your pumpkin bread in an airtight container or wrap it tightly in plastic wrap at room temperature for up to 3-4 days. For longer storage, you can slice the loaf and freeze individual slices in a freezer-safe bag or container for up to 2-3 months. Thaw at room temperature or gently warm in a toaster or microwave.
Q5: My bread machine paddle got stuck in the loaf. How do I remove it?
A5: This is very common! After removing the loaf from the pan, let it cool for about 15-30 minutes. Once it’s cool enough to handle, gently pry the paddle out with a non-stick safe utensil (like a silicone spatula or plastic knife) without damaging the bread. Sometimes, coating the paddle with a little cooking spray before adding ingredients can help prevent sticking.
Ready to Bake Your Best Pumpkin Bread?
There you have it – everything you need to bake a truly delightful pumpkin bread right in your bread machine! This recipe isn’t just about making bread; it’s about discovering the joy of baking, even if you’re a complete novice. The satisfaction of pulling a warm, fragrant loaf out of your machine is unmatched, and your friends and family will surely be impressed.
So, don’t hesitate! Gather your ingredients, follow these simple steps, and prepare to fill your home with the inviting aroma of homemade pumpkin spice goodness. Happy baking, and enjoy every delicious slice!