There’s nothing quite like the comforting aroma of freshly baked pumpkin bread filling your kitchen, especially as the seasons change. If you’ve ever dreamt of effortlessly creating that perfect, moist loaf without the usual fuss, you’re in the right place!

This Pumpkin Bread Recipe For Bread Machine is designed to be incredibly simple, making it one of the most easy baking recipes you’ll ever try. Forget complicated steps and endless cleanup; your bread machine does most of the heavy lifting. Whether you’re a seasoned baker or just looking for some practical baking tips for beginners, get ready to enjoy a delicious, homemade treat with minimal effort. Let’s get baking!
Ingredients You’ll Need
Gathering your ingredients before you start is a golden rule for easy baking. Here’s everything you’ll need for a delicious 1.5-2 lb loaf of pumpkin bread:
| Ingredient | Quantity |
|---|---|
| Large Eggs, room temperature | 2 |
| Canned Pumpkin Puree (not pie filling) | 1 cup (240g) |
| Vegetable Oil (or melted unsalted butter) | 1/2 cup (120ml) |
| Granulated Sugar | 1 cup (200g) |
| Light Brown Sugar, packed | 1/2 cup (100g) |
| All-Purpose Flour | 2 1/2 cups (300g) |
| Baking Soda | 1 teaspoon |
| Baking Powder | 1 teaspoon |
| Salt | 1/2 teaspoon |
| Pumpkin Pie Spice | 2 teaspoons |
| Ground Cinnamon | 1 teaspoon |
| Vanilla Extract (optional) | 1 teaspoon |
| Chopped Pecans or Walnuts (optional) | 1/2 cup |
| Chocolate Chips (optional) | 1/2 cup |
Step-by-Step Instructions for Your Perfect Pumpkin Bread
Ready to turn those simple ingredients into a warm, fragrant loaf? Follow these easy steps, and your bread machine will do most of the work for you!

1. Prepare Your Ingredients
- Ensure your eggs are at room temperature. This helps them mix better with other ingredients and contributes to a lighter texture. If you forgot, place them in a bowl of warm water for 5-10 minutes.
- Measure all your ingredients precisely. For flour, use the “spoon and level” method: spoon flour into your measuring cup until it overflows, then level off the top with a straight edge (like the back of a knife). Do not scoop directly from the bag, as this compacts the flour and can lead to a dense loaf.
2. Load Your Bread Machine Pan
The order of adding ingredients is crucial for bread machine quick breads to ensure proper mixing and activation of leavening agents. Generally, liquids go in first, then dry ingredients, with leavening agents on top.
- Add Wet Ingredients: Pour the room temperature eggs, pumpkin puree, and vegetable oil (or melted butter) into the bread machine pan.
- Add Sugars: Carefully add the granulated sugar and packed light brown sugar over the wet ingredients.
- Add Dry Ingredients: Now, spoon the all-purpose flour on top of the sugars, creating an even layer.
- Add Leavening and Spices: On top of the flour, add the baking soda, baking powder, salt, pumpkin pie spice, ground cinnamon, and vanilla extract (if using). Try to keep the baking soda and baking powder separate from the wet ingredients until the mixing cycle begins.
- Add Optional Mix-ins (if using): If you’re adding chopped nuts or chocolate chips, you can either add them now on top of the dry ingredients, or wait for your bread machine’s “mix-in” signal if it has one. Adding them now is perfectly fine for quick breads.
3. Select Your Bread Machine Cycle
This is where your bread machine truly shines!
- Choose the Right Cycle: Look for a “Quick Bread” or “Cake” setting on your bread machine. These cycles typically mix the ingredients, allow for a short resting period, and then bake, without the lengthy kneading and rising times of traditional yeast breads.
- Crust Color Setting: You can usually select a “Light,” “Medium,” or “Dark” crust. For pumpkin bread, a “Medium” setting often yields a beautiful golden-brown crust.
- Start the Machine: Close the lid and press “Start.”
4. The Baking Process
Your bread machine will now handle the rest! The mixing paddle will combine all the ingredients. Don’t worry if it looks a little clumpy at first; it will smooth out.
- Keep the Lid Closed: Resist the urge to open the lid during the baking cycle. Opening it can cause temperature fluctuations that might affect the bread’s rise and texture.
- Monitor (Optional): If your machine has a viewing window, you can peek occasionally to ensure everything is mixing well. Sometimes, especially with thicker batters, ingredients can stick to the sides. If you notice this, you can gently scrape down the sides with a rubber spatula during the initial mixing phase, but only if your machine allows for this without interrupting the cycle or losing heat significantly. This is generally less of an issue with quick breads.
5. Cooling and Serving
The waiting is the hardest part!
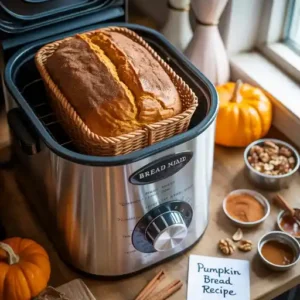
- Remove from Machine: Once the cycle is complete and your kitchen smells incredible, carefully unplug the bread machine. Open the lid and, using oven mitts, lift the bread pan out of the machine.
- Invert and Cool: Immediately invert the bread pan onto a wire cooling rack. The loaf should slide out easily. If the mixing paddle is stuck in the bottom of the loaf, carefully remove it once the bread has cooled slightly.
- Cool Completely: Allow the pumpkin bread to cool on the wire rack for at least 1-2 hours, or until completely cool. Slicing hot quick bread can make it gummy and difficult to cut cleanly. Patience is key for the best texture!
- Slice and Enjoy: Once cooled, slice your delicious homemade pumpkin bread and serve. It’s fantastic on its own, with a pat of butter, or even a dollop of cream cheese frosting!
Pro Tips & Tricks for Bread Machine Pumpkin Bread Success
Even with an easy bread machine recipe, a few insider tips can elevate your pumpkin bread from good to absolutely amazing. Here’s what you need to know:
- Room Temperature is Your Friend: Always ensure your eggs and pumpkin puree are at room temperature. Cold ingredients can stiffen the batter and prevent proper mixing and rising, leading to a denser loaf.
- Measure Accurately: Baking is a science, and precision matters. Use proper measuring cups and spoons, and for dry ingredients like flour, always use the ‘spoon and level’ method. Over-packed flour is a common culprit for dry, heavy bread.
- Pumpkin Puree vs. Pumpkin Pie Filling: This is crucial! Make sure you use 100% pure pumpkin puree, not pumpkin pie filling. Pie filling has added spices and sugar that will throw off the balance of your recipe. Check the label carefully!
- Don’t Peek Too Often: Resist the temptation to open the bread machine lid frequently during the baking cycle. Each time you open it, heat escapes, which can affect the bread’s rise and overall texture.
- Customize Your Loaf: Feel free to add 1/2 cup of chopped nuts (pecans or walnuts), chocolate chips, or even dried cranberries with your dry ingredients for extra flavor and texture.
- Proper Cooling is Essential: While it’s tempting to slice into a warm loaf, allow your pumpkin bread to cool completely on a wire rack. This allows the internal structure to set, resulting in a perfectly moist and sliceable texture.
- Storage: Store leftover pumpkin bread in an airtight container at room temperature for up to 3-4 days, or freeze slices for longer enjoyment.
Essential Baking Tools for Your Kitchen
While your bread machine does most of the heavy lifting, having a few basic kitchen tools makes the preparation even smoother. These are great for any budding baker!
- Mixing Bowl (for whisking eggs if needed, or preparing mix-ins)
- Whisk (for light mixing or combining spices)
- Baking Pan (not strictly needed for the bread machine, but useful for other recipes!)
- Measuring Cups (essential for accurate ingredient measurements)
- Spatula (rubber spatula for scraping down sides or removing bread from pan)
- Wire Cooling Rack (crucial for proper cooling of your bread)
Nutrition Information (Estimated)
Here’s an estimated nutritional breakdown per serving (assuming 12 servings per loaf). Please note these are approximate values and can vary based on exact ingredient brands and measurements.
| Nutrient | Amount Per Serving |
|---|---|
| Calories | 280 kcal |
| Total Carbohydrates | 45g |
| Protein | 4g |
| Total Fat | 11g |
| Dietary Fiber | 2g |
| Total Sugars | 30g |
Frequently Asked Questions About Bread Machine Pumpkin Bread
Q: Can I use pumpkin pie filling instead of pumpkin puree?
A: No, absolutely not! Pumpkin pie filling contains added sugars, spices, and sometimes other ingredients that will significantly alter the taste and texture of your bread. Always use 100% pure canned pumpkin puree for this recipe.
Q: My bread came out too dense. What went wrong?
A: A dense loaf can be caused by several factors:
- Too much flour: Ensure you’re measuring your flour using the spoon and level method.
- Cold ingredients: Make sure eggs and pumpkin puree are at room temperature.
- Expired leavening agents: Check the freshness of your baking soda and baking powder.
- Opening the lid: Frequent peeking during baking can cause heat loss and prevent proper rise.
Q: Can I add other mix-ins like nuts or chocolate chips?
A: Yes, definitely! You can add up to 1/2 cup of mix-ins like chopped walnuts, pecans, or chocolate chips. Add them along with your dry ingredients at the beginning of the cycle. If your bread machine has a “mix-in” dispenser, you can use that feature as well.
Q: How long does this pumpkin bread last, and how should I store it?
A: Once completely cooled, store your pumpkin bread in an airtight container at room temperature for up to 3-4 days. For longer storage, you can refrigerate it for up to a week, or wrap it tightly and freeze for up to 3 months. Thaw at room temperature before serving.
Q: What bread machine cycle should I use for this recipe?
A: You’ll want to use your bread machine’s “Quick Bread” or “Cake” cycle. These cycles are designed for recipes that use baking powder and baking soda as leavening agents, rather than yeast, meaning they skip the long kneading and rising phases.
Enjoy Your Homemade Pumpkin Bread!
And there you have it – a perfectly baked, wonderfully aromatic, and incredibly moist pumpkin bread, all thanks to your trusty bread machine! There’s an undeniable satisfaction that comes from creating something so delicious with such ease. This recipe is a testament to how simple and rewarding baking can be, even for those just starting their culinary journey.
Whether you’re sharing it with family, bringing it to a potluck, or simply enjoying a slice with your morning coffee, this Pumpkin Bread Recipe For Bread Machine is sure to become a seasonal favorite. Don’t be afraid to experiment with your favorite mix-ins next time! Happy baking, and enjoy every delightful bite!