Welcome, aspiring bakers! Are you ready to dive into the wonderful world of baking with a recipe that’s as classic as it is delicious? Today, we’re demystifying the Quatre Quart Cake Recipe, often known as French Pound Cake. Don’t let the fancy name intimidate you this is one of the most easy baking recipes you can tackle, perfect for building confidence and impressing friends and family.
The beauty of Quatre Quart (which literally means “four quarters”) lies in its simple, equal-part ratio of butter, sugar, eggs, and flour, making it incredibly forgiving and consistently moist. If you’re looking for foundational baking tips for beginners embedded in a delightful project, you’ve come to the right place. Let’s get baking!
What is Quatre Quart Cake?
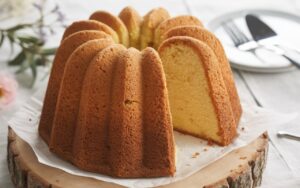
A Quatre Quart cake is essentially a French pound cake. Its name, “four quarters,” refers to its traditional composition: equal weights of butter, sugar, eggs, and flour. This simple ratio creates a dense, rich, and wonderfully moist cake with a fine crumb and a beautiful golden crust. It’s incredibly versatile, delicious on its own, or fantastic with a simple dusting of powdered sugar, fresh berries, or a light glaze. It’s the perfect canvas for your baking journey!
Ingredients for Your Perfect Quatre Quart Cake
Gathering your ingredients is the first step to success! Make sure everything is measured accurately and, importantly, at room temperature for the best results.
| Ingredient | Quantity | Unit |
|---|---|---|
| Unsalted Butter | 1 | cup (226g) |
| Granulated Sugar | 1 | cup (200g) |
| Large Eggs | 4 | (approx. 200g) |
| All-Purpose Flour | 1 | cup (120g) |
| Baking Powder | 1 | teaspoon |
| Salt | 1/4 | teaspoon |
| Vanilla Extract | 1 | teaspoon |
| Lemon Zest (optional) | 1 | teaspoon |
Step-by-Step Instructions: Your Quatre Quart Cake Journey
Follow these detailed steps, and you’ll be enjoying a beautiful homemade cake in no time. Take your time, read through each step, and don’t be afraid to make a mess – that’s part of the fun!
Step 1: Prepare Your Pan and Preheat Your Oven
- Preheat your oven: Set your oven to 325°F (160°C). A slightly lower temperature helps this dense cake bake evenly without over-browning the crust too quickly.
- Prepare your baking pan: Take an 8.5 x 4.5 inch (or similar size) loaf pan. You can also use an 8-inch round cake pan for a slightly different shape.
- Grease and flour: Generously grease the inside of the pan with butter or baking spray. Then, dust it with a light coating of all-purpose flour, tapping out any excess. This creates a non-stick barrier and helps your cake release cleanly. Beginner tip: For extra insurance, you can line the bottom of your pan with parchment paper after greasing, then grease and flour the sides.
Step 2: Combine Dry Ingredients
- Whisk dry ingredients: In a medium bowl, combine your all-purpose flour (1 cup), baking powder (1 teaspoon), and salt (1/4 teaspoon). Use a whisk to gently combine them. This ensures the leavening agent and salt are evenly distributed, so your cake rises uniformly. Beginner tip: Don’t skip this step! It prevents pockets of unmixed baking powder in your cake.
Step 3: Cream Butter and Sugar
- Soften butter: Ensure your unsalted butter (1 cup) is at room temperature. It should be soft enough to indent easily with your finger but not melted. This is crucial for creaming!
- Cream butter and sugar: In a large mixing bowl (or the bowl of a stand mixer fitted with the paddle attachment), add the softened butter and granulated sugar (1 cup). Beat them together on medium speed for 3-5 minutes. You’re looking for the mixture to become light, fluffy, and pale yellow. This process incorporates air, which is vital for a tender cake crumb. Common mistake: Not creaming long enough results in a dense cake.
Step 4: Incorporate Eggs and Flavor
- Add eggs one at a time: Crack your 4 large eggs into a separate small bowl. With the mixer on medium-low speed, add one egg at a time to the butter-sugar mixture. Beat well after each addition until fully incorporated. Scrape down the sides of the bowl with a spatula as needed.
- Add vanilla and zest: Once all eggs are mixed in, stir in the vanilla extract (1 teaspoon) and optional lemon zest (1 teaspoon). Mix until just combined. The mixture might look a little curdled at this stage, especially after adding eggs – don’t worry, this is normal and will resolve when you add the flour. Beginner tip: Room temperature eggs emulsify better with the butter and sugar, preventing a curdled appearance and ensuring a smoother batter.
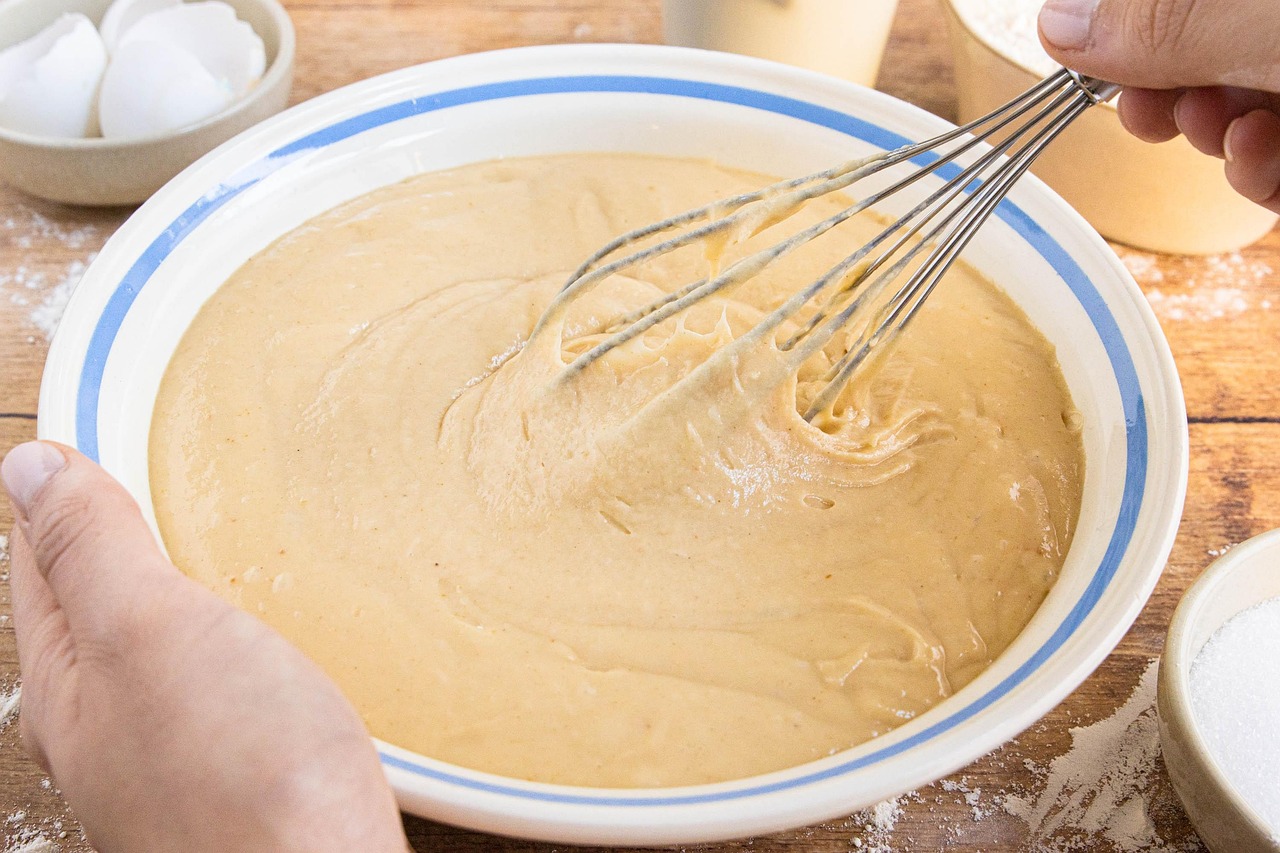
Step 5: Gradually Add Dry Ingredients
- Add dry ingredients in batches: With the mixer on the lowest speed, gradually add the dry ingredient mixture to the wet ingredients. Add about one-third of the flour mixture, mix until just combined, then add the next third, and so on.
- Mix until just combined: Mix only until you no longer see streaks of dry flour. Do not overmix! Overmixing develops the gluten in the flour too much, leading to a tough, dry cake.
- Final scrape: Use your spatula to give the batter one final gentle fold by hand, ensuring everything from the bottom and sides is incorporated.
Step 6: Bake Your Cake
- Transfer to pan: Pour the batter evenly into your prepared baking pan. Gently smooth the top with your spatula. You can also gently tap the pan on the counter a couple of times to release any large air bubbles.
- Bake: Place the pan in the preheated oven. Bake for 55-70 minutes. Baking times can vary significantly between ovens, so keep an eye on it.
- Check for doneness: The cake is done when the top is golden brown, and a wooden skewer or toothpick inserted into the center comes out clean or with a few moist crumbs attached (but no wet batter). If the top starts to brown too quickly, you can loosely tent it with aluminum foil for the last 15-20 minutes of baking.
Step 7: Cool and Serve
- Cool in pan: Once baked, remove the cake from the oven and let it cool in the pan on a wire rack for 15-20 minutes. This allows the cake to set and firm up, making it easier to remove without breaking.
- Invert onto rack: After 15-20 minutes, carefully invert the cake onto the wire rack. Lift off the pan and peel away any parchment paper.
- Cool completely: Let the cake cool completely on the wire rack before slicing. Slicing a warm cake can make it crumble and dry out faster.
- Serve: Enjoy your delicious Quatre Quart cake plain, dusted with powdered sugar, or served with fresh fruit!
Tips & Tricks for Beginner Bakers
Baking is a science and an art, but these simple tips will help you achieve consistent success with your Quatre Quart and other baking projects:
- Room Temperature is Key: Ensure your butter and eggs are at room temperature. This allows them to emulsify properly, creating a smooth, homogenous batter that traps air better, leading to a lighter, fluffier cake. Cold ingredients will result in a lumpy, curdled batter and a denser cake.
- Measure Accurately: Baking requires precision. Use proper measuring cups and spoons. For flour, spoon it into your measuring cup and level it off with a straight edge (like the back of a knife) rather than scooping directly from the bag, which can compact the flour and lead to too much being used.
- Don’t Overmix: Once you add the flour, mix only until just combined. Overmixing develops gluten, which can make your cake tough and chewy instead of tender and moist. A few streaks of flour are better than an overmixed batter.
- Know Your Oven: Ovens can vary widely in temperature. An oven thermometer can be a great investment to ensure your oven is actually at the temperature you set it to. If your cake bakes too quickly or slowly, this might be why.
- Patience with Cooling: Resist the urge to slice into your cake immediately after it comes out of the oven. Allowing it to cool completely on a wire rack helps it firm up, prevents crumbling, and allows the internal structure to set properly, locking in moisture.
Essential Baking Tools You’ll Need
Having the right tools makes all the difference, especially when you’re starting out. Here are some basics that will serve you well for this recipe and many others:
- Mixing Bowl: You’ll need at least two – one large for the batter, and a smaller one for dry ingredients or cracking eggs.
- Whisk: Essential for combining dry ingredients and light mixing.
- Baking Pan: An 8.5 x 4.5 inch loaf pan or an 8-inch round cake pan is perfect for this recipe.
- Measuring Cups and Spoons: Accurate measurements are crucial in baking. Get a good set for both dry and liquid ingredients.
- Spatula: For scraping down the sides of your mixing bowl and gently folding ingredients.
- Wire Cooling Rack: Allows air to circulate around the cake for even cooling.
- Electric Mixer (Handheld or Stand): While you can cream butter and sugar by hand, a mixer makes the job much easier and more effective.
Nutrition Information (Estimated Per Slice)
Please note that these are approximate values and can vary based on exact ingredients and portion sizes.
| Nutrient | Amount |
|---|---|
| Calories | 350-400 kcal |
| Carbohydrates | 40-45g |
| Protein | 5-6g |
| Fat | 20-25g |
| Fiber | 1g |
| Sugar | 25-30g |
Frequently Asked Questions (FAQs)
Q1: What does “Quatre Quart” actually mean?
A: “Quatre Quart” is French for “four quarters.” It refers to the traditional recipe’s ratio of equal weights for its four main ingredients: butter, sugar, eggs, and flour. This simple balance is what makes it such a reliable and delicious cake!
Q2: Why is it so important for ingredients like butter and eggs to be at room temperature?
A: Room temperature ingredients emulsify much better, meaning they blend together smoothly and evenly. Cold butter won’t cream properly with sugar, leading to a dense cake, and cold eggs can cause the batter to curdle. This smooth emulsion traps air, which is crucial for a light and tender crumb.
Q3: How do I know when my Quatre Quart cake is perfectly baked?
A: The best way to check is with a simple toothpick or wooden skewer test. Insert it into the very center of the cake; if it comes out clean or with a few moist crumbs attached (but no wet batter), your cake is done! The top should also be golden brown and spring back slightly when gently pressed.
Q4: Can I add other flavorings to this cake?
A: Absolutely! The Quatre Quart is a fantastic base. You can experiment with different extracts like almond or orange, or add citrus zest from oranges or limes. A tablespoon or two of a liqueur (like rum or Grand Marnier) can also be added for an adult twist. Just be mindful of altering the liquid content too much.
Q5: How should I store leftover Quatre Quart cake?
A: Store the cake at room temperature, tightly wrapped in plastic wrap or in an airtight container, for up to 3-4 days. It can also be frozen, well-wrapped, for up to 2-3 months. Thaw it at room temperature before serving.
Q6: My cake sank in the middle, what went wrong?
A: There are a few common reasons for a cake sinking: opening the oven door too early (especially in the first 2/3 of baking), overmixing the batter, or not baking it long enough. Make sure your oven temperature is accurate and resist peeking too often!
Your Delicious Baking Journey Begins Here!
Congratulations, you’ve just created a classic! The Quatre Quart cake is a testament to the fact that simple ingredients, when handled with a little care and attention, can produce something truly extraordinary. This recipe is not just about baking a cake; it’s about learning fundamental techniques that will serve you well in all your future baking adventures. Don’t worry if your first attempt isn’t absolutely perfect – every bake is a learning experience. The most important ingredient is always your enthusiasm!
We hope you enjoy this rich, moist, and utterly delightful cake. Share your creations with us, and happy baking!