Unlocking the Secret: Your Own Homemade Raising Cane’S Bread Recipe!
Craving that iconic, buttery, garlicky slice of Texas Toast from Raising Cane’s? You’re not alone! It’s the perfect crispy, soft, and savory complement to their delicious chicken fingers. While it might seem like a complex culinary mystery, we’re here to tell you that recreating this beloved side dish at home is not only possible but incredibly fun and rewarding! This **Raising Cane’S Bread Recipe** is designed specifically for home bakers, transforming a simple loaf of white bread into that irresistible golden-brown perfection.
Forget store-bought garlic bread – our detailed guide will walk you through every step, ensuring even complete novices can achieve bakery-quality results. We’ve packed this post with **easy baking recipes** principles and essential **baking tips for beginners** to make your journey into homemade bread a delicious success. Get ready to impress your family and friends with a copycat recipe that tastes just like the real deal!
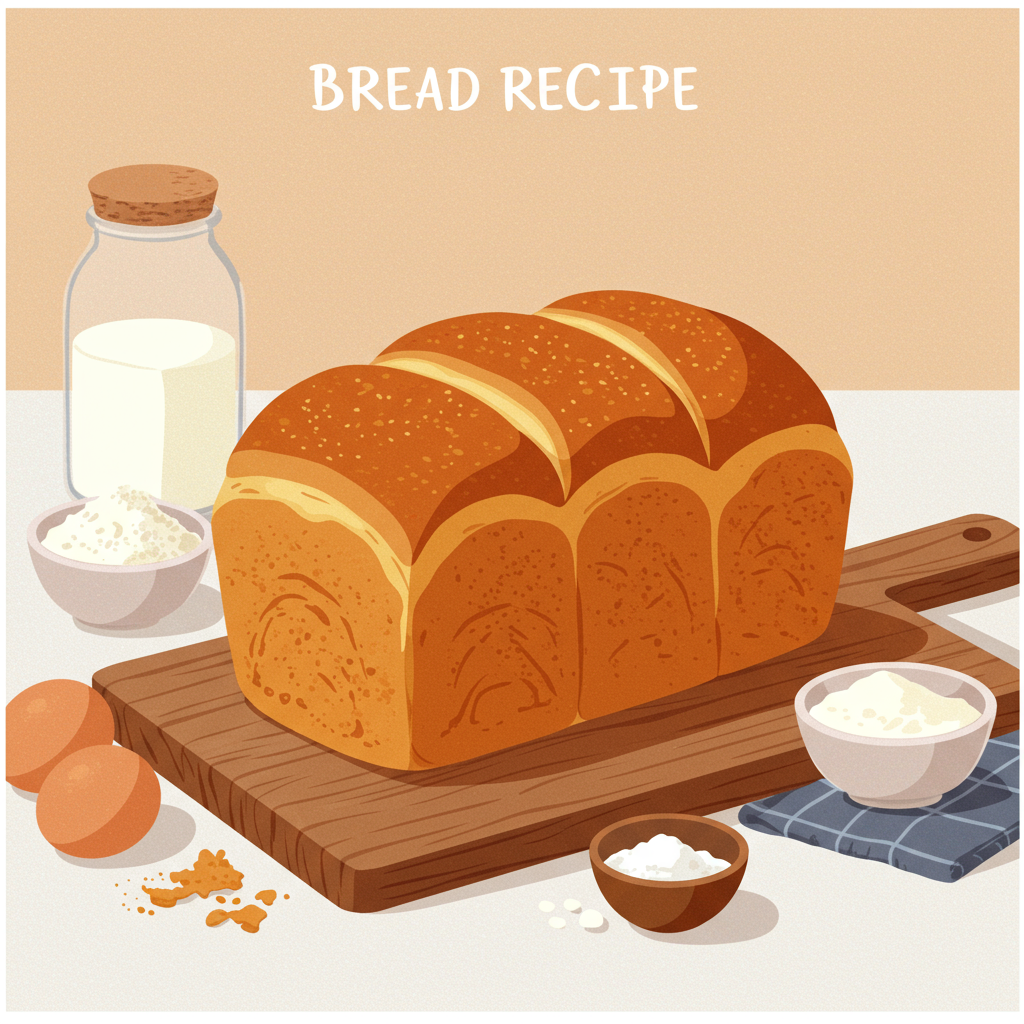
Ingredients List
Gather your ingredients! Freshness is key, especially for yeast.
| Ingredient | Quantity | Unit |
|---|---|---|
| For the White Bread Loaf: | ||
| Warm Water (105-115°F / 40-46°C) | 1 | cup |
| Active Dry Yeast | 2 ¼ | teaspoons (or 1 standard packet) |
| Granulated Sugar | 1 | tablespoon |
| All-Purpose Flour (plus extra for dusting) | 3 | cups |
| Salt | 1 | teaspoon |
| Vegetable Oil (or melted unsalted butter) | 2 | tablespoons |
| For the Texas Toast Finish: | ||
| Unsalted Butter, melted | ½ | cup (1 stick) |
| Garlic Powder | 1 | teaspoon (adjust to taste) |
| Salt (optional, if using unsalted butter) | ¼ | teaspoon |
| Dried Parsley (optional, for garnish) | Pinch | |
Step-by-Step Instructions: Crafting Your Raising Cane’s Bread
This recipe is broken down into two main parts: baking the delicious white bread loaf from scratch, and then transforming it into the famous Raising Cane’s style Texas Toast. Follow these detailed steps for guaranteed success!
Part 1: Baking the Perfect White Bread Loaf
Step 1: Activate Your Yeast – The Foundation of Great Bread
- In a large mixing bowl, pour in the **1 cup of warm water**. It’s crucial that the water is between 105-115°F (40-46°C). If it’s too hot, it will kill the yeast; too cold, and the yeast won’t activate. A kitchen thermometer is your best friend here!
- Sprinkle the **2 ¼ teaspoons of active dry yeast** and the **1 tablespoon of granulated sugar** over the warm water. The sugar acts as food for the yeast, helping it to activate.
- Gently stir once or twice, then let it sit for 5-10 minutes. You’ll know your yeast is alive and well when the mixture becomes **foamy and bubbly** on the surface. If it doesn’t foam, your yeast might be old or your water temperature was off. Start over with fresh yeast and check your water temperature carefully. This is a critical first step for any yeast bread recipe!
Step 2: Mix and Form Your Dough
- Once your yeast is active, add **2 cups of all-purpose flour**, the **1 teaspoon of salt**, and the **2 tablespoons of vegetable oil (or melted butter)** to the yeast mixture in the bowl.
- Using a sturdy spoon or a rubber spatula, stir until the ingredients are just combined and a shaggy dough forms.
- Gradually add the remaining **1 cup of all-purpose flour**, about a half-cup at a time, mixing after each addition. The dough will start to become stiff and sticky. You might not need all of the last cup, or you might need a tiny bit more – the goal is a dough that pulls away from the sides of the bowl.
Step 3: Kneading for Elasticity and Structure
- Lightly flour a clean work surface (your kitchen counter is perfect!). Turn the dough out onto the floured surface.
- Now for the kneading! This is where you develop the gluten, which gives bread its structure and chewiness.
- For hand kneading: Push the dough away from you with the heels of your hands, then fold it back over itself. Rotate the dough a quarter turn and repeat. Continue this process for 8-10 minutes. The dough will start sticky but become smooth, elastic, and less sticky as you knead. It should spring back when gently poked.
- For stand mixer kneading: If you have a stand mixer with a dough hook, attach it and knead on medium-low speed for 5-7 minutes. The dough should gather around the hook and clear the sides of the bowl.
- Beginner Tip: Don’t add too much extra flour during kneading unless the dough is truly unmanageably sticky. Adding too much flour can result in dry, dense bread. A lightly floured surface is all you need.
Step 4: The First Rise (Bulk Fermentation)
- Lightly grease a clean large bowl with a little vegetable oil or cooking spray. Place the kneaded dough into the bowl, then turn it over once to coat the top with oil. This prevents it from drying out.
- Cover the bowl tightly with plastic wrap or a clean kitchen towel.
- Place the bowl in a warm, draft-free spot. A slightly warm oven (turned off, or on for just a minute then off), or near a sunny window, works well. Let the dough rise for 60-90 minutes, or until it has **doubled in size**. This step is crucial for flavor and texture!
- Common Mistake: If your dough isn’t rising, your yeast might have been inactive, or your rising environment might be too cold. Give it more time in a warmer spot.
Step 5: Shaping Your Loaf
- Once the dough has doubled, gently punch it down to release the air. This is called “degassing” and helps create an even crumb structure.
- Lightly flour your work surface again. Turn the dough out and gently pat it into a rectangle, about 9×12 inches.
- Starting from one of the shorter ends, tightly roll the dough into a log. Pinch the seam closed firmly with your fingertips. Tuck the ends under slightly to create a neat loaf shape.
- Lightly grease a 9×5 inch loaf pan. Place the shaped dough, seam-side down, into the prepared loaf pan.
Step 6: The Second Rise (Proofing)
- Cover the loaf pan loosely with plastic wrap or a clean kitchen towel.
- Return the pan to your warm, draft-free spot for another 30-45 minutes, or until the dough has almost doubled in size again and is peeking over the top of the pan. This second rise makes the bread light and airy.
Step 7: Bake Your Loaf
- About 15 minutes before the end of the second rise, preheat your oven to **375°F (190°C)**.
- Once preheated and the dough has risen, carefully place the loaf pan into the preheated oven.
- Bake for 25-30 minutes, or until the top is a beautiful **golden brown** and the internal temperature reaches 200-210°F (93-99°C) when measured with an instant-read thermometer.
- Beginner Tip: Avoid opening the oven door frequently, especially in the first 15-20 minutes, as this can cause the loaf to collapse.
- Remove the loaf from the oven. Immediately remove the bread from the loaf pan and transfer it to a wire cooling rack. This prevents the bottom from becoming soggy. Let it cool completely (at least 1-2 hours) before slicing. **Patience is key here!** Slicing warm bread can make it gummy.
Part 2: Transforming Your Loaf into Raising Cane’s Texas Toast
Step 8: Prepare the Garlic Butter Mixture
- In a small bowl, combine the **½ cup melted unsalted butter**, **1 teaspoon garlic powder**, and **¼ teaspoon salt** (if using unsalted butter). Stir well to combine. If desired, add a pinch of dried parsley for a touch of color.
Step 9: Slice and Butter Your Bread
- Once your cooled bread loaf is ready, slice it into thick, approximately 1-inch slices. The thicker slices are characteristic of Texas Toast.
- Generously brush both sides of each bread slice with the garlic butter mixture. Don’t be shy – the butter is what gives it that amazing flavor and crispiness!
Step 10: Toast to Golden Perfection
You have a few options for toasting, depending on your preferred method:
- Skillet/Grill Pan Method (Recommended for authenticity): Heat a large skillet or grill pan over medium heat. Place the buttered bread slices in the hot pan (you might need to work in batches). Toast for 2-4 minutes per side, or until golden brown and crispy. The butter will sizzle and brown the bread beautifully.
- Oven/Broiler Method: Preheat your oven to 400°F (200°C) or set your broiler to high. Place buttered bread slices on a baking sheet.
- Oven: Bake for 5-8 minutes, flipping halfway, until golden brown.
- Broiler: Watch carefully! Broilers can burn quickly. Broil for 1-2 minutes per side, keeping a close eye on it to prevent burning.
Serve your homemade Raising Cane’s Bread immediately and enjoy the fruits of your labor!
Tips & Tricks for Perfect Bread
- Yeast Temperature is Key: Always check your water temperature. Too hot kills the yeast, too cold won’t activate it. 105-115°F (40-46°C) is the sweet spot for active dry yeast.
- Measure Flour Correctly: For accurate results, use the “spoon and level” method. Spoon flour into your measuring cup and then level off the top with a straight edge. Don’t scoop directly from the bag, as this compacts the flour and you’ll end up with too much.
- Don’t Rush the Rise: Patience is a virtue in bread making. Let your dough take its time to double in size. A warm, draft-free environment helps. If your kitchen is cold, consider placing the bowl in a slightly warmed (then turned off) oven.
- Kneading is Crucial: Proper kneading develops gluten, which gives bread its structure and texture. Don’t under-knead, or your bread will be dense. Don’t over-knead either, as it can make the dough tough. The “windowpane test” (stretching a small piece of dough until it’s translucent) is a good indicator of sufficient kneading.
- Cool Completely Before Slicing: It’s tempting to cut into a warm loaf, but resist! Bread continues to cook and set as it cools. Slicing too early can result in a gummy texture.
- Generosity with Butter: For the Texas Toast, don’t skimp on the garlic butter. It’s what makes it so rich and flavorful.
Essential Baking Tools
Having the right tools makes baking a breeze! Here are some essentials you’ll need for this recipe:
- Mixing Bowl
- Whisk (for dry ingredients and butter mixture)
- Loaf Pan (9×5 inch)
- Measuring Cups and Spoons
- Rubber Spatula
- Instant-Read Thermometer (for water and bread internal temp)
- Wire Cooling Rack
- Pastry Brush (for applying garlic butter)
- Large Skillet or Grill Pan (for toasting)
Nutrition Information (Estimated per 1 thick slice of Texas Toast)
Please note that these values are estimates and can vary based on exact ingredient measurements and brands used.
| Nutrient | Amount |
|---|---|
| Calories | ~300 kcal |
| Carbohydrates | ~35 g |
| Protein | ~4.5 g |
| Fat | ~15 g |
| Fiber | ~1 g |
| Sugar | ~1.5 g |
Frequently Asked Questions (FAQs)
- What if my yeast doesn’t foam when activated?
- If your yeast mixture doesn’t become foamy and bubbly after 5-10 minutes, it means your yeast isn’t active. This could be because your water was too hot (killing the yeast), too cold (not activating it), or your yeast is old/expired. You’ll need to discard it and start over with fresh yeast and carefully measured warm water.
- How do I know if I’ve kneaded the dough enough?
- The dough should feel smooth, elastic, and spring back when gently poked. A common test is the “windowpane test”: take a small piece of dough, gently stretch it with your fingers. If you can stretch it thin enough to see light through it without it tearing, your gluten is well-developed, and you’ve kneaded enough.
- My dough isn’t rising, what could be wrong?
- The most common culprits are inactive yeast (see above) or a too-cold environment. Ensure your rising spot is warm and draft-free. If your kitchen is cold, try placing the covered bowl in a slightly warm (turned off) oven for the rise.
- Can I prepare the dough ahead of time?
- Yes! After the first rise and punching down, you can place the dough in an oiled, airtight container and refrigerate it overnight (up to 24 hours). The next day, let it come to room temperature for about 30-60 minutes before proceeding with shaping (Step 5).
- Can I use a stand mixer instead of hand kneading?
- Absolutely! A stand mixer with a dough hook attachment is a great tool. After mixing the initial ingredients, attach the dough hook and knead on medium-low speed for 5-7 minutes, until the dough is smooth and elastic and pulls away from the sides of the bowl.
- How can I make this bread even more garlicky?
- Feel free to increase the amount of garlic powder in the butter mixture to your liking. For an even stronger garlic flavor, you can add a tiny pinch of onion powder or a very small amount of finely minced fresh garlic to the melted butter, but be careful as fresh garlic can burn quickly during toasting.
Conclusion: Your Homemade Raising Cane’s Dream!
There you have it – your very own **Raising Cane’S Bread Recipe**, from scratch, perfected for your home kitchen! We hope this detailed, beginner-friendly guide has demystified the art of bread baking and empowered you to create something truly delicious. The aroma of freshly baked bread combined with the savory scent of garlic butter is simply incomparable.
Don’t be intimidated by yeast or kneading; every step is a journey, and every loaf is a learning experience. With a little patience and these comprehensive **baking tips for beginners**, you’ll be turning out perfect Texas Toast that rivals your favorite fast-food joint. So, fire up your ovens, get your hands in that dough, and prepare for a truly satisfying culinary adventure. Happy baking!
“`