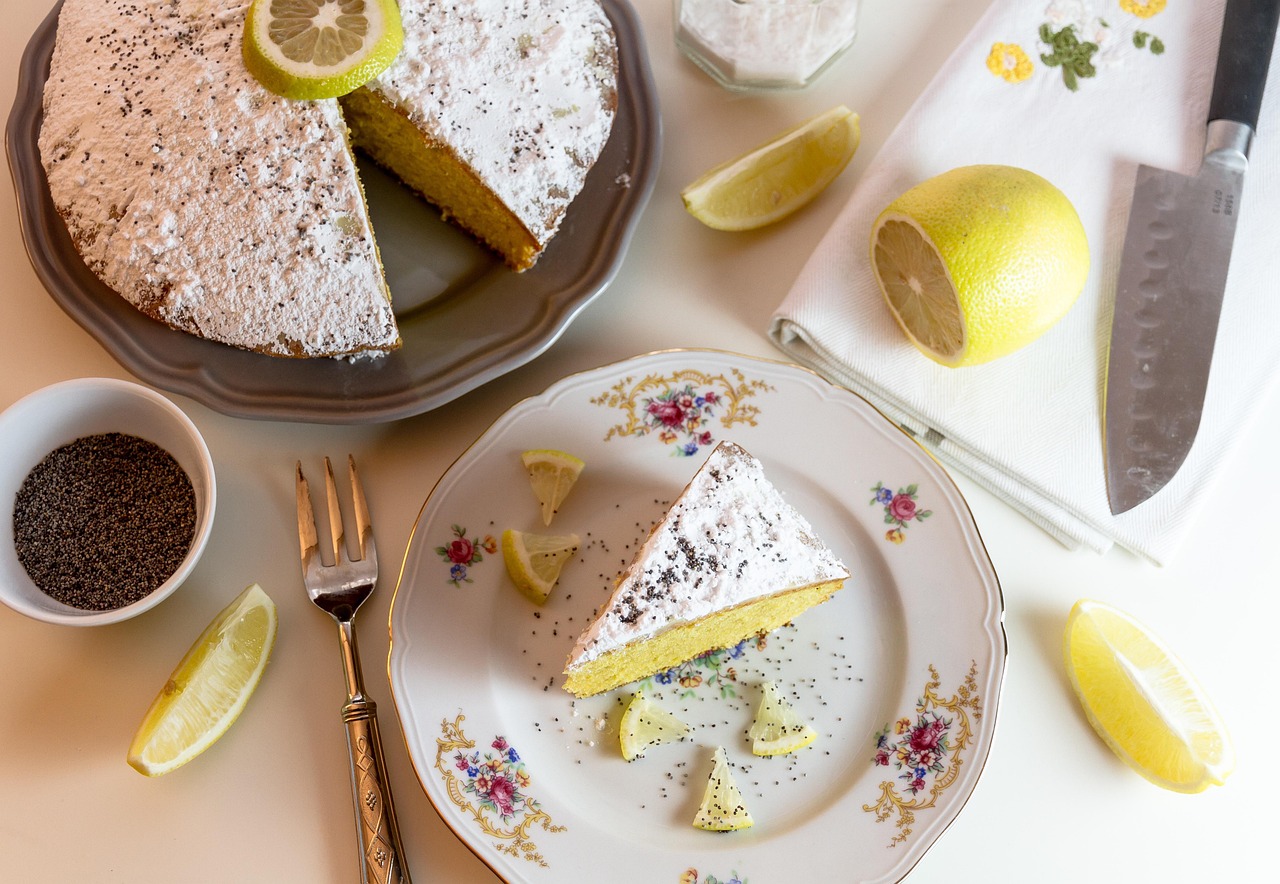
Welcome, aspiring bakers and seasoned pros alike! Are you ready to embark on a baking journey that promises a dessert as light as a cloud and as bright as sunshine? Today, we’re diving into the delightful world of the Recipe Angel Food Cake And Lemon Pie Filling. This isn’t just any dessert; it’s a symphony of textures and flavors the airy, delicate crumb of Angel Food Cake perfectly complemented by a vibrant, tangy, and irresistibly smooth lemon pie filling. If you’ve been searching for truly easy baking recipes that yield spectacular results, look no further.
We’ve meticulously crafted this guide with comprehensive baking tips for beginners to ensure your success. Get ready to impress yourself and your loved ones with this show-stopping dessert that’s surprisingly simple to master!
Ingredients: Gather Your Culinary Arsenal
Precision is key in baking, so make sure to measure all your ingredients accurately before you begin. For the best results, ensure your egg whites are at room temperature.
For the Angel Food Cake:
| Quantity | Unit | Ingredient |
|---|---|---|
| 12 | large | Egg Whites (approximately 1 ½ cups), at room temperature |
| 1 ½ | cups | Granulated Sugar, divided |
| 1 | cup | Cake Flour, sifted |
| 1 ½ | teaspoons | Cream of Tartar |
| 1 | teaspoon | Vanilla Extract |
| ¼ | teaspoon | Salt |
For the Lemon Pie Filling:
| Quantity | Unit | Ingredient |
|---|---|---|
| ¾ | cup | Fresh Lemon Juice (from 3-4 lemons) |
| 1 | tablespoon | Lemon Zest (from 1-2 lemons) |
| ¾ | cup | Granulated Sugar |
| 3 | large | Egg Yolks |
| 1 | large | Whole Egg |
| ¼ | cup | Cornstarch |
| ¼ | cup | Cold Water |
| 4 | tablespoons | Unsalted Butter, cut into pieces |
Step-by-Step Instructions: Your Path to Baking Perfection
Follow these detailed steps carefully. Patience and attention to detail will ensure your success, especially when working with delicate ingredients like egg whites!
Part 1: Crafting the Angel Food Cake
- Prepare Your Pan and Preheat Oven:
- Preheat your oven to 350°F (175°C).
- Crucial Beginner Tip: Use an ungreased 10-inch tube pan (the kind with a removable bottom and “feet”). Do not grease the pan! Angel food cake needs to climb the sides of the pan to get its height, and grease will prevent this, causing it to collapse.
- Combine Dry Ingredients:
- In a medium bowl, sift together the cake flour with ½ cup of the granulated sugar. Sifting is important for a lighter cake. Set aside.
- Whip the Egg Whites:
- In a very large, impeccably clean mixing bowl (preferably metal or glass, as plastic can retain grease), add the room temperature egg whites, cream of tartar, and salt.
- Using an electric mixer (stand mixer with whisk attachment or hand mixer) on medium-low speed, beat the egg whites until they become foamy.
- Gradually increase the speed to medium-high. Slowly add the remaining 1 cup of granulated sugar, one tablespoon at a time, while continuing to beat.
- Continue beating until the egg whites are glossy and form stiff, firm peaks. Beginner Tip: Stiff peaks mean that when you lift the whisk, the peak stands straight up and doesn’t droop. Be careful not to overbeat, as this can make the meringue dry and difficult to fold.
- Gently beat in the vanilla extract for just a few seconds until combined.
- Fold in Dry Ingredients:
- Now for the delicate part! Take your sifted flour and sugar mixture.
- Sprinkle about one-quarter of the flour mixture over the egg whites. Using a large rubber spatula, gently fold the flour into the egg whites using an upward motion from the bottom of the bowl, then sweeping over the top.
- Repeat with the remaining flour mixture, adding it in three more additions, folding gently after each. The Goal: To incorporate the flour without deflating the airy egg whites. Over-folding will result in a dense, tough cake.
- Bake the Cake:
- Gently spoon the batter into your ungreased tube pan.
- Smooth the top lightly with the spatula.
- Bake for 35-45 minutes, or until the top is golden brown and springs back when lightly touched.
- Cool Upside Down:
- Immediately upon removing from the oven, invert the pan over the neck of a bottle or onto its “feet” (if your pan has them). This prevents the cake from collapsing as it cools.
- Let it cool completely upside down for at least 1.5 to 2 hours. Patience is a virtue here! Removing it too soon will cause it to sink.
- Remove from Pan:
- Once completely cool, run a thin knife or offset spatula around the outer and inner edges of the pan to loosen the cake.
- Remove the bottom of the pan, then run the knife along the bottom to free the cake entirely.
Part 2: Preparing the Lemon Pie Filling
- Create the Slurry:
- In a small bowl, whisk together the cornstarch and cold water until smooth. This is your cornstarch slurry, which will thicken the filling. Set aside.
- Combine Wet Ingredients:
- In a medium saucepan, whisk together the lemon juice, lemon zest, granulated sugar, egg yolks, and whole egg until well combined.
- Beginner Tip: Whisking well now prevents lumps and ensures a smooth custard.
- Cook the Filling:
- Place the saucepan over medium-low heat. Cook, whisking constantly, until the mixture thickens significantly, coating the back of a spoon. This usually takes about 5-8 minutes.
- Common Mistake & Fix: If the mixture starts to curdle, you’ve likely cooked it too hot or not whisked enough. Reduce heat immediately and whisk vigorously. For future attempts, keep the heat lower and whisk continuously.
- Once thick, slowly whisk in the cornstarch slurry and continue to cook, whisking, for another 1-2 minutes until it reaches a thick, pudding-like consistency. It should bubble gently.
- Finish with Butter:
- Remove the saucepan from the heat. Add the cold butter pieces, one at a time, whisking until each piece is fully melted and incorporated. The butter adds richness and a silky texture.
- Chill the Filling:
- Pour the lemon filling into a clean bowl. Press a piece of plastic wrap directly onto the surface of the filling to prevent a skin from forming.
- Refrigerate for at least 2-3 hours, or until thoroughly chilled and firm enough to spread.
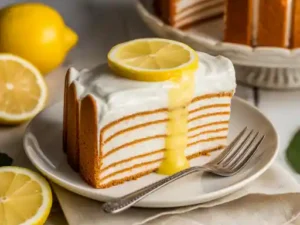
Part 3: Assembly and Serving
- Prepare the Cake for Filling:
- Place the cooled Angel Food Cake on a serving platter.
- Using a serrated knife, carefully slice the cake horizontally into two or three layers (your preference).
- Alternatively, you can hollow out the bottom of the cake slightly, leaving a 1-inch border on the sides and bottom, to create a “bowl” for the filling. This is a common and easy method for beginners.
- Fill the Cake:
- If you’ve sliced the cake, spread a generous layer of chilled lemon filling between each cake layer.
- If you’ve hollowed it out, spoon the lemon filling into the cavity.
- Final Touches:
- Optionally, you can reserve some filling to spread on top, or simply dust with powdered sugar.
- For an extra touch, garnish with fresh berries or a dollop of whipped cream.
- Chill and Serve:
- Refrigerate the assembled cake for at least 30 minutes to allow the filling to set with the cake.
- Slice and serve this heavenly dessert! Enjoy the light cake with its tangy, creamy companion.
Tips & Tricks for Baking Success
- Room Temperature Egg Whites are Key: For Angel Food Cake, cold egg whites won’t whip up to their full volume. Take them out of the fridge at least 30 minutes to an hour before you start.
- Cleanliness is Next to Godliness: Any trace of grease (from your hands, a dirty bowl, or a greasy whisk) will prevent egg whites from whipping properly. Ensure all your equipment is spotless.
- Measure Accurately: Baking is a science. Use proper measuring cups and spoons, and for dry ingredients like flour, spoon it into the measuring cup and level it off rather than scooping directly.
- Don’t Overmix the Cake Batter: Once the flour is added to the egg whites, fold gently and just until combined. Overmixing will deflate the air you’ve worked so hard to incorporate, leading to a dense cake.
- Patience with Cooling: Resist the urge to remove the Angel Food Cake from its pan too early. Cooling upside down is essential for maintaining its height and delicate structure.