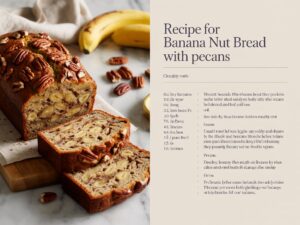
Welcome, aspiring bakers! Are you ready to dive into the wonderful world of baking with a recipe that’s as comforting as it is simple? This guide is specifically designed for you, filled with all the baking tips for beginners you’ll need. Today, we’re going to master the art of making a truly irresistible loaf using our special Recipe For Banana Nut Bread With Pecans. Forget complicated techniques; we’re focusing on creating a moist, flavorful, and perfectly textured bread that will impress everyone, including yourself!
Baking can seem daunting at first, but with the right instructions and a little patience, you’ll find it’s one of the most rewarding kitchen activities. This easy baking recipe is your perfect starting point. We’ll walk through each step together, offering advice to avoid common pitfalls and ensure your first (or fiftieth!) banana nut bread is a resounding success. So tie on your apron, gather your ingredients, and let’s create some magic!
Ingredients List: What You’ll Need
Before we begin, ensure you have all your ingredients measured and ready. This is called “mise en place” and it makes baking so much smoother!
| Ingredient | Quantity | Unit |
|---|---|---|
| All-purpose flour | 1.5 | cups |
| Granulated sugar | 0.5 | cups |
| Light brown sugar (packed) | 0.25 | cups |
| Baking soda | 1 | teaspoon |
| Salt | 0.5 | teaspoon |
| Large eggs | 2 | |
| Unsalted butter, melted and cooled | 0.5 | cups (1 stick) |
| Vanilla extract | 1 | teaspoon |
| Very ripe bananas, mashed | 3 | medium |
| Chopped pecans | 0.75 | cups |
Step-by-Step Instructions: Baking Your Perfect Loaf
Follow these detailed steps carefully, and you’ll be enjoying warm banana nut bread in no time!
Step 1: Prepare Your Oven and Baking Pan
- Preheat your oven to 350°F (175°C). It’s crucial for even baking.
- Grease and flour a 9×5 inch loaf pan. To do this, rub a thin layer of butter or cooking spray all over the inside of the pan, then sprinkle a tablespoon of flour over it. Tilt and tap the pan until the flour coats all surfaces, then tap out any excess. This ensures your bread won’t stick!
Step 2: Combine the Dry Ingredients
- In a large mixing bowl, whisk together the all-purpose flour, granulated sugar, brown sugar, baking soda, and salt.
- Beginner Tip: When measuring flour, spoon it into your measuring cup and then level it off with the back of a knife. Don’t scoop directly from the bag, as this can pack the flour and lead to a dry, dense bread.
- Set this bowl aside.
Step 3: Prepare the Wet Ingredients
- In a separate medium bowl, mash the very ripe bananas. The riper they are (brown spots are great!), the sweeter and more flavorful your bread will be. Aim for about 1.5 cups of mashed banana.
- Add the cooled melted butter (make sure it’s not hot, or it might cook the eggs!), eggs, and vanilla extract to the mashed bananas.
- Whisk these wet ingredients together until they are well combined and smooth.
Step 4: Gently Combine Wet and Dry Ingredients
- Pour the wet banana mixture into the bowl with your dry ingredients.
- Using a spatula or wooden spoon, gently fold the ingredients together until just combined.
- Critical Beginner Tip: Do NOT overmix! Overmixing develops the gluten in the flour, which can lead to a tough, chewy bread instead of a tender one. A few streaks of flour are perfectly fine. Stop mixing as soon as you no longer see dry flour.
Step 5: Fold in the Pecans
- Add the chopped pecans to the batter.
- Gently fold them in until they are evenly distributed.
- Alternative: If you’re not a fan of pecans, you can use walnuts, chocolate chips, or even a mix of both!
Step 6: Bake to Perfection
- Pour the batter into your prepared loaf pan, spreading it evenly.
- Place the pan in the preheated oven.
- Bake for 50-65 minutes. Baking times can vary depending on your oven, so keep an eye on it.
- How to Check for Doneness: Insert a wooden skewer or toothpick into the center of the loaf. If it comes out clean or with a few moist crumbs attached, your bread is ready! If it comes out with wet batter, continue baking for another 5-10 minutes and check again. If the top is browning too quickly, you can loosely tent it with aluminum foil.
Step 7: Cool and Enjoy
- Once baked, remove the loaf pan from the oven and let it cool in the pan for 10-15 minutes on a wire rack. This allows the bread to set and prevents it from crumbling when you remove it.
- After 10-15 minutes, carefully invert the pan onto the wire rack to remove the bread. Let it cool completely on the rack before slicing.
- Beginner Tip: While it’s tempting to cut into warm bread, letting it cool completely allows the flavors to meld and the texture to firm up, making for cleaner slices and a better eating experience.
- Slice, serve, and enjoy your homemade banana nut bread!
Tips & Tricks for Banana Nut Bread Success
Mastering banana bread is easy with a few extra pointers:
- The Riper, The Better: Seriously, don’t skimp on ripe bananas! They are the secret to that deep banana flavor and natural sweetness. If your bananas aren’t quite ripe, you can speed up the process by baking them on a baking sheet at 300°F (150°C) for 15-30 minutes until their skins turn black.
- Don’t Overmix: This bears repeating! A few lumps are fine and actually preferred. Overmixing leads to a dense, tough bread. Mix just until the ingredients are combined.
- Toasting Your Nuts: For an extra layer of flavor, lightly toast your pecans (or walnuts) in a dry skillet over medium heat for 5-7 minutes, stirring occasionally, until fragrant. Let them cool before adding to the batter.
- Storage Savvy: Store your banana bread in an airtight container at room temperature for up to 3 days, or in the refrigerator for up to a week. For longer storage, slice the cooled bread and freeze individual slices in an airtight container or freezer bag for up to 3 months. Thaw at room temperature or warm gently in the microwave.
- Add-ins & Variations: Feel free to get creative! Add a teaspoon of cinnamon or nutmeg for a spiced kick, or fold in a half cup of chocolate chips along with the pecans for an extra treat.
- Room Temperature Eggs: Eggs at room temperature incorporate more smoothly into your batter, creating a more uniform texture. If you forget, place them in a bowl of warm water for 5-10 minutes.
Essential Baking Tools
Having the right tools makes baking a breeze. Here are some essentials for this recipe:
- Mixing Bowl
- Whisk
- 9×5 inch Loaf Baking Pan
- Measuring Cups
- Spatula
- Measuring Spoons
- Wire Cooling Rack
Nutrition Information (Estimated per slice)
Here’s an approximate nutritional breakdown for one slice of banana nut bread (assuming 12 slices per loaf). Please note these are estimates and can vary based on exact ingredients and portion sizes.
| Nutrient | Amount |
|---|---|
| Calories | ~300 kcal |
| Carbohydrates | ~42 g |
| Protein | ~4.5 g |
| Fat | ~14 g |
| Fiber | ~2.5 g |
| Sugar | ~22 g |
Frequently Asked Questions (FAQs)
Q1: What if my bananas aren’t ripe enough?
A: Ripe bananas are crucial for flavor and moisture. If yours are green or firm, you can ripen them faster by placing them on a baking sheet in a 300°F (150°C) oven for 15-30 minutes until their skins turn black. Let them cool before mashing. If you don’t have time, you can still use them, but the bread might be less sweet and flavorful.
Q2: Can I use oil instead of butter?
A: Yes, you can! Vegetable oil or a light olive oil can be substituted for melted butter in equal amounts. Oil will often result in a slightly moister bread, while butter adds a richer flavor. It’s a matter of preference.
Q3: How do I know if I’m overmixing the batter?
A: You’ve overmixed if the batter looks perfectly smooth and uniform, and you’ve been vigorously stirring for a while after adding the dry ingredients. The goal is to mix just until no dry streaks of flour remain. A slightly lumpy batter is actually a good sign for tender banana bread!
Q4: My banana bread is raw in the middle, but the outside is done. What happened?
A: This is a common issue! It usually means your oven temperature was too high, causing the outside to cook too quickly before the inside had a chance. It could also mean you needed to bake it longer. Always use an oven thermometer to ensure your oven is at the correct temperature, and don’t be afraid to add extra baking time if the toothpick test isn’t clean. If the top is browning too fast, loosely tent it with foil.
Q5: Can I add other ingredients besides pecans?
A: Absolutely! Banana bread is very forgiving. Common additions include walnuts, chocolate chips (milk, semi-sweet, or dark), shredded coconut, or a sprinkle of cinnamon and nutmeg. Feel free to customize it to your taste!
Q6: How long does homemade banana bread last?
A: Stored in an airtight container, your banana bread will stay fresh at room temperature for about 3 days. If you keep it in the refrigerator, it can last up to a week. For longer storage, slice and freeze individual portions for up to 3 months.
Conclusion: Your Baking Journey Begins!
Congratulations, you’ve now got all the tools and knowledge to bake a truly delightful loaf of Banana Nut Bread With Pecans! We hope this detailed, beginner-friendly guide has made the process enjoyable and stress-free. Remember, baking is as much about the journey as it is about the delicious destination. Don’t be afraid to experiment, and most importantly, have fun!
There’s nothing quite like the aroma of freshly baked banana bread filling your home. So go ahead, share your creation with loved ones, or simply enjoy a slice (or two!) with your morning coffee. Happy baking!