Welcome, aspiring bakers Are you ready to embark on a journey back in time and discover the simple, wholesome goodness of ancient grains? Today, we’re diving into a truly special recipe that’s not only incredibly rewarding but also surprisingly straightforward: our Recipe For Biblical Bread. Forget complicated techniques or obscure ingredients; this is one of those truly easy baking recipes that will build your confidence in the kitchen.
Whether you’re a complete novice or just looking for a back-to-basics bread experience, this post is packed with essential baking tips for beginners to guide you every step of the way. Get ready to fill your home with the irresistible aroma of freshly baked bread and taste a piece of history!
Ingredients for Biblical Bread
Gathering your ingredients is the first exciting step! For this rustic and delicious bread, you’ll need just a few simple items. We’ve chosen whole wheat flour to honor the ancient tradition, giving your loaf a wonderfully hearty texture and flavor.
| Quantity | Unit | Ingredient |
|---|---|---|
| 3 | cups | Whole Wheat Flour (plus extra for dusting) |
| 1 ½ | cups | Warm Water (105-115°F or 40-46°C) |
| 1 | tablespoon | Active Dry Yeast |
| 1 | teaspoon | Honey or Maple Syrup (optional, helps activate yeast) |
| 1 | teaspoon | Fine Sea Salt |
| 1 | tablespoon | Olive Oil (plus extra for greasing the bowl) |
Step-by-Step Instructions: Making Your Biblical Bread
Baking bread might seem intimidating, but we’re breaking it down into super easy, manageable steps. Read through everything once before you start, and don’t be afraid to get your hands a little floury!
Step 1: Activate the Yeast
In a large mixing bowl, pour in your 1 ½ cups of warm water. It’s crucial that the water is warm, not hot or cold. Water that’s too hot will kill the yeast, and water that’s too cold won’t activate it. Aim for a temperature that feels like a warm bath – typically between 105-115°F (40-46°C). Stir in the 1 teaspoon of honey or maple syrup (if using) and then sprinkle the 1 tablespoon of active dry yeast evenly over the surface. Let it sit for 5-10 minutes. You should see foam or bubbles forming on the surface, which means your yeast is alive and ready to work! If nothing happens, your yeast might be old or the water temperature was off, and you’ll need to start this step again.
Step 2: Combine Dry Ingredients
While your yeast is activating, in a separate medium-sized bowl, whisk together the 3 cups of whole wheat flour and the 1 teaspoon of fine sea salt. Whisking ensures the salt is evenly distributed throughout the flour, which is important for flavor. This also helps to lighten the flour, making it easier to mix.
Step 3: Mix the Dough
Once your yeast is bubbly, add the 1 tablespoon of olive oil to the yeast mixture. Then, gradually add the flour mixture to the wet ingredients, about a cup at a time, stirring with a sturdy spoon or a spatula. Keep mixing until all the flour is incorporated and you have a shaggy, somewhat sticky dough. Don’t worry if it looks a bit messy at this stage; that’s perfectly normal for bread dough!
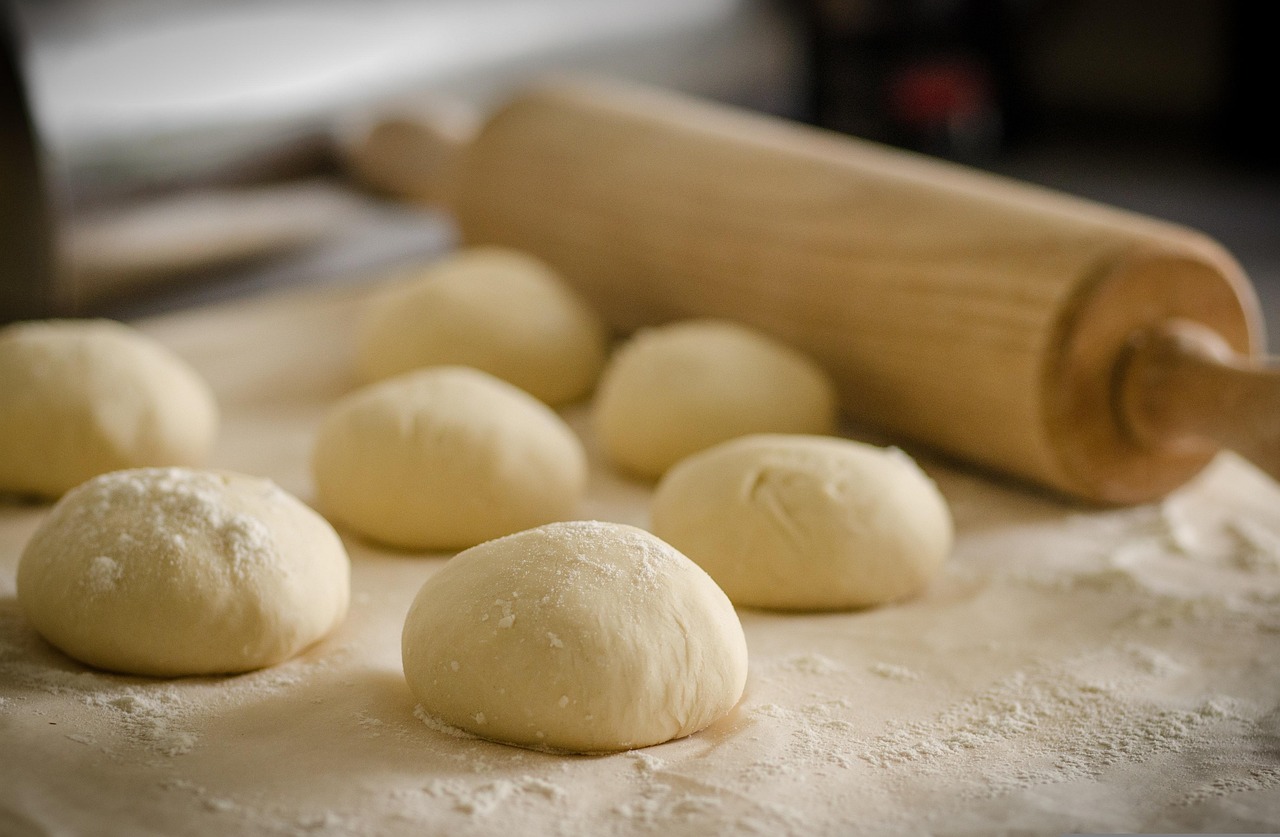
Step 4: Knead the Dough
Lightly flour a clean countertop or a large cutting board. Turn the shaggy dough out onto the floured surface. Now comes the fun part: kneading! Kneading develops the gluten in the flour, which gives the bread its structure and chewy texture. For beginners, a simple method is to push the dough away from you with the heels of your hands, fold it back over itself, give it a quarter turn, and repeat. Continue kneading for 8-10 minutes. The dough should become smoother, more elastic, and less sticky. If it’s too sticky, add a tiny bit more flour (a tablespoon at a time), but try not to add too much, as this can make your bread dense. You’ll know it’s ready when it springs back slowly when poked with a finger.
Common mistake: Not kneading enough! Under-kneaded dough results in a crumbly, dense loaf. Don’t be afraid to put some elbow grease into it!
Step 5: First Rise (Proofing)
Lightly grease a large clean bowl with a little olive oil. Place the kneaded dough into the bowl, turning it once to coat the top with oil (this prevents it from drying out). Cover the bowl tightly with plastic wrap or a clean kitchen towel. Find a warm, draft-free spot for your dough to rise. This could be a sunny windowsill, near a warm oven (but not on top of it!), or even in an oven that’s turned off with the light on. Let the dough rise for 1 to 1.5 hours, or until it has visibly doubled in size. The exact time depends on the warmth of your environment and the activity of your yeast.
Tip for beginners: To check if it’s doubled, gently poke it with two fingers. If the indentations remain, it’s usually ready. If it springs back immediately, give it a little more time.
Step 6: Shape the Loaf
Once the dough has doubled, gently punch it down to release the air. This helps create a finer texture and allows for an even second rise. Turn the dough out onto a lightly floured surface. To shape a simple loaf, flatten the dough into a rectangle. Fold the two longer sides towards the center, overlapping slightly. Then, starting from one of the short ends, roll the dough tightly into a log, pinching the seam closed at the bottom. Tuck the ends under to create a neat loaf shape.
Step 7: Second Rise
Lightly grease a standard 9×5-inch loaf pan with olive oil. Carefully place the shaped dough seam-side down into the prepared pan. Cover the loaf pan loosely with plastic wrap or a kitchen towel and let it rise again in a warm, draft-free spot for another 30-45 minutes, or until it has almost doubled in size and looks puffy.
Step 8: Preheat and Bake
About 15 minutes before the second rise is complete, preheat your oven to 375°F (190°C). Once preheated and the dough has risen sufficiently, carefully place the loaf pan into the preheated oven. Bake for 30-35 minutes, or until the crust is a beautiful golden brown and the internal temperature reaches 200-210°F (93-99°C). If you don’t have a thermometer, you can tap the bottom of the loaf – it should sound hollow when fully baked.
Safety first: Always use oven mitts when handling hot pans!
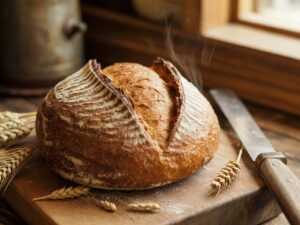
Step 9: Cool and Enjoy
Once baked, immediately remove the bread from the loaf pan and transfer it to a wire cooling rack. This is a crucial step! Cooling on a rack allows air to circulate around the entire loaf, preventing the bottom from becoming soggy and ensuring a crisp crust. Let the bread cool for at least 30-60 minutes before slicing. Slicing too early can result in a gummy texture. Once cooled, slice, slather with butter, and enjoy your incredible homemade **Recipe For Biblical Bread**!
Tips & Tricks for Perfect Biblical Bread
Even with simple recipes, a few extra pointers can make all the difference. Here are some **baking tips for beginners** to ensure your Biblical Bread turns out perfectly every time:
- Measure Flour Correctly: Don’t scoop flour directly from the bag with your measuring cup. Instead, spoon the flour into your measuring cup and then level it off with a straight edge (like the back of a knife). This prevents over-measuring, which can lead to dry, dense bread.
- Check Yeast Activity: Always proof your yeast (as in Step 1) to ensure it’s active. If it doesn’t bubble, your bread won’t rise. It’s a quick step that saves a lot of disappointment!
- Resist Adding Too Much Flour: During kneading, it’s tempting to add more flour if the dough feels sticky. Add it sparingly, a tablespoon at a time. Too much flour will make your bread tough and dry. A slightly sticky dough is normal.
- Create a Warm Proofing Environment: Yeast loves warmth! If your kitchen is cold, try warming your oven for a few minutes (then turn it OFF!) before placing the covered dough inside with the door slightly ajar. The oven light can also provide enough warmth.
- Don’t Skip Cooling: As tempting as it is to slice into warm bread, letting it cool completely on a wire rack allows the internal structure to set and steam to escape, resulting in the best texture.
- Oven Thermometer: Oven temperatures can vary widely. An inexpensive oven thermometer will give you an accurate reading and help prevent under or over-baking.
- Storage: Store cooled bread in an airtight container or bread bag at room temperature for 3-4 days. For longer storage, slice and freeze.
Essential Baking Tools
You don’t need a professional kitchen to make amazing bread! Here are the basic tools that will make your baking experience smooth and enjoyable:
- Mixing Bowl: A large, sturdy bowl is essential for mixing and proofing.
- Whisk: For blending dry ingredients and activating yeast.
- Baking Pan: Specifically, a 9×5-inch loaf pan for shaping your bread.
- Measuring Cups: Accurate measurement is key for consistent results.
- Measuring Spoons: For smaller quantities like yeast and salt.
- Spatula: A rubber or silicone spatula is great for scraping down bowls.
- Wire Cooling Rack: Crucial for allowing your bread to cool properly.
Nutrition Information (Per Serving)
This is an approximate nutritional breakdown per serving (assuming 12 servings per loaf). Actual values may vary based on exact ingredients and preparation.
| Nutrient | Amount |
|---|---|
| Calories | ~170 kcal |
| Total Carbohydrates | ~35 g |
| Protein | ~6 g |
| Total Fat | ~2 g |
| Dietary Fiber | ~5 g |
| Sugars | ~1 g |
Frequently Asked Questions (FAQs)
-
Can I use all-purpose flour instead of whole wheat?
- Yes, you can! However, the texture will be lighter and less dense, and the flavor will be less “rustic.” You might also need slightly less water with all-purpose flour, so add it gradually until you reach the right consistency.
-
My bread didn’t rise. What went wrong?
- The most common reasons are inactive yeast (water was too hot/cold, or yeast was expired), not enough kneading to develop gluten, or the dough was proofing in too cold a spot. Double-check your yeast’s expiration date and water temperature next time!
-
How do I know if I’ve kneaded the dough enough?
- Besides feeling smooth and elastic, you can perform the “windowpane test.” Pinch off a small piece of dough and gently stretch it. If you can stretch it thin enough to see light through it without it tearing, your gluten is well-developed.
-
Can I make this bread without yeast?
- While “Biblical bread” can refer to unleavened flatbreads (like matzo), this specific recipe uses yeast for a risen loaf. To make it without yeast, you’d need a completely different recipe, likely a flatbread or a sourdough starter, which is a more advanced technique.
-
How long does this homemade bread last?
- Stored in an airtight container or bread bag at room temperature, it will stay fresh for about 3-4 days. For longer storage, you can slice the cooled loaf and freeze the slices for up to 2-3 months. Just toast them straight from the freezer!
-
Can I add seeds or herbs to this bread?
- Absolutely! This is a great way to personalize your loaf. You can add up to ½ cup of seeds (like sesame, poppy, or flax) or 1-2 tablespoons of dried herbs (like rosemary or thyme) during Step 3, when you’re mixing the dry ingredients into the wet ones.
Conclusion
Congratulations, you’ve just unlocked a delicious piece of history with your very own Recipe For Biblical Bread. There’s truly nothing quite like the smell and taste of freshly baked homemade bread, especially when you’ve made it with your own hands. This recipe is a fantastic starting point for any beginner baker, proving that baking doesn’t have to be complicated to be incredibly rewarding. Don’t be afraid to experiment, make it your own, and share this wholesome goodness with friends and family. Keep practicing, and you’ll be a bread-baking pro in no time. Happy baking, and enjoy every flavorful bite!