Gather Your Ingredients: What You’ll Need
Before we dive into the mixing, ensure you have all your ingredients measured out and ready. This practice, called “mise en place,” makes the baking process much smoother and more enjoyable, especially for beginners!
Dry Ingredients:
| Ingredient | Quantity | Unit |
|---|---|---|
| All-purpose flour | 2 | cups |
| Granulated sugar | 1 | cup |
| Baking powder | 2 | teaspoons |
| Salt | ½ | teaspoon |
Wet Ingredients & Add-ins:
| Ingredient | Quantity | Unit |
|---|---|---|
| Large egg | 1 | |
| Milk (whole or 2%) | ½ | cup |
| Unsalted butter, melted | ¼ | cup |
| Vanilla extract | 1 | teaspoon |
| Orange zest | 1 | teaspoon |
| Fresh or frozen cranberries | 1 | cup |
| (Optional) Chopped walnuts or pecans | ½ | cup |
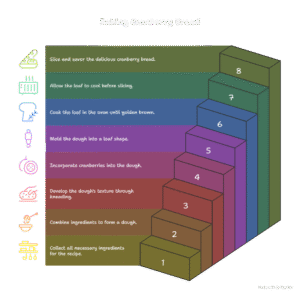
Step-by-Step Instructions: Your Baking Journey Begins!
Follow these detailed steps, and you’ll have a beautiful loaf of cranberry bread in no time. Remember, baking is a science, but it’s also a joy!
-
Preheat & Prep Your Pan:
First things first, let’s get that oven ready! Preheat your oven to 350°F (175°C). While it’s heating up, take an 8.5 x 4.5-inch or 9 x 5-inch loaf pan and grease it thoroughly. You can use butter, cooking spray, or shortening. Make sure to get into all the corners! For an extra non-stick layer, you can also lightly flour the greased pan, tapping out any excess. This ensures your beautiful bread slides right out after baking.
-
Combine Dry Ingredients:
In a large mixing bowl, whisk together the all-purpose flour, granulated sugar, baking powder, and salt. Whisking dry ingredients together before adding wet ones helps to evenly distribute the leavening agents (baking powder) and salt, ensuring a consistent rise and flavor throughout your bread. For beginners: when measuring flour, spoon it into your measuring cup and then level it off with a straight edge (like the back of a knife) – don’t scoop directly from the bag, as this compacts the flour and you’ll end up with too much!
-
Mix Wet Ingredients:
In a separate, medium-sized bowl, lightly whisk the large egg. Then, add the milk, melted unsalted butter, vanilla extract, and orange zest. Whisk everything together until well combined. The orange zest is a secret weapon here – it brightens the flavor of the cranberries and adds a wonderful aromatic touch! If your butter is too hot after melting, let it cool for a few minutes before adding it to the egg mixture, otherwise, it could “cook” the egg slightly.
-
Combine Wet and Dry (Gently!):
Now, pour the wet ingredient mixture into the bowl with your dry ingredients. Using a spatula or a wooden spoon, gently mix them together just until combined. This is one of the most crucial baking tips for beginners : DO NOT OVERMIX! Overmixing develops the gluten in the flour too much, which can lead to a tough, dense, and chewy bread instead of a tender, moist one. A few lumps are perfectly fine and even desirable. Stop mixing as soon as you no longer see streaks of dry flour.
-
Fold in Cranberries (and Nuts):
Add your fresh or frozen cranberries to the batter. If you’re using the optional chopped walnuts or pecans, add them now too. Gently fold them into the batter until they are evenly distributed. A little trick to prevent cranberries (and nuts) from sinking to the bottom of your loaf: toss them with about a tablespoon of flour from the measured amount before adding them to the batter. The flour creates a coating that helps them suspend more evenly.
-
Bake Your Bread:
Pour the batter into your prepared loaf pan and spread it evenly with your spatula. Place the pan in the preheated oven. Bake for approximately 50-60 minutes. Baking times can vary depending on your oven, so keep an eye on it.
You’ll know it’s done when the top is golden brown, and a wooden skewer or toothpick inserted into the center of the loaf comes out clean (without wet batter attached). If the top starts to brown too quickly, you can loosely tent it with aluminum foil for the last 10-15 minutes of baking. -
Cool & Enjoy:
Once baked, remove the loaf pan from the oven and let the bread cool in the pan on a wire rack for about 10-15 minutes. This allows the bread to set and prevents it from crumbling when you remove it. After this initial cooling, carefully invert the bread onto the wire rack to cool completely. Cooling completely before slicing is important for the best texture and flavor. Slicing too early can result in a gummy texture. Once cool, slice, serve, and savor your delicious homemade cranberry bread!
Pro Tips & Baking Tricks for Beginners
Mastering baking is all about learning the little secrets! Here are some actionable tips to make your cranberry bread (and future baking endeavors) even better:
- Room Temperature Ingredients: For most baking recipes (including this one), using room temperature eggs and milk helps them emulsify better with the melted butter, resulting in a smoother, more uniform batter and a finer-textured crumb. Take them out of the fridge about 30 minutes before you start.
- Don’t Overmix (Seriously!): We mentioned it in the instructions, but it’s worth repeating. Overmixing is the number one culprit for dry, tough quick breads and muffins. Mix just until the dry ingredients are moistened. A few lumps are okay!
- Flour Your Cranberries: To prevent your cranberries (and any nuts or chocolate chips) from sinking to the bottom of your loaf, toss them with a tablespoon of flour (taken from the measured amount) before folding them into the batter. This creates a light coating that helps them stay suspended.
- Orange Zest is Key: While optional, the orange zest truly elevates this bread. The citrus oils complement the tartness of the cranberries beautifully. Don’t skip it if you can!
- Know Your Oven: Ovens can vary wildly in temperature. Consider getting an inexpensive oven thermometer to ensure your oven is truly at the temperature you set it to. This can make a huge difference in baking success.
- Cool Completely: Resist the urge to slice into your warm bread immediately. While a little warmth is lovely, quick breads continue to “cook” and set as they cool. Slicing too early can lead to a gummy texture and make it harder to get clean slices.
- Storage: Store leftover cranberry bread at room temperature in an airtight container for up to 3-4 days. For longer storage, you can freeze slices or the whole loaf (wrapped tightly in plastic wrap and then foil) for up to 3 months. Thaw at room temperature.
- Experiment with Add-ins: Feel free to customize! Add white chocolate chips, different citrus zest (lemon or lime), or even a touch of cinnamon or nutmeg for a spiced version.
Essential Baking Tools for Your Kitchen
Having the right tools makes baking easier and more enjoyable. Here are a few essentials for this recipe and many others:
- Mixing Bowl
- Whisk
- Baking Pan (specifically, a loaf pan)
- Measuring Cups
- Spatula
- Measuring Spoons
- Wire Rack
Nutrition Information (Estimated)
Here’s an estimated nutritional breakdown per slice (assuming 12 slices per loaf). Please note these are approximate values and can vary based on exact ingredients and portion sizes.
| Nutrient | Per serving (1 slice) |
|---|---|
| Calories | 280 kcal |
| Carbohydrates | 48 g |
| Protein | 4 g |
| Fat | 10 g |
| Fiber | 2 g |
| Sugar | 30 g |
Frequently Asked Questions (FAQs)
Q1: Can I use frozen cranberries instead of fresh?
Absolutely! Frozen cranberries work perfectly in this recipe. There’s no need to thaw them beforehand; simply toss them directly into the batter from the freezer. They might add a minute or two to the baking time, but the end result will be just as delicious.
Q2: What if I don’t have fresh orange zest? Can I omit it?
You can omit the orange zest if you don’t have it, and your bread will still be tasty. However, the orange zest adds a wonderful bright, aromatic note that complements the cranberries beautifully. If you have lemon zest, that would be a good substitute.
Q3: Why is my cranberry bread dry or tough?
The most common reasons for dry or tough quick bread are overmixing the batter or overbaking. Remember to mix the wet and dry ingredients just until combined, with a few lumps still visible. Also, keep an eye on your baking time and use the toothpick test to avoid baking longer than necessary.
Q4: How do I know when the bread is perfectly done?
The best way to tell if your cranberry bread is done is to insert a wooden skewer or toothpick into the very center of the loaf. If it comes out clean, with no wet batter attached, your bread is ready. If there’s still wet batter, continue baking for another 5-10 minutes and re-test.
Q5: Can I turn this recipe into cranberry muffins?
Yes, you can! This batter works wonderfully for muffins. Simply line a muffin tin with paper liners or grease it well. Fill each muffin cup about two-thirds full. Bake at 375°F (190°C) for approximately 20-25 minutes, or until a toothpick inserted into the center of a muffin comes out clean.
Q6: Can I reduce the amount of sugar in the recipe?
You can slightly reduce the sugar, but be aware that sugar not only adds sweetness but also contributes to the bread’s moisture and tender texture. Reducing it too much might result in a slightly drier or less tender loaf. We recommend not reducing it by more than ¼ cup for the best results, especially since cranberries are quite tart.
Your Delicious Journey Awaits!
And there you have it! Your very own homemade cranberry bread. We hope this detailed guide has made the baking process enjoyable and straightforward, even if you’re just starting out. There’s nothing quite like the pride of pulling a golden, fragrant loaf from your oven. This **Recipe For Cranberry Bread** is more than just a recipe; it’s an invitation to create warmth and happiness in your home.
Don’t be afraid to experiment a little, and most importantly, have fun with it! Baking is a wonderful skill to develop, and every loaf you make builds your confidence. We can’t wait to hear how your cranberry bread turns out. Share your creations with us, and happy baking!
“`