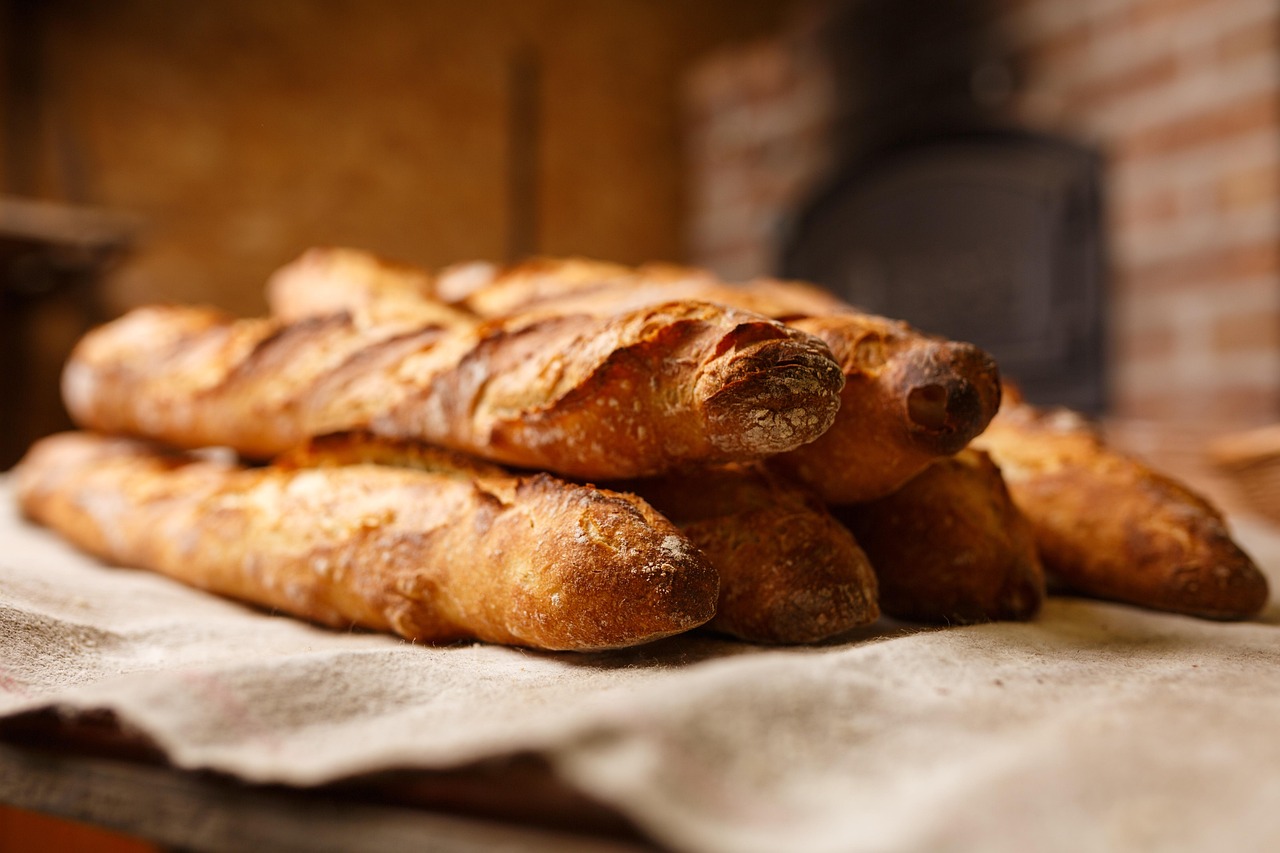
There’s nothing quite like the aroma of freshly baked bread filling your home. It’s a scent that promises comfort, warmth, and deliciousness. If you’ve always dreamed of baking your own artisan-style bread but felt intimidated by complex recipes or endless kneading, then you’re in for a treat!
This Recipe For French Bread In Bread Maker is designed specifically for you, the aspiring home baker. Forget the hours of manual labor; your bread maker will do most of the hard work, making this one of the most easy baking recipes you’ll ever try. We’ll walk you through every step, providing valuable baking tips for beginners to ensure your first loaf (and every loaf after!) is a resounding success. Get ready to impress yourself and your loved ones with a crusty, tender French bread that tastes straight out of a boulangerie!
Ingredients List
Gathering your ingredients correctly is the first step to baking success. Always use fresh ingredients for the best results!
| Ingredient | Quantity | Unit |
|---|---|---|
| Warm Water (105-115°F / 40-46°C) | 1 ½ | cups |
| Bread Flour | 3 ¾ | cups |
| Salt | 1 ½ | teaspoons |
| Granulated Sugar | 1 | tablespoon |
| Active Dry Yeast | 2 | teaspoons |
| Olive Oil (for brushing, optional) | 1 | teaspoon |
Step-by-Step Instructions: Mastering Your Bread Maker
Follow these detailed steps carefully for a perfect loaf of French bread. Remember, precision is key in baking, especially when you’re just starting!
Step 1: Prepare Your Bread Maker
- Ensure your bread maker pan is clean and dry. Even tiny bits of old dough can affect a new loaf.
- Have all your ingredients measured out and ready to go. This is called “mise en place” and it makes baking much smoother, especially for beginners.
Step 2: Add Ingredients in Order
Most bread makers require ingredients to be added in a specific order, typically liquids first, then dry ingredients, and finally yeast. This prevents the yeast from activating too early.
- Pour the warm water into the bread maker pan. The water should be warm to the touch, like a baby’s bath – not hot, which could kill the yeast, and not cold, which would slow down activation.
- Add the salt and granulated sugar to the water. Try to keep them separate from where the yeast will go initially.
- Carefully spoon the bread flour over the wet ingredients. Do not stir. To measure flour correctly, spoon it into your measuring cup and then level it off with a straight edge (like the back of a knife). Avoid scooping directly with the measuring cup, as this compacts the flour and you’ll end up with too much.
- Create a small well or indentation in the center of the flour, but make sure it doesn’t reach the water below.
- Pour the active dry yeast into this well. Keeping the yeast separate from the salt (which can inhibit yeast activity) and water until the kneading cycle begins is crucial.
Step 3: Set Your Bread Maker
- Place the pan securely back into your bread maker. Close the lid.
- Select the “French” or “French Bread” cycle on your bread maker. If your bread maker doesn’t have a specific “French” setting, look for a “White Bread” or “Basic” setting that offers a longer rise time and a darker crust option.
- Choose your crust setting. For classic French bread, a “Medium” or “Dark” crust usually works best to achieve that beautiful golden-brown exterior.
- Press “Start.” Your bread maker will now begin its cycle, which typically involves kneading, rising, and baking over several hours.
Step 4: Monitor the Dough (Optional but Recommended for Beginners)
During the first kneading cycle (usually the first 5-10 minutes), you can peek to check the dough’s consistency. This is a great **baking tip for beginners** to learn how dough should feel!
- Observe the dough ball. It should be forming a smooth, elastic ball that cleans the sides of the pan.
- Adjust if necessary:
- If the dough looks too dry and crumbly, or the paddle is struggling, add water, 1 teaspoon at a time, until it reaches the right consistency.
- If the dough looks too wet and sticky, clinging to the sides of the pan, add bread flour, 1 tablespoon at a time, until it forms a smooth ball.
Important: Make adjustments *only* during the first kneading cycle. Once the rising cycle begins, do not open the lid.
Step 5: The Waiting Game (Patience is a Virtue!)
- Let your bread maker do its work. Resist the urge to open the lid during the rising and baking cycles, as this can cause the dough to collapse.
- Enjoy the incredible aroma as your French bread bakes!
Step 6: Remove and Cool
- Once the bread maker beeps, signifying the end of the cycle, carefully open the lid. The bread will be very hot.
- Immediately remove the bread pan from the bread maker using oven mitts.
- Carefully invert the pan onto a wire cooling rack to release the loaf. If the paddle is stuck in the bread, gently remove it with a utensil.
- Brush the top of the hot loaf with a tiny bit of olive oil (optional) for an extra golden sheen and slightly softer crust.
- Allow the bread to cool completely on the wire rack for at least 1-2 hours before slicing. This step is crucial! Slicing hot bread can result in a gummy texture and loss of internal moisture, making it less enjoyable.
Step 7: Slice and Enjoy!
- Once cooled, use a serrated bread knife to slice your beautiful homemade French bread. Serve it with butter, olive oil, or alongside your favorite meal. Bon appétit!
Tips & Tricks for French Bread Success
Achieving bakery-quality French bread at home is surprisingly simple with a bread maker, but a few expert **baking tips for beginners** can elevate your results from good to magnificent:
- Yeast Freshness is Key: Yeast is a living organism. If your yeast is old or expired, your bread won’t rise. Always check the expiration date and store it properly (usually in the fridge or freezer after opening) to maintain its potency.
- Measure Accurately: Baking is a science. Use proper measuring cups and spoons. For flour, spoon it into the measuring cup and level it off with a straight edge rather than scooping directly, which compacts the flour and leads to a dense loaf.
- Water Temperature Matters: Aim for water between 105-115°F (40-46°C). Too cold, and the yeast won’t activate efficiently; too hot, and you risk killing the yeast. A kitchen thermometer is a great investment for precise results.
- Bread Flour vs. All-Purpose: While you can use all-purpose flour, bread flour has a higher protein content, which develops more gluten. This gives French bread its characteristic chewy texture and better structure.
- Resist the Urge to Peek: During the rising and baking cycles, avoid opening the bread maker lid. Temperature fluctuations can cause the dough to collapse, resulting in a flat loaf.
- Cool Completely: This cannot be stressed enough! Cooling bread on a wire rack allows steam to escape, preventing a gummy interior and promoting a crispier crust. Slicing too early traps moisture.
- Storage: Store your cooled French bread at room temperature in a paper bag or loosely wrapped in a clean kitchen towel for up to 2 days for the best crust. For longer storage, slice and freeze in an airtight bag.
Essential Baking Tools
Having the right tools makes baking easier and more enjoyable. Here are a few essentials:
- Mixing Bowl
- Whisk
- Baking Pan (though your bread maker has one, a cooling rack is vital!)
- Measuring Cups
- Spatula
- Bread Maker (of course!)
- Wire Cooling Rack (essential for crust and texture)
- Kitchen Thermometer (for accurate water temperature)
- Serrated Bread Knife (for clean slices)
Nutrition Information (Estimated per slice, approx. 1/12 of a 1.5lb loaf)
Please note that these values are estimates and can vary based on specific ingredient brands and exact measurements.
| Nutrient | Amount |
|---|---|
| Calories | 120 kcal |
| Carbohydrates | 24 g |
| Protein | 4 g |
| Fat | 0.5 g |
| Fiber | 1 g |
| Sugar | 1 g |
Frequently Asked Questions (FAQs)
Q1: Why is my French bread dense and not light and airy?
A dense loaf can be caused by several factors. The most common culprits are old or inactive yeast, using water that’s too hot or too cold, or adding too much flour. Ensure your yeast is fresh, your water is between 105-115°F, and measure your flour accurately by spooning and leveling.
Q2: Can I use all-purpose flour instead of bread flour?
Yes, you can, but your results may vary. All-purpose flour has a lower protein content than bread flour, which means less gluten will develop. This can result in a slightly less chewy texture and a loaf that doesn’t rise quite as high. For the best French bread texture, bread flour is highly recommended.
Q3: My bread maker paddle sometimes gets stuck in the loaf. How can I prevent this?
It’s quite common for the paddle to get baked into the loaf. Some bread maker models allow you to remove the paddle after the final kneading cycle, just before the last rise, but this requires opening the lid and disturbing the dough. For beginners, it’s often easier to just remove it after the bread has cooled slightly. If it’s still warm, it usually pops out easily. You can also try lightly greasing the paddle before adding ingredients.
Q4: How do I get a crisper crust on my French bread?
The “French” setting on your bread maker typically aims for a crispier crust due to longer baking times at slightly lower temperatures. Selecting a “Dark” crust setting can also help. For an even crisper crust, you can lightly mist the top of the loaf with water using a spray bottle right after it comes out of the bread maker, and then let it cool on a wire rack. The steam helps create that crackly exterior.
Q5: What if my dough looks too sticky or too dry during the kneading cycle?
This is a common issue and easy to fix during the first kneading cycle! If the dough is too sticky and clinging to the sides of the pan, add 1 tablespoon of bread flour at a time until it forms a smooth ball. If it’s too dry and crumbly, add 1 teaspoon of warm water at a time until it comes together. Make these adjustments slowly and only during the initial kneading phase.
Q6: How should I store my homemade French bread?
For the best crust and texture, store your cooled French bread at room temperature in a paper bag or loosely wrapped in a clean kitchen towel. This allows the crust to breathe and stay crispier for a day or two. Avoid airtight plastic bags unless you plan to freeze it, as they can make the crust soft and chewy quickly. For longer storage, slice the cooled bread and freeze it in an airtight freezer bag for up to a month; thaw and toast as needed.
Conclusion
Congratulations! You’ve just unlocked the secret to baking incredible French bread right in your own kitchen, all thanks to the magic of your bread maker. This Recipe For French Bread In Bread Maker proves that delicious, homemade bread doesn’t have to be a daunting task. With a little patience, accurate measurements, and these essential baking tips for beginners, you’re well on your way to becoming a confident baker.
There’s immense satisfaction in pulling a warm, crusty loaf from your bread maker, knowing you created it with your own hands (and a little help from technology!). Don’t be afraid to experiment and make this recipe your own. Enjoy the wonderful aroma, the satisfying crunch, and the tender crumb of your freshly baked French bread. We can’t wait to hear about your baking success.