
Are you new to the kitchen, or perhaps just looking for a ridiculously simple yet incredibly delicious treat? Then you’ve landed in the perfect spot! Today, we’re diving into the delightful world of no-bake desserts with our star attraction: the Recipe For Lazy Cake. This isn’t just any dessert; it’s a dream come true for anyone seeking easy baking recipes. You won’t need an oven, fancy equipment, or even extensive culinary experience. We’re going to walk through every step together, providing invaluable baking tips for beginners, ensuring your first attempt is a resounding success. Get ready to impress yourself and your loved ones with minimal effort and maximum flavor!
Ingredients You’ll Need
Gathering your ingredients is the first step to any great recipe. For this delightful Lazy Cake, you’ll find most of these staples are probably already in your pantry!
| Quantity | Unit | Ingredient |
|---|---|---|
| 200 | grams | Digestive Biscuits (or similar plain tea biscuits) |
| 115 | grams | Unsalted Butter |
| 1/2 | cup | Granulated Sugar |
| 1/2 | cup | Unsweetened Cocoa Powder |
| 1/4 | cup | Milk (whole or 2%) |
| 1 | teaspoon | Vanilla Extract |
| Pinch | Salt | |
| Optional | Powdered sugar or chocolate shavings for garnish |
Step-by-Step Instructions: Creating Your Lazy Cake Masterpiece
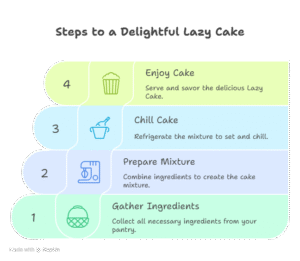
Ready to get started? Follow these detailed steps, and you’ll have a gorgeous, no-bake cake chilling in your fridge in no time!
Step 1: Prepare Your Biscuits
First things first, let’s get those biscuits ready. Place the 200 grams of Digestive biscuits into a large Ziploc bag. Using a rolling pin, gently but firmly crush the biscuits. You’re aiming for a mix of crumbs and some larger, pea-sized chunks. Beginner Tip: Don’t pulverize them completely! Those varying textures add a lovely bite to your finished cake. If you crush them too finely, your cake might become too dense. If you don’t have a rolling pin, the bottom of a heavy glass or a sturdy potato masher works just as well!
Step 2: Create the Rich Chocolate Mixture
Now for the delicious chocolate sauce that binds everything together. In a medium saucepan, combine the 115 grams of unsalted butter, 1/2 cup of granulated sugar, 1/2 cup of unsweetened cocoa powder, and 1/4 cup of milk. Place the saucepan over medium-low heat. Stir constantly with a whisk or spatula. Your goal here is to melt the butter and dissolve the sugar, creating a smooth, glossy chocolate mixture. Common Mistake & How to Fix It: Don’t let the mixture come to a rolling boil or burn on the bottom. Keep the heat low and stir often. If you see it starting to bubble too vigorously, remove it from the heat immediately and continue stirring. Once smooth, remove the pan from the heat and stir in the 1 teaspoon of vanilla extract and a pinch of salt. The salt helps to balance the sweetness and enhance the chocolate flavor.
Step 3: Combine Wet and Dry
Pour the warm chocolate mixture directly over your crushed biscuits in the large bowl. Using a sturdy spatula or a large spoon, gently fold the chocolate mixture into the biscuits. Make sure every single piece of biscuit is coated in that luscious chocolate. Take your time to ensure even distribution. Beginner Tip: Be patient here. It might seem like there isn’t enough chocolate at first, but keep folding, and the biscuits will gradually soak up the goodness. The goal is to have no dry biscuit pieces remaining.
Step 4: Prepare Your Baking Pan
Line a standard loaf pan (approximately 9×5 inches) with parchment paper or plastic wrap, allowing extra paper/wrap to hang over the sides. This “overhang” will act as handles later, making it incredibly easy to lift your finished cake out of the pan. Alternative: If you don’t have a loaf pan, a square 8×8 inch pan will also work, but your cake will be flatter. You can also form it into a log shape on a sheet of parchment paper and then roll it up tightly, twisting the ends like a giant candy wrapper.
Step 5: Press and Chill
Transfer the chocolate biscuit mixture into your prepared loaf pan. Using the back of your spatula or your hands (lightly greased if you find it sticky), press the mixture down firmly and evenly into the pan. You want it to be compact and without air pockets. Cover the pan loosely with plastic wrap and refrigerate for at least 4 hours, or ideally, overnight. Why Chilling is Crucial: This is the most important step for setting your Lazy Cake. The butter in the chocolate mixture needs to solidify and bind all the biscuit pieces together, giving it that firm, sliceable cake-like texture. If you don’t chill it long enough, it will be too soft and fall apart.
Step 6: Slice and Serve!
Once your Lazy Cake is thoroughly chilled and firm, use the parchment paper overhang to lift it out of the pan. Place it on a cutting board. Using a sharp knife, slice it into desired portions. For an extra touch, you can dust it with powdered sugar or sprinkle some chocolate shavings on top. Storage Tip: Store any leftover cake in an airtight container in the refrigerator for up to 5-7 days. Enjoy your delicious, no-fuss creation!
Tips & Tricks for Lazy Cake Success
Even though this is an incredibly easy recipe, a few extra pointers can elevate your Lazy Cake from good to absolutely phenomenal!
- Don’t Overcook the Chocolate Mixture: Keep the heat low and stir constantly to prevent burning the chocolate. A burnt taste will ruin the whole batch.
- Vary Your Biscuits: While Digestive biscuits are classic, feel free to experiment with Marie biscuits, rich tea biscuits, or even plain shortbread for a different flavor profile. Just ensure they are relatively plain to let the chocolate shine.
- Add-ins for Extra Flair: Once you’ve combined the biscuits and chocolate, consider folding in a handful of chopped nuts (walnuts, pecans, almonds), dried fruits (raisins, cranberries), or even mini marshmallows for added texture and flavor.
- Perfect Portioning: For cleaner slices, dip your knife in hot water and wipe it clean between each cut. This helps to prevent sticking and gives you beautifully presented pieces.
- Presentation Matters: A simple dusting of powdered sugar or a drizzle of melted chocolate can transform your cake into a showstopper. You can also top it with fresh berries for a pop of color.
- Chill, Chill, Chill: We can’t stress this enough. Insufficient chilling time is the number one reason Lazy Cakes don’t hold their shape. Plan ahead and give it ample time in the fridge.
Essential Baking Tools
You don’t need a lot of specialized equipment for this no-bake wonder, but having these basics on hand will make the process even smoother:
- Mixing Bowl (Large, for combining ingredients)
- Whisk (For stirring the chocolate mixture)
- Loaf Pan (Or a square pan, for shaping)
- Measuring Cups (For accurate ingredient amounts)
- Spatula (Heat-resistant for chocolate, sturdy for mixing)
- Rolling Pin (Or a heavy glass, for crushing biscuits)
- Parchment Paper or Plastic Wrap (For lining the pan)
Nutrition Information (Estimated per serving)
Please note that these are approximate values and can vary based on specific brands and exact portion sizes. This recipe makes approximately 10-12 servings.
| Nutrient | Amount |
|---|---|
| Calories | 320 kcal |
| Carbohydrates | 38 g |
| Protein | 4 g |
| Fat | 18 g |
| Fiber | 3 g |
| Sugar | 25 g |
Frequently Asked Questions (FAQs)
1. Can I use different types of biscuits or cookies?
Absolutely! While Digestive biscuits are traditional, you can use other plain, firm cookies like Marie biscuits, Rich Tea biscuits, or even Graham Crackers. Avoid overly soft or heavily flavored cookies as they might alter the texture and taste significantly.
2. How long does Lazy Cake last, and how should I store it?
When stored in an airtight container in the refrigerator, your Lazy Cake will stay fresh and delicious for 5-7 days. It can also be frozen for up to 1 month. If freezing, wrap individual slices tightly in plastic wrap before placing them in an airtight container.
3. My cake isn’t setting. What went wrong?
The most common reason for a cake not setting is insufficient chilling time. Ensure you refrigerate it for at least 4 hours, or preferably overnight. Also, make sure your chocolate mixture wasn’t too thin (too much milk, not enough butter/cocoa), as this can prevent it from firming up properly.
4. Can I reduce the amount of sugar in the recipe?
Yes, you can! The sugar helps with the texture and sweetness. You can reduce it by about 1/4 cup without significantly affecting the consistency. If you prefer a less sweet cake, you might also consider using darker cocoa powder, which is naturally less sweet.
5. Is this recipe suitable for dietary restrictions?
This recipe contains dairy (butter, milk) and gluten (biscuits). For a gluten-free version, use gluten-free plain biscuits. For a dairy-free option, you would need to use a plant-based butter alternative and plant-based milk (like almond or oat milk). Always check ingredient labels for hidden allergens.
Conclusion: Your No-Bake Journey Begins Here!
Congratulations! You’ve just mastered the art of making the incredibly simple and utterly delicious Recipe For Lazy Cake. This dessert proves that you don’t need an oven or complex techniques to create something truly special. Whether you’re a complete beginner or a seasoned baker looking for a quick treat, this recipe is a fantastic addition to your repertoire. We hope these detailed instructions and helpful tips have made your baking journey enjoyable and successful. Don’t be afraid to experiment with toppings and add-ins to make it your own. Now go forth, enjoy your creation, and share the joy of easy, no-bake baking!
“`