Hello, fellow baking enthusiasts! Are you ready to dive into the wonderful world of homemade treats? Today, we’re making something truly special: a delicious and moist Recipe For Pineapple Pound Cake From Scratch. Forget those dry, flavorless cakes; this recipe delivers a tender crumb, bursting with tropical pineapple flavor, and a sweet, tangy glaze that will have everyone asking for seconds. If you’ve been searching for easy baking recipes that don’t compromise on taste, you’ve found it!
This isn’t just any recipe; it’s a comprehensive guide packed with baking tips for beginners to ensure your success. We’ll walk through each step, explaining the ‘why’ behind the ‘how,’ so you can build confidence in the kitchen and create a show-stopping dessert. Get ready to impress yourself and your loved ones with this incredible homemade pound cake!
Why You’ll Love This Pineapple Pound Cake
- Irresistible Flavor: The perfect balance of sweet, tangy pineapple with rich, buttery pound cake.
- Perfect Texture: Incredibly moist, dense, and tender, just like a classic pound cake should be.
- Beginner-Friendly: Detailed instructions and helpful tips make it achievable for even first-time bakers.
- Crowd-Pleaser: A unique twist on a beloved classic, ideal for potlucks, family gatherings, or a cozy evening at home.
Ingredients You’ll Need
Gathering your ingredients before you start is key to a smooth baking process. Make sure your butter and eggs are at room temperature – it makes a big difference!
| Ingredient | Quantity | Unit |
|---|---|---|
| All-Purpose Flour | 2 ½ | cups |
| Granulated Sugar | 2 | cups |
| Unsalted Butter, softened | 1 ½ | cups (3 sticks) |
| Large Eggs, room temperature | 5 | |
| Baking Powder | 1 | teaspoon |
| Salt | ½ | teaspoon |
| Whole Milk, room temperature | ½ | cup |
| Vanilla Extract | 1 ½ | teaspoons |
| Crushed Pineapple, well drained | 1 (20 oz) | can |
| For the Pineapple Glaze: | ||
| Powdered Sugar (Confectioners’ Sugar) | 1 ½ | cups |
| Pineapple Juice (from canned pineapple) | 3-4 | tablespoons |
| Melted Unsalted Butter (optional, for richness) | 1 | tablespoon |
Step-by-Step Instructions for Your Perfect Pound Cake
Follow these detailed steps carefully, and you’ll be on your way to a glorious pineapple pound cake!
Step 1: Get Ready! (Prep Work)
Preheat your oven to 325°F (160°C). This lower temperature is ideal for pound cakes, allowing them to bake through evenly without browning too quickly on the outside. Next, prepare your bundt pan (a 10-12 cup capacity works best) by generously greasing it with butter or non-stick baking spray, then dusting it with flour. Make sure to get into all the nooks and crannies! This step is crucial to prevent your beautiful cake from sticking. Beginner Tip: Turn the floured pan upside down and tap out any excess flour. A thin, even coating is what you’re aiming for.
Step 2: Dry Ingredients Unite!
In a medium bowl, whisk together the 2 ½ cups of all-purpose flour, 1 teaspoon of baking powder, and ½ teaspoon of salt. Whisking ensures that these dry ingredients are evenly distributed, especially the baking powder, which helps the cake rise. Set this bowl aside for now. Beginner Tip: When measuring flour, spoon it into your measuring cup and then level it off with a straight edge (like the back of a knife). Scooping directly can pack too much flour, leading to a dry cake.
Step 3: Creaming for Success
In a large mixing bowl (preferably using a stand mixer with a paddle attachment, or a hand mixer), cream together the 1 ½ cups (3 sticks) of softened unsalted butter and 2 cups of granulated sugar. Beat on medium-high speed for about 5-7 minutes, or until the mixture is light, fluffy, and pale yellow. This creaming process is vital for pound cake! It incorporates air into the butter and sugar, which creates that characteristic light yet dense texture. Don’t rush this step!
Step 4: The Egg-cellent Addition
Once your butter and sugar are perfectly creamy, add the 5 large room temperature eggs, one at a time. Beat well after each addition, scraping down the sides of the bowl as needed. The mixture might look slightly curdled after the first few eggs, but keep beating, and it will come together. Adding eggs one by one allows them to fully emulsify into the butter mixture, creating a smooth and stable batter. If your eggs are cold, they can cause the butter to seize up, so room temperature is a must!
Step 5: Alternating Wet and Dry
Now, it’s time to combine the wet and dry ingredients. With your mixer on low speed, gradually add the dry flour mixture to the butter-egg mixture, alternating with the ½ cup of room temperature whole milk. Start and end with the flour mixture. For example, add about a third of the flour, mix until just combined, then half the milk, mix, then another third of the flour, mix, the remaining milk, mix, and finally the last third of the flour. The most important rule here: DO NOT OVERMIX! Overmixing develops gluten in the flour, which will result in a tough, dry cake. Mix only until the ingredients are just combined and no streaks of flour remain.
Step 6: Fold in the Pineapple
Gently fold in the well-drained 20 oz can of crushed pineapple and 1 ½ teaspoons of vanilla extract using a spatula. Make sure the pineapple is truly well-drained; excess moisture can make your cake soggy. The vanilla extract enhances all the flavors in the cake. Fold just until the pineapple is evenly distributed throughout the batter. Again, avoid overmixing!
Step 7: Bake to Golden Perfection
Pour the batter into your prepared bundt pan, spreading it evenly. You can gently tap the pan on the counter a few times to release any large air bubbles. Bake in your preheated oven for 60-75 minutes. Baking times can vary, so keep an eye on your cake. The cake is done when a wooden skewer or toothpick inserted into the center comes out clean or with a few moist crumbs attached, but no wet batter. The top should be golden brown and spring back lightly when touched. Beginner Tip: Avoid opening the oven door too frequently, especially in the first 45 minutes, as this can cause the cake to sink.
Step 8: Cool Down
Once baked, remove the cake from the oven and let it cool in the bundt pan on a wire rack for 15-20 minutes. This cooling time in the pan allows the cake to firm up and prevents it from breaking when you invert it. After 15-20 minutes, carefully invert the cake onto the wire rack to cool completely. It’s crucial for the cake to be completely cool before applying the glaze, otherwise, the glaze will melt right off!
Step 9: Whip up the Glaze
While the cake is cooling, prepare your pineapple glaze. In a small bowl, whisk together the 1 ½ cups of powdered sugar, 3-4 tablespoons of pineapple juice (from the canned pineapple), and 1 tablespoon of melted unsalted butter (if using). Start with 3 tablespoons of pineapple juice, then add more a tiny bit at a time until you reach your desired consistency. You want a glaze that is pourable but still thick enough to coat the back of a spoon. It shouldn’t be too runny or too thick.
Step 10: Drizzle and Enjoy!
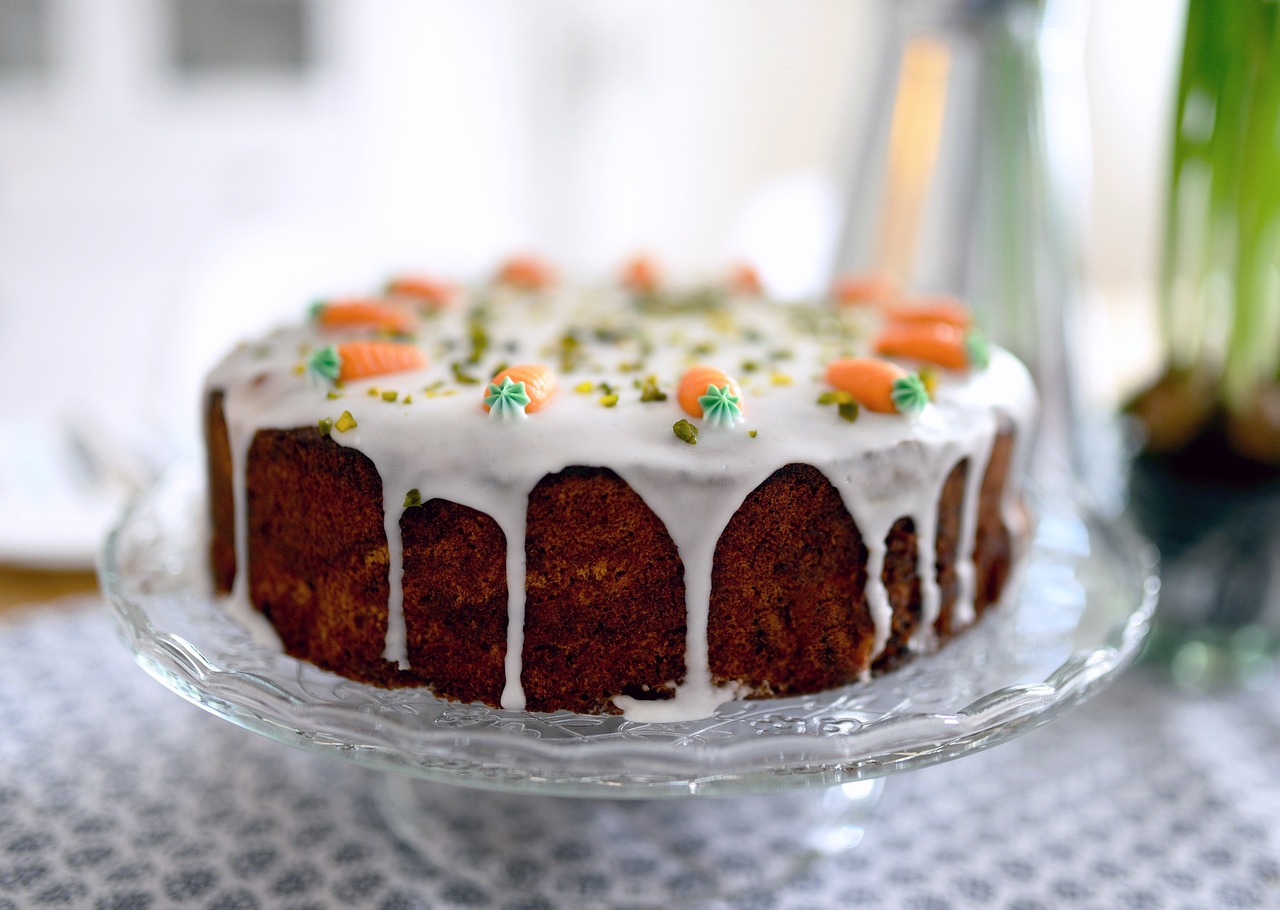
Once the cake is completely cool, drizzle the pineapple glaze evenly over the top, letting it drip down the sides. Allow the glaze to set for a few minutes before slicing and serving. Enjoy your magnificent, homemade **Recipe For Pineapple Pound Cake From Scratch**!
Baking Tips & Tricks for Beginners
Mastering baking is all about understanding the little details. Here are some essential tips to make your pound cake perfect every time:
- Room Temperature Ingredients are Non-Negotiable: This is arguably the most important tip for pound cake. Softened butter and room temperature eggs and milk emulsify better, creating a smooth, homogenous batter that holds more air. This results in a lighter, more tender crumb. If your butter is too cold, it won’t cream properly; if too warm, it’ll melt and won’t hold air.
- Measure Accurately: Baking is a science! Use proper measuring cups and spoons. For flour, spoon it into the measuring cup and level it off with a straight edge. Don’t scoop directly from the bag, as this compacts the flour and you’ll end up with too much, leading to a dry cake.
- Don’t Overmix the Batter: Once you add the flour, mix only until just combined. Overmixing develops gluten, which makes cakes tough and chewy instead of tender and moist. A few small streaks of flour are better than an overmixed batter.
- Proper Pan Preparation: Always grease and flour your bundt pan thoroughly, especially if it has intricate designs. This ensures your cake releases easily and beautifully. You can also use a baking spray that contains flour.
- Know Your Oven: Oven temperatures can vary significantly. Consider investing in an inexpensive oven thermometer to ensure your oven is truly at the temperature you set. A consistent temperature is crucial for even baking.
- Drain Pineapple VERY Well: Excess moisture from the crushed pineapple will make your cake soggy. Press the pineapple in a fine-mesh sieve or squeeze it in paper towels to remove as much liquid as possible.
- Cool Completely Before Glazing: Patience is a virtue! If you glaze a warm cake, the glaze will simply melt and run off, creating a sticky mess instead of a beautiful coating.
Essential Baking Tools
Having the right tools makes all the difference in your baking journey. Here are some essentials:
- Mixing Bowl Set (various sizes are helpful)
- Whisk (for dry ingredients and glaze)
- Bundt Baking Pan (10-12 cup capacity)
- Measuring Cups and Spoons (for accuracy)
- Rubber Spatula (for scraping and folding)
- Electric Mixer (stand mixer or hand mixer)
- Wire Cooling Rack
- Oven Thermometer (optional, but highly recommended)
Nutrition Information (Per Serving)
This information is an estimate based on 12 servings per cake. Actual values may vary.
| Nutrient | Amount |
|---|---|
| Calories | ~500 kcal |
| Total Carbohydrates | ~65 g |
| Protein | ~6 g |
| Total Fat | ~28 g |
| Dietary Fiber | ~1.5 g |
| Total Sugars | ~45 g |
Frequently Asked Questions (FAQs)
Q1: Why is it important for ingredients to be at room temperature?
A: Room temperature butter creams better with sugar, incorporating more air for a lighter cake. Room temperature eggs and milk emulsify more easily into the batter, preventing curdling and creating a smoother, more uniform texture. Cold ingredients can cause the batter to seize up and result in a dense, uneven cake.
Q2: How do I know when my pineapple pound cake is fully baked?
A: The best way is the toothpick test! Insert a long wooden skewer or toothpick into the center of the cake. If it comes out clean or with just a few moist crumbs attached, your cake is done. If you see wet batter, continue baking for another 5-10 minutes and test again. The cake should also be golden brown on top and spring back lightly when gently pressed.
Q3: Can I use fresh pineapple instead of canned crushed pineapple?
A: For this specific recipe, canned crushed pineapple is highly recommended. Fresh pineapple contains enzymes that can sometimes break down dairy proteins in the batter, leading to an unpleasant texture. Canned pineapple is heat-treated, neutralizing these enzymes, and provides the consistent moisture needed for this pound cake.
Q4: My cake sank in the middle! What went wrong?
A: A sunken cake can be due to several reasons: opening the oven door too early (which causes a sudden temperature drop), underbaking (the center isn’t fully set), overmixing the batter (which develops too much gluten and creates air pockets that collapse), or sometimes too much leavening. Ensure your oven temperature is accurate and resist the urge to peek during the first 45-50 minutes of baking.
Q5: How should I store leftover pineapple pound cake?
A: Store your pineapple pound cake at room temperature, tightly covered with plastic wrap or in an airtight container, for up to 3-4 days. For longer storage, you can freeze individual slices (without glaze, or with glaze if wrapped well) for up to 2-3 months. Thaw at room temperature before serving.
Q6: Can I make this cake ahead of time?
A: Absolutely! Pound cake often tastes even better the next day as the flavors meld. You can bake the cake a day in advance, let it cool completely, and then glaze it just before serving. It’s a perfect make-ahead dessert for entertaining!
Conclusion: Your Pineapple Pound Cake Adventure Awaits!
Congratulations, baker! You’ve just mastered the art of making a delightful Recipe For Pineapple Pound Cake From Scratch. We hope this detailed guide, filled with practical baking tips for beginners, has made your baking experience enjoyable and successful. There’s nothing quite like the pride of serving a homemade dessert, especially one as delicious and impressive as this pineapple pound cake.
So, go ahead, take a slice, savor the tropical sweetness, and share your creation with friends and family. Don’t be afraid to experiment with other glazes or toppings next time! Happy baking, and we can’t wait to hear about your pineapple pound cake triumphs in the comments below!