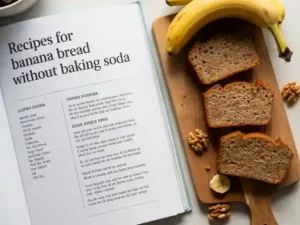
Ever found yourself craving a warm, comforting slice of homemade banana bread, only to realize you’re out of baking soda? Don’t let that stop your baking dreams! This comprehensive guide brings you one of the most delightful and easy baking recipes for Recipes For Banana Bread Without Baking Soda.
We’ve perfected a method that delivers incredible moisture, perfect texture, and that signature sweet banana flavor you love, all without a speck of baking soda. This recipe is specifically designed with baking tips for beginners in mind, breaking down every step to ensure your success. Get ready to impress yourself and your loved ones with a loaf that’s so good, no one will guess it’s missing a common ingredient!
Ingredients List
Gathering your ingredients before you start is a crucial step for any baker, especially for beginners. Make sure everything is measured out and ready to go!
| Ingredient | Quantity | Unit |
|---|---|---|
| Very Ripe Bananas (medium) | 3 | (about 1 ½ cups mashed) |
| All-Purpose Flour | 1 ½ | cups |
| Granulated Sugar | ¾ | cup |
| Large Egg | 1 | |
| Unsalted Butter, melted | ½ | cup |
| Milk (any kind) | ¼ | cup |
| Vanilla Extract | 1 | teaspoon |
| Baking Powder | 1 ½ | teaspoons |
| Salt | ½ | teaspoon |
Step-by-Step Instructions
Follow these detailed steps carefully, and you’ll be on your way to baking a perfect loaf of banana bread. Remember, baking is a science, but it’s also about having fun!
1. Prep Your Workspace and Oven
- Preheat Your Oven: Start by preheating your oven to 350°F (175°C). This ensures the oven is at the correct temperature when your batter is ready, which is vital for even baking and proper rising.
- Prepare Your Loaf Pan: Grease and flour a 9×5 inch loaf pan. To do this, simply coat the inside of the pan lightly with butter or non-stick cooking spray, then sprinkle a tablespoon or two of flour into the pan. Tilt and tap the pan to coat all surfaces, then dump out any excess flour. This creates a non-stick barrier, making it much easier to remove your banana bread after baking.
2. Mash Those Bananas
- Peel and Mash: Peel your three very ripe bananas. Place them in a large mixing bowl. Using a fork, potato masher, or even the back of a spoon, mash the bananas until they are mostly smooth with a few small lumps remaining. Don’t overthink this step! A few lumps are actually great for adding texture to your finished bread.
- Why Ripe Bananas? Very ripe bananas (the ones with plenty of brown spots!) are key here. They are naturally sweeter and have a stronger banana flavor, which truly elevates your bread.
3. Combine Wet Ingredients
- Add Wet to Bananas: To the bowl with your mashed bananas, add the melted ½ cup unsalted butter, ¾ cup granulated sugar, 1 large egg, ¼ cup milk, and 1 teaspoon vanilla extract.
- Whisk Until Combined: Using a whisk or a rubber spatula, mix these wet ingredients together until they are well combined. You don’t need to beat them vigorously; just ensure everything is incorporated and looks uniform. The sugar should mostly dissolve into the mixture.
4. Mix Dry Ingredients Separately
- In a Separate Bowl: In a medium-sized bowl, measure out your 1 ½ cups of all-purpose flour. Then add 1 ½ teaspoons of baking powder and ½ teaspoon of salt.
- Whisk Them Together: Use a whisk to gently mix these dry ingredients. This step is important because it ensures that the baking powder and salt are evenly distributed throughout the flour, which will help your banana bread rise uniformly and taste balanced. This is where the magic of “no baking soda” happens, as baking powder steps in as our primary leavening agent!
5. Gently Combine Wet and Dry
- Add Dry to Wet: Pour the dry ingredient mixture directly into the large bowl with your wet banana mixture.
- Mix Just Until Combined: Using a rubber spatula, gently fold the dry ingredients into the wet ingredients. Mix just until no streaks of dry flour remain. This means you should stop mixing as soon as everything is moistened.
- Why “Just Until Combined”? This is perhaps the most important tip for tender banana bread! Overmixing the batter develops the gluten in the flour too much, which leads to a tough, dense, and chewy banana bread instead of a light and moist one. A few small lumps in the batter are perfectly fine and even desirable.
6. Bake to Golden Perfection
- Pour into Pan: Pour your beautifully mixed batter into the prepared 9×5 inch loaf pan. Use your spatula to spread the batter evenly and smooth out the top if needed.
- Bake It Up: Place the loaf pan in your preheated oven. Bake for approximately 50-65 minutes. Baking times can vary depending on your oven, so keep an eye on it.
- Check for Doneness: To check if your banana bread is done, insert a wooden skewer or a toothpick into the center of the loaf. If it comes out clean or with a few moist crumbs attached (but no wet batter), your bread is ready! If it comes out with wet batter, continue baking for another 5-10 minutes and test again.
- Troubleshooting Tip: If the top of your banana bread starts to brown too quickly before the inside is cooked, you can loosely tent the pan with aluminum foil for the remaining baking time. This prevents over-browning while allowing the inside to cook through.
7. Cool and Enjoy!
- Cool in Pan: Once baked, carefully remove the loaf pan from the oven. Let the banana bread cool in the pan on a wire rack for about 10-15 minutes. This allows the bread to firm up slightly and makes it easier to remove.
- Transfer to Wire Rack: After 10-15 minutes, gently invert the loaf pan onto the wire rack, then flip the bread right side up. Allow the banana bread to cool completely on the wire rack before slicing.
- Why Cool Completely? Slicing warm banana bread can lead to a gummy texture and make it fall apart. Allowing it to cool completely (which can take an hour or two) ensures a perfect slice and the best flavor and texture.
- Slice and Serve: Once cooled, use a serrated knife to slice your delicious banana bread. Enjoy it plain, with a smear of butter, or even a dollop of cream cheese!
Tips & Tricks for Perfect Banana Bread
Becoming a great baker means learning a few secrets along the way. Here are some actionable tips to ensure your banana bread is a masterpiece every time:
- Embrace the Brown Spots: The riper your bananas, the better your banana bread will taste. Look for bananas with plenty of brown spots, or even entirely brown peels. They are sweeter and easier to mash, imparting a much richer flavor to your bread.
- Don’t Overmix (Seriously!): This is the golden rule for quick breads. Overmixing develops gluten, which leads to a tough, rubbery texture. Mix only until the dry ingredients are just incorporated into the wet. A few lumps are perfectly fine!
- Measure Flour Correctly: Use the “spoon and level” method. Spoon flour into your measuring cup until it overflows, then use a straight edge (like the back of a knife) to level off the excess. Scooping directly from the bag can pack too much flour into the cup, resulting in dry bread.
- Know Your Oven: All ovens can vary in temperature. If you find your bread bakes faster or slower than the recipe suggests, consider getting an oven thermometer to verify your oven’s true temperature.
- Add-ins for Extra Flair: Feel free to customize! Fold in ½ cup of chopped walnuts, pecans, or chocolate chips (milk, semi-sweet, or dark) with the dry ingredients before combining with the wet. Just remember to fold them in gently to avoid overmixing.
- Storage Secrets: Store your banana bread at room temperature in an airtight container for up to 3-4 days. For longer storage, wrap individual slices or the whole loaf tightly in plastic wrap, then aluminum foil, and freeze for up to 3 months. Thaw at room temperature or gently warm in the microwave.
- Patience is a Virtue (Especially for Cooling): Resist the urge to slice into your warm banana bread right away. Cooling completely allows the starches to set, preventing a gummy texture and ensuring clean, beautiful slices.
Essential Baking Tools
Having the right tools makes baking much easier and more enjoyable. Here are a few essentials you’ll need for this recipe:
- Mixing Bowls (one large, one medium)
- Whisk
- 9×5 Inch Loaf Pan
- Measuring Cups
- Measuring Spoons
- Rubber Spatula
- Fork or Potato Masher (for bananas)
- Wire Cooling Rack
Nutrition Information (Estimated Per Slice)
Please note that these values are estimates and can vary based on specific ingredients and serving size (calculated for 12 slices per loaf).
| Nutrient | Amount |
|---|---|
| Calories | ~260-290 kcal |
| Total Carbohydrates | ~45-50 g |
| Protein | ~3-4 g |
| Total Fat | ~10-12 g |
| Dietary Fiber | ~1-2 g |
| Sugars | ~25-30 g |
Frequently Asked Questions (FAQs)
Why No Baking Soda? What’s the Substitute?
In this recipe, we’ve replaced baking soda entirely with baking powder. Baking soda requires an acid (like buttermilk or brown sugar) to activate and create lift. Baking powder, on the other hand, contains its own acid, meaning it simply needs liquid and heat to produce carbon dioxide and help your bread rise. It’s a fantastic, reliable leavening agent that works perfectly here, giving you a beautiful, fluffy texture without the need for additional acidic ingredients.
What if My Bananas Aren’t Ripe Enough?
If your bananas are still green or firm, don’t despair! You have a few options:
- The Oven Trick: Place unpeeled bananas on a baking sheet and bake at 300°F (150°C) for 15-30 minutes, or until the peels are shiny and black. Let them cool, then peel and mash.
- The Paper Bag Trick: Place bananas in a paper bag with an apple or tomato for 1-2 days. The ethylene gas released by the other fruit will speed up ripening.
- Wait It Out: Sometimes, the best solution is just patience!
Can I Use Oil Instead of Butter?
Yes, you can! You can substitute the ½ cup of melted unsalted butter with ½ cup of a neutral-flavored oil like vegetable oil, canola oil, or even a light olive oil. Using oil often results in a slightly more moist and tender crumb that stays fresh longer, as oil is 100% fat, while butter contains some water. The flavor profile will be slightly different, but still delicious.
How Do I Know When My Banana Bread Is Done?
The best way to check for doneness is the “toothpick test.” Insert a wooden skewer or toothpick into the very center of the loaf. If it comes out clean or with a few moist crumbs attached (but no wet batter), your banana bread is ready. If it comes out wet, continue baking and check again in 5-10 minute intervals.
How Should I Store My Banana Bread?
Once completely cooled, store your banana bread in an airtight container at room temperature for up to 3-4 days. For longer storage, you can wrap the loaf or individual slices tightly in plastic wrap, then aluminum foil, and freeze for up to 3 months. Thaw at room temperature or gently warm in the microwave before serving.
Can I Add Other Ingredients Like Nuts or Chocolate Chips?
Absolutely! Banana bread is wonderful for customization. You can gently fold in ½ cup of chopped walnuts, pecans, chocolate chips (milk, semi-sweet, or dark), or even dried cranberries or shredded coconut into the batter along with the dry ingredients. Just be careful not to overmix once they’re added.
Conclusion
Congratulations! You’ve just discovered how incredibly simple and satisfying it is to bake a fantastic loaf of banana bread, even without baking soda. This recipe proves that you don’t need every single ingredient to create something truly delicious and comforting. Whether you’re a seasoned baker or just starting your journey, this Recipes For Banana Bread Without Baking Soda is a testament to easy, accessible baking. So go ahead, tie on that apron, mash those ripe bananas, and fill your home with the irresistible aroma of homemade goodness. We hope this becomes a cherished recipe in your kitchen. Happy baking!