Welcome, fellow dessert lovers and aspiring bakers! Are you ready to embark on a delightful culinary journey that promises exquisite flavors and stunning presentation? Today, we’re diving into the enchanting world of the Rose Milk Cake Recipe a dessert that’s as beautiful to look at as it is delicious to eat. This cake isn’t just a treat; it’s an experience, with its delicate rose aroma, moist texture, and creamy milk soak. If you’re searching for easy baking recipes that impress without overwhelming, you’ve found your next favorite! We’ll walk you through every step, ensuring that even if you’re a complete novice, you’ll feel confident in the kitchen. Get ready to master some essential baking tips for beginners and create a masterpiece!
What is Rose Milk Cake?
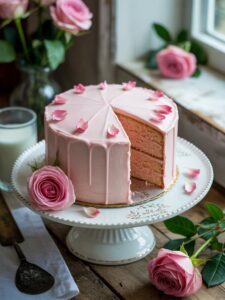
Originating from Middle Eastern and South Asian influences, Rose Milk Cake is a delightful variation of the popular “tres leches” (three milks) cake. Instead of traditional milks, this version often incorporates evaporated milk, sweetened condensed milk, and heavy cream, infused with fragrant rose water. The cake itself is a light, airy sponge that acts as a perfect canvas for absorbing the luscious milk mixture, resulting in an incredibly moist and flavorful dessert that’s often topped with whipped cream and rose petals or pistachios.
Ingredients You’ll Need for Your Rose Milk Cake
Gathering your ingredients beforehand is a crucial step for any successful bake. It’s called “mise en place” and it makes the process so much smoother! Here’s everything you’ll need, organized for your convenience:
For the Sponge Cake:
| Quantity | Unit | Ingredient |
|---|---|---|
| 1 ½ | cups | All-purpose flour |
| 1 ½ | teaspoons | Baking powder |
| ¼ | teaspoon | Salt |
| ½ | cup | Unsalted butter, softened |
| 1 | cup | Granulated sugar |
| 2 | large | Eggs, room temperature |
| 1 | teaspoon | Vanilla extract |
| ½ | cup | Whole milk, room temperature |
For the Rose Milk Soak:
| Quantity | Unit | Ingredient |
|---|---|---|
| 1 | can (12 oz) | Evaporated milk |
| 1 | can (14 oz) | Sweetened condensed milk |
| ½ | cup | Heavy cream |
| 1-2 | teaspoons | Rose water (adjust to taste) |
| (Optional) Few drops | Pink food coloring |
For the Whipped Cream Frosting & Garnish:
| Quantity | Unit | Ingredient |
|---|---|---|
| 1 ½ | cups | Heavy cream, very cold |
| ¼ | cup | Powdered sugar (confectioners’ sugar) |
| ½ | teaspoon | Vanilla extract |
| (Optional) | Dried rose petals or chopped pistachios for garnish |
👩🍳 Step-by-Step Instructions: Baking Your Rose Milk Cake 👩🍳
Let’s get baking! Follow these detailed steps carefully for the best results. Don’t rush, and remember, baking is a joyful process!
Step 1: Prepare Your Baking Pan & Preheat Oven
- Preheat your oven: Set your oven to 350°F (175°C). This ensures your oven is at the correct temperature when your batter is ready, which is key for even baking.
- Prepare your pan: Grease and flour a 9×13 inch baking pan. You can also line it with parchment paper for easier removal, leaving an overhang on the sides like “handles.” This prevents sticking and makes serving much simpler.
Step 2: Dry Ingredients First
- In a medium bowl, whisk together the all-purpose flour, baking powder, and salt. Whisking ensures these ingredients are evenly distributed, which is important for your cake’s rise and texture. Set this aside.
Step 3: Cream Butter and Sugar
- In a large mixing bowl (or the bowl of a stand mixer fitted with the paddle attachment), beat the softened unsalted butter and granulated sugar together on medium speed until the mixture is light and fluffy. This usually takes about 3-5 minutes. This creaming process incorporates air, which contributes to a light and tender cake.
Step 4: Add Eggs and Vanilla
- Add the large eggs one at a time, beating well after each addition. Make sure each egg is fully incorporated before adding the next. If you add them all at once, the mixture might curdle.
- Stir in the vanilla extract.
Step 5: Alternate Dry and Wet Ingredients
- With the mixer on low speed, gradually add the dry ingredient mixture to the wet ingredients, alternating with the whole milk. Start and end with the dry ingredients. For example: add ⅓ of the flour mixture, mix until just combined, then ½ of the milk, mix, then ⅓ of the flour, mix, remaining milk, mix, and finally the last ⅓ of the flour, mixing until *just* combined.
- Do not overmix! Overmixing develops the gluten in the flour too much, which can lead to a tough, dense cake. Mix only until no streaks of flour remain. A few small lumps are okay.
Step 6: Bake the Cake
- Pour the cake batter into your prepared 9×13 inch baking pan and spread it evenly.
- Bake for 25-30 minutes, or until a wooden skewer or toothpick inserted into the center comes out clean. Baking times can vary depending on your oven, so keep an eye on it!
- Once baked, remove the cake from the oven and let it cool in the pan on a wire rack for about 15-20 minutes. This initial cooling helps the cake set.
Step 7: Prepare the Rose Milk Soak
- While the cake is cooling, prepare the milk soak. In a large bowl or pitcher, whisk together the evaporated milk, sweetened condensed milk, heavy cream, and rose water.
- If desired, add a few drops of pink food coloring to give the soak a beautiful, subtle rose hue. Mix until fully combined.
Step 8: Soak the Cake
- Once the cake has cooled slightly (it should still be warm but not hot), use a fork or skewer to poke holes all over the top surface of the cake. Poke generously, ensuring the holes go deep enough to allow the milk to penetrate.
- Slowly and evenly pour the rose milk soak over the entire cake. Take your time, allowing the cake to absorb the liquid. You might need to wait a few minutes between pours. The cake will look very wet initially, but it will absorb most of the liquid.
- Allow the cake to cool completely to room temperature, then cover it with plastic wrap and refrigerate for at least 4 hours, or preferably overnight. This chilling time is crucial for the cake to fully absorb the milk and for the flavors to meld beautifully.
Step 9: Make the Whipped Cream Frosting
- Just before serving, prepare the whipped cream frosting. In a cold bowl (chilled bowls help whip cream faster) with a cold whisk attachment, beat the very cold heavy cream, powdered sugar, and vanilla extract on high speed until stiff peaks form. Be careful not to overbeat, or you’ll end up with butter!
Step 10: Frost and Garnish
- Spread the whipped cream evenly over the chilled, soaked cake.
- Garnish with dried rose petals or chopped pistachios for an extra touch of elegance and flavor.
Step 11: Serve and Enjoy!
- Slice your beautiful Rose Milk Cake and serve immediately. Store any leftovers in the refrigerator. Enjoy your homemade masterpiece!
✨ Tips & Tricks for Baking Success ✨
Even for beginners, these little nuggets of wisdom can make a huge difference in your baking results. Pay attention to these baking tips for beginners for a truly perfect Rose Milk Cake:
- Room Temperature Ingredients are Key: For the cake batter, ensure your butter, eggs, and milk are at room temperature. This allows them to emulsify better, creating a smoother, more uniform batter and a lighter cake texture.
- Don’t Overmix: This is probably the most common beginner mistake! Once you add the flour, mix only until just combined. Overmixing develops gluten, leading to a tough, dry cake.
- Measure Accurately: Baking is a science! Use proper measuring cups and spoons, and for flour, spoon it into the measuring cup and level it off with a straight edge (don’t scoop directly from the bag, as it compacts the flour).
- Chill Your Whipping Cream & Bowl: For the best whipped cream, make sure your heavy cream, mixing bowl, and whisk attachment are all very cold. This helps the cream whip up faster and hold its shape better.
- Patience with the Soak: Don’t rush the soaking process! The longer the cake chills in the milk mixture, the more flavor it will absorb and the moister it will become. Overnight is truly best for maximum deliciousness.
- Customize Your Rose Flavor: Rose water can be quite potent. Start with 1 teaspoon in the milk soak and taste it. Add more if you desire a stronger rose flavor.
- Test Your Oven: Ovens can vary. If you suspect your oven runs hot or cold, an inexpensive oven thermometer can be a great investment.
🛠️ Essential Baking Tools for Your Kitchen 🛠️
Having the right tools makes all the difference in your baking journey. Here are some essentials you’ll need for this Rose Milk Cake, with handy links to find them:
- Mixing Bowl
- Whisk
- Baking Pan (9×13 inch recommended)
- Measuring Cups
- Measuring Spoons
- Spatula
- Electric mixer (handheld or stand mixer)
- Wire rack for cooling
📊 Nutrition Information (Estimated per serving) 📊
Here’s an estimated nutritional breakdown for a serving of this delicious Rose Milk Cake (assuming 12 servings from a 9×13 inch cake). Please note that these are approximate values and can vary based on specific brands and exact measurements.
| Nutrient | Amount |
|---|---|
| Calories | ~450-500 kcal |
| Carbohydrates | ~60-70g |
| Protein | ~7-9g |
| Fat | ~20-25g |
| Fiber | ~1-2g |
| Sugar | ~45-55g |
❓ Frequently Asked Questions (FAQs) for Beginners ❓
Q1: Can I make this Rose Milk Cake ahead of time?
Absolutely! This cake is actually best when made ahead. After pouring the milk soak, cover and refrigerate it for at least 4 hours, or ideally overnight. This allows the cake to fully absorb the milk and for the flavors to deepen, making it incredibly moist and flavorful. You can then frost it just before serving.
Q2: What if I don’t have rose water or don’t like the flavor?
If you’re not a fan of rose water or don’t have it on hand, you can certainly omit it! You could also substitute it with other extracts like almond extract, cardamom extract, or even a little orange blossom water for a different but equally delicious flavor profile.
Q3: How should I store leftover Rose Milk Cake?
Leftovers should be stored in an airtight container in the refrigerator for up to 3-4 days. The cake’s moisture content actually improves over time, making it a fantastic dessert to enjoy for a few days.
Q4: My cake turned out dense/dry, what went wrong?
A dense or dry cake usually points to one of two common issues: overmixing the batter (which develops gluten too much) or overbaking the cake. Ensure you mix the dry ingredients into the wet only until just combined, and keep a close eye on your oven to avoid baking longer than necessary. Using room temperature ingredients also helps prevent a dense texture.
Q5: Can I use a different size baking pan?
You can, but you’ll need to adjust baking time. If you use a smaller pan (e.g., 8×8 inch square), the cake will be thicker and take longer to bake. If you use a larger pan, it will be thinner and bake faster. For beginners, sticking to the 9×13 inch pan ensures the recipe works as intended without needing adjustments.
🎉 Your Rose Milk Cake Journey Begins Now! 🎉
Congratulations, you’re now equipped with everything you need to bake a truly spectacular Rose Milk Cake! This dessert is more than just a sweet treat; it’s a labor of love that will impress your friends and family and bring a touch of elegance to any occasion. Don’t be afraid to try it, even if you’re new to baking. Remember, every master baker started as a beginner, and with these detailed steps and helpful tips, you’re well on your way to creating something truly delicious. Happy baking, and enjoy every fragrant, moist bite of your beautiful Rose Milk Cake!