
We’ve designed this post to be your ultimate guide, packed with comprehensive instructions and essential baking tips for beginners. From perfectly grated carrots to achieving that silky-smooth frosting, we’ll walk you through every step, ensuring your first (or fiftieth!) homemade carrot cake is a resounding success. Get ready to impress your friends and family with a dessert that tastes like it came straight from a gourmet bakery, all thanks to your own two hands!
Ingredients List: What You’ll Need
Gathering all your ingredients before you start is a crucial first step for any beginner baker. This is called “mise en place” and it helps ensure a smooth, stress-free baking experience. Make sure your butter and cream cheese are at room temperature for the frosting!
For the Carrot Cake:
| Quantity | Unit | Ingredient |
|---|---|---|
| 2 | cups | All-purpose flour |
| 1 ¾ | cups | Granulated sugar |
| ½ | cup | Packed light brown sugar |
| 2 | teaspoons | Baking soda |
| 1 | teaspoon | Salt |
| 2 | teaspoons | Ground cinnamon |
| ½ | teaspoon | Ground nutmeg (optional, but highly recommended!) |
| 1 ½ | cups | Vegetable oil (or other neutral oil like canola) |
| 4 | large | Eggs |
| 2 | teaspoons | Vanilla extract |
| 3 | cups | Finely grated carrots (from about 5-6 medium carrots) |
| 1 (8-ounce) | can | Crushed pineapple, well drained |
| 1 | cup | Chopped pecans or walnuts (plus extra for garnish) |
| ½ | cup | Shredded coconut (sweetened or unsweetened, optional) |
For the Cream Cheese Frosting:
| Quantity | Unit | Ingredient |
|---|---|---|
| 1 (8-ounce) | package | Cream cheese, softened |
| ½ | cup (1 stick) | Unsalted butter, softened |
| 3 ½ – 4 | cups | Powdered sugar (confectioners’ sugar), sifted |
| 1 | teaspoon | Vanilla extract |
| Pinch | Salt |
Step-by-Step Instructions: Bake Your Masterpiece!
Follow these detailed steps carefully, and remember that baking is a science – precision matters, especially for beginners!
Step 1: Prepare Your Baking Pans and Preheat Oven
- Preheat your oven to 350°F (175°C). This is crucial for even baking; never put your cake batter into a cold oven!
- Grease and flour two 9-inch round cake pans. To do this, rub the inside of each pan with a generous amount of butter or non-stick baking spray. Then, sprinkle about a tablespoon of flour into each pan, tilting and tapping it around until the entire greased surface is coated. Invert the pan and tap out any excess flour. This creates a non-stick barrier, ensuring your cake comes out cleanly.
- Beginner Tip: For extra insurance, you can also line the bottom of each pan with a circle of parchment paper after greasing and before flouring. This makes removal incredibly easy!
Step 2: Combine Dry Ingredients
- In a large bowl, whisk together the all-purpose flour, granulated sugar, brown sugar, baking soda, salt, ground cinnamon, and ground nutmeg (if using).
- Beginner Tip: Whisking these dry ingredients together thoroughly isn’t just for mixing; it also helps to aerate the flour and distribute the leavening agents (like baking soda) and spices evenly throughout the batter. This prevents pockets of unmixed ingredients and ensures a light, consistently flavored cake.
Step 3: Mix Wet Ingredients
- In a separate, medium bowl, whisk together the vegetable oil, eggs, and vanilla extract until well combined.
- Beginner Tip: Make sure your eggs are large-sized for this recipe, as the amount of liquid they contribute is important for the cake’s moisture.
Step 4: Combine Wet and Dry Ingredients
- Pour the wet ingredients mixture into the bowl with the dry ingredients.
- Using a spatula or a large spoon, stir the ingredients together just until they are combined.
- Beginner Tip: This is where many beginners make a common mistake: do not overmix! Overmixing develops the gluten in the flour too much, leading to a tough, dense cake. Stop stirring as soon as you no longer see streaks of dry flour. A few small lumps are perfectly fine.
Step 5: Fold in the Carrot Cake Goodies
- To the batter, gently fold in the finely grated carrots, well-drained crushed pineapple, chopped pecans/walnuts, and shredded coconut (if using).
- Beginner Tip: “Folding” means using your spatula to gently scoop from the bottom of the bowl up and over the top, turning the bowl as you go. This incorporates the add-ins without deflating the batter.
- Important Note on Carrots and Pineapple: Ensure your carrots are grated finely, not coarsely. This helps them melt into the cake beautifully. For the crushed pineapple, draining it thoroughly is key! Excess moisture can make your cake soggy. Press it against a fine-mesh sieve or squeeze it in paper towels.
Step 6: Bake the Cake Layers
- Divide the batter evenly between your two prepared 9-inch round cake pans. You can use a kitchen scale for precision, but simply eyeballing it is usually fine for home baking.
- Place the pans in the preheated oven and bake for 30-35 minutes, or until a wooden skewer or toothpick inserted into the center of the cake comes out clean or with just a few moist crumbs attached.
- Beginner Tip: Avoid opening the oven door too frequently during baking, especially in the first 20 minutes, as this can cause the cake to sink.
Step 7: Cool the Cake Layers
- Once baked, remove the cakes from the oven and let them cool in their pans on a wire rack for about 10-15 minutes. This allows the cake to firm up slightly before you attempt to remove it.
- After 10-15 minutes, carefully invert the cakes onto the wire rack to cool completely. Gently peel off any parchment paper if you used it.
- Beginner Tip: It is absolutely essential that your cake layers are completely cooled before you attempt to frost them. Frosting a warm cake will cause the frosting to melt and slide right off, creating a messy situation! This might take 1-2 hours, or even longer. You can even wrap them in plastic wrap and refrigerate them once cooled to make them easier to handle.
Step 8: Make the Cream Cheese Frosting
- In a large mixing bowl (using an electric mixer with a paddle attachment or handheld mixer is best here), beat the softened cream cheese and softened unsalted butter together on medium speed until smooth and creamy, about 2-3 minutes. Make sure there are no lumps of cream cheese or butter left.
- Gradually add the sifted powdered sugar, one cup at a time, mixing on low speed until combined, then increasing to medium speed. Continue until all the sugar is incorporated.
- Beginner Tip: Sifting the powdered sugar is crucial! It breaks up any lumps, ensuring you get a perfectly smooth, silky frosting. If you don’t sift, you’ll likely end up with grainy frosting.
- Stir in the vanilla extract and pinch of salt. Beat on medium-high speed for another 1-2 minutes until the frosting is light, fluffy, and spreadable. If it’s too thick, add a tiny splash of milk or cream (1 teaspoon at a time). If it’s too thin, add a bit more sifted powdered sugar.
Step 9: Assemble and Frost Your Carrot Cake
- Once the cake layers are completely cool, place one layer on your serving plate or cake stand.
- Spread about one-third of the cream cheese frosting evenly over the top of the first layer.
- Carefully place the second cake layer on top.
- Spread the remaining frosting over the top and sides of the entire cake, using an offset spatula for a smooth finish.
- Beginner Tip: Don’t worry about perfection, especially for your first cake! A rustic, homemade look is charming. You can garnish the top and sides with extra chopped nuts or a sprinkle of cinnamon if desired.
- Refrigerate the cake for at least 30 minutes before slicing to allow the frosting to set.
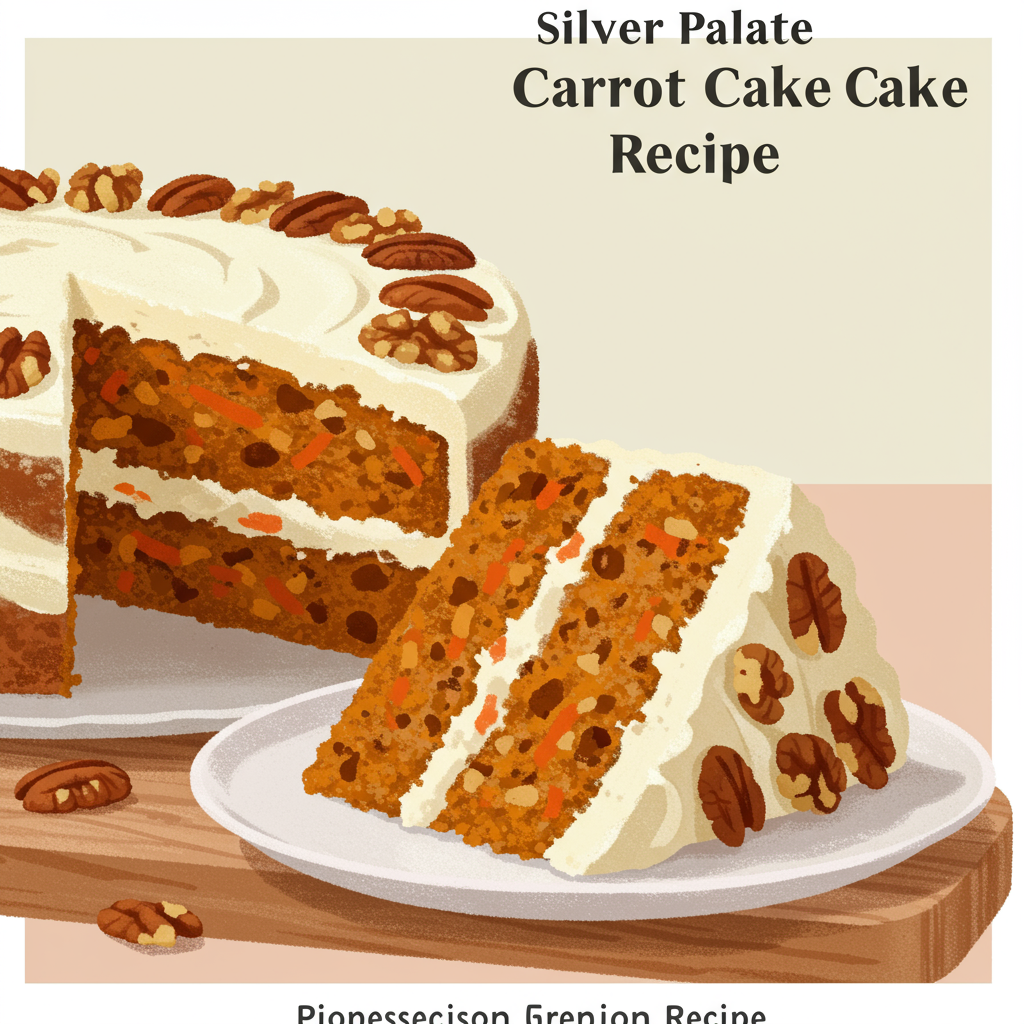
Enjoy your magnificent, homemade Silver Palate Carrot Cake!
Tips & Tricks for Baking Success
- Room Temperature Ingredients are Key: For the frosting, ensure your cream cheese and butter are truly softened to room temperature. This is vital for a smooth, lump-free frosting. Take them out of the fridge at least 1-2 hours before you start.
- Measure Accurately: Especially for dry ingredients like flour, spoon it into your measuring cup and then level it off with the back of a knife. Don’t pack it down!
- Don’t Overmix the Batter: As mentioned in the instructions, overmixing develops gluten, which leads to a tough, chewy cake. Mix just until combined.
- Grate Carrots Finely: Fine shreds of carrot integrate better into the cake, providing moisture and flavor without being too chunky. A food processor with a grating attachment makes this super easy!
- Drain Pineapple Thoroughly: Squeeze out as much liquid as possible from the crushed pineapple. This prevents your cake from becoming soggy.
- Cool Cakes Completely: Patience is a virtue here! Frosting a warm cake is a recipe for disaster. Allow ample time for your cake layers to cool entirely on a wire rack.
- Sift Powdered Sugar: This step is non-negotiable for smooth cream cheese frosting. It removes lumps and makes for a far superior texture.
- Parchment Paper is Your Friend: Lining your cake pans with parchment paper circles on the bottom is a fantastic way to ensure your cakes release perfectly every time.
- Toast Your Nuts: For an extra layer of flavor, lightly toast your chopped pecans or walnuts in a dry pan over medium heat for 5-7 minutes, stirring frequently, before adding them to the batter. Let them cool completely first.
Essential Baking Tools
Having the right tools makes all the difference, especially when you’re starting out. Here are a few essentials for this recipe:
- Mixing Bowls (various sizes)
- Whisk
- 9-inch Round Baking Pans (x2)
- Measuring Cups & Spoons
- Rubber Spatula
- Wire Cooling Rack
- Electric Mixer (handheld or stand mixer for frosting)
- Fine-Mesh Sieve (for sifting powdered sugar and draining pineapple)
- Box Grater or Food Processor (for carrots)
Nutrition Information (Estimated per serving)
Please note that this is an estimated nutritional breakdown for one slice (assuming 12 servings per cake) and can vary based on exact ingredient brands and quantities used.
| Nutrient | Amount |
|---|---|
| Calories | 480 kcal |
| Carbohydrates | 65 g |
| Protein | 5 g |
| Fat | 25 g |
| Fiber | 2 g |
| Sugar | 45 g |
Frequently Asked Questions (FAQs)
- Q: Why is my carrot cake dry?
- A: The most common culprits for a dry cake are overmixing the batter (which develops too much gluten) or overbaking. Ensure you only mix until just combined and remove the cake from the oven as soon as the toothpick test indicates it’s done.
- Q: Can I make this carrot cake ahead of time? How should I store it?
- A: Absolutely! Carrot cake often tastes even better the next day. You can bake the layers, let them cool completely, wrap them tightly in plastic wrap, and store them at room temperature for up to 2 days, or freeze them for up to a month. The frosted cake should be stored in an airtight container in the refrigerator for up to 3-5 days. Bring it to room temperature for about 30 minutes before serving for the best flavor and texture.
- Q: Do I have to use nuts or pineapple in the recipe?
- A: No, you can omit them if you prefer! The Silver Palate recipe is famous for these additions, which contribute to its incredible moisture and texture. If omitting nuts due to allergies, ensure your kitchen is free of cross-contamination. If you omit pineapple, the cake might be slightly less moist, but still delicious.
- Q: How do I know when the cake is truly done baking?
- A: The best way is the “toothpick test.” Insert a wooden skewer or toothpick into the very center of the cake. If it comes out clean or with just a few moist crumbs attached (no wet batter), the cake is done. Also, the top of the cake should spring back lightly when gently pressed.
- Q: My cream cheese frosting is lumpy. What went wrong?
- A: Lumpy frosting usually happens for two main reasons: your cream cheese and/or butter were not soft enough (they need to be truly at room temperature) or you didn’t sift your powdered sugar. Make sure to beat the softened cream cheese and butter until perfectly smooth before adding the sifted sugar gradually.
- Q: Can I use pre-shredded carrots from the store?
- A: Yes, you can, but often store-bought shredded carrots are thicker and drier. For the best results, if using pre-shredded, you might want to give them another chop or pulse in a food processor to get a finer, more consistent texture, which helps them blend better into the cake and contribute more moisture.
Conclusion: Your Delicious Achievement Awaits!
Congratulations, future master baker! You’ve just navigated the wonderful world of the Silver Palate Carrot Cake Recipe. We hope this detailed guide, filled with practical baking tips for beginners, has empowered you to create a truly spectacular dessert. This cake isn’t just a treat; it’s an experience – a perfect blend of sweet spices, moist cake, and tangy cream cheese frosting that will make any occasion special.
Don’t be afraid to get your hands a little messy, enjoy the process, and most importantly, have fun! Baking is a journey of learning and delicious discovery. We encourage you to try this recipe, share it with loved ones, and savor every single bite. Happy baking, and we can’t wait to hear about your carrot cake triumphs!