Sourdough Bread Bowl Recipe: Your Guide to Homemade Comfort
Welcome, fellow food lovers and aspiring bakers! There’s something incredibly satisfying about creating delicious, comforting food from scratch, and today, we’re diving into one of the most rewarding projects: the Sourdough Bread Bowl Recipe. Imagine a perfectly crusty, chewy sourdough vessel, ready to cradle your favorite soup or stew. This recipe isn’t just about baking; it’s about the journey of transforming simple ingredients into something truly spectacular. If you’ve been searching for easy baking recipes that truly impress, you’ve found it! We’ll walk you through every step, offering essential baking tips for beginners to ensure your success. Get ready to fill your home with the irresistible aroma of freshly baked sourdough!
This detailed guide will demystify sourdough baking, making it accessible even if you’re new to the world of natural leavening. We’ll focus on creating a dough that’s not only delicious but also robust enough to hold up to hearty fillings. So, grab your apron, get your active sourdough starter ready, and let’s embark on this delightful baking adventure together!
Ingredients List
Precision is key in sourdough baking, so we highly recommend using a kitchen scale for accuracy. This recipe yields 2 medium-sized bread bowls.
| Ingredient | Quantity | Unit |
|---|---|---|
| Active Sourdough Starter | 100 | grams |
| Warm Water (approx. 95-105°F / 35-40°C) | 350 | grams |
| Bread Flour | 500 | grams |
| Fine Sea Salt | 10 | grams |
| Olive Oil (for greasing) | 1-2 | teaspoons |
| Rice Flour (for dusting, optional but recommended) | 2-3 | tablespoons |
Step-by-Step Instructions: Crafting Your Sourdough Bread Bowls
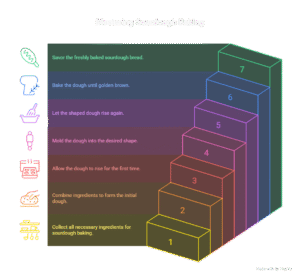
Sourdough baking is a process that requires patience and attention, but the steps are surprisingly straightforward. Follow along closely, and don’t be afraid to get your hands a little messy!
Step 1: Activate Your Sourdough Starter
Ensure your sourdough starter is **active and bubbly**. This means it has been fed 4-8 hours prior and has roughly doubled in size, showing lots of bubbles on the surface and along the sides. A strong starter is the foundation of a successful loaf.
Step 2: Mixing the Dough (Autolyse)
- In a large mixing bowl, combine the **warm water** and your **active sourdough starter**. Use a whisk or your hands to gently break up the starter and dissolve it into the water.
- Add the **bread flour** to the bowl. Mix with your hands or a Danish dough whisk until no dry flour remains and a shaggy, rough dough forms. Don’t worry about developing gluten at this stage; just ensure all the flour is hydrated.
- Cover the bowl with a damp tea towel or plastic wrap and let it rest for **30-60 minutes**. This resting period is called **autolyse**, and it allows the flour to fully hydrate and enzymes to start breaking down starches, which helps with gluten development later.
Step 3: Incorporating Salt & Initial Mixing
- After the autolyse, sprinkle the **fine sea salt** over the dough.
- Using wet hands, gently dimple the salt into the dough. Then, begin to fold and squeeze the dough repeatedly for about 5-7 minutes. The dough will feel sticky at first, but as you mix, it will start to come together and become smoother. The goal here is to thoroughly integrate the salt and begin to build some initial gluten structure.
Step 4: Bulk Fermentation & Stretch and Folds
This is where the magic happens! **Bulk fermentation** is the first rise, and we’ll strengthen the dough through a series of “stretch and folds.”
- Lightly grease your mixing bowl with a tiny bit of **olive oil**. Place the dough back into the bowl.
- Over the next **3-4 hours** (depending on your room temperature and starter activity), you will perform **3-4 sets of stretch and folds**. Each set should be done every 30-45 minutes.
- To perform a stretch and fold: With wet hands, grab a portion of the dough from one side, stretch it upwards, and fold it over to the opposite side of the bowl. Rotate the bowl a quarter turn and repeat this process 3-4 times until you’ve stretched and folded all sides. This builds strength and incorporates air.
- After each set, cover the bowl and let the dough rest. By the end of bulk fermentation, the dough should feel much stronger, gassy, and slightly increased in volume (about 20-30%). You should see some bubbles on the surface.
Step 5: Pre-shaping the Dough
- Lightly flour your work surface. Gently turn the dough out onto the surface.
- Divide the dough into two equal portions if you’re making two bowls.
- Gently shape each portion into a loose round (a “boule”). Do this by gently pulling the edges of the dough towards the center to create some surface tension. Don’t be too aggressive; you just want to create a rough ball shape.
- Cover the pre-shaped dough with a damp tea towel and let it rest for **20-30 minutes**. This allows the gluten to relax, making final shaping much easier.
Step 6: Final Shaping for Bread Bowls
This step is crucial for creating a taut surface that will hold its shape and give you a great crust.
- Prepare two proofing baskets (bannetons) or two medium-sized bowls lined with clean tea towels. Dust them generously with **rice flour** (this prevents sticking better than regular flour).
- Take one piece of pre-shaped dough. Gently flip it over so the seam side is up.
- Work with gentle but firm hands. Imagine you’re creating a tight sphere. Fold the top edge down to the middle, then the bottom edge up to meet it. Fold the sides in. Then, flip the dough over so the seam is now on your work surface.
- Using the palms of your hands and the friction of the counter, gently cup the dough and rotate it towards you in small circles. This action creates surface tension, pulling the dough into a tight, smooth ball. Aim for a taut, smooth surface.
- Carefully transfer the shaped dough, **seam-side up**, into your prepared proofing basket/bowl. The seam-side up placement means the smooth, taut surface will be on top when you bake.
- Repeat with the second piece of dough.
Step 7: Cold Proof (Retardation)
- Cover the proofing baskets loosely with plastic wrap or a plastic shower cap.
- Place them in the refrigerator for **12-18 hours (or up to 24 hours)**. Cold proofing slows down fermentation, allowing for deeper flavor development and making the dough easier to handle and score when cold.
Step 8: Preheat Oven & Dutch Oven
- About an hour before you plan to bake, place your Dutch oven (or a heavy baking pot with a lid) into your oven.
- Preheat your oven to **475°F (245°C)** with the Dutch oven inside. It’s crucial to let the Dutch oven heat up thoroughly.
Step 9: Scoring and Baking
- Carefully remove the hot Dutch oven from the oven. Be extremely cautious as it will be very hot.
- Gently invert one of your cold doughs from its proofing basket directly into the hot Dutch oven. The rice flour will help it release easily.
- Using a sharp razor blade (a “lame”) or a very sharp knife, score the top of the dough. For a bread bowl, a simple “X” or a circle around the top works well. This allows the dough to expand predictably.
- Place the lid back on the Dutch oven.
- Bake with the lid on for **25 minutes**. The lid traps steam, which helps the crust expand and prevents it from setting too quickly, resulting in a beautiful “oven spring.”
- After 25 minutes, remove the lid. Reduce the oven temperature to **450°F (230°C)**.
- Continue baking for another **20-25 minutes**, or until the crust is a deep golden brown and sounds hollow when tapped on the bottom.
- Carefully remove the bread from the Dutch oven and transfer it to a wire rack to cool completely.
- Repeat the baking process with the second dough.
Step 10: Cooling and Hollowing Out
- Allow your bread bowls to **cool completely** on a wire rack for at least 1-2 hours before cutting into them. Cutting too early can result in a gummy interior.
- Once cooled, use a serrated knife to carefully cut a circle on the top of the bread, about 1-2 inches from the edge, creating a “lid.”
- Gently scoop out the soft interior bread, leaving a sturdy wall about 1 inch thick. Be careful not to puncture the bottom or sides. The scooped-out bread is delicious for dipping!
Tips & Tricks for Sourdough Bread Bowl Success
Baking sourdough can seem daunting, but these tips will help you achieve fantastic results, especially as a beginner:

- Use an Active Starter: This is non-negotiable! Your starter should be fed, bubbly, and active. If it’s sluggish, give it a few more feedings before baking.
- Warm Water is Your Friend: Aim for water around 95-105°F (35-40°C) to encourage yeast activity. Too hot will kill it, too cold will slow it down.
- Don’t Rush the Process: Sourdough takes time. Embrace the slow fermentation. Rushing leads to dense, underdeveloped bread.
- Invest in a Kitchen Scale: Measuring by weight (grams) is far more accurate than cups, which is crucial for consistent sourdough results.
- Gentle Handling: Once you’ve built up the dough’s strength, try to handle it gently during shaping to avoid deflating all those precious air bubbles.
- Embrace Stickiness: Sourdough dough, especially high-hydration dough, can be sticky. Wet hands or a bench scraper can help manage it. Don’t add too much extra flour to your work surface, as this can change the hydration of your dough.
- The Dutch Oven Advantage: For beginners, a Dutch oven is a game-changer. It mimics a professional steam-injected oven, creating that perfect crust and spring. If you don’t have one, you can try baking on a preheated baking stone and creating steam with a tray of hot water at the bottom of the oven.
- Rice Flour for Dusting: Using rice flour in your proofing basket prevents sticking much better than wheat flour, leading to a clean release every time.
- Listen to Your Dough, Not Just the Clock: Fermentation times are estimates. Factors like room temperature, starter strength, and flour type can vary. Learn to observe your dough for signs of readiness (volume increase, bubbles, jiggliness).
Essential Baking Tools
Having the right tools makes all the difference in your baking journey. Here are some essentials:
- Large Mixing Bowl
- Whisk (or Danish Dough Whisk)
- Dutch Oven (a heavy pot with a lid)
- Digital Kitchen Scale (more accurate than measuring cups for sourdough)
- Bench Scraper (invaluable for handling sticky dough)
- Proofing Baskets (Bannetons) or large bowls lined with floured tea towels
- Sharp Razor Blade (Lame) or very sharp knife for scoring
- Wire cooling rack
Nutrition Information (per bread bowl, approximately)
This information is an estimate and can vary based on specific ingredients and preparation methods.
| Nutrient | Amount |
|---|---|
| Calories | ~900 kcal |
| Carbohydrates | ~188 g |
| Protein | ~32 g |
| Fat | ~3 g |
| Fiber | ~8 g |
| Sugar | ~1 g |
Frequently Asked Questions (FAQs)
Q1: My sourdough starter isn’t very bubbly. Can I still use it?
A: It’s best to wait until your starter is active and bubbly, meaning it has at least doubled in size after being fed. A weak starter will result in a dense loaf with poor rise. Give it another feeding or two until it’s vigorous.
Q2: Do I have to do the cold proof in the refrigerator?
A: While not strictly mandatory for a basic sourdough, cold proofing (also known as retardation) is highly recommended. It significantly enhances the flavor of your bread, develops a better crust, and makes the dough much easier to handle and score, especially for beginners.
Q3: Why is a Dutch oven so important for sourdough?
A: A Dutch oven creates a steamy environment around the dough, mimicking a professional bakery oven. This steam allows the crust to remain pliable, enabling the dough to expand fully (get good “oven spring”) before the crust sets. This results in a much better rise, a beautiful open crumb, and a wonderfully crispy crust.
Q4: My dough is very sticky and hard to handle. What am I doing wrong?
A: Sourdough dough, especially with higher hydration, can be sticky. This is normal! Make sure your hands are wet when performing stretch and folds, and use a light dusting of flour (or rice flour) on your work surface during shaping, along with a bench scraper. Avoid adding too much extra flour, as this changes the recipe’s hydration. With practice, you’ll get used to the feel of the dough.
Q5: How do I store leftover sourdough bread bowls?
A: Store whole, cooled bread bowls at room temperature in a breathable bag (like a paper bag or a linen bread bag) for 1-2 days. For longer storage, you can freeze them. If you’ve already hollowed them out, they will dry out faster, so try to use them on the day you hollow them. The scooped-out bread can be toasted, made into croutons, or enjoyed with butter!
Q6: What are some great fillings for my sourdough bread bowls?
A: The possibilities are endless! Classic choices include creamy tomato soup, clam chowder, broccoli cheddar soup, chili, or a hearty beef stew. For a lighter touch, try a warm spinach dip or a rich macaroni and cheese. Get creative!
Conclusion: Your Sourdough Journey Begins Now!
Congratulations, you’ve made it to the end of your **Sourdough Bread Bowl Recipe** guide! We hope this detailed, beginner-friendly post has empowered you to bake your very own magnificent sourdough bread bowls. There’s truly nothing quite like the aroma, the taste, and the sheer pride of pulling a homemade sourdough loaf from your oven. Each loaf tells a story, and every bake is a learning experience.
Don’t be discouraged if your first attempt isn’t perfect; sourdough baking is a skill that improves with practice. Embrace the process, enjoy the journey, and most importantly, savor the delicious results. We can’t wait to see what you create! Share your baking adventures with us in the comments below, and let us know what delicious fillings you chose for your beautiful bread bowls. Happy baking!
“`
1 thought on “Sourdough Bread Bowl Recipe – Yummy & Simple”