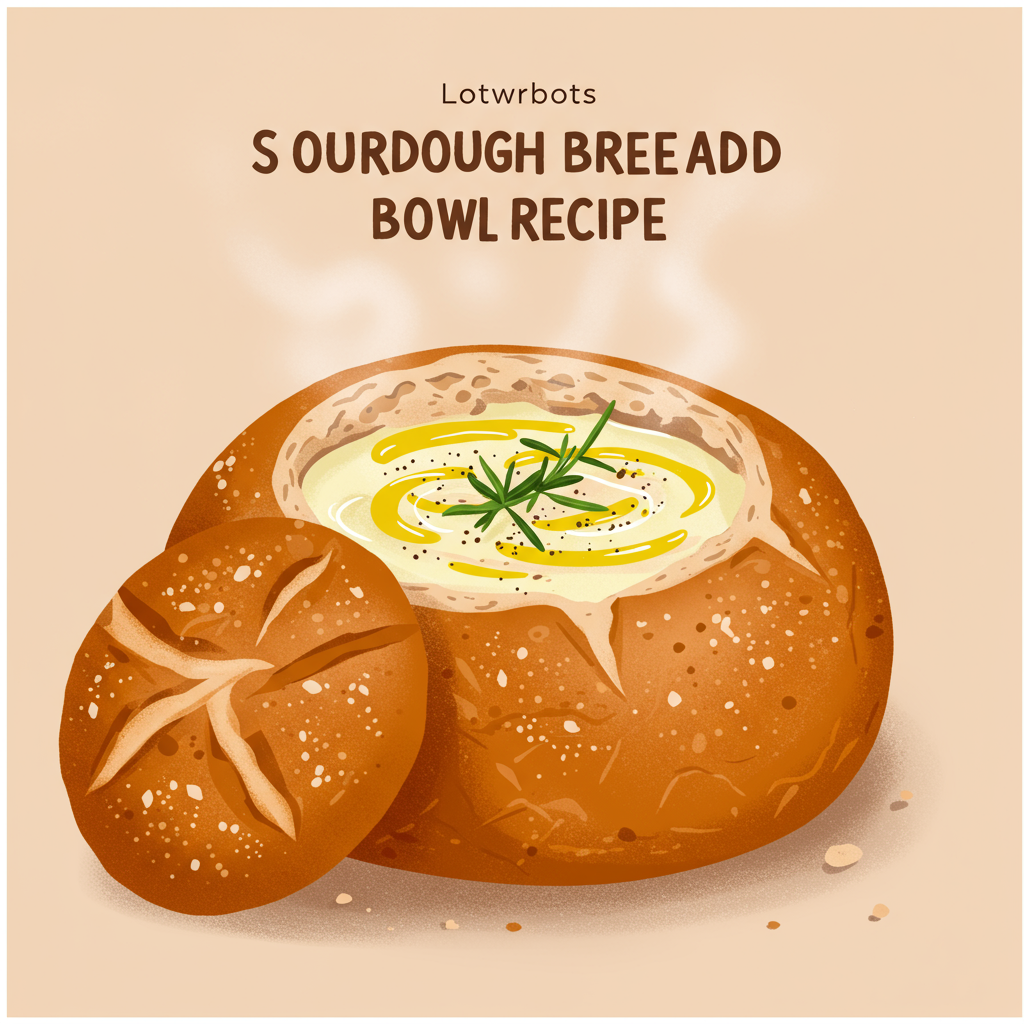
The Ultimate Sourdough Bread Bowl Recipe: Your Beginner-Friendly Guide
Welcome, aspiring bakers! Are you ready to embark on a culinary adventure that will fill your home with the irresistible aroma of freshly baked bread? Today, we’re diving into the wonderful world of sourdough with our ultimate Sourdough Bread Bowl Recipe. Forget store-bought; nothing compares to a warm, crusty, perfectly chewy bread bowl made right in your own kitchen. This recipe is designed to be incredibly beginner-friendly, guiding you through each step with clear instructions and helpful baking tips for beginners. Whether you’re looking to impress guests with a comforting soup served in edible perfection or simply want to master a new skill, this detailed guide will make your sourdough dreams a delicious reality. Get ready to create magic with flour, water, salt, and your vibrant sourdough starter!
Ingredients for Your Sourdough Bread Bowls
Gather these simple ingredients to create your masterpiece. Quality ingredients make a difference!
| Quantity | Unit | Ingredient |
|---|---|---|
| 150 | grams (g) | Active Sourdough Starter (fed and bubbly) |
| 350 | grams (g) | Warm Water (approx. 95-105°F / 35-40°C) |
| 500 | grams (g) | All-Purpose Flour or Bread Flour (plus extra for dusting) |
| 10 | grams (g) | Fine Sea Salt |
| 1-2 | tablespoons | Olive Oil (for greasing bowl, optional) |
| 1-2 | tablespoons | Rice Flour (for dusting proofing basket/bowl, optional) |
Step-by-Step Instructions: Baking Your Perfect Sourdough Bread Bowls
Follow these detailed steps carefully, and you’ll be enjoying your homemade sourdough bread bowls in no time. Remember, sourdough baking is as much about feel as it is about precise timing, so pay attention to your dough!
1. Prepare Your Sourdough Starter
Timing is Key: Your starter should be fed 4-12 hours before you plan to mix your dough. It’s ready when it has doubled (or tripled) in size, is full of bubbles, and passes the “float test” (a small spoonful floats in water). An active starter is the secret to a good rise!
2. The Autolyse: Mixing Flour, Water, and Starter
- In a large mixing bowl, combine the active sourdough starter and the warm water. Stir gently with a spatula or your hand until the starter is mostly dissolved into the water.
- Add the 500g of flour to the bowl. Mix with your hand or a sturdy spoon until there are no dry spots of flour left. The mixture will be shaggy and a bit sticky – that’s perfectly normal!
- Cover the bowl with a damp tea towel or plastic wrap and let it rest for 30 minutes to 1 hour. This resting period, called autolyse, allows the flour to fully hydrate and gluten to begin developing, making the dough easier to work with later.
3. Add the Salt & Initial Mixing
- After the autolyse, sprinkle the 10g of fine sea salt over the dough.
- With wet hands, gently incorporate the salt into the dough. You can do this by squeezing the dough between your fingers, or by performing a few “stretch and folds” in the bowl. The dough will feel a bit resistant at first, but keep going until the salt is evenly distributed. This step helps strengthen the gluten structure.
4. Bulk Fermentation (The First Rise) & Stretch and Folds
This is where the magic happens! Bulk fermentation (also known as the first rise) typically takes 4-6 hours at room temperature (ideally 72-78°F / 22-25°C). The goal is for the dough to increase in volume by about 30-50% and become bubbly.
- Perform a series of “stretch and folds”: For the first 2-3 hours of bulk fermentation, you’ll perform a set of stretch and folds every 30-60 minutes.
- To do a stretch and fold: With wet hands, grab a portion of the dough from the edge of the bowl, gently stretch it upwards, and fold it over towards the center. Rotate the bowl a quarter turn and repeat this process 3-4 more times until you’ve gone all around the dough. This builds strength and elasticity.
- Beginner Tip: Don’t worry about being perfect. Just aim to gently stretch and fold the dough over itself. The stickiness will lessen with each fold.
- After the initial series of stretch and folds, let the dough continue to ferment undisturbed until it looks visibly puffy, has bubbles on the surface, and feels light. The total bulk fermentation time will vary depending on your kitchen temperature and starter activity.
5. Pre-Shaping Your Dough
- Lightly flour your work surface (use just enough flour to prevent sticking). Gently scrape the dough out of the bowl onto the floured surface.
- Gently form the dough into a loose round shape (a “boule”) by cupping your hands around it and pulling it towards you to create some surface tension. Don’t overwork it.
- Cover the dough with a damp cloth or the bowl it was in and let it rest for 20-30 minutes. This allows the gluten to relax, making the final shaping easier.
6. Final Shaping for Bread Bowls
This step is crucial for getting that beautiful, round bread bowl shape with good oven spring.
- Lightly dust your work surface with a little more flour. If you’re using a banneton (proofing basket), generously dust it with rice flour (it helps prevent sticking). If using a regular bowl, line it with a clean tea towel and dust the towel well with rice flour.
- Gently flip the pre-shaped dough over so the sticky side is facing up.
- Shape into a tight boule: Imagine the dough as a square. Grab the top edge and fold it down towards the center. Then take the left edge and fold it towards the center, then the right, then the bottom. You’re essentially creating a package.
- Now, flip the dough over so the seam side is down. Using the pinky-side of your hands, cup the dough and rotate it on the counter, pulling it towards you slightly to create tension on the surface. You want to create a tight, smooth skin on top.
- Common Mistake: Not enough tension during shaping can lead to a flat, spread-out loaf rather than a tall, round bread bowl. Practice makes perfect!
7. Proofing (The Second Rise / Cold Fermentation)
- Carefully transfer the shaped dough, seam-side up, into your floured banneton or prepared bowl.
- Cover the banneton/bowl with plastic wrap or a shower cap to prevent the dough from drying out.
- Cold Proof: Place the dough in the refrigerator for 8-12 hours, or up to 24 hours. Cold proofing slows down fermentation, develops flavor, and makes the dough easier to handle and score.
- Beginner Tip: Cold proofing is very forgiving! It allows you to bake when it’s convenient for you and often results in a better crust and crumb.
8. Preheat Your Oven & Dutch Oven
- About 45-60 minutes before you’re ready to bake, place your Dutch oven (with the lid on) into your cold oven.
- Preheat your oven to 450°F (232°C). Allow the Dutch oven to preheat with the oven for at least 30 minutes (preferably 45-60 minutes) to ensure it’s scorching hot. This trapped heat creates amazing steam for a crusty exterior.
9. Score & Bake Your Bread Bowls
- Carefully remove the very hot Dutch oven from the oven (use oven mitts!). Place it on a heat-proof surface.
- Gently invert your cold dough from the banneton/bowl directly into the hot Dutch oven (seam side will now be down, smooth side up).
- Using a sharp razor blade (a “lame”) or a very sharp knife, score the top of your dough. A simple “X” or a crosshatch pattern is great for beginners and helps the bread expand properly (oven spring).
- Place the lid back on the Dutch oven.
- Bake covered for 20-25 minutes. The lid traps steam, creating a soft, pliable crust that allows for maximum expansion.
- After 20-25 minutes, carefully remove the lid from the Dutch oven.
- Continue baking uncovered for another 25-30 minutes, or until the crust is a deep golden brown and sounds hollow when tapped on the bottom.
- Alternative without a Dutch Oven: If you don’t have a Dutch oven, preheat your oven to 450°F (232°C) with a baking stone or heavy baking sheet inside. Place a separate oven-safe pan on the bottom rack. When ready to bake, carefully slide the scored dough onto the hot baking stone/sheet. Pour about 1 cup of boiling water into the hot pan on the bottom rack (be careful of steam!). Close the oven quickly. Bake for 20 minutes with steam, then remove the water pan and bake for another 25-30 minutes until golden brown.
10. Cool & Hollow Out Your Bread Bowls
- Once baked, carefully remove the bread bowl from the Dutch oven and transfer it to a wire cooling rack.
- Cool completely for at least 2-3 hours before slicing or hollowing. This is critical!
- Common Mistake: Cutting into hot bread causes the internal moisture to escape too quickly, resulting in a gummy texture. Patience is a virtue here!
- Once fully cooled, use a serrated knife to carefully cut a circular “lid” from the top of the bread bowl. Then, gently scoop out the soft interior crumb, leaving a sturdy shell about 1/2 to 3/4 inch thick.
Your beautiful, homemade sourdough bread bowls are now ready to be filled with your favorite creamy soups, stews, or chili! Enjoy the fruits of your labor!
Tips & Tricks for Sourdough Bread Bowl Success
Mastering sourdough takes practice, but these tips will set you up for success, especially for beginners:
- Know Your Starter: An active, bubbly starter that has been fed 4-12 hours prior is paramount. If it’s sluggish, feed it more frequently or move it to a warmer spot for a day or two.
- Don’t Fear the Stick: Sourdough dough, especially high-hydration ones, can be sticky. Resist the urge to add too much extra flour. Use wet hands when handling the dough during stretch and folds to prevent sticking.
- Listen to Your Dough, Not Just the Clock: While timings are given, environmental factors (like your kitchen temperature) greatly affect fermentation. Learn to recognize visual cues: look for bubbles, a jiggly texture, and a noticeable increase in volume.
- Temperature Matters: A warmer kitchen will speed up fermentation, while a cooler one will slow it down. Adjust your bulk fermentation time accordingly.
- Practice Your Scoring: Scoring isn’t just for aesthetics; it helps control where the bread expands. Simple scores are just as effective as intricate ones. Practice on parchment paper if you’re nervous!
- Cool Completely: This cannot be stressed enough. Cooling allows the crumb to set and moisture to redistribute, preventing a gummy interior.
- Don’t Waste the Scraps: The scooped-out bread makes excellent croutons, breadcrumbs, or even a base for bread pudding!
Essential Baking Tools for Sourdough Bread Bowls
Having the right tools can make your sourdough journey much smoother. Here are some essentials:
- Large Mixing Bowl
- Whisk (or sturdy spoon)
- Dutch Oven (recommended) or Baking Sheet
- Kitchen Scale (for precise measurements)
- Dough Scraper / Spatula
- Banneton (proofing basket) or a bowl lined with a floured tea towel
- Lame or very sharp knife (for scoring)
- Wire Cooling Rack
Nutrition Information (Approximate per Bread Bowl)
Please note: These are approximate values and can vary based on specific ingredients, portion size, and preparation methods. This recipe yields one large bread bowl, typically serving 4-6 people for a soup meal.
| Nutrient | Amount |
|---|---|
| Calories | ~450-500 kcal |
| Total Carbohydrates | ~90-100 g |
| Protein | ~14-16 g |
| Total Fat | ~2-4 g |
| Dietary Fiber | ~4-5 g |
| Sugars | ~0-1 g |
Frequently Asked Questions (FAQs)
Q: My sourdough starter isn’t very active. What should I do?
A: If your starter seems sluggish, try feeding it more frequently (every 8-12 hours) and place it in a warmer spot (75-80°F / 24-27°C) for a day or two. Ensure you’re using a 1:1:1 ratio of starter, water, and flour by weight when feeding. Patience is key!
Q: Why is my dough so sticky and hard to handle?
A: Sourdough dough, especially with higher hydration, can be quite sticky, which is actually a good sign of a well-hydrated dough! Avoid adding too much extra flour. Instead, use wet hands when performing stretch and folds or handling the dough. A dough scraper can also be very helpful.
Q: Can I make this sourdough bread bowl recipe without a Dutch oven?
A: Yes, absolutely! While a Dutch oven helps create a perfect crust, you can achieve good results by preheating your oven with a baking stone or heavy baking sheet. To create steam (which is crucial for a good crust), place an oven-safe pan on the bottom rack and add about 1 cup of boiling water to it right after you place your dough in the oven.
Q: How do I know when the dough is properly proofed during the cold fermentation?
A: After cold fermentation, your dough should have increased in size slightly, look puffy, and feel light. A gentle “poke test” can help: lightly press a wet finger into the dough; if the indentation slowly springs back halfway, it’s likely ready. If it springs back immediately, it might need more time. If it doesn’t spring back at all, it might be over-proofed (though cold proofing makes over-proofing less common).
Q: How should I store leftover sourdough bread bowls?
A: Store empty bread bowls at room temperature in an airtight container or a paper bag (for crustiness) for 1-2 days. For longer storage, wrap them tightly in plastic wrap and then foil, and freeze for up to a month. Thaw at room temperature, and you can refresh them in a warm oven for a few minutes.
Q: Can I use whole wheat flour in this recipe?
A: Yes, you can! You might substitute up to 25-50% of the all-purpose flour with whole wheat flour for added flavor and nutrition. Keep in mind that whole wheat flour absorbs more water, so you might need to add an extra 10-20g of water to maintain the same dough consistency.
Conclusion: Your Sourdough Bread Bowl Journey Begins!
Congratulations, baker! You’ve just walked through every step of creating your very own, magnificent sourdough bread bowl. This journey, while sometimes challenging, is incredibly rewarding. There’s nothing quite like the pride of pulling a perfectly baked loaf from your oven, especially one that’s destined to hold a delicious meal. Don’t be discouraged if your first attempt isn’t absolutely perfect – every loaf is a learning experience. Embrace the process, enjoy the aromas, and savor the incredible taste of homemade sourdough. We encourage you to share your creations with us! Happy baking, and may your bread bowls be forever crusty and delicious!
“`