
This detailed guide is designed with beginners in mind, proving that creating delicious, tangy bread doesn’t require weeks of feeding a sourdough starter. We’ll show you how to harness the power of a tiny bit of commercial yeast and a long, slow fermentation to achieve that coveted sourdough flavor and texture. Get ready to impress yourself and your loved ones with one of the most satisfying and easy baking recipes you’ll ever try. Follow our comprehensive baking tips for beginners, and you’ll be pulling a beautiful loaf from your oven in no time!
Ingredients List
Gather your simple ingredients. Quality matters, even with just a few items!
| Ingredient | Quantity | Unit |
|---|---|---|
| Warm Water (100-105°F / 38-40°C) | 375 | ml |
| Active Dry Yeast | 1/4 | teaspoon |
| Bread Flour (or All-Purpose Flour) | 500 | grams |
| Salt (fine sea salt or table salt) | 10 | grams |
| Optional: A pinch of sugar or honey | 1/2 | teaspoon |
Step-by-Step Instructions: Your Path to Perfect Bread
Patience is your secret ingredient. Read through all steps before you begin!
Step 1: Activate the Yeast & Autolyse (The Hydration Boost)
In a large mixing bowl, combine the warm water, yeast, and optional sugar/honey. Stir gently and let it sit for about 5-10 minutes until it looks foamy. This confirms your yeast is active! If it doesn’t foam, your yeast might be old or the water too hot/cold. Start again.
Next, add the flour to the foamy water. Mix with a spatula or your hands until just combined and there are no dry spots. Don’t knead yet, just bring it together into a shaggy mass. This is called an “autolyse” – it allows the flour to fully hydrate and gluten to start developing on its own, making kneading easier later. Cover the bowl with a clean kitchen towel or plastic wrap and let it rest for 20-30 minutes.
Step 2: Incorporate the Salt & Initial Kneading
After the autolyse, sprinkle the salt over the dough. Now it’s time to knead! You can do this by hand or with a stand mixer fitted with a dough hook.
- By Hand: On a lightly floured surface, knead the dough for 8-10 minutes. At first, it will be sticky and messy. Don’t add too much flour; resist the urge! Scrape it off your hands and the counter as you go. As you knead, the dough will become smoother, more elastic, and less sticky. You’re looking for a dough that passes the “windowpane test” – you should be able to stretch a small piece of dough thin enough to see light through it without tearing.
- With a Stand Mixer: Knead on low speed for 2 minutes, then increase to medium-low and knead for 6-8 minutes until the dough is smooth and elastic.
Beginner Tip: Kneading develops gluten, which gives bread its structure and chewiness. Don’t skimp on this step! If your dough feels too sticky to handle, lightly dampen your hands with water instead of adding more flour, which can make your bread dense.
Step 3: First Rise (Bulk Fermentation) – The Flavor Developer
Lightly grease your mixing bowl with a tiny bit of olive oil. Place the dough in the bowl, turning it once to coat all sides. Cover the bowl tightly with plastic wrap or a lid. This prevents a skin from forming.
Now, let the dough rise in a warm spot (ideally 70-75°F / 21-24°C) for 10-12 hours, or even better, place it in the refrigerator for 12-24 hours for a long, cold fermentation. The cold fermentation is key to developing that characteristic tangy “sourdough” flavor and complex aromas, despite using commercial yeast. The longer and colder the rise, the more flavor will develop.
What to Look For: The dough should significantly increase in size (it might not double in the fridge, but it will be noticeably larger and have small bubbles on the surface). It should also feel very soft and airy.
Step 4: Shape the Loaf
Once your dough has completed its first rise, gently turn it out onto a lightly floured surface. Be careful not to deflate all the air – those bubbles are flavor!
Gently stretch the dough into a rough rectangle. Now, we’ll shape it into a round (boule) or an oval (batard). There are many techniques, but a simple one for beginners is to fold the top third down, then the bottom third up and over that. Then, fold the left side to the middle, and the right side to the middle. Finally, flip the dough over, seam-side down, and gently cup your hands around it, rotating it to create surface tension and a smooth, taut top. You want to create a tight “skin” on the outside.
Common Mistake: Over-handling the dough or being too aggressive will knock out all the precious air, resulting in a dense loaf. Be gentle!
Step 5: Second Rise (Proofing)
Lightly flour a proofing basket (banneton) or a bowl lined with a floured kitchen towel. Carefully transfer your shaped dough, seam-side up, into the prepared basket/bowl. Cover with plastic wrap.
Let it proof at room temperature for 1-2 hours, or for an even better result (and convenience), place it back in the refrigerator for another 2-4 hours, or even overnight. Cold proofing further develops flavor and makes the dough easier to score.
How to Tell It’s Ready: The dough should look visibly puffed up. To test, gently press a floured finger into the dough. If the indentation springs back slowly, it’s ready. If it springs back immediately, it needs more time. If it stays indented, it’s over-proofed (though a slightly over-proofed dough is still bakeable!).
Step 6: Preheat Your Oven & Dutch Oven
About 30-45 minutes before you’re ready to bake, place your Dutch oven (with its lid) in your oven and preheat the oven to 450°F (232°C). Getting the Dutch oven extremely hot is crucial for achieving that signature crispy crust and excellent oven spring. If you don’t have a Dutch oven, you can use a baking stone or heavy baking sheet, but you’ll need to create steam in the oven (see tips).
Step 7: Score and Bake!
Carefully remove the blazing hot Dutch oven from the oven. Gently invert your dough from the proofing basket directly into the hot Dutch oven (seam-side down will now be the top). Use parchment paper under the dough for easier transfer and removal.
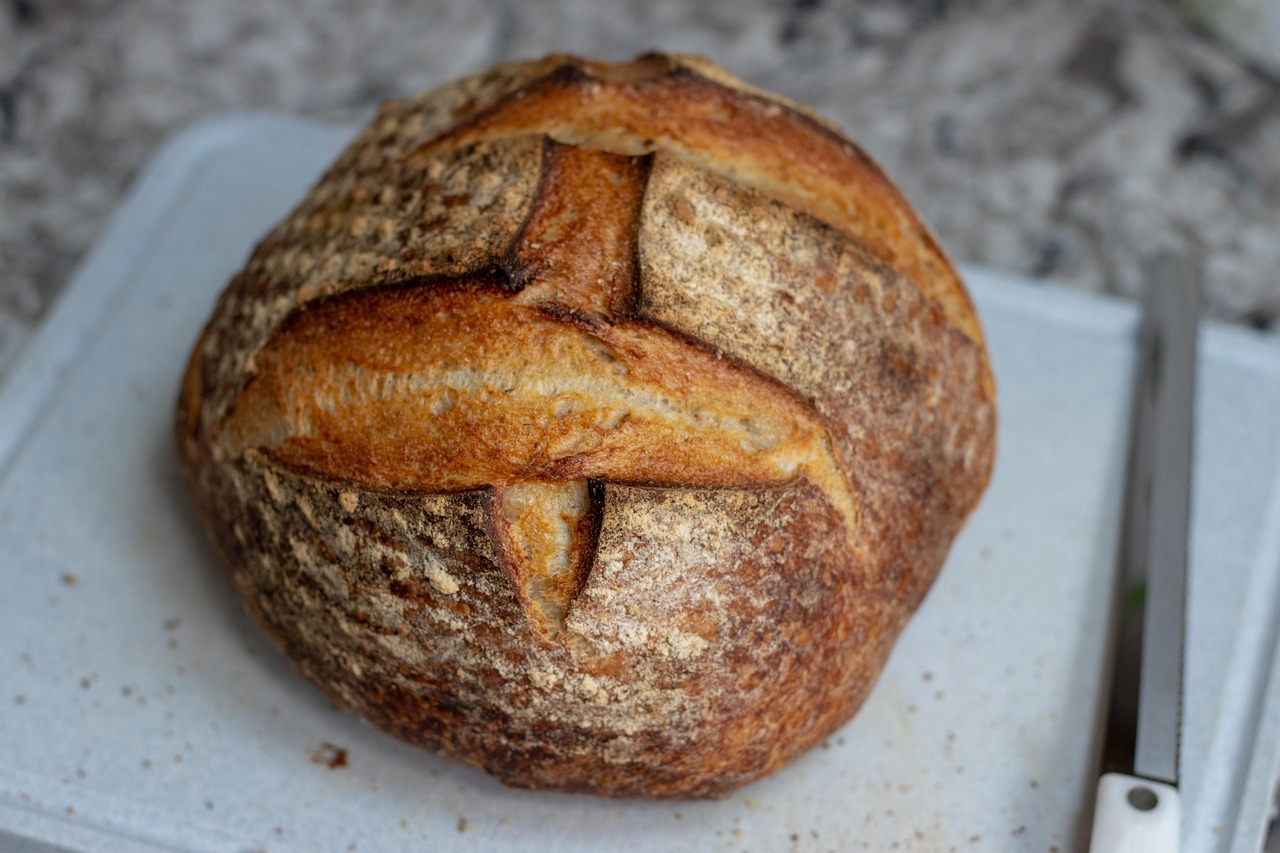
Using a very sharp knife, razor blade (lame), or scissors, score the top of your dough. A single deep slash is common, or a cross, or a more intricate design. Scoring allows the bread to expand predictably in the oven and creates a beautiful pattern.
Place the lid back on the Dutch oven and return it to the preheated oven. Bake for 25 minutes with the lid on. This traps steam around the loaf, which helps the crust expand and prevents it from setting too quickly, leading to a much better “oven spring.”
After 25 minutes, remove the lid. Reduce the oven temperature to 425°F (220°C) and continue baking for another 20-30 minutes, or until the crust is a deep golden brown and the internal temperature reaches 200-210°F (93-99°C).
Step 8: Cool Completely
Once baked, carefully remove the bread from the Dutch oven and transfer it to a wire rack to cool completely. This is perhaps the hardest step, but absolutely essential! Cooling allows the internal structure of the bread to set and the moisture to redistribute, preventing a gummy texture. Cutting into a hot loaf can ruin its crumb. Resist the urge for at least 1-2 hours, preferably longer.
Tips & Tricks for Beginner Bakers
Elevate your bread-making game with these actionable pieces of advice:
- Use a Kitchen Scale: For baking, especially bread, accuracy is key. Measuring by weight (grams) is far more precise than by volume (cups) and will give you consistent results.
- Don’t Fear the Stickiness: High hydration doughs are sticky, and that’s a good thing! It contributes to a moist, open crumb. Instead of adding excessive flour, try dampening your hands with water when handling sticky dough.
- Embrace the Cold Fermentation: This is your secret weapon for developing that sought-after sourdough tang and complex flavor without a starter. Don’t rush it!
- Read the Dough, Not Just the Clock: Environmental factors (room temperature, humidity) can affect rise times. Learn to recognize what your dough should look and feel like at each stage, rather than strictly adhering to timings.
- Preheat Thoroughly: A properly preheated oven and Dutch oven are crucial for achieving a great crust and oven spring. Don’t pull the trigger too early!
- Score with Confidence: A swift, decisive cut with a sharp blade is better than hesitant, shallow cuts. It allows the bread to expand beautifully.
- Cool Completely: We can’t stress this enough! Patience here is rewarded with the best texture and flavor. Cutting too early can result in a gummy interior.
- Experiment with Flour: While bread flour provides excellent gluten development, try mixing in a small percentage of whole wheat or rye flour for added flavor complexity once you’re comfortable with the basic recipe.
Essential Baking Tools
Having the right tools makes all the difference. Here are a few essentials:
- Large Mixing Bowl
- Whisk (or spatula)
- Dutch Oven (or a heavy baking sheet/stone)
- Kitchen Scale (highly recommended over measuring cups for accuracy)
- Dough Scraper / Spatula
- Proofing Basket (Banneton) or a bowl lined with a floured towel
- Sharp Knife or Razor Blade (Lame) for scoring
- Wire Cooling Rack
Nutrition Info (Estimated per slice, 12 slices per loaf)
Please note: These are approximate values and can vary based on exact ingredients and preparation.
| Nutrient | Amount |
|---|---|
| Calories | 160 kcal |
| Carbohydrates | 32g |
| Protein | 6g |
| Fat | 0.5g |
| Fiber | 1g |
| Sugar | 0g |
Frequently Asked Questions (FAQs)
Q: Can I really get a “sourdough” flavor without a traditional starter?
A: Yes! While it won’t be identical to a starter-leavened loaf, using a very small amount of commercial yeast (like 1/4 teaspoon) combined with a long, cold fermentation (especially overnight in the fridge) allows for the development of lactic and acetic acids, which contribute to that characteristic tangy flavor and complex aroma often associated with sourdough.
Q: My dough is too sticky during kneading. What should I do?
A: Resist the urge to add too much extra flour. A sticky dough is often a sign of good hydration. Instead, try lightly wetting your hands with water or using a dough scraper to help handle the dough. As you knead, the gluten will develop, and the dough will become less sticky and more manageable.
Q: How do I know if my dough is properly proofed?
A: For the first rise (bulk fermentation), the dough should significantly increase in volume and have visible bubbles. For the second rise (proofing), perform the “poke test”: gently press a floured finger into the dough. If the indentation slowly springs back halfway, it’s ready. If it springs back immediately, it needs more time. If it collapses or stays fully indented, it’s likely over-proofed.
Q: My bread crust isn’t crispy enough. What went wrong?
A: The key to a crispy crust is steam during the initial baking phase and high heat. Make sure your Dutch oven (or baking stone) is thoroughly preheated before the dough goes in. Baking with the lid on for the first 25 minutes traps steam, while removing the lid allows the crust to brown and crisp up. Ensure your oven temperature is accurate.
Q: Can I use all-purpose flour instead of bread flour?
A: Yes, you can! Bread flour has a higher protein content, which leads to stronger gluten development and a chewier texture. All-purpose flour will still work, but your loaf might be slightly less chewy and have a slightly different crumb structure. For best results, we recommend bread flour.
Q: How should I store my homemade sourdough bread?
A: Once completely cool, store your bread at room temperature. A cut loaf is best stored cut-side down on a clean cutting board, or wrapped in a clean kitchen towel. You can also place it in a paper bag or a breathable bread box. Avoid airtight plastic bags, as they can make the crust soggy. For longer storage, slice and freeze the bread in an airtight bag or container for up to 2-3 months.
Conclusion
Congratulations, you’ve just unlocked the world of homemade bread with our Sourdough Bread Without Starter Recipe. We hope this detailed guide has demystified the process and empowered you to create a truly spectacular loaf right in your own kitchen. Remember, baking is a journey, and every loaf is a learning experience. Don’t be afraid to experiment, trust your instincts, and most importantly, enjoy the process.
There’s immense satisfaction in pulling a warm, crusty loaf from the oven that you made with your own hands. So go ahead, slice into your masterpiece, slather it with butter, and savor the incredible flavor of your very own “sourdough” bread. Happy baking!