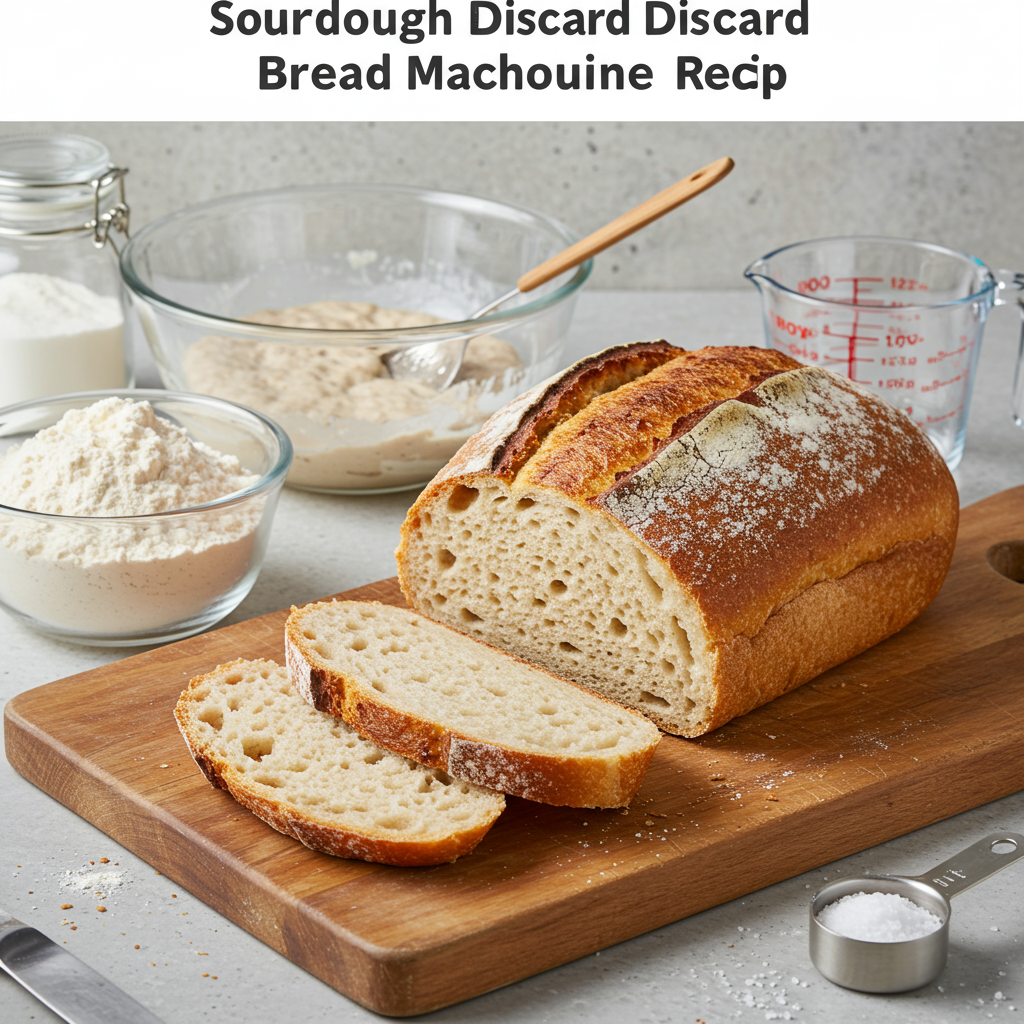
Unlock Effortless Baking with This Sourdough Discard Bread Machine Recipe!
Are you ready to dive into the wonderful world of homemade bread but feel a little intimidated? You’re in the right place! This **Sourdough Discard Bread Machine Recipe** is specifically designed for beginners, making it one of the easiest baking recipes you’ll ever try. Forget complex kneading or long proofing times; your bread machine does all the hard work for you. We’ll turn that often-wasted sourdough discard into a delicious, flavorful loaf with minimal effort. Get ready for incredible aroma and a satisfyingly chewy crust, all thanks to these simple **baking tips for beginners**. Let’s transform your kitchen into a bakery!
Using your bread machine simplifies the process dramatically, ensuring consistent results every time. It’s the perfect way to enjoy the tangy depth of sourdough without the fuss, making fresh, warm bread a regular treat in your home. This recipe is not just about baking; it’s about building confidence in your kitchen, one perfect slice at a time.
Ingredients You’ll Need
For Your Delicious Loaf
| Ingredient | Quantity | Unit |
|---|---|---|
| Warm Water (105-115°F / 40-46°C) | 1 | cup |
| Sourdough Discard (100% hydration, unfed) | 1 | cup |
| Olive Oil or Melted Butter | 2 | tablespoons |
| All-Purpose Flour (or Bread Flour for chewier texture) | 3 | cups |
| Granulated Sugar | 2 | tablespoons |
| Salt | 1.5 | teaspoons |
| Instant Dry Yeast | 1.5 | teaspoons |
Baking Your Sourdough Discard Bread: A Simple Guide
Follow these detailed steps, and you’ll have a perfect loaf in no time!
Getting Started: Prep & Measure
- Gather and Prepare: First things first, gather all your ingredients and measuring tools. Ensure your sourdough discard is at room temperature – cold discard can slow down the yeast activity. If it’s been in the fridge, take it out about an hour before you plan to bake. This small step makes a big difference in yeast activation!
- Liquids First: Open the lid of your bread machine. Remove the bread pan from the machine. Pour the warm water into the bread pan. It’s crucial that the water is warm, not hot (which can kill the yeast) and not cold (which can inhibit it). Then, add your room-temperature sourdough discard and the olive oil or melted butter. The liquids always go in first to protect the yeast from direct contact with salt and sugar.
- Add Dry Ingredients (Flour, Sugar, Salt): Carefully add the flour on top of the liquid ingredients. Try to form a bit of a mound. Next, sprinkle the granulated sugar and the salt over the flour. Beginner Tip: Keep the salt and yeast separate for as long as possible. Salt can inhibit yeast growth if they come into direct contact too early, leading to a flat loaf.
- Create a Well for Yeast: Using your finger, create a small indentation or “well” in the center of the flour mound. This is where your instant dry yeast will go. Gently pour the yeast into this well. This ensures the yeast is activated by the water but protected from the salt until the mixing cycle begins.
- Place Pan in Machine & Select Setting: Carefully place the bread pan back into your bread machine, ensuring it clicks securely into place. Close the lid. Now, select the appropriate setting. For most bread machines, the “Basic” or “White Bread” cycle is perfect. Choose a “Light” or “Medium” crust setting, depending on your preference. A light crust is usually sufficient for this recipe.
-
Start the Machine & Monitor Dough: Press “Start.” The machine will begin its first kneading cycle. During the first 5-10 minutes of kneading, keep an eye on the dough.
- If the dough looks too dry and isn’t forming a smooth ball: Add water, one teaspoon at a time, until it comes together.
- If the dough looks too wet and sticky, clinging to the sides of the pan: Add flour, one teaspoon at a time, until it forms a soft, pliable ball.
This initial adjustment is key to a perfectly textured loaf. Don’t worry if you need to add a little – conditions like humidity and flour type can vary.
- Let the Machine Do Its Work: Once you’ve made any necessary adjustments, resist the urge to open the lid frequently! The bread machine maintains an optimal temperature for rising, and opening it releases precious heat. Let the machine complete its full cycle, which typically takes 3 to 4 hours, depending on your model and chosen setting.
- Remove and Cool: Once the cycle is complete, the machine will usually beep. Carefully open the lid and, using oven mitts, remove the hot bread pan. Invert the pan onto a wire cooling rack and gently shake the bread out. If the kneading paddle is stuck in the bottom of your loaf, carefully remove it with a utensil. Crucial Step: Allow the bread to cool completely on the wire rack for at least 1-2 hours before slicing. Slicing hot bread can lead to a gummy texture inside, as the steam needs time to dissipate and set the crumb. Patience is a virtue here!
- Enjoy Your Masterpiece! Once cooled, slice your beautiful, homemade sourdough discard bread and enjoy! It’s fantastic with butter, jam, or as part of a sandwich. You’ve just created something amazing with very little effort!
Pro Tips for Perfect Sourdough Discard Bread
Even with a bread machine, a few extra tips can elevate your baking game. Firstly, always use good quality ingredients. Fresh flour, decent olive oil, and active yeast make a noticeable difference in flavor and texture. For the sourdough discard, ensure it’s unfed and has been stored in the fridge for no more than 1-2 weeks for best results. Older discard can be used, but the sourdough tang might be stronger, and it might have less leavening power.
Temperature Matters: Pay close attention to the water temperature. Too hot, and you kill the yeast; too cold, and it won’t activate properly. Aim for lukewarm, like a baby’s bath. Also, try to use room temperature discard for more consistent results. Don’t Peek Too Much: Resist the temptation to open the bread machine lid repeatedly during the proofing and baking cycles. Each time you open it, heat escapes, which can affect the rise and final texture of your bread.
Customization is Key: Feel free to experiment with add-ins! Towards the end of the first kneading cycle (your machine might beep to indicate this, or you can check manually), you can add 1/2 cup of seeds (like sunflower or pumpkin), dried herbs (rosemary or thyme), or even some shredded cheese for extra flavor. Just don’t overdo it, as too many additions can weigh down the dough. Finally, remember that every bread machine is a little different. Get to know yours! You might find that a tiny bit more or less water or flour works best for your specific model and local environment.
Tools for Your Baking Journey
Having the right tools makes baking even more enjoyable and efficient.
- Mixing Bowl (for initial ingredient prep, if needed)
- Whisk (for light mixing of dry ingredients)
- Baking Pan (your bread machine’s pan!)
- Measuring Cups
- Measuring Spoons
- Spatula (for scraping down sides if needed during kneading)
- Wire Cooling Rack (essential for proper cooling)
Nutrition Snapshot (Per Slice, approx.)
(Estimates based on a loaf yielding 12-16 slices, actual values may vary based on ingredients and slice size)
| Nutrient | Amount |
|---|---|
| Calories | 150-180 kcal |
| Carbohydrates | 30-35 g |
| Protein | 5-6 g |
| Fat | 2-3 g |
| Fiber | 1-2 g |
| Sugar | 2-3 g |
Your Sourdough Discard Bread Machine Questions Answered
What exactly is sourdough discard?
Sourdough discard is the portion of your sourdough starter that you remove before “feeding” it fresh flour and water. It’s unfed, meaning its wild yeast and bacteria are less active than a fed, “ripe” starter. It’s perfectly good to use for flavor and some leavening, but because it’s less active, we supplement with commercial yeast in this recipe to ensure a good rise in the bread machine.
Can I use active sourdough starter instead of discard?
While you *can* use an active starter, this recipe is specifically formulated for discard, which is less potent. If you use an active starter, your bread might rise more aggressively, and you might need to slightly reduce the amount of instant yeast. For beginners, sticking to discard as specified is best for predictable results.
What if my dough is too sticky or too dry during the kneading cycle?
This is a common question, and it’s easy to fix! If the dough is too sticky and clinging excessively to the sides of the pan, add flour one teaspoon at a time until it forms a soft, cohesive ball. If it’s too dry and crumbly, not coming together into a ball, add warm water one teaspoon at a time. Make these adjustments slowly, as a little goes a long way. The ideal dough ball should be soft, pliable, and clean the sides of the pan as it kneads.
How long does this sourdough discard bread last?
Homemade bread generally lasts 3-4 days at room temperature when stored in an airtight container or bread bag. For longer storage, you can slice the cooled loaf and freeze the slices. They’ll keep well for up to 2-3 months and can be toasted directly from frozen.
Why is my bread dense?
Several factors can lead to dense bread. Common culprits include:
- Inactive Yeast: Ensure your instant yeast is fresh and not expired.
- Incorrect Water Temperature: Water that’s too hot kills the yeast, too cold inhibits it.
- Too Much Flour: Adding too much flour can make the dough stiff and heavy, preventing a good rise.
- Not Enough Water: Conversely, too little water can also create a dense crumb.
- Salt & Yeast Contact: If salt and yeast come into direct contact too early, the salt can inhibit the yeast.
- Opening the Lid: Frequent opening of the bread machine lid during rising can cause the dough to deflate.
Double-check your measurements and ingredient freshness!
Enjoy Your Homemade Sourdough Discard Bread!
And there you have it! A simple, satisfying, and utterly delicious loaf of sourdough discard bread, baked with minimal effort thanks to your trusty bread machine. You’ve taken your first confident steps into the world of homemade baking, proving that **easy baking recipes** can yield incredibly rewarding results. The aroma alone is worth the small amount of effort, and the taste is unparalleled.
Don’t be afraid to make this recipe your own – add some seeds, herbs, or cheese next time for a delightful variation. Share your creations with friends and family, or simply enjoy slice after delicious slice yourself. Happy baking, and welcome to the joy of homemade bread!
“`