Ingredients List
Gather your ingredients! Using room temperature ingredients (especially butter and egg) makes a big difference in dough consistency and rise.
For the Dough:
| Ingredient | Quantity | Unit |
|---|---|---|
| All-Purpose Flour | 3 ½ – 4 | cups |
| Granulated Sugar | ¼ | cup |
| Salt | 1 | teaspoon |
| Instant Yeast (optional, but recommended for speed) | 2 ¼ | teaspoons (1 packet) |
| Sourdough Discard (unfed, 100% hydration) | 1 | cup |
| Milk (whole or 2%, warmed to 105-115°F / 40-46°C) | ¾ | cup |
| Unsalted Butter (melted) | ¼ | cup |
| Large Egg (room temperature) | 1 |
For the Filling:
| Ingredient | Quantity | Unit |
|---|---|---|
| Unsalted Butter (softened) | ½ | cup (1 stick) |
| Light Brown Sugar (packed) | ¾ | cup |
| Ground Cinnamon | 1 ½ | tablespoons |
For the Cream Cheese Frosting:
| Ingredient | Quantity | Unit |
|---|---|---|
| Cream Cheese (softened) | 4 | ounces |
| Unsalted Butter (softened) | ¼ | cup (½ stick) |
| Powdered Sugar (confectioners’ sugar) | 1 ½ – 2 | cups |
| Vanilla Extract | ½ | teaspoon |
| Milk (optional, for thinning) | 1-2 | tablespoons |
Step-by-Step Instructions: Your Sourdough Journey Begins!
Step 1: Prepare Your Wet Ingredients
In a microwave-safe bowl or small saucepan, gently warm the ¾ cup of milk until it reaches 105-115°F (40-46°C). It should feel warm but not hot to the touch. If it’s too hot, it can kill the yeast (if using) and sourdough bacteria. Melt the ¼ cup of butter separately and let it cool slightly. In a large mixing bowl (or the bowl of a stand mixer), combine the warm milk, cooled melted butter, room temperature egg, and your 1 cup of **sourdough discard**. Whisk gently until well combined. The discard doesn’t need to be perfectly incorporated, just generally mixed in.
Beginner Tip: If you don’t have a thermometer, test the milk on your wrist – it should feel like a warm baby bottle. If it’s scalding, let it cool down!
Step 2: Combine Dry Ingredients
In a separate medium bowl, whisk together 3 ½ cups of the all-purpose flour, ¼ cup granulated sugar, 1 teaspoon salt, and 2 ¼ teaspoons instant yeast (if using). The yeast is optional but highly recommended for a reliably fluffy texture and quicker rise, as discard alone isn’t typically strong enough for substantial leavening in a sweet dough like this.
Common Mistake: Don’t add the salt directly to the yeast, as salt can inhibit yeast activity. Mixing it with the flour first helps distribute it evenly.
Step 3: Mix the Dough
Gradually add the dry ingredients to the wet ingredients, mixing on low speed with a stand mixer fitted with a dough hook, or by hand with a sturdy spoon. Once a shaggy dough forms, increase the speed to medium-low and knead for 5-7 minutes. If mixing by hand, turn the dough out onto a lightly floured surface and knead for 8-10 minutes.
What to look for: The dough should be soft, slightly sticky, and pull away from the sides of the bowl. If it’s too sticky to handle, add the remaining ½ cup of flour, one tablespoon at a time, until it reaches the right consistency. Be careful not to add too much flour, as this will result in dry rolls.
Step 4: First Rise (Bulk Fermentation)
Lightly grease a clean large bowl with a little oil. Place the dough in the bowl, turning it once to coat. Cover the bowl with plastic wrap or a clean kitchen towel. Let the dough rise in a warm, draft-free place for 1-1.5 hours, or until it has nearly doubled in size. Since this recipe uses discard and optional instant yeast, the rise will be quicker than a pure sourdough bread dough.
Beginner Tip: A slightly warm (but *turned off*) oven, or a sunny spot on your counter, are great places for dough to rise. You can also place the bowl in a larger bowl of warm water.
Step 5: Prepare the Filling
While the dough is rising, prepare your delicious filling. In a small bowl, combine the ½ cup softened unsalted butter, ¾ cup packed light brown sugar, and 1 ½ tablespoons ground cinnamon. Mix until it forms a smooth, spreadable paste. Set aside.
Tip: Ensure your butter is truly softened (leave it out for an hour or two), not melted, for the best consistency. It should be soft enough to easily dent with your finger but not greasy.
Step 6: Roll Out the Dough
Once the dough has risen, gently punch it down to release the air. Turn the dough out onto a lightly floured surface. Using a rolling pin, roll the dough into a large rectangle, approximately 12×18 inches and about ¼ inch thick. Try to keep the edges as straight as possible for even rolls.
Alternatives: If your dough is too springy, let it rest for 5-10 minutes, covered, then try rolling again. This relaxes the gluten.
Step 7: Spread the Filling & Roll Up
Evenly spread the cinnamon-sugar filling over the entire surface of the dough rectangle, leaving a small ½-inch border along one of the long edges clean (this will help seal the roll). Starting from the opposite long edge, carefully roll the dough into a tight log. Try to keep it as even as possible to ensure uniform rolls.
Step 8: Slice the Rolls
Once you have a tight log, it’s time to slice! You can use a sharp knife, but for perfectly round rolls, dental floss or unflavored string works wonders. Slide a piece of floss under the log, cross the ends over the top, and pull firmly to slice. Cut the log into 12 equal pieces, each about 1 ½ inches thick.
Beginner Tip: Using dental floss prevents squishing the dough, giving you prettier rolls. Measure your log and divide by 12 to get even slices!
Step 9: Second Rise (Proofing)
Lightly grease a 9×13 inch baking pan. Arrange the sliced cinnamon rolls in the prepared pan, leaving a little space between each one (they will expand). Cover the pan loosely with plastic wrap or a clean kitchen towel and let them rise in a warm spot for another 30-45 minutes, or until they look visibly puffy and are touching each other.
Step 10: Bake
While the rolls are proofing, preheat your oven to 375°F (190°C). Once the rolls have risen, remove the cover and bake for 20-25 minutes, or until golden brown on top and cooked through. The internal temperature should be around 200-205°F (93-96°C).
How to tell if done: The rolls should be nicely golden brown on top, and if you gently press one in the center, it should feel firm but still soft. Avoid overbaking, as this can make them dry.
Step 11: Prepare the Cream Cheese Frosting
While the rolls are cooling slightly, make your frosting! In a medium bowl, beat together the 4 ounces softened cream cheese and ¼ cup softened unsalted butter until smooth and creamy. Gradually add the 1 ½ to 2 cups powdered sugar, beating until well combined and smooth. Stir in ½ teaspoon vanilla extract. If the frosting is too thick, add milk one tablespoon at a time until you reach your desired consistency. If it’s too thin, add a little more powdered sugar.
Step 12: Frost and Serve!
Once the cinnamon rolls are out of the oven, let them cool in the pan for about 5-10 minutes. This allows them to set slightly. Then, generously spread the cream cheese frosting over the warm rolls. The warmth of the rolls will melt the frosting slightly, creating that irresistible gooey glaze. Serve immediately and enjoy your homemade sourdough masterpiece!
Serving Suggestion: These are best enjoyed warm, but also delicious at room temperature. A cup of coffee or tea is the perfect accompaniment!
Tips & Tricks for Sourdough Baking Success
- Room Temperature Matters: For the dough, ensure your egg, milk (warmed), butter (melted and cooled slightly), and especially your sourdough discard are at room temperature. This helps everything mix smoothly and promotes a more consistent rise. Cold ingredients can stiffen the dough and slow down yeast activity.
- Don’t Over-Flour: It’s tempting to keep adding flour if your dough feels sticky, but too much flour leads to dry, dense rolls. Aim for a dough that is soft and slightly tacky, but manageable. The small amount of stickiness is good for texture.
- Warm Environment is Key: Yeast and sourdough bacteria love warmth! For both rises, find a cozy, draft-free spot. A turned-off oven with the light on, or near a warm window (but not in direct blazing sun), works wonderfully.
- Use a Scale for Accuracy (Optional but Recommended): While cup measurements are provided, using a kitchen scale for flour (around 420-480g) and discard will give you the most consistent results, especially as you get more comfortable with baking.
- Customize Your Filling: Feel free to experiment with your filling! Add a pinch of nutmeg, a dash of cardamom, or even some finely chopped pecans or walnuts for extra texture and flavor.
- Make Ahead Option: You can prepare the rolls up to the second rise, then cover them tightly and refrigerate overnight (8-12 hours). In the morning, pull them out, let them come to room temperature and proof for about 30-60 minutes, then bake as usual.
- Sourdough Discard: For this recipe, unfed, straight-from-the-fridge sourdough discard (100% hydration means equal parts flour and water were used to feed it) works perfectly. It adds flavor and tenderness without requiring the active leavening power of a fed starter.
Essential Baking Tools
Having the right tools makes baking a breeze! Here are some basics you’ll find useful:
- Mixing Bowl (various sizes)
- Whisk
- 9×13 inch Baking Pan
- Measuring Cups
- Measuring Spoons
- Rubber Spatula
- Rolling Pin
- Kitchen Timer
- Optional: Stand Mixer with Dough Hook
- Optional: Kitchen Scale
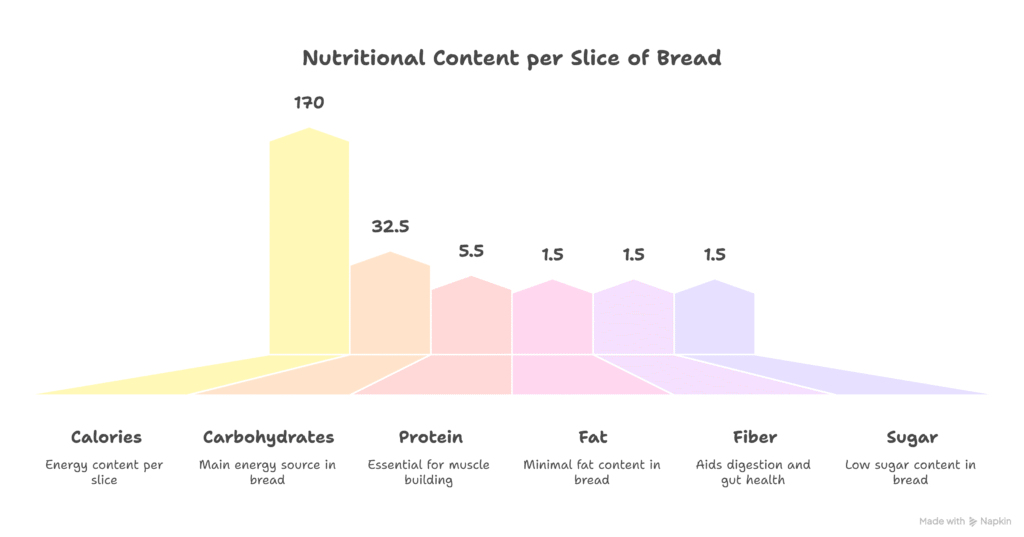
Nutrition Information (Estimated per Cinnamon Roll)
Please note: These are approximate values and can vary based on specific ingredients and brands used.
| Nutrient | Amount |
|---|---|
| Calories | 350-400 kcal |
| Carbohydrates | 50-60g |
| Protein | 6-8g |
| Fat | 15-20g |
| Fiber | 1-2g |
| Sugar | 30-40g |
Frequently Asked Questions (FAQs) for Beginner Bakers
Q1: Can I use active sourdough starter instead of discard?
A: While you technically *could* use active starter, it’s not ideal for this specific recipe as it might alter the texture and rise times. This recipe is designed to use **sourdough discard**, which is unfed and less active. Using discard is a fantastic way to add a subtle sourdough tang and tenderness without the strong leavening power that could over-proof this type of sweet dough.
Q2: My dough is too sticky/dry, what did I do wrong?
A: Dough consistency can be tricky! If it’s too sticky, try adding a tablespoon of flour at a time until it’s manageable. If it’s too dry and crumbly, add a teaspoon of milk or water at a time. Humidity, exact flour type, and even the hydration of your discard can affect this. Don’t be afraid to adjust slightly; practice makes perfect!
Q3: Why add instant yeast if I’m using sourdough discard?
A: Sourdough discard is typically unfed and not very active, meaning it won’t provide enough leavening power on its own for a quick, fluffy rise in a rich dough like cinnamon rolls. The instant yeast acts as a reliable leavening agent, ensuring your rolls are light and airy, while the discard adds a wonderful depth of flavor and tenderness that commercial yeast alone can’t replicate. It’s the best of both worlds!
Q4: Can I make these cinnamon rolls ahead of time?
A: Absolutely! You can prepare the rolls up to the second rise (after they’ve been cut and placed in the baking pan). Cover them tightly with plastic wrap and refrigerate overnight (8-12 hours). In the morning, pull them out, let them come to room temperature and proof for about 30-60 minutes (until puffy), then bake as directed. This is a fantastic option for fresh-baked treats on a busy morning!
Q5: How do I store leftover sourdough cinnamon rolls?
A: Leftover rolls can be stored in an airtight container at room temperature for up to 2-3 days, or in the refrigerator for up to 5 days. For best results, gently reheat them in the microwave for 15-20 seconds before serving to bring back their warmth and gooeyness. They also freeze well for longer storage!
Conclusion: Enjoy Your Sourdough Sweet Success!
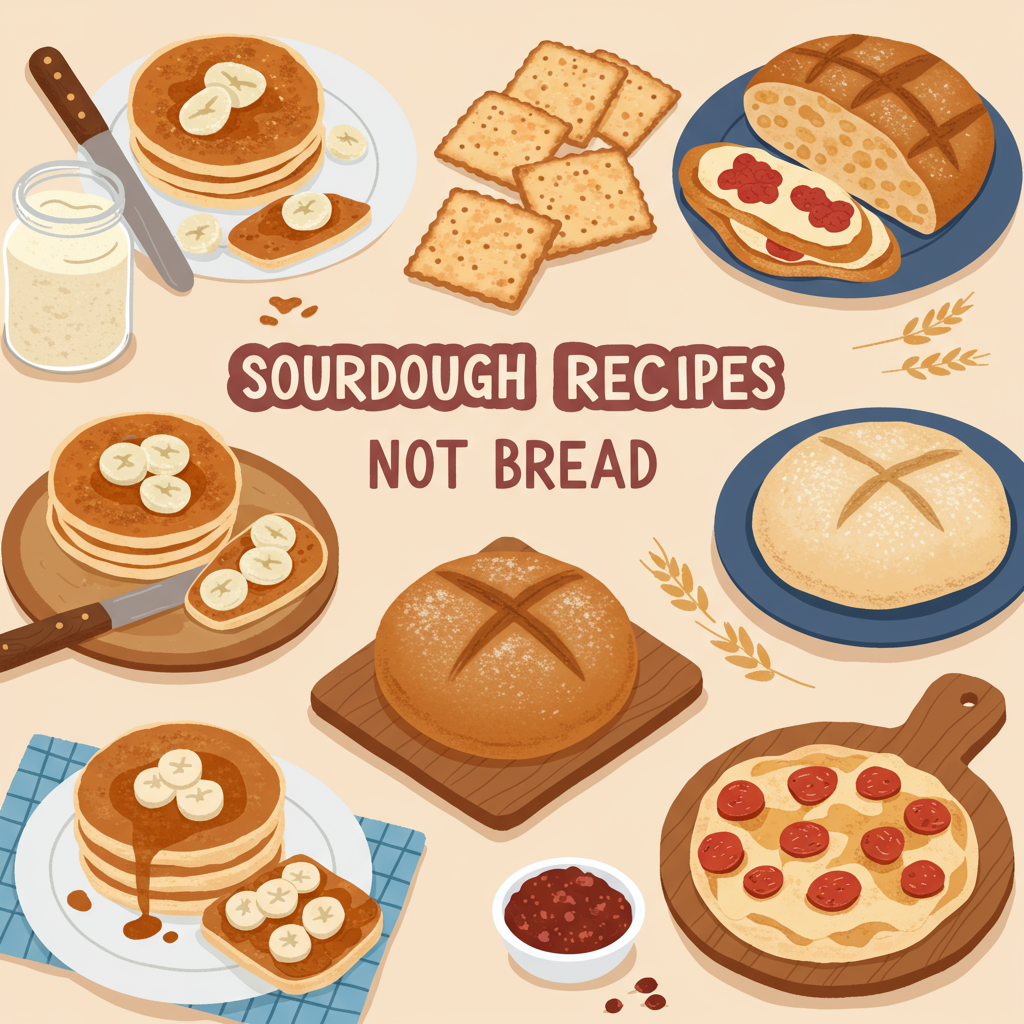
Congratulations, you’ve just unlocked a whole new world of baking with your sourdough starter! These Sourdough Discard Cinnamon Rolls are not just a delicious treat; they’re a testament to how versatile and rewarding sourdough baking can be, even beyond bread. You’ve taken your first confident steps into sourdough recipes not bread, and we hope this has been one of many sourdough recipes not bread you’ll master. Don’t be afraid to experiment, learn from each bake, and most importantly, enjoy the process and the amazing results. Share your creations, savor every bite, and keep on baking! Happy baking!
3 thoughts on “sourdough recipes not bread – Bake & Enjoy”