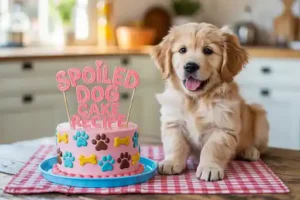
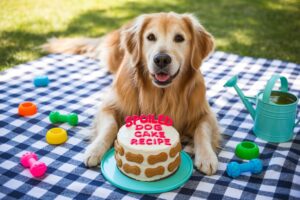
Are you looking for a special way to show your furry best friend just how much you love them? Look no further! This Spoiled Dog Cake Recipe is not only incredibly easy to make, but it’s also packed with wholesome, dog-friendly ingredients. If you’re new to the kitchen or just starting your journey into easy baking recipes, this guide is perfect for you. We’ll walk you through every step, providing essential baking tips for beginners to ensure your first dog cake is a resounding success. Get ready to bake a delicious, tail-wagging treat that will make your dog feel truly spoiled!
Baking for your dog can be a fun and rewarding experience. Unlike human cakes, dog cakes are free from harmful ingredients like excessive sugar, chocolate, and artificial sweeteners. This recipe focuses on natural flavors and textures that dogs adore, making it a healthy indulgence. So, tie on your apron, gather your ingredients, and let’s create some canine culinary magic!
Ingredients List
Before we begin, make sure you have all your ingredients measured out and ready to go. This practice, known as “mise en place,” makes the baking process much smoother, especially for beginners!
| Ingredient | Quantity | Unit |
|---|---|---|
| Whole Wheat Flour | 1 | cup |
| Baking Soda | 1/2 | teaspoon |
| Unsweetened Applesauce | 1/2 | cup |
| Natural Peanut Butter (Xylitol-free!) | 1/4 | cup |
| Egg | 1 | large |
| Water or Unsalted Chicken Broth | 1/4 | cup |
| Honey (optional, for a touch of sweetness) | 1 | tablespoon |
| Plain Greek Yogurt (for “frosting”) | 1/2 | cup |
| Extra Peanut Butter (for “frosting”, optional) | 1 | tablespoon |
Step-by-Step Instructions: Bake Like a Pro!
Follow these detailed steps carefully, and you’ll have a perfect dog cake in no time. Don’t worry if it’s your first time baking; we’ve got you covered with extra tips!
Step 1: Preheat and Prepare Your Pan
- Preheat Your Oven: Start by preheating your oven to 350°F (175°C). This is a crucial first step for most baking recipes, as it ensures the oven is at a consistent temperature when your cake goes in, allowing it to bake evenly.
- Prepare Your Baking Pan: Lightly grease and flour a 6-inch round cake pan or a standard loaf pan. If you don’t have a specific dog cake pan, a muffin tin works great for individual “cupcakes” – just adjust baking time!
- Beginner Tip: To grease, use a small amount of butter or cooking spray. To flour, sprinkle a tablespoon of flour into the greased pan, then tilt and tap it around until the entire surface is coated. Dump out any excess. This prevents your cake from sticking! Alternatively, you can line your pan with parchment paper for super easy removal.
Step 2: Mix Your Dry Ingredients
- Combine Dry Ingredients: In a large mixing bowl, whisk together the whole wheat flour and baking soda. Use a whisk to ensure there are no lumps and that the baking soda is evenly distributed. This helps the cake rise properly.
- Common Mistake & Fix: Don’t skip whisking! If baking soda isn’t mixed well, you might get pockets of bitterness or an uneven rise. A few quick stirs are all it takes.
Step 3: Combine Your Wet Ingredients
- Whisk Wet Ingredients: In a separate medium-sized bowl, whisk together the unsweetened applesauce, natural peanut butter (double-check it’s Xylitol-free – this is critical for dog safety!), the egg, and the water or unsalted chicken broth. If you’re using honey, add it now too.
- Beginner Tip: Ensure your peanut butter is creamy and easy to mix. If it’s too stiff, you can warm it slightly in the microwave for 10-15 seconds to make it more pliable.
- Alternative: No applesauce? You can use mashed banana (about 1 medium banana) or pureed pumpkin (plain, unsweetened) as a substitute for a different flavor and texture.
Step 4: Combine Wet and Dry Ingredients
- Gently Combine: Pour the wet ingredient mixture into the bowl with your dry ingredients. Using a spatula or a wooden spoon, mix until just combined.
- Beginner Tip: The key here is to not overmix! Overmixing develops the gluten in the flour too much, leading to a tough, dense cake. Mix only until you no longer see streaks of dry flour. A few small lumps are perfectly fine.
Step 5: Bake Your Dog Cake
- Pour into Pan: Pour the batter into your prepared baking pan, spreading it evenly with your spatula.
- Bake Time: Place the pan in the preheated oven and bake for 25-35 minutes. If you’re making cupcakes, they might bake faster, around 18-25 minutes.
- Check for Doneness: To check if your cake is done, insert a toothpick into the center. If it comes out clean, your cake is ready! If it comes out with wet batter, bake for a few more minutes and test again.
Step 6: Cool and Frost
- Cool in Pan: Once baked, remove the cake from the oven and let it cool in the pan for about 10-15 minutes. This allows the cake to firm up slightly before you attempt to remove it.
- Transfer to Wire Rack: After the initial cooling, carefully invert the cake onto a wire cooling rack to cool completely. This prevents the bottom of the cake from getting soggy.
- Beginner Tip: Patience is key! Don’t try to frost a warm cake, or your “frosting” will melt right off.
- Prepare the “Frosting”: While the cake cools, mix the plain Greek yogurt with the extra tablespoon of peanut butter (if using) in a small bowl until smooth.
- Frost and Serve: Once the cake is completely cool, spread the yogurt mixture over the top. You can decorate with a few extra kibbles, small dog treats, or a sprinkle of chopped parsley (good for doggy breath!).
Tips & Tricks for the Best Dog Cake
Baking for your pup is fun, and these extra tips will help you master this **easy baking recipe** and ensure your dog’s safety and enjoyment!
- Always Check Peanut Butter for Xylitol: This cannot be stressed enough! Xylitol is an artificial sweetener that is highly toxic to dogs, even in small amounts. Always read the ingredient label of your peanut butter carefully. Opt for natural peanut butter with only peanuts (and maybe salt) as ingredients.
- Portion Control is Key: While this cake is made with healthy ingredients, it’s still a treat. Serve in moderation, especially if your dog is prone to weight gain or has a sensitive stomach. Cut it into small slices or cubes.
- Storage: Store any leftover cake in an airtight container in the refrigerator for up to 3-4 days. You can also freeze individual slices for up to a month – just thaw in the fridge before serving.
- Ingredient Substitutions: Feel free to experiment! You can swap applesauce for mashed banana or pumpkin puree. For a savory cake, use unsalted beef or vegetable broth instead of water. Just ensure all ingredients are dog-safe.
- Decorating Fun: Get creative with decorations! Besides yogurt and peanut butter, you can use small, crushed dog treats, a sprinkle of oats, or even a few berries (like blueberries or raspberries, in moderation) that are safe for dogs.
- Know Your Dog’s Allergies: Just like humans, dogs can have allergies. If your dog has known sensitivities to certain ingredients (e.g., wheat, dairy), consult your vet or adjust ingredients accordingly.
Essential Baking Tools
Having the right tools makes all the difference, especially when you’re just starting out. Here are a few essentials you’ll need for this recipe:
- Mixing Bowl
- Whisk
- Baking Pan (6-inch round, loaf pan, or muffin tin)
- Measuring Cups
- Measuring Spoons (not explicitly in prompt but essential)
- Spatula
- Wire Cooling Rack (highly recommended)
Nutrition Info (Estimated per serving, for dogs)
Please note that these values are estimates and can vary based on exact ingredient brands and portion sizes. This cake is intended as a treat and should be given in moderation.
| Nutrient | Amount (per 1/8 cake serving) |
|---|---|
| Calories | ~120-150 kcal |
| Carbohydrates | ~15-20 g |
| Protein | ~5-7 g |
| Fat | ~6-9 g |
| Fiber | ~2-3 g |
| Sugar | ~3-5 g (natural sugars from applesauce/honey) |
Frequently Asked Questions (FAQs)
Q: Can I use regular all-purpose flour instead of whole wheat?
A: Yes, you can! While whole wheat flour offers more fiber and nutrients, all-purpose flour will also work. The texture might be slightly different, perhaps a bit lighter. Just make sure to use the same quantity.
Q: Is this cake safe for puppies?
A: Generally, yes, in very small portions. However, it’s always best to consult your veterinarian before introducing new foods, especially treats, to puppies under 6 months old or those with sensitive digestive systems. Small amounts of the plain cake (without frosting) are usually well-tolerated.
Q: How long does this dog cake last, and how should I store it?
A: The cake, especially with the yogurt frosting, should be stored in an airtight container in the refrigerator. It will last for about 3-4 days. For longer storage, you can freeze individual slices for up to one month. Thaw them in the refrigerator before serving.
Q: Can I add other ingredients like carrots or pumpkin?
A: Absolutely! Finely grated carrots (about 1/4 cup) or pureed pumpkin (replace some of the applesauce, about 1/4 cup) are excellent additions that dogs often love and provide extra nutrients. Just ensure any additions are dog-safe and in moderation.
Q: My cake turned out dense. What went wrong?
A: A dense cake is often a sign of overmixing the batter. When you overmix, you develop the gluten in the flour too much, leading to a tough texture. Remember to mix only until the ingredients are just combined and no dry streaks of flour remain.
Q: What if my dog has a peanut allergy?
A: If your dog has a peanut allergy, you must omit the peanut butter entirely. You can substitute it with another dog-safe nut butter (like almond butter, if your vet approves and it’s Xylitol-free) or simply increase the applesauce or mashed banana to maintain moisture and consistency. Consult your vet for safe alternatives specific to your dog’s needs.
Conclusion: Happy Baking, Happy Pup!
And there you have it – your very own Spoiled Dog Cake Recipe, baked with love! We hope this detailed, beginner-friendly guide has given you the confidence to whip up this delicious treat for your canine companion. There’s nothing quite like seeing the joy on your dog’s face when they realize you’ve made something special just for them.
Remember, baking is a journey, and every bake is a learning experience. Don’t be afraid to experiment with dog-safe ingredients and make this recipe your own. Share your creations with us, and let us know how your furry friend enjoyed their custom-made cake. Happy baking, and enjoy those tail wags!