Welcome, aspiring bakers! Are you ready to dive into the wonderful world of homemade bread? There’s truly nothing quite like the aroma of freshly baked bread wafting through your kitchen. Today, we’re going to embark on a delightful culinary journey to create the most incredible Stecca Bread Recipe. Often overlooked in favor of more complex loaves, Stecca bread (meaning “stick” in Italian) is a rustic, elongated, and unbelievably flavorful bread that’s surprisingly simple to master, even if you’re new to the game.
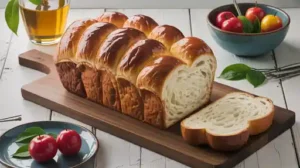
Forget your fears about yeast and sticky dough! This guide is crafted specifically for you, providing easy baking recipes and practical baking tips for beginners at every turn. We’ll break down each step, demystify the process, and help you bake a loaf that’s chewy on the inside, wonderfully crisp on the outside, and perfect for dipping in olive oil or serving with your favorite meal. Get ready to impress yourself and your loved ones!
Ingredients You’ll Need
Gathering your ingredients is the first step to baking success. Accuracy is key, so grab your measuring tools!
| Ingredient | Quantity |
|---|---|
| Bread Flour (or All-Purpose Flour) | 3 cups (360g) |
| Instant Yeast | 1 teaspoon (3g) |
| Fine Sea Salt | 1 teaspoon (6g) |
| Warm Water (105-115°F / 40-46°C) | 1 ¼ cups (300ml) |
| Extra Virgin Olive Oil (plus more for drizzling) | 2 tablespoons |
| Semolina Flour (for dusting, optional) | 2 tablespoons |
Step-by-Step Instructions: Your Stecca Bread Journey
Follow these detailed steps closely, and you’ll be pulling a beautiful Stecca loaf out of your oven in no time!
1. Prepare Your Yeast and Water
- In a large mixing bowl, combine the warm water and the instant yeast.
- Beginner Tip: The water should feel comfortably warm to the touch, like a baby’s bath. If it’s too hot, it will kill the yeast; too cold, and the yeast won’t activate properly. You can use a thermometer to be precise (105-115°F is ideal).
- Let this mixture sit for 5-10 minutes. You might see a slight foam or bubbling on the surface – this indicates your yeast is active and ready to work! If nothing happens, your yeast might be old, or your water temperature was off. Start again with fresh yeast.
2. Mix the Dough
- To the yeast mixture, add the bread flour, salt, and 2 tablespoons of olive oil.
- Using a wooden spoon or your hands, mix until all the flour is incorporated and a shaggy, sticky dough forms. It won’t look smooth, and that’s perfectly normal!
- Common Mistake: Don’t be tempted to add more flour at this stage, even if it feels very sticky. This dough is meant to be high in hydration, which contributes to its wonderful chewy texture.
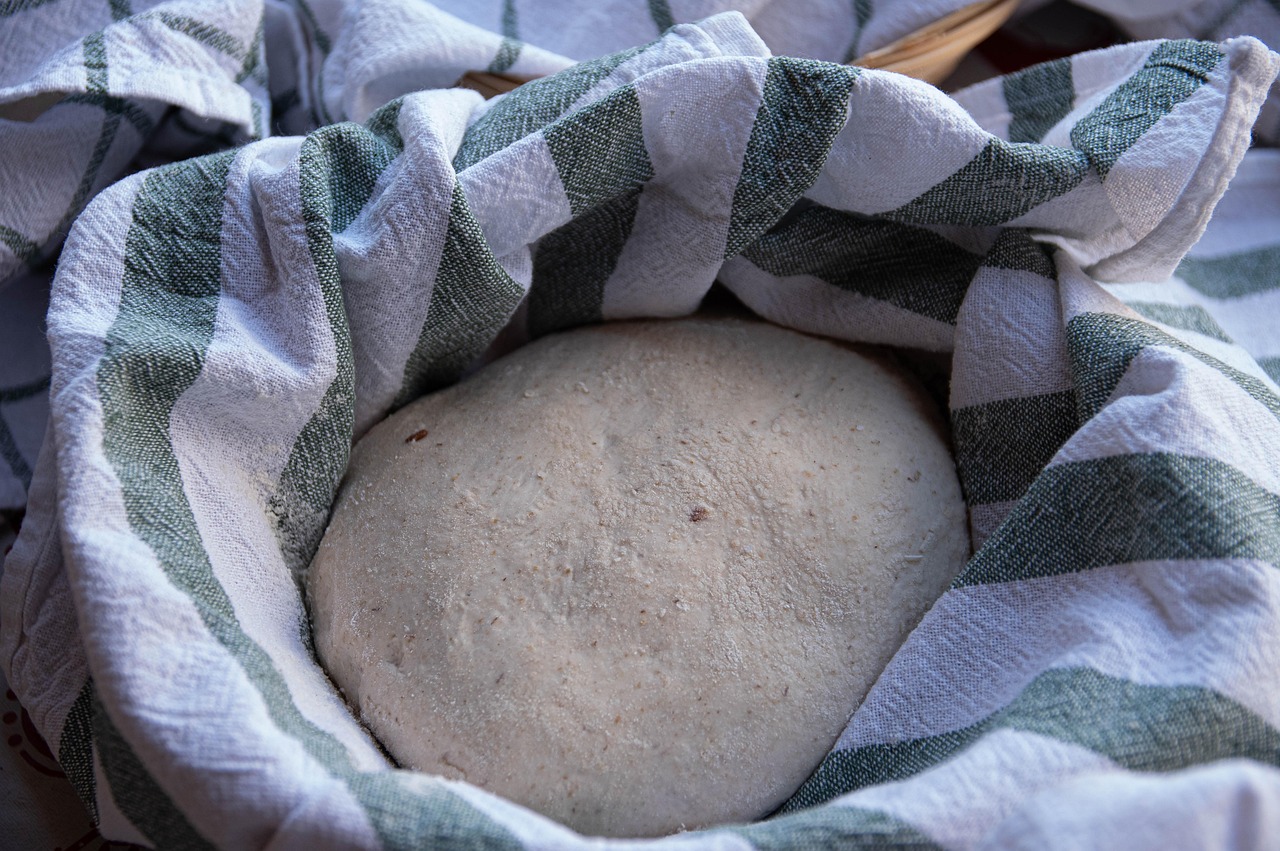
3. The First Rise (Bulk Fermentation)
- Cover the bowl tightly with plastic wrap or a damp kitchen towel.
- Place the bowl in a warm spot in your kitchen. A slightly warm oven (turned off, but perhaps preheated to 100°F and then turned off) or simply on your kitchen counter if it’s warm enough, works well.
- Let the dough rise for 1 to 1.5 hours, or until it has doubled in size.
- Beginner Tip: Patience is a virtue in bread making! Don’t rush this step. The yeast needs time to work its magic, developing flavor and structure.
4. Gently Shape Your Stecca
- Lightly flour your work surface, or even better, drizzle a little olive oil instead of flour to keep the dough from sticking without adding too much extra flour.
- Gently turn the risen dough out onto your prepared surface. Try not to punch out all the air – we want to preserve those precious bubbles!
- Using your hands, gently pat the dough into a rough rectangle.
- Now, here’s the fun part: gently stretch and pull the dough to form two long, narrow “sticks.” Aim for about 12-15 inches long and 2-3 inches wide. They don’t need to be perfect rustic is the charm of Stecca!
- Alternative Shaping: If the dough is too sticky to handle easily, lightly oil your hands. You can also do a few “stretch and folds” in the bowl first: grab an edge of the dough, stretch it up, and fold it over the center. Rotate the bowl and repeat 3-4 times. This helps build gluten without traditional kneading.
5. The Second Rise (Proofing)
- Carefully transfer your shaped Stecca sticks to a baking sheet lined with parchment paper, dusted with a little semolina flour (if using) to prevent sticking and add a nice crunch. Leave some space between them.
- Cover the Stecca loosely with a damp kitchen towel or plastic wrap.
- Let them rise again for 30-45 minutes in a warm spot. They should look noticeably puffier, but not necessarily doubled in size.
- Beginner Tip: To test if your dough is ready for baking (properly proofed), gently poke it with a floured finger. If the indentation springs back slowly, it’s ready. If it springs back immediately, it needs more time. If it collapses, it’s over-proofed.
6. Preheat Oven & Prepare for Baking
- About 20 minutes before the end of the second rise, preheat your oven to 450°F (230°C).
- If you have a pizza stone or baking steel, place it in the oven during preheating for an even crispier crust.
- For a crispy crust: You can also place a shallow, oven-safe pan on the bottom rack of your oven while it preheats. Just before putting the bread in, carefully pour about ½ cup of hot water into this pan to create steam. Be cautious of the hot steam!
7. Bake Your Stecca Bread
- Once the oven is preheated and your Stecca is properly proofed, drizzle a little extra virgin olive oil over the top of each loaf. You can also sprinkle with a pinch of flaky sea salt or Italian herbs if desired.
- Carefully transfer the baking sheet to the preheated oven.
- Bake for 20-25 minutes, or until the Stecca is deeply golden brown and sounds hollow when tapped on the bottom.
- Beginner Tip: Don’t open the oven door too often during the first 10-15 minutes of baking, especially if you’re using steam. This helps maintain the oven temperature and crust development.
8. Cool and Enjoy!
- Once baked, transfer the Stecca bread to a wire rack to cool completely.
- Crucial Step: Resist the urge to cut into it immediately! Cooling allows the internal structure to set and the flavors to fully develop. Cutting too early can result in a gummy texture.
- After cooling, tear or slice and enjoy! It’s fantastic with olive oil, balsamic vinegar, or alongside soups and salads.
Tips & Tricks for Beginner Bakers
Baking bread is a craft that gets easier and more intuitive with practice. Here are some extra pointers to help you succeed with your Stecca and beyond:
- Accurate Measuring: Especially for flour, try to use a kitchen scale for the most accurate results (360g for 3 cups). If using measuring cups, spoon the flour into the cup and level it off with a straight edge; don’t scoop directly from the bag, as this compacts the flour and adds too much.
- Hydration is Key: Don’t fear sticky dough! High hydration (more water relative to flour) is what gives artisan breads like Stecca their open crumb and chewy texture. Resist adding too much extra flour.
- Understand Your Yeast: Instant yeast can be mixed directly with dry ingredients, but activating it in warm water (as we did) is a great way to confirm it’s alive and kicking, giving you peace of mind.
- Warm Environment for Rising: Yeast loves warmth! If your kitchen is cold, try placing your dough in a turned-off oven with the light on, or near a sunny window.
- Don’t Over-Proof: While under-proofed bread won’t rise well, over-proofed bread can collapse in the oven or have a very weak structure. Pay attention to the visual cues and the poke test.
- Good Olive Oil Matters: Since olive oil is a prominent flavor in Stecca, using a good quality extra virgin olive oil will make a noticeable difference in the final taste.
- Practice Makes Perfect: Your first loaf might not be Instagram-perfect, but it will be delicious. Each bake teaches you more about how dough behaves in your unique kitchen environment. Don’t be afraid to experiment!
Essential Baking Tools
Having the right tools makes all the difference! Here are some basics you’ll want in your kitchen:
- Mixing Bowl (large, for dough)
- Whisk (for dry ingredients, or just a spoon)
- Baking Sheet (for baking your loaves)
- Measuring Cups and Spoons (for accuracy)
- Spatula (or a wooden spoon for mixing)
- Parchment Paper (for non-stick baking)
- Kitchen Scale (highly recommended for precision)
- Dough Scraper (optional, but helpful for sticky dough)
Nutrition Information (Approximate per serving)
This information is an estimate based on 10 servings per recipe and general ingredient values.
| Nutrient | Per Serving (approx.) |
|---|---|
| Calories | 150 kcal |
| Carbohydrates | 28g |
| Protein | 5g |
| Fat | 2.5g |
| Fiber | 1g |
| Sugar | 0.5g |
Frequently Asked Questions (FAQs)
Q1: My dough isn’t rising. What went wrong?
A: The most common culprits are inactive yeast (it might be old or “dead”), or the water temperature was too hot or too cold. Ensure your yeast is fresh, and your water is comfortably warm (105-115°F / 40-46°C). A cold kitchen can also slow down the rise; try a warmer spot.
Q2: Can I use all-purpose flour instead of bread flour?
A: Yes, you can! Bread flour has a higher protein content, which develops more gluten and gives a chewier texture. All-purpose flour will still work, but your Stecca might be slightly less chewy. It will still be delicious!
Q3: How do I store leftover Stecca bread?
A: Stecca is best enjoyed fresh on the day it’s baked. However, you can store leftovers at room temperature in an airtight container or a bread bag for 1-2 days. For longer storage, slice and freeze. Reheat frozen slices in a toaster or oven for a few minutes.
Q4: Can I add herbs or other flavorings to my Stecca bread?
A: Absolutely! Stecca is wonderful with additions. Try kneading in a tablespoon of dried Italian herbs, some minced fresh rosemary, or even a handful of pitted olives during the mixing stage. A sprinkle of flaky sea salt and cracked black pepper on top before baking is also fantastic.
Q5: My bread came out dense. Why?
A: Density can be due to several reasons: not enough rise time (under-proofing), too much flour added during mixing or shaping, or yeast that wasn’t active enough. Ensure your dough doubles in the first rise and visibly puffs up in the second. Try to handle the dough gently to keep those air bubbles.
Time to Bake Your Own Stecca!
Congratulations, you’ve made it to the end of this detailed guide! By now, you should feel confident and excited to tackle this Stecca Bread Recipe. Remember, baking is a journey of learning and discovery. Don’t worry if your first loaf isn’t perfect; every attempt is a step closer to becoming a master baker.
The satisfaction of pulling a warm, crusty loaf of homemade bread from your oven is truly unparalleled. So, go ahead, gather your ingredients, follow these baking tips for beginners, and fill your home with the irresistible scent of freshly baked Stecca. We can’t wait to see your creations!