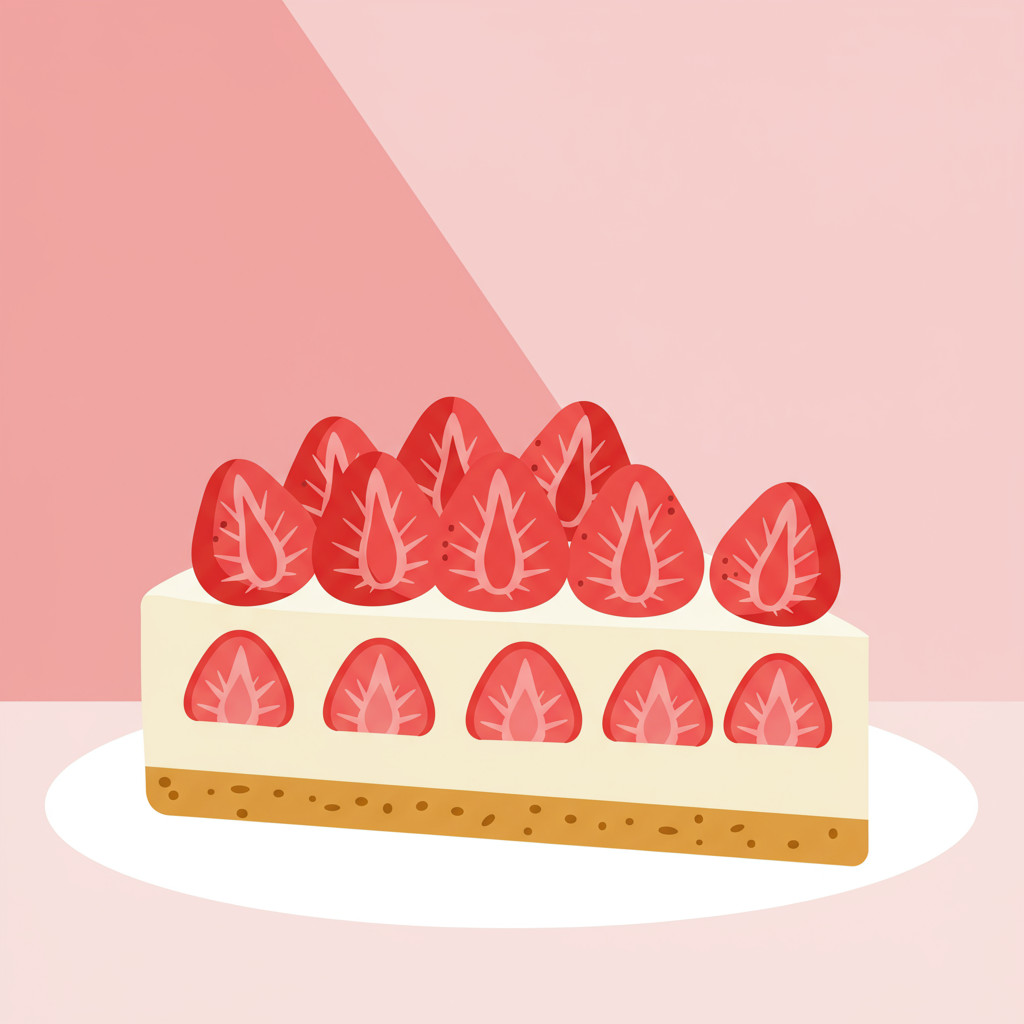
Welcome, fellow aspiring bakers! Are you ready to dive into the wonderful world of homemade desserts? Today, we’re going to create something truly special and utterly delicious: a homemade Strawberry Cream Cheese Cake Recipe. Forget store-bought; this cake is packed with fresh strawberry flavor, moist cake layers, and a dreamy cream cheese frosting that will have everyone asking for seconds. If you’ve been searching for easy baking recipes that deliver impressive results, you’ve come to the right place.
This comprehensive guide is designed with baking tips for beginners in mind. We’ll walk through every step, from gathering your ingredients to the final, beautiful assembly. Don’t be intimidated by the layers; we’ll break it down into simple, manageable parts. Get ready to bake a showstopper that tastes as good as it looks, and discover the joy of creating something wonderful from scratch!
Gather Your Delicious Ingredients!
For the Moist Cake Layers:
| Item | Quantity | Unit |
|---|---|---|
| All-Purpose Flour | 2 ½ | cups |
| Granulated Sugar | 1 ¾ | cups |
| Baking Powder | 1 | tablespoon |
| Salt | ½ | teaspoon |
| Unsalted Butter (softened) | ½ | cup (1 stick) |
| Large Eggs | 3 | |
| Whole Milk | 1 | cup |
| Vanilla Extract | 2 | teaspoons |
For the Fresh Strawberry Filling:
| Item | Quantity | Unit |
|---|---|---|
| Fresh Strawberries (hulled and diced) | 2 | cups |
| Granulated Sugar | ¼ | cup |
| Lemon Juice | 1 | tablespoon |
| Cornstarch | 1 | tablespoon |
| Water | 2 | tablespoons |
For the Dreamy Cream Cheese Frosting:
| Item | Quantity | Unit |
|---|---|---|
| Cream Cheese (full-fat, softened) | 16 | ounces (2 blocks) |
| Unsalted Butter (softened) | ½ | cup (1 stick) |
| Powdered Sugar (confectioners’ sugar) | 4 | cups (sifted) |
| Vanilla Extract | 1 | teaspoon |
| Heavy Cream (cold) | 2 | tablespoons (optional, for consistency) |
Let’s Get Baking! Your Step-by-Step Guide
Part 1: Preparing the Moist Cake Layers
- Preheat Your Oven & Prep Pans: Preheat your oven to 350°F (175°C). Grease and flour two 8-inch round cake pans. You can also line the bottoms with parchment paper for extra insurance against sticking. This small step makes a big difference when unmolding!
- Combine Dry Ingredients: In a large mixing bowl, whisk together the 2 ½ cups all-purpose flour, 1 ¾ cups granulated sugar, 1 tablespoon baking powder, and ½ teaspoon salt. Whisking ensures everything is evenly distributed and helps aerate the flour.
- Cream Butter & Eggs: In a separate, larger bowl (or the bowl of a stand mixer), cream together the ½ cup softened unsalted butter and 3 large eggs. Beat them on medium speed until the mixture is light and fluffy – this incorporates air for a tender cake.
- Alternate Wet & Dry: Gradually add the dry ingredients to the butter-egg mixture, alternating with the 1 cup whole milk and 2 teaspoons vanilla extract. Start and end with the dry ingredients. Beginner Tip: Mix on low speed just until combined. Do not overmix! Overmixing develops the gluten in the flour too much, leading to a tough, dry cake.
- Divide & Bake: Divide the batter evenly between your two prepared cake pans. Spread it gently with a spatula to level the tops. Bake for 28-32 minutes, or until a wooden skewer or toothpick inserted into the center comes out clean.
- Cool Down: Once baked, let the cakes cool in their pans on a wire rack for about 10-15 minutes. This allows them to firm up slightly. Then, carefully invert them onto the wire rack to cool completely. Patience is key here! Trying to frost warm cakes will result in a melty, messy disaster.
Part 2: Crafting the Fresh Strawberry Filling
- Combine Ingredients: In a medium saucepan, combine the 2 cups diced fresh strawberries, ¼ cup granulated sugar, and 1 tablespoon lemon juice.
- Cook Gently: Cook over medium heat, stirring occasionally, until the strawberries soften and release their juices, about 5-7 minutes.
- Thicken with Slurry: In a small separate bowl, whisk together 1 tablespoon cornstarch and 2 tablespoons cold water until smooth (this is called a “slurry”). Pour the slurry into the simmering strawberry mixture, stirring constantly.
- Simmer to Thicken: Continue to cook and stir for another 1-2 minutes, until the filling thickens to your desired consistency. It should be thick enough to stay put on a cake layer.
- Cool Down: Remove from heat and transfer the strawberry filling to a bowl. Cover it with plastic wrap pressed directly onto the surface to prevent a skin from forming. Let it cool completely in the refrigerator. Beginner Tip: Ensure it’s completely chilled before assembling, or it will make your cake soggy.
Part 3: Whipping Up the Dreamy Cream Cheese Frosting
- Cream Butter & Cream Cheese: In a large mixing bowl or stand mixer, beat the 16 ounces softened cream cheese and ½ cup softened unsalted butter together on medium speed until smooth and creamy. Make sure there are no lumps of cream cheese!
- Add Powdered Sugar: Gradually add the 4 cups sifted powdered sugar, one cup at a time, beating on low speed until just combined after each addition. Once all the sugar is in, increase the speed to medium-high and beat for 2-3 minutes until light and fluffy. Beginner Tip: Sifting your powdered sugar prevents lumps in your frosting!
- Flavor & Adjust: Beat in 1 teaspoon vanilla extract. If your frosting seems too thick, you can add 1-2 tablespoons of cold heavy cream, one tablespoon at a time, until it reaches your desired spreadable consistency. If it’s too thin, you can add a little more sifted powdered sugar.
Part 4: Assembling Your Masterpiece
- Level Your Cakes (Optional but Recommended): If your cake layers have domed tops, use a serrated knife to carefully level them. This creates a more stable and professional-looking cake.
- First Layer & Frosting Dam: Place one cooled cake layer on your serving plate or cake stand. Pipe or spread a thin border (a “dam”) of cream cheese frosting around the outer edge of the cake layer. This dam will hold your strawberry filling in place.
- Add Strawberry Filling: Carefully spoon about ¾ of your chilled strawberry filling inside the frosting dam. Spread it evenly.
- Second Layer & Crumb Coat: Gently place the second cake layer on top, pressing down lightly. Apply a thin layer of cream cheese frosting all over the top and sides of the entire cake. This is called a “crumb coat” – it traps any loose crumbs and creates a smooth base for your final frosting layer.
- Chill the Crumb Coat: Place the cake in the refrigerator for at least 20-30 minutes (or freezer for 10-15 minutes) to chill and set the crumb coat. This step is crucial for a neat final frosting.
- Final Frosting: Once the crumb coat is firm, apply the remaining cream cheese frosting to the top and sides of the cake. Use an offset spatula or bench scraper to smooth it out.
- Decorate (Optional): Decorate with the remaining fresh strawberry filling on top, or with fresh strawberry slices.
- Chill Before Serving: For best results and easier slicing, chill the cake in the refrigerator for at least 1-2 hours before serving. This allows the frosting to firm up.
- Enjoy! Slice and serve your beautiful, homemade Strawberry Cream Cheese Cake!
Pro Tips for a Perfect Strawberry Cream Cheese Cake
Baking is an art, but with these tips, you’ll feel like a pro in no time!
- Room Temperature Ingredients are Key: For the cake and frosting, make sure your butter, eggs, and cream cheese are at room temperature. This allows them to cream together smoothly and incorporate air, resulting in a lighter, fluffier cake and a lump-free, easier-to-spread frosting. Plan ahead and take them out of the fridge at least an hour before you start.
- Don’t Overmix: This is one of the most common mistakes beginners make! When adding dry ingredients to wet, mix *just* until the flour disappears. Overmixing develops gluten, which can make your cake tough and dry.
- Sift Your Powdered Sugar: For the smoothest, silkiest cream cheese frosting, always sift your powdered sugar. It removes any lumps and ensures a beautiful texture.
- Chill, Chill, Chill: Chilling is your friend! Ensure your strawberry filling is completely cold before assembling the cake. Also, don’t skip the crumb coat chill – it’s essential for preventing crumbs from getting into your final frosting layer and helps set the cake for easier handling.
- Leveling Your Cake Layers: For a professional-looking cake, level your cake layers with a serrated knife if they have domed tops. This creates a flat surface for stacking and prevents your cake from leaning.
- Taste as You Go: Especially for the strawberry filling, taste and adjust the sweetness or tartness with a little more sugar or lemon juice if needed.
- Clean Your Edges: Use a warm, damp cloth to wipe down your cake stand or plate after frosting. This gives your finished cake a clean, polished look.
Your Essential Baking Toolkit
Having the right tools makes baking much more enjoyable and easier for beginners!
- Mixing Bowl
- Whisk
- 8-inch Round Baking Pans (2)
- Measuring Cups and Spoons
- Rubber Spatula & Offset Spatula
- Wire Rack
- Parchment Paper
- Electric Mixer (Handheld or Stand Mixer)
Nutrition Snapshot (per serving, estimated)
(Estimates based on 12 servings)
| Nutrient | Amount |
|---|---|
| Calories | 550-600 kcal |
| Carbohydrates | 70-75g |
| Protein | 6-8g |
| Fat | 28-32g |
| Fiber | 1-2g |
| Sugar | 50-55g |
Frequently Asked Questions for Beginner Bakers
Q1: Can I use frozen strawberries for the filling?
A: Yes, you absolutely can! If using frozen strawberries, there’s no need to thaw them first. Just add them directly to the saucepan with sugar and lemon juice. They might release a bit more liquid, so you might need to cook the filling for a minute or two longer, or add a tiny bit more cornstarch slurry if it’s not thickening enough.
Q2: My cream cheese frosting is too runny. What went wrong?
A: This usually happens if your cream cheese or butter were too warm, or if you added too much liquid (like milk or cream). To fix it, try adding more sifted powdered sugar, about ¼ cup at a time, until it reaches the desired consistency. You can also pop the bowl into the refrigerator for 15-20 minutes to firm up the fats, then beat it again.
Q3: How do I prevent my cake layers from sticking to the pan?
A: The best way is proper pan preparation! Always grease your pans thoroughly with butter or non-stick spray, then dust with flour, tapping out any excess. For extra security, you can cut out parchment paper circles to line the bottom of your pans. This almost guarantees an easy release!
Q4: Can I make this cake ahead of time?
A: Yes! The cake layers can be baked a day or two in advance, cooled completely, wrapped tightly in plastic wrap, and stored at room temperature. The strawberry filling can also be made a day ahead and stored in the refrigerator. The assembled cake, once frosted, can be stored in an airtight container in the refrigerator for up to 3-4 days. Bring it to room temperature for about 30 minutes before serving for the best flavor and texture.
Q5: What’s a “crumb coat” and why is it important?
A: A crumb coat is a very thin layer of frosting that you apply to the entire cake after it’s assembled. Its purpose is to trap any loose crumbs from the cake layers, preventing them from mixing into your final, decorative layer of frosting. After applying the crumb coat, you chill the cake, allowing this thin layer to set firmly. This creates a smooth, crumb-free canvas for your beautiful final frosting layer!
Your Baking Journey Starts Now!
There you have it! A complete guide to baking a truly spectacular Strawberry Cream Cheese Cake Recipe. We know that diving into baking can seem daunting at first, but with clear instructions and a little patience, you’ll be amazed at what you can create. This recipe is more than just a dessert; it’s an opportunity to learn, grow, and share something delicious with those you love.
Don’t worry if your first cake isn’t absolutely perfect – every baker, even the pros, had a first attempt. The most important thing is to have fun, enjoy the process, and savor the incredible flavors you’ve brought to life. So, grab your apron, preheat that oven, and get ready to bake some magic. Happy baking!